Table of Contents >> Show >> Hide
- What “Ceramic Stove Top” Usually Means (And Why It Burns So Bad)
- Before You Start: A Quick Safety + Setup Checklist
- The “Do This First” Clean: 5–10 Minutes for Everyday Mess
- How to Clean Burnt-On Residue Without Scratching
- DIY Methods That Actually Work (And When They Don’t)
- Stain-Specific Fixes for the Most Common Burnt Messes
- Burnt sugar, syrup, candy, or melted plastic: Act fast to avoid permanent damage
- Burnt milk or dairy boil-overs: The “invisible glue” problem
- Tomato sauce rings: Acidic + sticky + annoying
- White marks, mineral haze, or a metallic sheen
- Metal marks and “pan residue speckles”
- Scratches and pitting: What’s permanent?
- Big Mistakes That Make a Burnt Ceramic Stove Top Worse
- Maintenance Habits That Keep You Out of Burnt-On Jail
- FAQ: Quick Answers for Real Kitchens
- Conclusion
- Real-World Experience: What Actually Happens in Kitchens (And What I’d Do Differently Next Time)
If you’ve ever looked down at your ceramic stove top after making “just a quick pasta sauce” and thought,
Wow, my cooktop looks like it fought a dragon and lostwelcome. Burnt-on spills happen to everyone.
The good news: most burnt, crusty, suspiciously permanent-looking messes on a glass-ceramic cooktop can be removed
safely, without scratching, and without crying into your dish soap.
This guide gives you an expert-backed, step-by-step approach (with a little humor, because you deserve it),
plus stain-specific fixes for the stuff that laughs at paper towels: burnt sugar, boiled-over dairy, tomato sauce,
greasy haze, mineral marks, and the dreaded “what even is that?” ring.
What “Ceramic Stove Top” Usually Means (And Why It Burns So Bad)
Most “ceramic” stove tops are actually glass-ceramic (a smooth, glossy surface over radiant electric
elements or induction zones). It’s sleek, modern, and very easy to wipe… until something bakes on.
Once a spill heats repeatedly, it turns into a thin, hardened layer that bonds to the surface like it signed a lease.
Before You Start: A Quick Safety + Setup Checklist
1) Let the cooktop cool (mostly)
For routine cleaning, wait until the surface is cool to the touch. For certain disasters (especially sugary spills),
some manufacturers recommend carefully scraping while it’s still slightly warmnot hotbecause sugar can cause permanent damage
if it cools and bonds to the glass. If you’re doing any warm scraping, wear an oven mitt.
2) Grab the right tools (your cooktop will judge you less)
- Microfiber cloths (at least two)
- Non-abrasive sponge or cooktop-safe scrubbing pad
- Dish soap + warm water
- White vinegar (optional but helpful)
- Baking soda (for paste or gentle scrubbing)
- Cooktop scraper (razor-style tool made for glass cooktops) or a manufacturer-approved scraper
- Dedicated glass cooktop cleaner (optional, often faster for heavy soil)
Skip steel wool, harsh scouring pads, and gritty powders. A glass-ceramic cooktop is tough, but it’s not a cast-iron skillet.
The “Do This First” Clean: 5–10 Minutes for Everyday Mess
- Dry wipe first. Use a dry or barely damp microfiber cloth to remove crumbs and grit (grit is basically sandpaper in disguise).
- Soapy wipe. Add a few drops of dish soap to warm water and wipe the surface gently.
- Vinegar spritz (optional). A vinegar-and-water spray helps cut haze and streaks. Wipe in small circles and finish with a dry cloth.
- Buff dry. Drying mattersleftover moisture can turn into spots or a dull film.
If your cooktop looks decent after this, congratulations: you just avoided a deep-clean workout.
If burnt-on residue is still there, keep going.
How to Clean Burnt-On Residue Without Scratching
Here’s the winning combo used by appliance brands and cleaning pros: soften → scrape (gently) → clean/polish → remove residue.
Step 1: Soften the burnt mess (make it less stubborn)
Lay a hot, damp towel over the burnt-on area for about 10 minutes. This “steam blanket” helps loosen hardened gunk
so you don’t have to attack the surface like you’re sanding a deck.
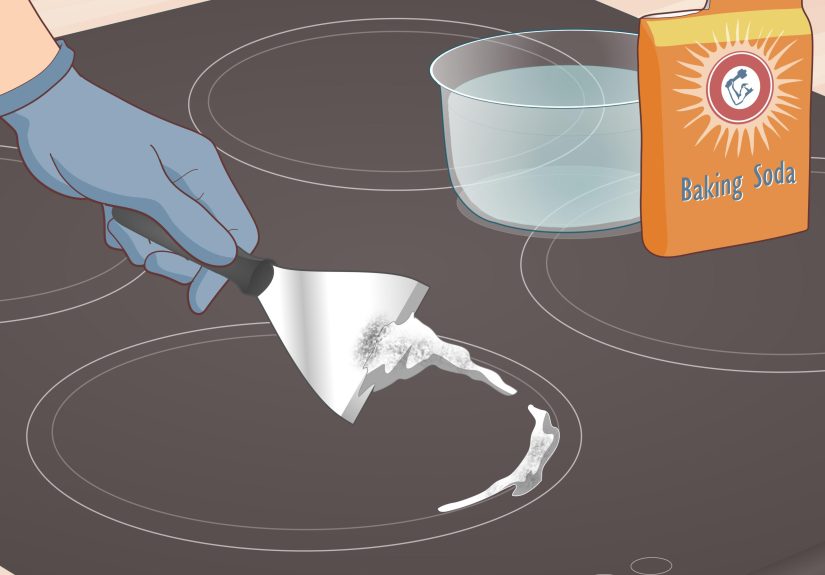
Step 2: Scrape smart (not angry)
Use a cooktop scraper with a fresh blade. Hold it at a shallow anglemany guides describe around
30–45 degrees. The goal is to slide under the residue, not chisel into your cooktop like it owes you money.
- Short strokes, light pressure at first
- Keep the surface slightly lubricated if needed (a tiny bit of cleaner or water can help the scraper glide)
- Wipe away loosened bits as you go so you’re not dragging debris around
Step 3: Clean and break down what’s left
Once the thick stuff is scraped off, choose one:
Option A: Dedicated glass cooktop cleaner (often fastest)
Apply a few drops of cooktop cleaner to the affected area, rub with a non-abrasive pad, then wipe completely clean.
Many manufacturer instructions emphasize removing all cleaner residue before heating the surface again.
Option B: Baking soda paste (DIY, effective, inexpensive)
Mix baking soda with a small amount of water until you get a spreadable paste (think “pancake batter that gave up”).
Apply to the burnt area, let it sit 10–20 minutes, then gently rub with a damp, non-abrasive sponge. Wipe clean and buff dry.
Step 4: Rinse/wipe, then buff dry
This step sounds boring, but it’s where people accidentally create a new problem: leftover product can bake onto the cooktop.
Finish by wiping with a clean damp cloth, then buff dry with microfiber until it looks smooth and streak-free.
DIY Methods That Actually Work (And When They Don’t)
Vinegar + baking soda: The foamy loosener
This combo is great for loosening grime and cutting through greasy dullness. Sprinkle baking soda over the spot,
spritz with vinegar (it will foam), then cover with a warm wet cloth for 10–15 minutes. Wipe and gently scrub.
If residue remains, scrape again (gently) and repeat.
Lemon juice: Helpful for grease, nice for morale
A little lemon juice can help with grease and leaves a fresh scent. It’s not magic, but it can improve the “I’m cleaning” vibe.
When DIY isn’t enough
If you’re dealing with thick, blackened buildup that’s been repeatedly reheated, a dedicated cooktop cleaner plus scraper
is usually the fastest, least-scratchy way to get back to a smooth surface.
Stain-Specific Fixes for the Most Common Burnt Messes
Burnt sugar, syrup, candy, or melted plastic: Act fast to avoid permanent damage
Sugar is the villain with great PR. It looks harmlessthen it can bond to glass-ceramic and potentially cause
permanent pitting or marks if it cools and hardens.
- Turn off the heat and remove the pan.
- Put on an oven mitt (seriously).
- While the surface is still slightly warm, use a scraper to carefully lift and move the spill away from the hottest area.
- Wipe up loosened residue with paper towels or a cloth.
- Let the surface cool fully, then finish with cooktop cleaner or a baking soda paste.
If you’re thinking “I’ll handle it later,” please don’t. Sugar has a long memory.
Burnt milk or dairy boil-overs: The “invisible glue” problem
Milk boils over fast, then bakes into a stubborn film. Use the hot towel softening step first, scrape lightly, then follow with
cooktop cleaner or baking soda paste. Don’t over-scrub in one spotgentle repetition beats aggressive scratching.
Tomato sauce rings: Acidic + sticky + annoying
Tomato sauce can leave a burnt ring that looks like a crop circle. Scrape the thick edge, then treat with cleaner or paste.
A vinegar wipe after cleaning can help remove lingering haze.
White marks, mineral haze, or a metallic sheen
These often come from evaporated water and food minerals, or residue from cookware. Use a cooktop cream/cleaner designed for glass-ceramic,
rub gently with a non-abrasive pad, then wipe completely clean and buff dry.
Metal marks and “pan residue speckles”
Sliding pans can leave marks that look like scratches but may be removable. Try cooktop cleaner with a cooktop-safe pad.
If needed, a careful scrape (with cleaner as lubrication) can lift stubborn residue. Going forward: lift cookware instead of dragging it.
Scratches and pitting: What’s permanent?
Light marks and residue are often removable. True scratches are hardersometimes they can be minimized cosmetically, but not fully removed.
Pitting (tiny crater-like damage), often linked to sugar spills, is typically permanent. Prevention is the real “repair.”
Big Mistakes That Make a Burnt Ceramic Stove Top Worse
- Using abrasive pads or steel wool: Quick way to turn “dirty” into “scratched forever.”
- Scraping at a steep angle: Keep the scraper low and controlled; steep angles raise scratch risk.
- Using a dull or nicked blade: Replace blades often. A fresh blade glides; a damaged blade drags.
- Leaving cleaner residue behind: It can bake on and create a cloudy film (the irony is cruel).
- Cleaning while the surface is hot: Aside from burns, some products can stain or create fumes when heated.
- Dragging heavy cookware: Lift it. Your cooktop is a cooking surface, not a runway for cast iron.
Maintenance Habits That Keep You Out of Burnt-On Jail
Daily (or “whenever you remember”) routine
- Wipe crumbs/grit first, then a gentle soapy wipe.
- Dry buff with microfiber to prevent streaks and spots.
Weekly (or after a messy cooking week)
- Use a cooktop cleaner or baking soda paste to restore shine.
- Inspect cookware bottoms: remove stuck grit and avoid rough or damaged bases.
FAQ: Quick Answers for Real Kitchens
Can I use regular glass cleaner?
For shine, some people do, but many guides recommend avoiding cleaners that may contain harsh ingredients.
If you use a glass cleaner, choose one that’s cooktop-safe and avoid applying products to a hot surface.
Do I really need a scraper?
If you get burnt-on spills, yes. A cooktop scraper is the difference between “two minutes” and “two episodes of a show you don’t even like.”
Why does my cooktop look cloudy after cleaning?
Usually it’s leftover cleaner residue or mineral deposits. Wipe with a clean damp cloth, dry buff thoroughly,
and use a cooktop cream if the haze persists.
Conclusion
Cleaning a burnt ceramic stove top is mostly about the right order: soften, scrape gently, clean/polish, then remove every trace of residue.
Use non-abrasive tools, keep your scraper angle shallow, and treat sugar spills like a tiny emergency (because they are).
Do that, and your cooktop can go from “campfire aftermath” back to “sleek and shiny” without a scratch-induced meltdown.
Real-World Experience: What Actually Happens in Kitchens (And What I’d Do Differently Next Time)
The first time I owned a glass-ceramic cooktop, I treated it like a normal stovetop: boil pasta, spill a little sauce,
wipe it later. The cooktop treated me like a rookie: it baked that sauce into a dark ring that looked like a warning symbol.
I responded with the classic beginner movescrubbing harder. Spoiler: aggressive scrubbing doesn’t erase mistakes; it upgrades them to scratches.
What worked was slowing down and doing the “boring” steps. I tried the hot towel trick, and it immediately changed the game.
The burnt-on gunk softened enough that a scraper could slide under it instead of skating over it. That’s the moment it clicked:
the goal isn’t to punish the stain. The goal is to separate it from the surface.
Another real-life lesson: crumbs are sneaky. I once cleaned a cooktop “perfectly,” then cooked the next day and noticed faint new lines.
Turns out, I’d missed tiny gritty bits near the edge, and sliding a pan across them left micro-scratches. Now, I do a dry wipe first
every timeespecially around the perimeter and near the controlsbecause grit is basically free sandpaper.
The most dramatic episode involved sugar. A friend warmed a jar of syrup in a small pot (don’t ask), it dripped, and the cooktop got
a shiny, hardened blob that looked innocent until it cooled. When we tried to clean it later, it fought back like it had legal representation.
That’s when I learned why so many manufacturer guides treat sugar as special: it can bond to glass-ceramic and potentially cause permanent pitting.
If I could rewind, I’d do exactly what the pros recommend: oven mitt on, scraper out, and remove it while it’s still slightly warm
(not hotnobody needs an ER trip as part of “kitchen maintenance”).
Over time, I also learned the difference between “a mark” and “damage.” Some streaks and discoloration really are just residuecleaner left behind,
mineral deposits from water, or metal transfer from cookware. Those can often be reduced with a proper cooktop cleaner and a thorough buff.
But true scratches don’t magically vanish. The best you can do is stop them from multiplying: ditch abrasive pads, replace scraper blades,
and lift cookware instead of dragging it like you’re auditioning for a cooking show montage.
Finally, the biggest quality-of-life improvement wasn’t a fancy productit was consistency. A quick wipe after cooking takes less than a minute,
and it prevents the “reheated spill” problem that creates those stubborn, layered burn marks. Think of it like brushing your teeth:
skip it long enough and eventually you’ll be doing something intense, uncomfortable, and probably expensive.
If your cooktop is currently in the “dragon aftermath” phase, don’t panic. Start gentle, repeat as needed, and remember:
you’re not cleaning a crime sceneyou’re just separating cooked-on food from very tough glass. With the right steps,
the cooktop will look dramatically better, and you’ll feel like the kind of adult who owns matching towels (even if you don’t).


