Table of Contents >> Show >> Hide
- Before You Start: Safety, Permission, and a Tiny Reality Check
- Tools and Setup
- The 14 Steps to Harvest Black Walnuts
- Step 1: Identify a black walnut tree (and not a look-alike)
- Step 2: Scout early, harvest later
- Step 3: Time it rightaim for early-to-mid fall
- Step 4: Use the thumb-dent test for ripeness
- Step 5: Collect the best nuts (and leave the worst)
- Step 6: Protect your driveway, hands, and dignity
- Step 7: Hull quicklydon’t let the stain migrate into flavor
- Step 8: Pick your hulling method (small batch vs. big batch)
- Step 9: Expect “worms” and don’t panic
- Step 10: Wash the hulled nuts thoroughly
- Step 11: Do the float test and sort your keepers
- Step 12: Cure/dry with airflow for 2–3 weeks
- Step 13: Store in-shell properly (breathable, cool, dry)
- Step 14: Crack smarter, not harderand store the nutmeats well
- Troubleshooting and Pro Tips
- Conclusion
- Real-World Experiences: What Harvesting Black Walnuts Is Actually Like (and What People Learn Fast)
Black walnuts are the “choose-your-own-adventure” of fall foraging: the reward is rich, earthy nutmeat that tastes like a regular walnut’s moodier,
more interesting cousin… and the process is equal parts treasure hunt and mild chaos.
Between the inky hull stains, the occasional surprise worm, and shells that laugh at flimsy nutcrackers, harvesting black walnuts is not for the faint of heart
but it is for anyone who likes good food and doesn’t mind a little mess.
This guide walks you through how to harvest black walnuts in 14 practical stepsfrom choosing the best nuts to washing, curing, cracking, and storing.
Follow the sequence and you’ll avoid the biggest beginner mistakes (like picking too early, letting hull stain ruin flavor, or “curing” them in a sealed bucket
that basically invents new forms of mold).
Before You Start: Safety, Permission, and a Tiny Reality Check
First: get permission. Harvest only on property where you’re allowed to collect. Some parks and public lands restrict removing nuts or plant material,
and fines are a terrible seasoning.
Second: dress for the job. Black walnut hulls contain strong staining compounds and can irritate skin. Wear rubber or nitrile gloves (double up if you’re sensitive),
old clothes, and shoes you don’t mind sacrificing to the “ink gods.” If you’re cracking nuts later, add safety glassesshell fragments can fly like confetti with a grudge.
Third: accept the truth. Black walnuts take effort. You’re not buying a snack; you’re adopting a hobby for a weekend.
Tools and Setup
- Gloves (rubber/nitrile) + old clothes you can stain
- Sturdy boots (for rolling/stomping hulls)
- Buckets or tubs (at least twoone for “dirty,” one for “washed”)
- Tarp (to keep nuts off soil and make cleanup easier)
- Wire rack or screen (for curing/drying with airflow)
- Optional: board with holes (DIY huller), corn sheller, drill with paint-mixer attachment for washing, pressure sprayer for rinsing
- For cracking: vise, hammer + heavy board, or a purpose-built black walnut cracker
The 14 Steps to Harvest Black Walnuts
Step 1: Identify a black walnut tree (and not a look-alike)
Black walnut trees (Juglans nigra) drop round, tennis-ball-ish fruits with green husks that darken as they age.
Underfoot you’ll often smell a bold, earthy, citrusy-resin scent when hulls are bruised. If you’re unsure, confirm with a local extension resource
or a reliable field guidemisidentification is how people end up “harvesting” decorative yard mysteries.
Step 2: Scout early, harvest later
In midsummer, scout locations and plan access. In early fall, watch the ground under the canopy. Once nuts start dropping consistently,
you’re officially in business. This also helps you beat squirrels and chipmunks, who treat black walnuts like a seasonal performance bonus.
Step 3: Time it rightaim for early-to-mid fall
For much of the U.S., black walnut harvesting season typically runs late September through October, sometimes into early November depending on region and weather.
Don’t rush it: unripe nuts are harder to hull and can be less satisfying. Your goal is “ripe enough to process,” not “still clinging to summer.”
Step 4: Use the thumb-dent test for ripeness
A simple test: press your thumb into the husk. If it dents, you’re good. If it’s rock-hard, it’s likely underripe and you’ll work twice as hard for half the payoff.
Visually, many ripe husks shift from solid green to green-yellow and may show dark patches.
Step 5: Collect the best nuts (and leave the worst)
Gather newly fallen nuts whenever possible. Choose ones that are relatively intactavoid cracked shells, severe damage, or nuts that look dried-out and ancient.
Very dark, mushy hulls can still be usable, but they can also be messier and sometimes yield bitter results. When in doubt, collect a small test batch and process it first.
Step 6: Protect your driveway, hands, and dignity
Black walnut hull juice stains skin, clothing, and porous surfaces. Work on a tarp or in a spot you don’t mind discoloring.
If you care about your hands looking “normal” this week, gloves are non-negotiable. Also: don’t rub your eyes. You only make that mistake once.
Step 7: Hull quicklydon’t let the stain migrate into flavor
Remove the outer husk soon after collecting. Leaving nuts in their hulls too long can allow staining compounds to seep inward and discolor the nutmeat,
sometimes creating off flavors. In plain English: procrastination can make your walnuts taste like regret.
Step 8: Pick your hulling method (small batch vs. big batch)
For a small batch, the classic method is surprisingly low-tech: wearing boots, roll each nut under your heel or stomp lightly until the husk splits and peels away.
For bigger batches, people use DIY hullers (a board with holes sized so the nut passes but the hull catches), corn shellers, or other mechanical helpers.
However you do it, expect messthis is normal.
Step 9: Expect “worms” and don’t panic
Sometimes you’ll see small larvae in decomposing hulls (often walnut husk fly larvae). It’s gross, but it’s usually not a sign the nutmeat is ruined.
You’re discarding the hull anyway. The key is to inspect the shell and, later, the kernel for mold or rancid smell.
Step 10: Wash the hulled nuts thoroughly
Once hulled, rinse nuts in water to remove the sticky black residue and debris. Agitate them in a bucket, change the water, repeat.
You’ll know it’s working because the water will look like villain coffee at first and gradually lighten as you keep rinsing.
(Do this outdoorsthe runoff can stain surfaces and may not be kind to sensitive plants.)
Step 11: Do the float test and sort your keepers
In a tub of water, many good nuts sink while poorly filled or compromised nuts may float. Skim off floaters and set them aside.
This isn’t a perfect scientific guarantee, but it’s a fast, practical quality filter that saves time before you invest weeks curing them.
Step 12: Cure/dry with airflow for 2–3 weeks
Spread nuts in a shallow layer (think: no more than a few nuts deep) on a wire screen or rack in a cool, dry, well-ventilated area out of direct sunlight.
A garage, shed, or covered porch can work if airflow is good and squirrels can’t run a heist.
Stir or rotate nuts occasionally. The goal is slow drying with ventilationsealed containers are how you grow disappointment.
Step 13: Store in-shell properly (breathable, cool, dry)
Once cured, store walnuts in-shell in mesh bags, baskets, or breathable containers in a cool, dry place.
Avoid plastic bags for long storagethey trap moisture. If you’re keeping a large quantity, think “air circulation” as your main storage theme.
(Bonus tip: label the bag. Otherwise you’ll find it in three months and wonder why you own a sack of medieval marbles.)
Step 14: Crack smarter, not harderand store the nutmeats well
Black walnut shells are famously tough. Skip flimsy handheld nutcrackers. Use a vise, a hammer on a solid surface, or a heavy-duty walnut cracker.
If shells feel brittle and you’re shattering kernels, try “conditioning” the nuts: soak in water for an hour or two, drain, and keep them moist overnight in a closed container.
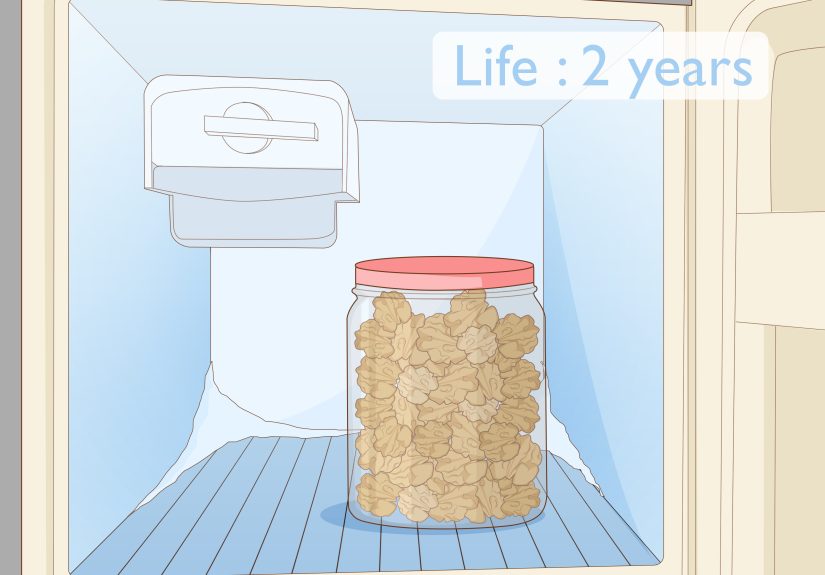
Then crack. Once you have nutmeats, store them airtight in the refrigerator for short-term use or freeze for longer storage to preserve flavor.
Troubleshooting and Pro Tips
If your hands stain anyway
Even with caution, stains happen. Wash promptly, but don’t sand your skin like you’re refinishing furniture. Let time do its thing.
More importantly, prevent irritation by using glovessome people experience skin sensitivity when hulling.
If your walnuts taste bitter
Bitterness can come from overripe/very dark hulls, delayed hulling (stain and compounds moving inward), or poor drying conditions.
Next time, collect fresher fallen nuts, hull sooner, and cure with airflow in cool shade.
If you see mold during curing
Mold usually means too much moisture and not enough airflow. Spread nuts thinner, increase ventilation, and remove affected nuts.
Don’t store curing nuts in sealed bins or deep pilesblack walnuts need to breathe.
What about juglone and garden safety?
Black walnuts produce juglone, a natural compound that can inhibit growth in some sensitive plants. Keep hull piles and dark wash water away from
gardens you care aboutespecially if you grow juglone-sensitive crops. When disposing, choose a spot where staining and plant sensitivity aren’t an issue.
Conclusion
Learning how to harvest black walnuts is mostly about mastering three things: timing (wait for the thumb-dent stage),
speed (hull promptly), and airflow (cure properly).
Do that, and you’ll turn a yard full of falling “green cannonballs” into a stash of nutmeat that makes cookies, brownies, breads, and savory dishes taste
like you’ve got secret woodland skills.
Start with a small batch, dial in your process, and scale up once you know what works in your climate. Your future self will thank you
probably while eating something buttery and walnut-studded.
Real-World Experiences: What Harvesting Black Walnuts Is Actually Like (and What People Learn Fast)
If you’ve never harvested black walnuts before, here’s the part nobody fully understands until they’ve done it: the “harvest” is the easy part.
The real adventure begins when you decide you want clean nuts, dry nuts, and finally edible nutmeats.
That’s where most people rack up their best lessonsand their funniest mistakes.
One common first-time experience is the over-enthusiastic collection phase. The ground is covered. You’re excited. You fill buckets like you’re
training for a pioneer decathlon. Then you start hulling and realize each nut is basically a tiny ink grenade. That’s why experienced harvesters
often recommend a “test batch” approach: process 20–30 nuts end-to-end first. It teaches you how ripe nuts look in your area, how easily
the hulls come off, and how long washing takes before the water stops resembling a potion from a questionable wizard.
Another very normal moment: discovering the stain is not a rumor. People often describe it as going to bed with normal hands and waking up looking
like they changed the oil on a haunted tractor. Even green hulls can stain. The funniest part is how quickly you learn what not to touch:
car door handles, white countertops, your favorite hoodie, your phone screen, your face. Veterans keep a “walnut kit” outsidegloves, tarp, bucket,
and an old towelso they never carry the mess into the house.
The thumb-dent ripeness test becomes a fan favorite because it prevents the “I tried to hull a rock” scenario. People who collect too early often
report that hulling feels like wrestling a bowling ball. But once the hull gives slightly, methods like heel-rolling suddenly work, and the job changes
from “impossible” to “messy but doable.” Another small trick many people learn: if hulls are stubborn, letting nuts sit briefly (not forever) can soften hulls
but wait too long and you risk deeper staining and more funky odors. Timing is a balancing act, not a moral virtue.
Then there’s the worm moment. First-timers may think they’ve discovered a walnut apocalypse. In reality, larvae in the hull are often just part of the ecosystem.
Most experienced harvesters focus on the shell integrity and later kernel quality. It’s not “romantic,” but it’s practical: the hull is compost-ish waste,
the shell is the protective vault, and the kernel is the prize. The washing stageespecially repeated rinses and removing floatersusually restores confidence fast.
Curing is where patience becomes a superpower. A frequent beginner mistake is piling nuts in a deep layer or sealing them in a container “to keep them clean.”
That often leads to the classic disappointment: moldy shells and a sour smell. People who succeed tend to describe curing as “letting them breathe.”
They use wire racks, shallow layers, airflow, and occasional stirring. They also learn to protect the curing area from squirrels, who will absolutely
attempt a snack burglary while you’re at work.
Finally, cracking black walnuts teaches humility. Many people try a standard nutcracker once, then laugh-cry. Those who stick with it often switch to a vise
or a heavy-duty cracker and accept that extraction is a skill. The “aha” moment is realizing you’re not trying to smash the nutyou’re trying to
crack it with control so the kernel comes out in larger pieces. Conditioning the shells (brief soaking + overnight moisture) is another real-world trick
people use when they’re tired of turning beautiful kernels into walnut confetti.
The best part of these experiences is that the learning curve is steepmeaning you get better quickly. By the second batch, you’ll likely have a workflow:
collect ripe nuts, hull promptly, wash and float-test, cure with airflow, then crack with the right tool. And when you finally bake something with your own
harvested black walnuts, the flavor payoff feels earned in the most satisfying way.


