Table of Contents >> Show >> Hide
- Understand the Basic Signal Flow First
- The Main Parts of a Stage Sound System
- Powered vs. Passive Speakers
- How to Set Up a Stage Sound System Step by Step
- Step 1: Assess the Venue and the Event
- Step 2: Position the Main Speakers
- Step 3: Place the Subwoofers Thoughtfully
- Step 4: Lay Out the Mixer and Stage Inputs
- Step 5: Connect Monitors
- Step 6: Make All Connections Before Powering Up
- Step 7: Set Gain Structure Properly
- Step 8: Build the Front-of-House Mix
- Step 9: Build Monitor Mixes
- Step 10: Ring Out the System and Control Feedback
- Step 11: Run a Real Soundcheck
- Common Stage Sound Setup Mistakes to Avoid
- Example Stage Sound Setups
- Experience-Based Lessons From Real Stage Sound Setups
- Conclusion
Setting up a stage sound system looks glamorous right up until you are crawling under a riser with an XLR cable in your teeth and a drummer asking, “Can I get more me in the monitor?” Welcome to live sound. It is part science, part logistics, part diplomacy, and part gentle prayer to the audio gods. The good news is that a reliable setup is not magic. Once you understand signal flow, speaker placement, monitor mixes, and gain structure, building a clean-sounding stage rig becomes much more predictable.
Whether you are setting up for a school auditorium, a worship band, a local club, a corporate event, or an outdoor concert, the core idea is the same: capture the sound, mix it, amplify it, and deliver it clearly to both the audience and the performers. The trick is doing all that without feedback, distortion, dead spots, or the dreaded “everything sounds fine on stage but terrible in the room” problem.
This guide walks through the process step by step in plain English, with enough detail to help beginners avoid rookie mistakes and enough practical advice to keep experienced crews nodding along instead of rolling their eyes.
Understand the Basic Signal Flow First
Before you connect a single cable, it helps to know what the stage sound system is actually doing. In the simplest terms, sound travels through this path:
Source → microphone or DI box → mixer → processing → amplifiers or powered speakers → audience and monitors
That signal flow matters because every problem in live sound usually lives somewhere along that chain. No vocal in the mains? Check the mic, cable, input channel, routing, mute status, and output. Feedback in the singer’s wedge? Look at the mic position, monitor placement, EQ, aux send, and stage volume. When you understand the route, troubleshooting gets faster and far less dramatic.
The Main Parts of a Stage Sound System
1. Input Sources
These are your microphones, wireless microphones, instruments, playback devices, and laptops. Vocals usually go through dynamic microphones for durability and feedback control. Keyboards, acoustic guitars, basses, and playback devices often sound cleaner through DI boxes, which convert the signal into something the mixer can handle more reliably.
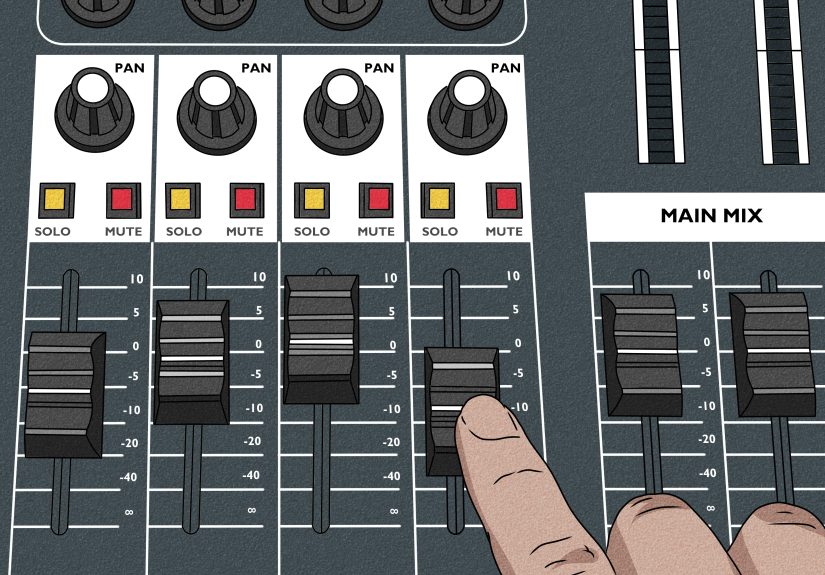
2. Mixing Console
The mixer is mission control. It lets you adjust levels, EQ, effects, pans, group routing, and monitor sends. Analog mixers are straightforward and budget-friendly. Digital mixers offer scenes, onboard processing, remote control, and more flexible routing. If your event changes quickly or uses multiple monitor mixes, digital can feel like a cheat code.
3. Main Speakers
These are the front-of-house speakers, often called mains. They project sound to the audience. Small rooms may only need one or two powered speakers on stands. Larger venues may need subs, fills, or line arrays. The goal is even coverage, not brute-force loudness. Louder is not always better. Sometimes louder is just a more expensive way to sound bad.
4. Subwoofers
Subs handle low-frequency energy such as kick drum, bass guitar, synth bass, and backing tracks. They add weight and impact, but too much sub can turn a mix into sonic soup. Use them with intention. A stage should shake people emotionally, not rearrange their internal organs.
5. Stage Monitors
Monitors help performers hear what they need on stage. These may be floor wedges, side fills, or in-ear monitors. Good monitor mixes improve pitch, timing, confidence, and communication. Bad monitor mixes create frustration, feedback, and passive-aggressive eye contact with the engineer.
6. Cables, Snakes, and Power Distribution
Cables are the unsung heroes of every live setup. XLR cables typically carry balanced mic or line-level signals. Speaker connections vary depending on whether the system is powered or passive. A stage snake keeps long cable runs organized, reduces clutter, and saves your setup from becoming a spaghetti festival.
Powered vs. Passive Speakers
If you are building or upgrading a stage sound system, one of the first decisions is whether to use powered or passive speakers.
Powered speakers have built-in amplifiers and usually onboard processing. They are easier to transport, faster to set up, and popular for small to medium live events.
Passive speakers require external amplifiers. They are more common in larger or more modular systems where separate amps and processors offer extra flexibility.
For most bands, schools, churches, and event crews working in small to medium venues, powered speakers are the easier choice. They reduce guesswork and speed up setup. Passive rigs can be excellent, but they require more planning, more rack space, and more attention to amp matching and system design.
How to Set Up a Stage Sound System Step by Step
Step 1: Assess the Venue and the Event
Start by asking boring but essential questions. How many people are attending? Is the event speech-heavy, music-heavy, or both? Is the room reflective or carpeted? Indoors or outdoors? Do you need simple left-right coverage, or are there balconies, side seating, or awkward dead zones?
A speech-only setup in a hotel ballroom has very different needs from a five-piece rock band on an outdoor stage. If you skip this step, you risk bringing the wrong gear or placing it in the wrong positions. Live sound punishes assumptions with impressive efficiency.
Step 2: Position the Main Speakers
Main speakers should generally go in front of the performance area and point toward the audience, not back at the microphones. Put them high enough that the high-frequency drivers project over the front row and toward audience ear level. In many small and medium setups, that means speaker stands or poles above head height.
Try to avoid burying speakers against bad room boundaries unless the system is designed for that placement. Speaker location affects coverage, clarity, bass buildup, and feedback risk. If you place the mains too low, the front row gets blasted while the back row hears mush. If you place them behind the microphones, you are basically scheduling feedback in advance.
Step 3: Place the Subwoofers Thoughtfully
Subs should sit on the floor, since low frequencies couple well with boundary surfaces. Keep them centered when possible for more even low-end coverage, especially in smaller systems. If you split subs wide left and right without a plan, you can create uneven bass across the room. One side thumps, the other side sulks.
If your system allows crossover settings, make sure the mains and subs are integrated correctly. Too much overlap muddies the mix. Too little leaves a hole where the punch should live.
Step 4: Lay Out the Mixer and Stage Inputs
Place the mixer where the engineer can hear what the audience hears. Front of house is ideal. If the mixer must live on stage or side stage, use headphones carefully and recognize that your mix decisions will be less accurate.
Run microphones and DI boxes into the stage box or directly into the mixer. Label channels clearly. A little labeling now saves a lot of chaos later. “Is vocal 2 on channel 7 or 9?” is not a fun sentence during a live intro.
Step 5: Connect Monitors
Place stage monitors a few feet in front of performers and angle them toward the ears, not the knees. Each monitor should connect to an aux or bus output on the mixer. In most live situations, monitor sends should be set pre-fader, so changes to the front-of-house mix do not suddenly change what performers hear on stage.
Think about what each performer actually needs. Singers often want vocals and pitch references. Drummers may want kick, snare, and bass. Guitarists often want less guitar than they think they do and more vocal than they initially admit.
Step 6: Make All Connections Before Powering Up
Connect microphones, instruments, DI boxes, speakers, monitors, playback devices, and network or remote-control connections before turning on the system. Then follow a safe power sequence: source gear and mixer first, amplifiers or self-powered speakers last. When shutting down, do the opposite. Speakers go off first. This helps prevent nasty pops and potential damage.
Step 7: Set Gain Structure Properly
Gain structure is where many stage sound systems either become clean and controlled or descend into crunchy sadness. Start with channel faders down or at unity depending on your workflow, mute what is not needed, then set preamp gain for each input while the performer sings or plays at realistic performance level.
You want a healthy signal that is strong but not clipping. Too little gain raises noise. Too much gain creates distortion and reduces headroom. Good gain staging keeps the whole system working efficiently from the input all the way to the speakers.
Do not set gain during a whisper-check and expect it to survive the first chorus. Ask for real performance level. “Check one, two” is helpful. “Pretend you are in the final song and the crowd actually paid money” is better.
Step 8: Build the Front-of-House Mix
Once gain is set, build your main mix. Start with essentials: lead vocal, kick, snare, bass, and key instruments. Use high-pass filters where appropriate to clear out unnecessary low-frequency rumble on vocals, guitars, and speech mics. Pan carefully if you are in stereo, but do not overdo it in small venues where much of the audience may only hear one side well.
Cut problematic frequencies before boosting everything in sight. Small EQ moves are often more effective than dramatic ones. A well-placed cut can create more clarity than three heroic boosts and a motivational speech.
Step 9: Build Monitor Mixes
After the front-of-house mix is reasonably stable, work through monitor mixes one at a time. Ask performers what they need, but translate requests into usable decisions. “I need more energy” usually means “I cannot hear the vocal and snare.”
Keep monitor levels only as loud as necessary. Excessive stage volume is one of the fastest ways to lose clarity and invite feedback. If guitar amps, wedges, and drums are all fighting for dominance, the PA ends up working harder just to restore basic intelligibility.
Step 10: Ring Out the System and Control Feedback
Feedback happens when sound from a speaker re-enters a microphone, gets re-amplified, and loops. The classic fixes are physical first: move the mic, reposition the monitor, reduce stage volume, aim speakers correctly, and use directional microphones wisely. A cardioid vocal mic, for example, rejects best from the rear, so placing the monitor in the mic’s null zone can help.
After that, use EQ carefully. If a specific monitor keeps ringing at a certain frequency, make a narrow cut. Do not carve the entire tone out of the system just to solve one problem. That is like demolishing your kitchen because one drawer sticks.
Step 11: Run a Real Soundcheck
Soundcheck is not just “make noise for 90 seconds.” It is where you test inputs, confirm routing, verify monitor mixes, listen for buzzes and hums, check wireless performance, and walk the room to hear coverage. Use a full song if possible. Real transitions between quiet and loud passages reveal issues that line checks miss.
Walk the venue if you can. Listen front, center, sides, and back. Fix what you hear now, because the audience will definitely hear it later.
Common Stage Sound Setup Mistakes to Avoid
- Placing mains behind the microphones: This is practically a feedback subscription.
- Ignoring gain structure: Bad gain staging makes everything harder downstream.
- Turning up monitors instead of fixing placement: Physics usually wins.
- Using too much low end: Big bass feels impressive until the vocals disappear.
- Forgetting cable management: Messy stages are slow to troubleshoot and easy to trip over.
- Not labeling channels: Confusion loves unlabeled inputs.
- Skipping the room walk: The mix at the board is not always the mix in the room.
Example Stage Sound Setups
Small Acoustic Performance
Use two powered mains on stands, one small mixer, one vocal mic, one DI for acoustic guitar, and one monitor wedge. This is a fast and practical setup for cafés, school events, and intimate indoor rooms.
Full Band in a Medium Venue
Use two mains, one or two subs, a digital mixer, several vocal mics, drum mics, guitar amp mics, DI boxes for bass and keys, and at least two separate monitor mixes. A stage snake helps keep runs tidy and setup efficient.
Outdoor Community Event
Use more speaker coverage than you think you need, because outdoor spaces do not give you reflective help. Speech intelligibility matters, wind matters, and power distribution matters. Bring weather protection, tape, extra cables, and patience.
Experience-Based Lessons From Real Stage Sound Setups
Anyone who has spent time around live events learns the same truth sooner or later: the best stage sound system is not the fanciest one. It is the one that is organized, predictable, and calm under pressure. A modest rig with good placement, clean gain staging, and sensible monitor levels will outperform an expensive rig that was thrown together in a panic. That lesson shows up again and again in real venues.
One of the most common experiences is discovering that the room matters as much as the gear. A band can sound balanced during rehearsal in a treated room, then arrive at a gymnasium and suddenly every snare hit turns into a small weather event. Hard surfaces throw reflections everywhere, vocals smear, and the low end becomes a thick blanket. In those moments, experienced engineers stop chasing perfection and focus on intelligibility. They trim stage volume, tighten the EQ, and simplify the mix. The crowd rarely complains that the floor tom needed more shimmer. They do notice when they cannot understand the singer.
Another real-world lesson is that monitor discipline solves half of the night’s problems. Performers often ask for “more everything,” especially in the first few minutes. But once wedges get too loud, everybody plays louder, sings harder, and asks for even more monitor. That spiral is famous. The smarter approach is to build focused monitor mixes with only what each player truly needs. A vocalist usually needs lead vocal, a little guitar or piano for pitch, and enough rhythm to stay locked in. A drummer may need kick, bass, and vocal cues. Cleaner monitor mixes feel better and feed back less.
There is also the universal experience of learning that cable management is not glamorous until something breaks. The neatly labeled and taped stage is easier to troubleshoot, safer to walk across, and much faster to strike after the show. The messy stage, on the other hand, is how you end up tracing the wrong XLR while the audience is already seated and someone on stage says, “We have no keyboard in the house.” Suddenly, cable labels feel like an act of wisdom bordering on poetry.
Many engineers also learn the hard way that soundcheck has to sound like the actual performance. A polite line check does not reveal what happens when the singer belts, the guitarist engages three pedals at once, and the drummer decides the chorus deserves extra enthusiasm. Real performance energy changes levels, EQ balance, and monitor needs. The best soundchecks simulate the show as honestly as possible.
And finally, experience teaches that live sound is as much about people as equipment. The engineer who stays calm, communicates clearly, and solves problems without making the band feel foolish usually gets a better result than the genius with a bad attitude. A stage sound system works best when the crew, performers, and venue staff all trust the process. Good sound is technical, yes, but it is also collaborative. That is why the best live mixes rarely feel accidental. They feel prepared.
Conclusion
Learning how to set up a stage sound system is really about mastering a repeatable workflow. Understand the signal path, position the speakers correctly, use the right inputs and routing, keep monitor mixes under control, set gain carefully, and soundcheck like the show actually matters. Because it does.
You do not need a stadium budget to get professional results. You need a thoughtful setup, good habits, and the willingness to solve problems at the source instead of hiding them under more volume. Do that consistently, and your stage sound system will stop feeling like a mysterious beast and start acting like a reliable tool.


