Table of Contents >> Show >> Hide
- Why an Old Wood Filing Cabinet Is Worth Saving
- Start with the Least Glamorous Step: Prep
- Choosing the Right Paint Color for the Cabinet
- How to Decoupage a Filing Cabinet Without Making It Look Accidental
- Best Design Ideas for a Painted and Decoupaged Old Wood Filing Cabinet
- How to Finish the Cabinet So It Lasts
- Common Mistakes to Avoid
- Where a Decoupaged Filing Cabinet Looks Best
- Real-World Experiences DIYers Commonly Report
- Conclusion
An old wood filing cabinet does not usually enter a room with much swagger. It clunks. It creaks. It may smell faintly of dust, forgotten tax documents, and the year 1997. But with paint, decoupage, and a little patience, that tired cabinet can become one of the most interesting pieces in your home. It can anchor a home office, brighten a craft room, add charm to a hallway, or become the one furniture makeover guests ask about before they ask for coffee.
The beauty of a painted and decoupaged old wood filing cabinet is that it blends function with personality. You keep the practical storage, but you lose the “accounting department in a basement” vibe. Whether you love cottage style, vintage florals, bold botanical prints, French-inspired patterns, or modern color blocking, this kind of makeover gives you a chance to create custom furniture without paying custom-furniture prices.
Even better, this project works for beginners and experienced DIY fans alike. You do not need a giant workshop, a cabinet-making degree, or the patience of a saint. You just need a solid plan, the right prep, and enough restraint not to slap wet paper onto wet paint and hope for miracles. Hope is lovely. Adhesion is better.
Why an Old Wood Filing Cabinet Is Worth Saving
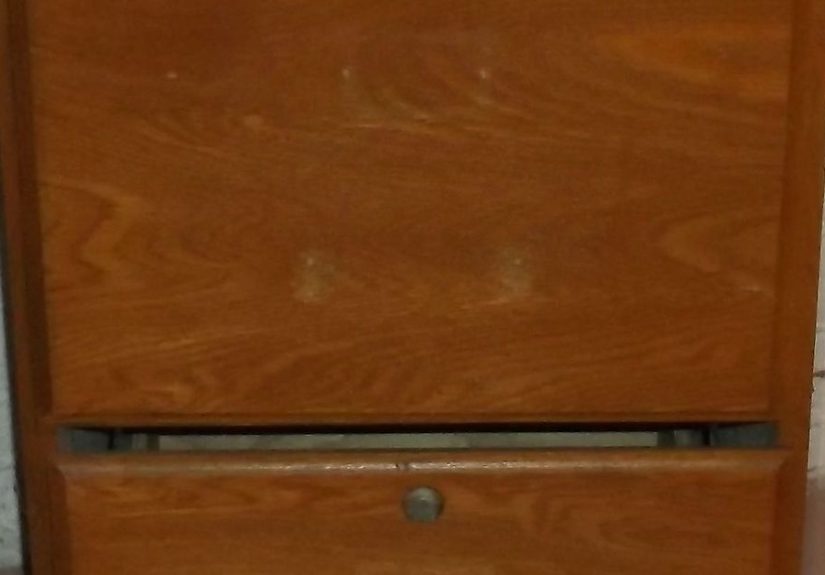
Before you reach for the paintbrush, it helps to remember why these cabinets are such good makeover candidates in the first place. Many older wood filing cabinets are sturdier than newer budget furniture. They often have real wood, solid drawer construction, and enough weight to survive an accidental encounter with a vacuum, a child, or a dog who believes zoomies are an Olympic sport.
They also offer lots of flat surfaces, which is excellent news for both painting and decoupage. Drawer fronts are perfect for patterned paper or fabric. Side panels can take a bold color beautifully. The top can be styled like a mini console table. In other words, a filing cabinet is not just storage. It is a blank canvas with drawers.
Start with the Least Glamorous Step: Prep
If furniture makeovers had a theme song, prep would be the underrated backup singer doing all the hard work. A painted and decoupaged old wood filing cabinet looks great when the surface is properly cleaned, lightly sanded or deglossed, and ready for primer. Skip that stage, and the finish may chip, peel, bubble, or otherwise betray you at the worst possible moment.
Clean First, Always
Old furniture collects more than dust. It may have wax, oils from hands, furniture polish residue, mystery grime, and the sticky ghost of labels that refused to leave with dignity. Start by removing hardware if possible, emptying the drawers, and cleaning every surface thoroughly. Let the cabinet dry completely before moving on.
Scuff, Sand, or Degloss
You do not always need to sand a piece down to bare wood. In many cases, a light scuff-sand is enough to give the next coat something to grip. Focus on smoothing rough areas, dulling glossy finishes, and removing anything loose or flaky. If the cabinet has dents or old hardware holes you want to hide, use wood filler, let it dry, and sand smooth.
If you are working on a very old painted cabinet, be smart about safety. Older finishes may contain lead, especially on pieces that date back decades. That does not mean panic, but it does mean caution. Avoid careless dust creation, work with proper containment and ventilation, and follow lead-safe renovation guidance when the age of the finish is uncertain.
Prime for a Better Finish
Primer may not be the fun part, but it is often the difference between “professionally refreshed” and “painted during a caffeine emergency.” A good bonding primer helps paint stick to previously finished wood. A stain-blocking primer is especially useful if the cabinet has knots, dark stains, tannin bleed, or old discoloration that could ghost through lighter paint colors.
Choosing the Right Paint Color for the Cabinet
Once the surface is prepped, the fun starts. Choosing paint color for a filing cabinet makeover depends on where the piece will live and how bold you want to be. Soft white, sage green, dusty blue, charcoal, warm greige, and muted black remain popular because they pair well with many interiors. But filing cabinets also reward risk. Deep emerald, navy, terracotta, mustard, or even blush can look incredible, especially when balanced with decoupage details.
If your decoupage paper has a busy pattern, keep the painted sections simple. If the paper is subtle, you can use a stronger paint color to add energy. One easy formula is this: patterned drawer fronts, solid frame. Another is the reverse: painted drawers, decoupaged side panels or cabinet top. Both can work beautifully when the palette feels intentional.
Paint Finish Matters Too
For a wood filing cabinet, matte, satin, and eggshell finishes are the most forgiving. High gloss can look dramatic, but it reveals more imperfections. Chalk-style paint appeals to many DIYers because it is beginner-friendly and can create a soft, vintage look. Acrylic furniture paint offers durability and clean color. Either can work, as long as the prep and topcoat make sense for the level of use the cabinet will get.
How to Decoupage a Filing Cabinet Without Making It Look Accidental
Decoupage sounds fancy, but at heart it is the art of gluing beautiful things onto furniture on purpose. The best painted and decoupaged old wood filing cabinet projects look curated, not chaotic. That means choosing the right material, cutting carefully, planning the layout, and sealing the surface well.
Pick the Right Decoupage Material
You have options: wrapping paper, scrapbook paper, tissue paper, rice paper, napkins, wallpaper offcuts, maps, sheet music, book pages, or fabric. Thin materials are easier to smooth, but delicate papers can wrinkle or tear if handled roughly. Heavier paper can be more forgiving, though it may need more patience around corners and edges.
Floral prints are classic for vintage furniture. Botanical illustrations create a collected, English-garden feel. Maps and documents add a travel or library vibe. Geometric patterns can make an old cabinet feel modern. The key is scale. Tiny prints may get lost. Huge prints may be hard to line up across multiple drawers. Medium-scale patterns usually hit the sweet spot.
Plan the Layout Before You Glue
Lay out your paper dry before committing. This step is not optional unless you enjoy discovering upside-down birds after the glue dries. Decide whether the pattern will continue across drawers or whether each drawer will stand alone. Mark your cuts lightly and trim pieces to fit with care. Some DIYers wrap paper over drawer edges for a seamless look, while others trim exactly to the front panel and let the painted border frame the design.
Apply Decoupage Medium in Thin Coats
Brush a thin, even layer of decoupage medium onto the cabinet surface, place the paper carefully, and smooth from the center outward to push out trapped air. Work gently. This is not the time for aggressive enthusiasm. A plastic scraper, brayer, or even a wrapped card can help flatten bubbles without tearing thin paper.
Once the piece is in place, let it dry thoroughly before adding sealing coats on top. Decoupage medium often goes on milky and dries clear, so do not judge the finish too early. Several thin coats usually look better than one heavy one. The goal is a sealed, smooth, wipeable surface rather than a gluey mess that looks permanently damp.
Best Design Ideas for a Painted and Decoupaged Old Wood Filing Cabinet
Vintage Floral Cabinet
Paint the cabinet frame in soft cream, pale sage, or muted black, then decoupage the drawer fronts with oversized floral paper. Add antique brass pulls for a romantic, collected look. This style works especially well in bedrooms, reading nooks, and feminine home offices.
Botanical Specimen Look
Use green-gray paint and decoupage with plant illustrations, fern prints, or herb labels. It feels fresh, smart, and slightly academic in the best way. Style the top with a lamp, a small stack of books, and a ceramic pot for extra charm.
Modern Graphic Makeover
Pair matte black, white, or navy paint with bold geometric paper on the drawer faces. Keep the hardware simple and streamlined. This approach is ideal for a more modern office or studio where you want the cabinet to feel intentional rather than overly sweet.
French Cottage Style
Paint the cabinet in a dusty blue or warm white, distress the edges lightly, and use script paper, toile, or faded botanical motifs. A satin or matte topcoat helps preserve the soft old-world look without making it feel shiny and new.
How to Finish the Cabinet So It Lasts
Once the paint and decoupage are dry, a protective finish helps the cabinet survive real life. That includes hands, files, mugs, dusting, drawer friction, and whatever else your household throws at it. A clear topcoat can protect against scratches, scuffs, dirt, and everyday wear.
For lighter colors and decoupage designs where you want clarity, a water-based, non-yellowing finish is often a smart choice. If you want a warmer tone and maximum durability, other clear finishes may work, but always consider how they might affect the color underneath. Apply thin coats, let them dry properly, and avoid rushing the cure time. Furniture often feels dry before it is truly ready for heavy use.
Do Not Forget the Drawers
The outside gets the compliments, but the inside still deserves dignity. Line the drawers with shelf paper or lightly sand and refresh the interiors if needed. Clean drawer runners and check that the hardware works smoothly. A stunning cabinet that sticks every time you open it is the furniture version of a pretty shoe that blisters in ten minutes.
Common Mistakes to Avoid
Painting over dirt: Paint sticks better to clean surfaces than to old polish, grease, or dust. Revolutionary, but true.
Skipping primer on problem surfaces: Dark wood, stained areas, glossy finishes, and patched spots usually benefit from primer.
Using thick glue coats: Heavy decoupage medium can lead to wrinkles, tackiness, and longer drying times.
Ignoring cure time: Just because the cabinet looks done does not mean it is ready for abuse by binders, baskets, or office supplies.
Choosing paper without testing scale: Gorgeous paper can still look awkward when cut into multiple drawer sections.
Where a Decoupaged Filing Cabinet Looks Best
This project is wonderfully flexible. In a home office, it can hold paperwork while acting as statement furniture. In a craft room, it becomes colorful storage for supplies. In an entryway, it can hold keys, chargers, stationery, and pet gear. In a bedroom, a smaller wood filing cabinet can work like a quirky nightstand with better storage and far more personality than the average flat-pack cube.
That is part of the appeal. A painted and decoupaged old wood filing cabinet is not just rescued furniture. It is useful art. It earns its square footage.
Real-World Experiences DIYers Commonly Report
One of the most relatable experiences with this type of makeover is that the cabinet almost always looks worse before it looks better. DIYers often say the middle stage is the emotional danger zone: hardware removed, primer half-dry, drawers scattered around the room, and one family member asking, “Are you sure about this?” That moment is normal. In fact, it is practically a rite of passage. Once the paint evens out and the paper goes on, the transformation becomes obvious.
Another common experience is surprise at how much the paper choice changes the personality of the piece. A cabinet painted black with floral decoupage can feel elegant and moody. The same cabinet in white with blue botanical paper can look airy and coastal. Many people start the project thinking paint is the star, then realize the pattern is what gives the cabinet its voice. Paint sets the mood, but decoupage tells the story.
DIYers also talk about learning patience the hard way. They rush the drying time between coats, only to find fingerprints in the finish or paper that shifts because the base was still tacky. Almost everyone who has done this project more than once becomes a passionate believer in letting each step dry fully. It is not glamorous advice, but it is useful. Furniture restoration has a funny way of teaching time management through mild regret.
There is also the practical joy of watching an “ugly but solid” piece become something genuinely stylish. People who live with small spaces especially appreciate this. Instead of buying a trendy storage cabinet that may not last, they keep a sturdy older piece and make it beautiful. That balance of thrift, creativity, and functionality is a huge part of why painted furniture projects remain so popular.
Many DIYers say the final surprise is how often the cabinet becomes a conversation piece. Guests notice it. Kids comment on it. Someone inevitably asks where it came from, and there is a quiet thrill in saying, “It used to be an old filing cabinet.” That sentence carries the special satisfaction of a successful makeover. You did not just decorate a room. You reimagined an object.
And maybe that is the best part of the whole experience. A painted and decoupaged old wood filing cabinet proves that usefulness and beauty do not have to compete. A practical item can still be charming. An old piece can still feel current. And something destined for a garage corner or curbside farewell can end up with a second life at the center of the room, looking like it belonged there all along.
Conclusion
A painted and decoupaged old wood filing cabinet is one of the most satisfying furniture makeovers you can tackle. It is affordable, creative, and surprisingly transformative. With good prep, thoughtful color choices, carefully applied decoupage, and a protective finish, you can turn a dated storage piece into something functional, durable, and full of style. Whether your taste leans vintage, modern, cottage, or eclectic, this project offers an easy way to create custom furniture that feels personal instead of mass-produced. In a world full of forgettable storage, that is a lovely upgrade.
Note: This article is formatted as HTML body content only and is ready for web publishing after your normal editorial review.


