Table of Contents >> Show >> Hide
- Why homeowners are switching to heat pumps
- Step 1: Start with the house, not the equipment brochure
- Step 2: Choose the right type of heat pump system
- Step 3: Size the system correctly or regret it later
- Step 4: Do not ignore the ductwork
- Step 5: Check electrical, drainage, location, and installation details
- Step 6: Compare bids like a homeowner, not a game show contestant
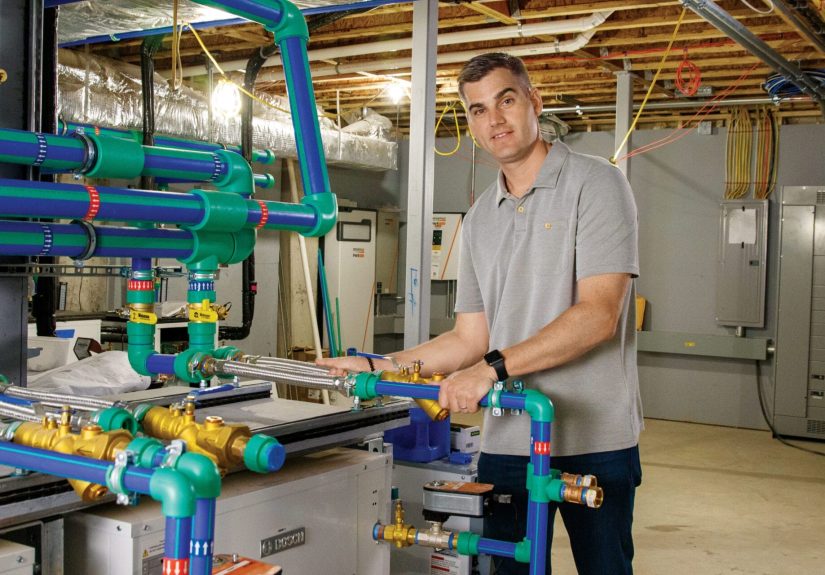
- Step 7: Installation and commissioning are not optional extras
- Step 8: Learn how to operate the system properly
- What about cost, rebates, and return on investment?
- Common mistakes to avoid
- Real-world experiences: what upgrading to a heat pump system feels like
- Final thoughts
If your old furnace sounds like it is filing a labor complaint every winter, or your air conditioner turns July into a financial crisis, it may be time to upgrade to a heat pump system. A heat pump is one of the smartest HVAC upgrades a homeowner can make because it handles both heating and cooling in one system, uses electricity efficiently, and can dramatically improve comfort when it is designed and installed the right way.
That last part matters. A heat pump is not magic. It is not a silver bullet. And it definitely is not a “slap in a box and hope for the best” project. The best heat pump upgrade starts with understanding your house, choosing the right equipment, fixing airflow problems, and working with a contractor who knows how to size and commission the system properly. Do that, and a heat pump can make your home quieter, more comfortable, and less wasteful. Skip those steps, and you may end up with a very expensive machine that still leaves one bedroom feeling like a walk-in freezer and another like Florida in August.
This guide walks through how to upgrade to a heat pump system the smart way, with practical advice, real-world considerations, and the common mistakes homeowners should avoid.
Why homeowners are switching to heat pumps
A heat pump does not create heat the way a combustion furnace does. Instead, it moves heat from one place to another. In summer, it pulls heat out of your home. In winter, it pulls heat from the outdoor air and moves it inside. That sounds slightly suspicious the first time you hear it. Heat from cold air? Yes. Modern heat pumps are specifically designed to do exactly that.
The appeal is easy to understand. One system handles both heating and air conditioning. Many modern models are variable-speed, which means they can ramp up and down instead of blasting on and off like a dramatic stage actor. That usually leads to steadier temperatures, better humidity control, quieter operation, and lower energy use compared with older equipment.
For many households, upgrading to a heat pump system also makes sense because the home already needs an HVAC replacement. If your furnace is aging, your air conditioner is limping, or repair bills are becoming a monthly subscription service, replacing both with a single high-efficiency heat pump may be more logical than buying separate systems again.
Step 1: Start with the house, not the equipment brochure
The first step in a successful heat pump upgrade is not picking a brand. It is understanding the home. A professional home energy audit can reveal where your house is leaking air, losing heat, struggling with insulation, or suffering from duct problems. That information matters because the best HVAC system in the world cannot fully compensate for a house that leaks like an unplugged bathtub.
Older homes especially benefit from some “house first” improvements before or during a heat pump installation. Air sealing around attic penetrations, rim joists, windows, doors, and other leakage points can reduce wasted heating and cooling. Adding attic insulation or improving insulation in key areas can shrink the home’s heating load. That can make a smaller heat pump possible, which may lower installation cost while improving comfort.
In plain English: before buying a bigger machine, make the house less needy.
What to ask for before you sign a contract
- A home energy audit or detailed home comfort assessment
- An inspection of insulation and air leakage issues
- A duct inspection if you plan to keep existing ductwork
- A room-by-room load calculation rather than a rough guess based on square footage
Step 2: Choose the right type of heat pump system
Not every heat pump upgrade looks the same. The best option depends on your existing HVAC setup, climate, house layout, and budget.
Ducted air-source heat pump
This is often the most natural replacement when you already have central heating and cooling with ductwork in good condition. The outdoor unit pairs with an indoor air handler or coil and uses the home’s ducts to distribute conditioned air. This option works well for whole-home comfort, especially if your existing duct system is properly sized, sealed, and insulated.
Ductless mini-split heat pump
A ductless mini-split is ideal when your home has no ducts, has additions that are hard to condition, or needs zoned comfort. Each indoor head serves a room or zone, which gives excellent flexibility. Mini-splits are also popular in older homes, finished attics, garages, bonus rooms, and homes where installing new ducts would be expensive or invasive.
Dual-fuel or hybrid heat pump system
In some homes, especially in colder regions or where electricity rates and fossil-fuel rates create a tricky math problem, a dual-fuel system makes sense. This setup pairs a heat pump with a gas furnace. The heat pump handles mild and moderate weather efficiently, while the furnace takes over in very cold conditions when it is more cost-effective or necessary. It is the HVAC equivalent of owning both sneakers and snow boots.
Geothermal heat pump
A geothermal heat pump uses the stable temperature underground rather than outdoor air. It can be extremely efficient and comfortable, but installation is more complex and expensive because it requires ground loops or wells. For some properties, especially long-term homes with enough land and a bigger budget, it can be an excellent solution. For many homeowners, though, a modern air-source heat pump is the more practical upgrade.
Step 3: Size the system correctly or regret it later
Heat pump sizing is where good projects separate from expensive mistakes. A contractor should not size your new system based only on the size of the old furnace or air conditioner. That is how oversized and undersized systems are born, and neither one is fun.
A proper upgrade should include a Manual J load calculation to estimate the home’s heating and cooling needs, plus equipment selection based on those numbers. This is especially important for variable-speed and cold-climate heat pumps, where performance at different outdoor temperatures matters.
An oversized system can short-cycle, reduce dehumidification, increase wear, and create uneven comfort. An undersized system may struggle on the coldest days and rely too heavily on backup heat. The goal is not “biggest machine wins.” The goal is “right-sized system performs beautifully.”
Cold climate matters
If you live in a region with long freezes or sharp winter lows, ask specifically about cold-climate heat pump performance. Some systems are designed to maintain stronger heating output at lower outdoor temperatures. Do not settle for a vague promise like, “Oh yeah, this one should be fine.” Ask for performance data, design temperature assumptions, and whether supplemental heat is part of the plan.
Step 4: Do not ignore the ductwork
If you are installing a ducted heat pump, your duct system can make or break the project. Leaky ducts, undersized returns, unbalanced airflow, and poorly insulated ducts in attics or crawl spaces can sabotage efficiency and comfort. Homeowners sometimes replace the equipment and keep bad ducts, which is like buying premium running shoes and then jogging through wet cement.
Your contractor should inspect the ducts for leakage, insulation, sizing, and airflow. In many homes, duct sealing and modest duct modifications are worth every penny. If the duct system is truly poor or impossible to fix economically, ductless mini-splits or a partial-ducted approach may be the better answer.
Signs your ducts need attention
- Rooms that are always too hot or too cold
- Whistling grilles or weak airflow
- Dusty rooms despite regular cleaning
- Ducts running through very hot attics or damp crawl spaces
- High energy bills that do not match your thermostat settings
Step 5: Check electrical, drainage, location, and installation details
Upgrading to a heat pump system is not only about the indoor and outdoor units. Several support details can affect cost, code compliance, and long-term reliability.
Electrical capacity
Some homes, especially older ones, may need electrical work to support new equipment. That might mean a new circuit, service upgrades, wiring changes, or an electrical panel upgrade. This should be evaluated before installation day, not discovered while the old furnace is already sitting on the driveway like a retired robot.
Outdoor unit placement
The outdoor unit should be located where it has adequate clearance, drainage, service access, and airflow. In snowy climates, elevation and snow management matter. In tight side yards, noise and maintenance access matter. In all climates, the unit should not be boxed in by shrubbery that seems innocent now but plans to become a jungle by July.
Condensate management
Heat pumps produce condensate, and that water needs to go somewhere safely. Poor drainage can create water damage, mold risks, or nuisance freezing in cold weather. A good installation plan covers condensate routing just as carefully as refrigerant lines and electrical connections.
Refrigerant and safety
Only trained, licensed professionals should handle refrigerants and system charging. Homeowners should also avoid any sketchy shortcuts involving unapproved refrigerants or bargain “repairs” that sound too good to be true. HVAC is not the place for mystery chemicals and creative chaos.
Step 6: Compare bids like a homeowner, not a game show contestant
When you collect quotes, do not compare only the bottom-line price. Compare scope, design quality, and commissioning details. A lower bid may leave out duct repairs, electrical work, controls, or startup testing. That cheaper number can become very expensive once comfort problems start.
Questions to ask every contractor
- Will you perform a Manual J load calculation?
- How are you selecting the equipment?
- What is the system’s heating performance at my winter design temperature?
- Will you inspect and test existing ductwork?
- What electrical work is included?
- How will you handle thermostat setup and homeowner training?
- What startup and commissioning tests will you document?
- Who handles permits and inspections?
- What warranty applies to equipment and labor?
A solid bid should feel like a thoughtful plan, not a vague promise wrapped around a brand name.
Step 7: Installation and commissioning are not optional extras
A heat pump system should be commissioned after installation. That means the contractor verifies refrigerant charge, airflow, controls, electrical connections, duct leakage issues, and overall operation. If your installer disappears the second the thermostat lights up, that is not commissioning. That is fleeing the scene.
Ask for final documentation showing system settings, model numbers, controls, filter information, and maintenance guidance. You also want to understand how backup heat is configured, how defrost mode behaves, and what normal winter operation sounds like. Many homeowners think something is broken the first time they hear a defrost cycle. Usually, the system is just doing its job.
Step 8: Learn how to operate the system properly
A modern heat pump is not always best used like an old furnace. Many systems perform better when they maintain a steady indoor temperature rather than bouncing wildly up and down. Aggressive thermostat setbacks can work against efficiency or comfort, depending on the system and controls.
Ask the installer to explain:
- Recommended thermostat settings
- When auxiliary or backup heat engages
- How zoning works, if applicable
- How often filters should be cleaned or changed
- What maintenance the homeowner should handle
- When to call for professional service
Maintenance matters. Dirty filters, blocked airflow, and neglected outdoor units can reduce performance fast. Keep leaves and debris away, maintain clearance around the condenser, and follow the manufacturer’s filter guidance.
What about cost, rebates, and return on investment?
The cost to upgrade to a heat pump system varies widely depending on the equipment type, whether ducts exist, how much electrical work is needed, and how much weatherization the house needs. A straightforward ducted replacement is one thing. A whole-home electrification project with panel work, duct upgrades, air sealing, and new controls is another.
Rebates and tax incentives can help, but homeowners should verify them in real time before signing a contract. State, utility, and Tribal rebate programs vary by location, and federal incentive rules have shifted recently. Build your budget based on confirmed eligibility, not on something your cousin saw online three months ago.
As for payback, the answer depends on what you are replacing. Upgrading from electric resistance heat can produce strong savings. Replacing older air conditioning and an aging furnace at the same time can also make the economics attractive. In some cases, the biggest wins are not only on utility bills, but on comfort, quieter operation, better humidity control, and fewer temperature swings.
Common mistakes to avoid
- Choosing equipment based only on square footage
- Skipping a load calculation
- Keeping bad ductwork without fixing it
- Ignoring insulation and air sealing
- Assuming every heat pump performs the same in cold weather
- Comparing bids only by price
- Forgetting to ask about electrical upgrades and permits
- Running the system incorrectly after installation
Real-world experiences: what upgrading to a heat pump system feels like
In real homes, the heat pump experience is usually less about one dramatic moment and more about a collection of small improvements that add up. Homeowners often notice the noise first, or more accurately, the lack of it. An older furnace can sound like it is launching a small aircraft every time it starts. A well-installed variable-speed heat pump tends to run more gently and more often, which makes the house feel calmer. Instead of the temperature swinging up and down in big waves, rooms often feel more steady throughout the day.
Another common experience is surprise at how different the heat feels. People moving from a hot-blast gas furnace sometimes expect the air from a heat pump to feel just as toasty at the register. It usually does not. Heat pumps often deliver warm air at a lower temperature for longer periods. That can make some homeowners think the system is weak when it is actually operating exactly as intended. Once they adjust expectations, many end up preferring the more even comfort because the house feels consistently comfortable instead of alternating between “too warm” and “why am I wearing a blanket indoors?”
Homeowners in older houses often report the biggest improvement when the heat pump upgrade is paired with weatherization. Sealing attic leaks, fixing drafts, insulating problem areas, and addressing duct losses can make the system seem dramatically better. In those cases, it is not just the heat pump doing the work. It is the whole house finally acting like a team instead of a group project with four people doing nothing.
People who install ductless mini-splits frequently talk about room-by-room control as a quality-of-life upgrade. A finished attic, sunroom, or back bedroom that used to be impossible to keep comfortable suddenly becomes usable all year. Families also like being able to avoid conditioning rooms they barely use. That flexibility can make the home feel more tailored to daily life instead of forcing daily life to revolve around one stubborn thermostat in a hallway nobody loves.
There are also adjustment moments. Some homeowners need to learn not to crank the thermostat up and down as if the heat pump were an old single-stage furnace. Others are surprised by defrost cycles in winter or by the way auxiliary heat is controlled. Good installer education makes a huge difference here. When the contractor explains what is normal, homeowners tend to feel confident. When nobody explains anything, every unfamiliar sound becomes a mini emotional event.
The most satisfied homeowners usually have three things in common. First, the system was sized properly. Second, the installer addressed the house and airflow, not just the box. Third, expectations were set honestly from the beginning. That combination leads to the stories you hear most often: the house feels more even, the loud old system is gone, summer humidity is better controlled, and the utility bills are at least more predictable if not noticeably lower. In other words, the best heat pump upgrade does not just replace equipment. It changes how the home feels to live in every day.
Final thoughts
If you are wondering how to upgrade to a heat pump system, think bigger than the equipment itself. Start with the house. Get the load calculation. Check the ducts. Plan for electrical needs. Choose the right heat pump type for your layout and climate. Then hire a contractor who treats commissioning and homeowner education as part of the job, not as optional hobbies.
Done right, a heat pump upgrade can be one of the most useful improvements you make to your home. It can deliver efficient heating and cooling, better comfort, quieter operation, and a cleaner path forward when your old HVAC equipment reaches the end of the road. And unlike some home upgrades, this one actually works every day instead of just sitting there hoping guests notice it.


