Table of Contents >> Show >> Hide
- Why the IKEA RAST Is So Good for a Vintage Hack
- Planning the Vintage Telephone Dresser Look
- Step-by-Step: How to Make Over an IKEA RAST Dresser
- Best Ways to Use a Vintage Telephone Dresser
- Common Mistakes to Avoid
- Why This IKEA Hack Is Worth Doing
- Experience Notes: What This Makeover Feels Like in Real Life
- Conclusion
Some furniture pieces arrive in your home looking like they know exactly who they are. The IKEA RAST is not one of those pieces. It shows up as a humble little pine dresser and basically says, “I have potential. Please do the rest.” Honestly, that is part of its charm. It is simple, compact, easy to customize, and just plain begging for a makeover.
That is exactly why the Vintage Telephone Dresser Makeover – IKEA Rast Hack has become such a fun DIY idea. You get the practicality of a small three-drawer dresser, but you also get the chance to turn it into something that feels nostalgic, stylish, and surprisingly custom. Think old-school telephone table meets modern storage. Think rotary-phone vibes without the rotary-phone bill. Think antique character with IKEA-level convenience.
This makeover style works especially well in bedrooms, entryways, guest rooms, and small apartments where every square inch has to earn its keep. A vintage telephone dresser can hold chargers, notebooks, reading glasses, cables, stationery, and all the random little things that otherwise migrate into messy piles. And because the RAST starts as unfinished wood, it is one of the rare flat-pack pieces that can truly become whatever you want it to be.
Why the IKEA RAST Is So Good for a Vintage Hack
The RAST has a few built-in advantages that make it perfect for a furniture flip. First, its simple lines are easy to rework. Second, unfinished pine takes paint and stain far better than slick laminated surfaces. Third, the piece is compact enough for small rooms but sturdy enough to look substantial once you add better hardware, feet, trim, or a richer finish.
That matters because the best IKEA RAST hack projects do not rely on magic. They rely on a good blank canvas. A basic pine dresser can become a faux antique, a mid-century bedside cabinet, a moody apothecary piece, or in this case, a charming vintage-inspired telephone dresser. Add the right color, the right drawer pulls, and the right styling, and suddenly it looks less “I assembled this after coffee” and more “I found this at a lovely little vintage market and definitely did not carry it home in a hatchback.”
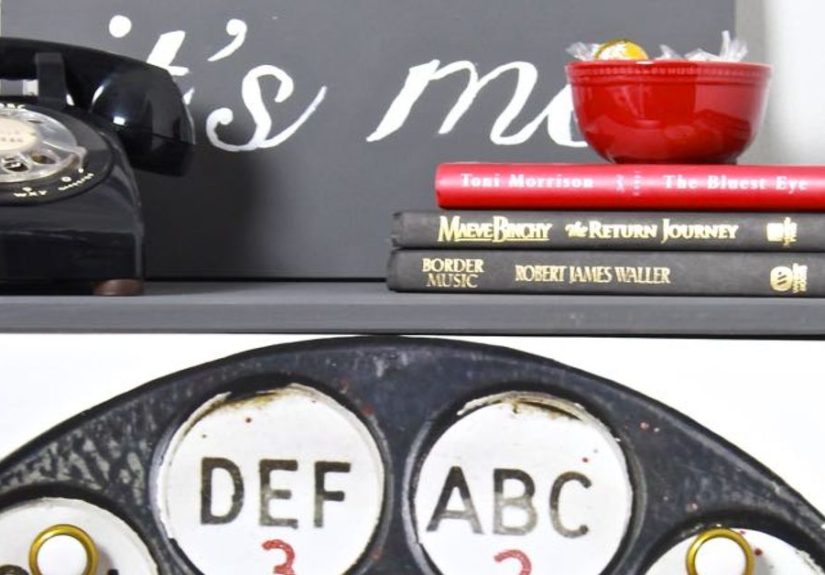
The telephone-table inspiration is especially smart. Traditional telephone tables were built to keep a phone, notepad, and small household items in one tidy place. That idea still works today, even though the “phone” now also holds your messages, playlists, maps, group chats, weather, and questionable late-night shopping history. A dresser with a small display surface and useful drawers is basically the modern version of that same idea.
Planning the Vintage Telephone Dresser Look
Before you open a paint can, decide what kind of vintage personality you want. “Vintage” is a huge umbrella. Do you want cottage charm, mid-century warmth, French-inspired elegance, or a little moody antique drama? The answer changes everything from the paint finish to the drawer pulls.
Color Ideas That Fit the Style
For a classic vintage telephone dresser, muted tones usually work best. Deep olive, dusty blue, warm cream, charcoal, black, or muted sage all feel collected and timeless. If you want a softer look, try greige, mushroom, pale blue-gray, or buttercream. If you want more drama, dark green with brass hardware is a guaranteed scene-stealer.
You can also combine finishes. A painted body with lightly stained drawer fronts creates contrast and gives the piece a more layered, custom feel. Another great option is using one main color and then distressing the edges so some wood peeks through. That little bit of wear makes the dresser feel older in the best possible way.
Hardware Makes the Whole Thing
Do not underestimate drawer pulls. Hardware is the jewelry of furniture, except more useful and less likely to end up tangled in a tiny box. Swapping plain pulls for bin pulls, glass knobs, antique brass handles, or ceramic knobs instantly gives the dresser personality. This is one of the fastest ways to move the piece away from “starter furniture” and toward “styled vintage accent.”
Optional Add-Ons
If you want to push the hack further, add bun feet, tapered legs, trim molding, a tiny riser shelf, or decorative appliqué. A small back lip or tray on the top can reinforce the telephone-table idea and give you a pretty place for a lamp, vase, framed print, or charging station. Cane webbing, fluted trim, or faux drawer lines can also add that custom-furniture magic without requiring a woodworking degree.
Step-by-Step: How to Make Over an IKEA RAST Dresser
1. Assemble with the End Look in Mind
You can partly assemble the dresser first, but think ahead. It is often easier to paint drawer fronts separately and install upgraded hardware after finishing. If you plan to add feet, trim, or overlays, dry-fit those pieces before painting so you do not get halfway through the makeover and realize your “easy weekend project” has become a tiny home-renovation saga.
2. Remove the Drawers and Hardware
Take out the drawers, remove any temporary knobs, and label parts if needed. This step sounds obvious, but many messy paint jobs begin with someone saying, “I can totally paint around that.” Famous last words. Working with separate parts gives you cleaner edges and a more professional result.
3. Sand the Wood Properly
Even though the RAST starts unfinished, sanding is still worth doing. A light sanding smooths rough spots, softens sharp edges, and helps create a more even surface for primer and paint. Focus on the top, side panels, drawer fronts, and anywhere your hands will touch often. If you want a distressed antique effect later, be extra mindful around corners and edges, because those are the spots where natural-looking wear tends to appear.
After sanding, wipe away all dust thoroughly. Dust is the sneaky villain of furniture makeovers. It hides in corners, clings to drawer grooves, and shows up under paint at the exact moment you were beginning to feel proud of yourself.
4. Prime Like You Mean It
Raw wood can absorb paint unevenly, so primer matters. A good primer improves adhesion, evens out the surface, and helps your topcoat look richer and last longer. If you are painting a dark color, a tinted primer can help reduce the number of finish coats you need. That means less frustration, less paint, and fewer opportunities to question your life choices while waiting for things to dry.
Use a brush for corners, grooves, and drawer edges, then a foam roller on broad flat surfaces for a smoother finish. Let the primer dry fully, then lightly sand again before moving on. It is one of those small steps that makes a surprisingly big difference.
5. Paint for Depth, Not Just Color
Now the fun part. Apply thin, even coats instead of one heavy coat. Thin coats level better, look smoother, and are far less likely to drip. Satin and eggshell finishes are especially good for this project because they strike a balance between durability and softness. Matte can look gorgeous too, especially for a vintage feel, but it usually benefits from a protective topcoat.
If you want the dresser to look like an old heirloom instead of a fresh showroom piece, consider layering color. For example, you might use a warm beige base under a deeper olive topcoat, then sand very lightly at the edges so a bit of the underlayer peeks through. That kind of subtle variation gives the piece depth and age without making it look fake or overdone.
6. Distress with Restraint
Distressing is a bit like adding salt to soup. Enough gives it character. Too much makes everyone nervous. Focus on places that would naturally wear over time: corners, drawer edges, around knobs, and the top rim. Use a sanding sponge and go slowly. Step back often. If the dresser starts looking like it survived three shipwrecks and a family of raccoons, it may be time to stop.
The goal is not destruction. The goal is believable age. A few softly worn edges can make the piece feel collected and charming rather than aggressively “DIY.”
7. Seal the Finish
Once the paint is fully dry, protect it. A clear wax or water-based topcoat can help preserve the finish, especially on the top surface where phones, lamps, trays, and daily clutter will sit. If you want a softer antique feel, wax can work beautifully. If you want extra durability, a clear protective finish is the safer choice.
8. Install New Hardware and Final Details
This is where the transformation really clicks. Install your new pulls or knobs, add feet if you are using them, and slide the drawers back in. Suddenly the RAST stops looking like a project and starts looking like furniture.
If you want to lean harder into the vintage telephone table makeover idea, style the top with a pleated lampshade, a small tray for keys and earbuds, a framed print, a bud vase, and perhaps a decorative notebook. Functional, yes. Cute, also yes. Your phone charger has never felt more dignified.
Best Ways to Use a Vintage Telephone Dresser
One of the best things about this hack is how flexible it is. In a bedroom, it can work as a nightstand alternative with more storage than a standard bedside table. In an entryway, it becomes a drop zone for mail, keys, sunglasses, and the eternal mystery item known as “that cord.” In a guest room, it can hold extra toiletries, linens, and a small reading lamp. In a home office, it can serve as a charming side cabinet with enough room for supplies you would rather not look at all day.
The old telephone-table concept actually feels surprisingly modern in that sense. It was designed to keep daily essentials within reach, and that function still matters. The objects changed. The need did not.
Common Mistakes to Avoid
Skipping Prep
If you skip sanding, cleaning, or primer, the finish usually tells on you. Paint may look uneven, chip sooner, or feel rough to the touch. Good prep is not glamorous, but it is the difference between “custom vintage piece” and “why is my drawer front peeling?”
Choosing Hardware Too Late
Select hardware early enough to confirm the scale and hole placement. Oversized pulls can add drama, but they need to fit the proportions of the drawer fronts. Tiny knobs on a bold dark dresser can look shy. Sometimes that works. Sometimes it looks like the furniture forgot its glasses.
Over-Distressing
A little wear looks elegant. Heavy random damage looks theatrical. Keep distressing intentional and concentrated where age would naturally appear.
Ignoring Safety
If the dresser will be used in a home with kids, pets, or busy traffic flow, anchor it properly. Style is wonderful. Stability is better.
Why This IKEA Hack Is Worth Doing
The beauty of the Vintage Telephone Dresser Makeover – IKEA Rast Hack is that it combines affordability, function, and personality in one project. You are not just changing a finish. You are changing the feeling of the piece. What starts as simple flat-pack furniture becomes something that looks more thoughtful, more personal, and more connected to the room around it.
It also gives you creative control without demanding expert-level skills. You can keep it simple with paint and hardware, or go all in with legs, trim, distressing, and styling details. Either way, the result can feel far more expensive than the starting point.
And let us be honest: there is something deeply satisfying about taking a plain little pine dresser and turning it into the furniture equivalent of a glow-up montage. It is practical. It is pretty. It stores your stuff. It does not judge your tangled charging cables. That is a rare combination.
Experience Notes: What This Makeover Feels Like in Real Life
The experience of doing a vintage telephone dresser makeover is part design project, part hands-on therapy session, and part lesson in patience. At first, the RAST can look almost too plain to become anything special. The wood is simple, the lines are simple, and the whole thing has that “I came in a box” energy. But once you start working on it, the charm shows up quickly.
One of the most enjoyable parts is choosing the look. That stage feels a little like costume design for furniture. You start imagining whether the piece belongs in a cottage bedroom, a moody guest room, or a cheerful entryway with old brass hooks and a striped runner. Even before the first coat of primer goes on, the project starts to feel personal. It is no longer just a dresser. It is becoming a character in the room.
The prep work is not glamorous, but it does create momentum. Sanding the pine smooth, wiping away dust, and lining up paint supplies makes the makeover feel real. Then comes the first coat of primer, which is usually the moment when the project switches from “idea” to “transformation.” The wood begins to unify. The surface begins to settle down. Suddenly, the dresser looks less like a spare part and more like something with intention.
Painting is usually where the emotional roller coaster kicks in. The first coat can look streaky. The second coat can look better but still not magical. Then the third pass, the light sanding, and the new hardware all start working together. That is the point when you get the tiny DIY thrill that says, yes, this is actually going somewhere. It is a very satisfying feeling.
The most memorable moment often comes at the end, when the final hardware goes on. A dresser that looked basic five hours ago suddenly feels styled and complete. Brass bin pulls make it feel collected. Glass knobs make it feel sweet and old-fashioned. Dark paint makes it feel grounded. Soft paint makes it feel romantic. Those finishing details do more than decorate the piece. They give it identity.
Living with the finished dresser is another reward altogether. In everyday use, it becomes one of those pieces that quietly makes a room better. The top is handy for a lamp, a coaster, a little dish, or your phone at night. The drawers swallow clutter that would otherwise sit out in the open. And because the makeover has personality, the piece does not fade into the background. It contributes to the room.
There is also a small but real pride that comes from saying, “I made that.” Not in a dramatic reality-show way. More in a calm, deeply satisfying way. You notice the color because you picked it. You notice the distressing because you did it by hand. You notice the hardware because you changed it from ordinary to memorable. The furniture feels more valuable because your effort is part of it.
That may be the best part of the whole project. A vintage telephone dresser hack is not just about saving money or upgrading storage. It is about creating something useful that also feels charming, a little nostalgic, and completely yours. And in a world full of disposable things, a piece like that feels pretty great.
Conclusion
If you want a DIY project that is practical, stylish, and genuinely fun, this is an excellent place to start. The RAST offers a simple structure, the vintage telephone-table idea gives you a clear design direction, and the makeover process leaves plenty of room for creativity. Whether you choose a dark dramatic finish, a soft cottage color, or a lightly distressed antique look, the end result can feel special without becoming fussy.
That is the magic of a great IKEA hack. It takes something ordinary and gives it character. In this case, it also gives you better storage, a more polished room, and one more excuse to admire your own good taste while pretending you casually “found” the piece somewhere fabulous.


