Table of Contents >> Show >> Hide
- What “Unclogged” Really Means in a Home Radiator
- Signs Your Radiator May Need to Be Unclogged
- Before You Start: Tools and Safety
- How to Unclog a Radiator: 13 Steps
- 1. Make Sure You Have a Hot-Water Radiator, Not a Steam Unit
- 2. Turn Off the Thermostat and Let Everything Cool
- 3. Gather Your Tools Before You Touch the Valve
- 4. Feel the Radiator and Identify the Pattern
- 5. Check That Both Radiator Valves Are Open
- 6. Look at the Boiler Pressure Gauge
- 7. Start with the Highest Radiator in the House
- 8. Open the Bleed Valve Slowly
- 9. Close the Valve as Soon as Water Runs in a Steady Stream
- 10. Repeat the Process on the Remaining Radiators
- 11. Recheck Boiler Pressure and Restore It if Needed
- 12. If One Radiator Still Has Cold Spots, Consider a Flush or Professional Cleaning
- 13. Turn the Heat Back On and Fine-Tune the Balance
- When to Stop DIY and Call a Professional
- How to Keep a Radiator from Clogging Again
- Conclusion
- Extra Section: Real-World Experiences Homeowners Often Have
- SEO Tags
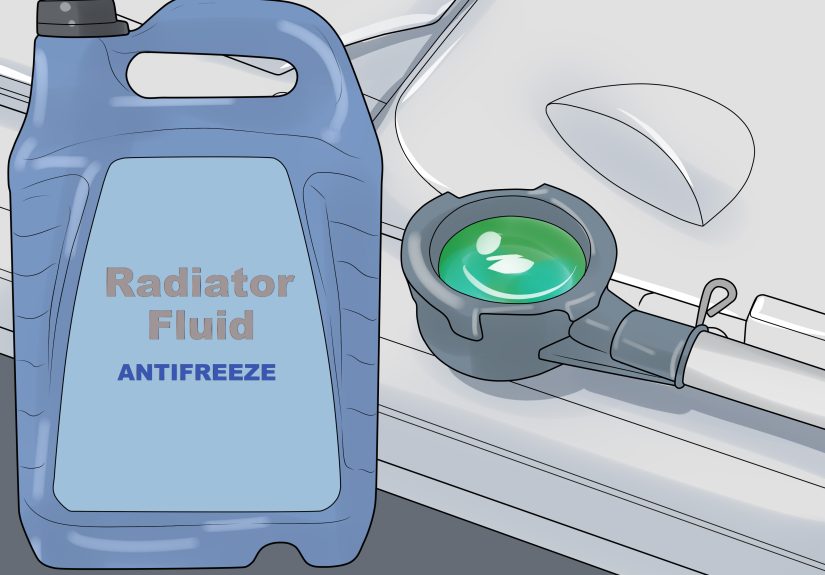
If your radiator is giving you the silent treatment while the rest of the house is trying its best to be warm and civilized, you probably have a circulation problem. In plain English, your radiator may be “clogged.” In a hot-water heating system, that usually does not mean someone stuffed a sandwich into the pipe. It usually means trapped air, a partially closed valve, low system pressure, or sediment and rusty sludge slowing the flow of hot water.
The good news is that many radiator problems can be improved without turning your basement into a mechanical crime scene. The less good news is that you still need patience, a towel, and the willingness to get familiar with a little metal valve that has probably not been touched since the last time somebody used the phrase “fax me that.”
This guide walks through how to unclog a radiator in 13 clear steps, with a focus on standard hot-water home radiators. You will learn how to spot the real cause, bleed trapped air, check pressure, inspect valves, and know when a simple fix has turned into a “please call a professional” situation. If your radiator is old, noisy, cold in weird places, or only warming up when it feels emotionally ready, this is where to start.
What “Unclogged” Really Means in a Home Radiator
In a hydronic system, hot water leaves the boiler, travels through pipes, moves through radiators, and then returns to be reheated. When that loop is interrupted, heat gets uneven fast. One radiator may stay cold at the top. Another may be lukewarm on one side. A third may bang, gurgle, or behave like it is protesting your energy bill.
Most of the time, the problem falls into one of four buckets: air trapped inside the radiator, a shut or stuck valve, low boiler pressure, or debris and sludge inside the radiator or system. That matters because the fix depends on the cause. Bleeding a radiator helps trapped air, but it will not magically dissolve years of rusty buildup. In the same way, flushing a radiator will not help much if the valve feeding it is closed halfway.
So before you start twisting anything, the smartest move is a quick diagnosis. Think of it as radiator detective work, but with less dramatic music.
Signs Your Radiator May Need to Be Unclogged
A radiator that needs attention usually gives clues long before it gives up completely. Common warning signs include cold spots, uneven heating, gurgling sounds, delayed warm-up times, and a radiator that stays cool while neighboring units get hot. You might also notice dirty water when bleeding, recurring pressure loss at the boiler, or valves that seem stuck in one position.
A radiator that is warm at the bottom but cool at the top often points to trapped air. A radiator that still refuses to heat properly after bleeding may have a flow restriction, balancing issue, or sediment buildup. If several radiators are struggling, the issue may be system-wide rather than isolated to one unit.
Before You Start: Tools and Safety
You do not need a truck full of gear for this job. In many cases, a radiator key or flathead screwdriver, gloves, old towels, a small bowl or cup, and a flashlight will do. A bucket helps if you need to drain more water. Keep a rag nearby because even small jobs have a magical ability to find your nicest flooring.
Most important, turn the heat down or off and let the system cool. Working on a hot radiator is a great way to learn new vocabulary you did not plan to use. If you see active leaking, heavy corrosion, broken bleed screws, or signs of pressure trouble at the boiler, stop and reassess before moving forward.
How to Unclog a Radiator: 13 Steps
-
1. Make Sure You Have a Hot-Water Radiator, Not a Steam Unit
This guide is for home hot-water radiators in hydronic systems. Steam radiators work differently, use different vents, and should not be handled the same way. If you have a one-pipe steam radiator, do not start bleeding it like a hot-water radiator. That is how small problems become expensive stories.
-
2. Turn Off the Thermostat and Let Everything Cool
Set the thermostat low enough that the boiler and circulator stop running. Give the radiator time to cool to a safe temperature. This reduces the risk of burns and also makes bleeding more effective because the system is not actively moving water while you work.
-
3. Gather Your Tools Before You Touch the Valve
Bring a radiator key, flat screwdriver if your bleed valve is slotted, gloves, towels, and a cup or shallow bowl. If you have to leave mid-job to hunt for a rag, the radiator will take that personally and drip exactly where you do not want it to.
-
4. Feel the Radiator and Identify the Pattern
Put your hand near the surface carefully and check whether the radiator is cold at the top, cool all over, or warm in some places and cold in others. This gives you a clue about what is wrong. Top-cold radiators often have trapped air. Whole-radiator coldness may point to a valve or pressure issue. Persistent cold zones after bleeding can mean restricted flow or sludge.
-
5. Check That Both Radiator Valves Are Open
Many radiators have a supply valve on one side and a return or lockshield valve on the other. Make sure they are open enough for flow. Do not force a stuck or corroded valve. Old valves can leak when disturbed, and “I was just checking it” is not much comfort when water starts appearing on the floor.
-
6. Look at the Boiler Pressure Gauge
Before bleeding, check the system pressure at the boiler. Many residential hot-water systems operate somewhere around 12 to 20 psi, but the correct number depends on the height and design of your home. If pressure is very low, hot water may not be circulating properly. If the gauge looks wrong or keeps dropping, that is a clue the radiator may not be the only issue.
-
7. Start with the Highest Radiator in the House
Air rises, which is rude in balloons but helpful in heating systems. Start on the top floor or the highest radiator that is giving you trouble. Working from the highest point downward is the usual order because that is where trapped air tends to collect first.
-
8. Open the Bleed Valve Slowly
Place your towel and bowl under the bleed valve. Insert the key or screwdriver and turn it slowly counterclockwise, usually about a quarter-turn to a half-turn. You should hear a hiss. That is trapped air escaping. Open it just enough to vent the air. You are not trying to remove the valve or audition for a plumbing disaster reel.
-
9. Close the Valve as Soon as Water Runs in a Steady Stream
Once the hissing stops and water starts coming out in a steady stream, close the bleed valve snugly. Do not crank it down with superhero force. Overtightening can damage the valve seat and create a leak that was not there five seconds ago. Wipe the area dry so you can tell later whether the valve is dripping.
-
10. Repeat the Process on the Remaining Radiators
Move through the house one radiator at a time, working from higher radiators to lower ones. Even radiators that seem fine can benefit from seasonal bleeding if your system has air in it. Keep an eye on the bowl, the towel, and your patience. Small maintenance jobs tend to go better when you stop trying to rush them.
-
11. Recheck Boiler Pressure and Restore It if Needed
Bleeding radiators can lower system pressure. After you finish, go back to the boiler and look at the gauge again. If pressure dropped below the normal operating range for your system, add water according to the manufacturer’s instructions or your boiler manual. If you are unsure how to refill safely, this is a good place to pause and call a pro instead of improvising your way into a larger problem.
-
12. If One Radiator Still Has Cold Spots, Consider a Flush or Professional Cleaning
If the radiator still heats unevenly after bleeding and confirming valve position and pressure, the problem may be debris or sludge restricting water flow. At that stage, some homeowners isolate the radiator, drain it, remove it from the wall brackets, and flush it outdoors with clean water until the discharge runs clearer. If the water is dark, rusty, or gritty, buildup may be part of the problem.
This step is where caution matters most. Older systems can be messy, heavy, and surprisingly stubborn. If you are not comfortable shutting isolation valves, draining safely, or handling a cast-iron radiator that weighs as much as regret, hire a heating professional. For system-wide sludge, a technician may recommend a hydronic cleaner and a thorough flush based on the boiler manufacturer’s instructions.
-
13. Turn the Heat Back On and Fine-Tune the Balance
Restart the system and let it run long enough for the radiator to heat fully. If one room becomes tropical while another stays merely human, you may need to adjust balancing valves gradually. Make changes in small increments, then wait several minutes between adjustments. Tiny turns make a difference. Wild guessing does not.
When to Stop DIY and Call a Professional
Some radiator problems are firmly in the “worth paying for” category. Call a licensed heating technician if the bleed valve is corroded or broken, the radiator leaks after bleeding, the boiler keeps losing pressure, several radiators stay cold, or you suspect heavy sludge in the entire system. The same goes for steam systems, repeated air buildup, noisy pumps, relief valve discharge, or anything involving gas, combustion, or electrical faults.
In other words, if the problem is no longer a simple venting or valve issue, professional diagnosis is usually cheaper than guessing wrong three times in a row.
How to Keep a Radiator from Clogging Again
Radiators like consistency. Bleed hot-water radiators at the start of the heating season, keep an eye on boiler pressure, and check for leaks before they become a recurring habit. If the system frequently gathers air, ask an HVAC pro about automatic air vents or improved air separation. If you have older piping or recurring dirty water, system cleaning and water treatment may be worth discussing.
It also helps to avoid constantly forcing old valves open and closed unless you are making a needed adjustment. Many heating systems are old enough to have opinions, and gentle handling goes a long way.
Conclusion
Learning how to unclog a radiator is mostly about learning how to diagnose it correctly. The simplest fixes are often the right ones: bleed the air, verify the valves, confirm system pressure, and then test the radiator again. If that solves the problem, great. You just restored comfort with a key, a towel, and a modest amount of bravery.
If it does not solve the problem, that is useful information too. It means the issue is likely deeper than trapped air and may involve sludge, poor circulation, or a larger system imbalance. Either way, you are no longer guessing. And in home maintenance, that alone is half the battle.
Extra Section: Real-World Experiences Homeowners Often Have
In real homes, radiator problems rarely show up in a neat, textbook way. A lot of people first notice something is wrong on the first genuinely cold morning of the season. The thermostat says the heat is on, the boiler sounds awake, and yet one bedroom still feels like it is auditioning for a winter survival documentary. That is usually when the radiator gets its first suspicious look.
One common experience is discovering that the radiator is not fully cold. It is warm on one side, cooler on the other, or hot near the bottom but chilly across the top. That half-working behavior is what confuses people. They assume that because some heat is showing up, the radiator cannot be blocked. In reality, partial heat is often the classic sign that water is moving, but not the way it should.
Another very normal experience is hearing the hiss during bleeding and immediately feeling like a home-repair genius. It is a deeply satisfying sound. It means you found trapped air and actually fixed something. Then, of course, a few drops of dark water hit the towel, and the mood changes from triumph to caution. That moment teaches homeowners two things very quickly: radiators can absolutely spit ugly water, and towels are not optional.
Many people also learn that the first radiator they bleed is the easy one. The second one works too. By the third, the valve is painted over, placed in an awkward corner, or apparently installed by someone who hated future generations. Suddenly the project becomes less about heating and more about body positioning, flashlight angles, and trying not to round off a tiny metal fitting.
Then there is the pressure-gauge lesson. Plenty of homeowners successfully bleed the radiators, turn the system back on, and still wonder why the heat feels weak. That is when they notice the boiler pressure dropped. It is a useful reminder that radiators are part of a loop, not standalone pieces of furniture with opinions. Fixing one part of the system often means checking the system as a whole.
Probably the most humbling experience is the radiator that still stays cold after all the obvious steps. That is the point where a lot of people realize the issue is not air at all. It may be sludge, a stuck valve pin, or poor balancing in the loop. Oddly enough, that is still progress. The DIY steps ruled out the simple stuff, which makes the professional repair faster and smarter.
And finally, there is the best experience of all: the quiet moment later that night when the room heats evenly, the radiator stops gurgling, and the house feels normal again. No fanfare. No marching band. Just steady heat doing its job. For a home repair this small, that outcome feels weirdly luxurious.


