Table of Contents >> Show >> Hide
- What Are DIY Garden Globes?
- Why Garden Globes Make Outdoor Spaces More Interesting
- Best Materials for DIY Garden Globes
- How to Make a Mosaic Garden Globe
- How to Make Concrete Garden Spheres
- Easy Painted Garden Globe Ideas
- Where to Place Garden Globes for the Best Effect
- Design Tips for Better DIY Garden Globes
- Maintenance and Weatherproofing
- Budget-Friendly Ways to Make Garden Globes
- Common Mistakes to Avoid
- Project Experiences: What DIYers Learn After Making Garden Globes
- Conclusion
- SEO Tags
Every garden has a personality. Some are calm and cottage-like, some look like they were planned by a landscape architect with a ruler and a very serious hat, and some are proudly chaotic in the best possible way. But nearly every outdoor space can use one extra ingredient: a focal point. That is where DIY garden globes come in.
Garden globes, also called garden gazing balls, are decorative spheres placed among flowers, shrubs, paths, planters, patios, or water features. They can be shiny, mosaic-covered, concrete, painted, glassy, rustic, whimsical, or so colorful your marigolds may file a complaint. The best part? You do not need to buy an expensive designer version. With a bowling ball, lamp globe, concrete mold, glass gems, broken tiles, outdoor adhesive, or weather-resistant paint, you can make custom garden decor that looks personal instead of mass-produced.
This guide walks through materials, design ideas, step-by-step methods, placement tips, maintenance, and real-world project lessons so your DIY garden globe survives more than one enthusiastic thunderstorm.
What Are DIY Garden Globes?
DIY garden globes are handmade decorative spheres used as outdoor garden ornaments. Traditional gazing balls were often made from reflective glass or polished metal, but modern DIY versions can be created from upcycled objects and craft materials. A globe may sit directly on soil, rest on a pedestal, nestle inside a planter, or appear as a surprise accent near a walkway.
Think of them as jewelry for the garden. Plants provide the outfit; the globe adds the sparkle, texture, and “Oh, did you make that?” conversation starter.
Popular Types of DIY Garden Globes
There are several ways to make garden globes depending on your skill level, budget, and desired look:
- Mosaic garden globes: Covered with glass gems, broken tile, mirror pieces, ceramic shards, or stained-glass scraps.
- Concrete garden spheres: Cast inside round molds for a clean, sculptural, modern look.
- Painted globes: Made from bowling balls, plastic balls, or old light globes and finished with outdoor paint.
- Reflective gazing balls: Designed with mirror-like materials to bounce light and color around the garden.
- Mini garden globes: Small ornaments made from plastic ornaments, marbles, or round craft balls for planters and fairy gardens.
Why Garden Globes Make Outdoor Spaces More Interesting
A garden globe works because it interrupts the expected shapes in the yard. Most gardens are full of vertical stems, flat leaves, pointed grasses, square pavers, and rectangular beds. A sphere instantly softens the scene. It adds contrast without shouting, unless you cover it in neon glass beads, in which case it politely shouts.
They Create a Focal Point
A focal point gives the eye somewhere to land. Place a colorful globe at the end of a path, in the center of a circular bed, beside a birdbath, or near a cluster of ornamental grasses. Suddenly, the space feels intentional rather than “I put plants wherever the shovel stopped.”
They Add Light and Reflection
Reflective garden globes can catch sunlight, reflect flowers, and create movement as the light changes throughout the day. In shady areas, metallic paint or mirrored tiles can brighten a dull corner. Near bright flowers, a gazing ball can repeat color and make the planting feel fuller.
They Bring Personality
Store-bought garden decor can look charming, but DIY garden art tells a story. A mosaic made from chipped plates, old buttons, or leftover tile has character. A bowling ball turned into a garden globe is not just decor; it is recycling with better lighting.
Best Materials for DIY Garden Globes
The right materials depend on whether your globe will live outdoors year-round, sit under a covered patio, or come inside during harsh weather. Outdoor projects need durability, water resistance, and a surface that can handle temperature swings.
Good Base Options
- Old bowling balls: Heavy, sturdy, and perfect for mosaic or painted globes.
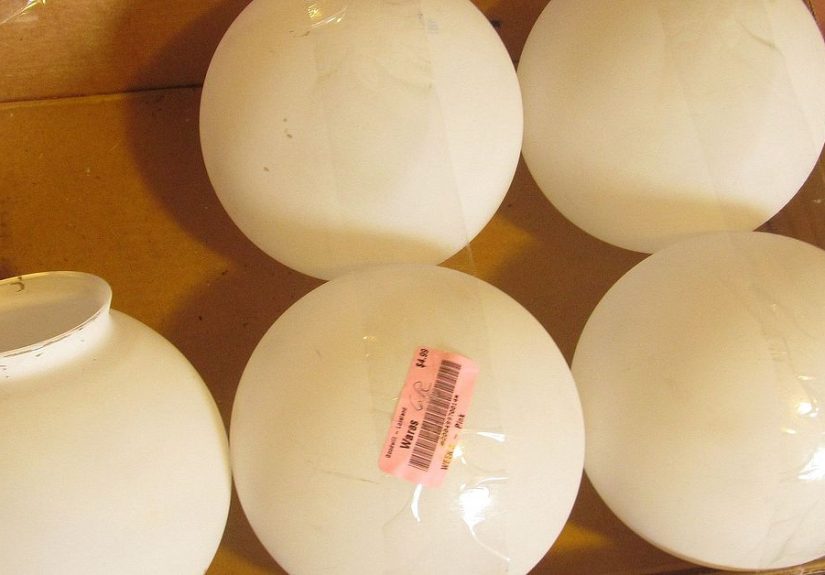
- Glass lamp globes: Useful as molds for concrete spheres or as lightweight decorative bases.
- Plastic light covers: Affordable, lightweight, and easy to paint or decorate.
- Foam balls: Best for covered areas or temporary displays, not ideal for long-term exposed weather.
- Concrete spheres: Durable, heavy, and stylish for modern or rustic gardens.
Decorative Materials
For a mosaic garden globe, consider flat glass gems, ceramic tile pieces, mirror tiles, sea glass, broken china, glass beads, marbles, and weather-resistant mosaic tiles. Try to keep the pieces similar in thickness so the surface feels balanced and the grout lines do not become tiny mountain ranges.
Adhesives, Grout, and Sealers
For outdoor garden globes, indoor craft glue is usually not enough. Use an adhesive labeled for exterior use, especially if the globe will face rain, heat, freezing temperatures, or sprinklers. For mosaic projects, sanded grout is often preferred for larger gaps because it fills spaces well and creates a durable surface. After the grout cures, a penetrating grout sealer or outdoor-rated sealant helps reduce water absorption and staining.
How to Make a Mosaic Garden Globe
A mosaic garden globe is one of the most charming versions because it can be customized endlessly. You can go elegant with mirrored glass, playful with rainbow beads, coastal with sea glass, or sentimental with broken dishes from a family kitchen. Yes, even the chipped plate you refused to throw away can finally have a career change.
Supplies You Need
- A bowling ball, concrete sphere, or sturdy round base
- Sandpaper
- Outdoor adhesive or exterior mosaic adhesive
- Glass gems, tile pieces, mirror pieces, or ceramic shards
- Sanded grout
- Disposable gloves
- Sponge and bucket of clean water
- Grout sealer rated for outdoor use
Step 1: Clean and Rough Up the Surface
Wash the base thoroughly to remove dirt, oil, wax, or mystery garage dust. If you are using a bowling ball, lightly sand the surface so adhesive can grip better. Wipe it clean and let it dry completely. This step may not look exciting, but it is the difference between “handmade heirloom” and “decorative pieces falling off like sad confetti.”
Step 2: Plan the Design
Lay out your materials before gluing. You can create spirals, flowers, stripes, sunbursts, random patterns, or color blocks. If you are nervous about design, choose three colors and repeat them evenly. A limited palette often looks more polished than using every color in the craft drawer at once.
Step 3: Glue the Pieces
Apply outdoor adhesive to the back of each piece and press it onto the globe. Work in small sections so the pieces do not slide around. Leave consistent gaps for grout. If the globe rolls, place it in a bowl, bucket, or towel ring while you work. Rotate as sections dry.
Step 4: Grout the Globe
Once the adhesive has fully cured according to the product instructions, apply grout with a gloved hand or grout float. Press it into the gaps. Wipe away excess with a damp sponge, rinsing often. Do not scrub too aggressively, or you may remove grout from the joints.
Step 5: Seal for Outdoor Life
After the grout has cured, apply an outdoor grout sealer. This helps protect the project from moisture, dirt, and weather. Place the finished globe somewhere safe while the sealer dries. Then carry it proudly to the garden like a tiny moon you personally negotiated with.
How to Make Concrete Garden Spheres
Concrete garden spheres are perfect for modern landscapes, minimalist patios, gravel gardens, and rustic flower beds. They look expensive but can be made from basic concrete mix and round molds, such as old glass lamp globes.
Supplies You Need
- Concrete mix or mortar mix
- Round glass lamp globe or plastic mold
- Bucket for mixing
- Water
- Trowel or mixing tool
- Waterproof gloves and eye protection
- Cooking spray or mold release
Step 1: Prepare the Mold
Coat the inside of the mold with a light layer of cooking spray or mold release. This helps the concrete separate once it cures. Place the mold upright in sand, soil, or a sturdy bucket so it does not tip over.
Step 2: Mix the Concrete Safely
Wear gloves and eye protection when handling cement-based products. Add water slowly and mix until the concrete has a thick, workable texture. Avoid making it too watery; extra water can weaken the final sphere and create cracking.
Step 3: Fill and Tap
Pour or scoop the concrete into the mold. Tap the sides gently to release trapped air bubbles. Fill the mold as evenly as possible, then smooth the opening. Let it cure according to the concrete product directions.
Step 4: Remove the Mold
If you used a glass lamp globe, carefully break away the glass after the concrete cures. Wear eye protection and thick gloves, and place the globe inside a heavy bag or wrap it with a towel before breaking the glass. If you used a reusable plastic mold, flex or separate it gently.
Step 5: Style the Sphere
You can leave concrete spheres natural, paint them, stain them, add metallic wax, or group them in sets of three. Odd-numbered groupings often look more natural in garden design. A cluster of small, medium, and large spheres near ornamental grasses can look like a sculpture installation without the sculpture-installation price tag.
Easy Painted Garden Globe Ideas
If mosaic and concrete feel too involved, painted garden globes are a beginner-friendly option. A bowling ball or plastic globe can be transformed with primer, outdoor spray paint, stencils, and a protective clear coat.
Galaxy Garden Globe
Paint the globe dark blue or black, then sponge on purple, silver, white, and teal. Flick tiny white dots for stars. This design looks especially fun in a night garden with solar lights nearby.
Ladybug Bowling Ball
A classic DIY favorite: paint the ball red, add black spots, and use the finger holes as part of the face or underside. Place it among herbs, flowers, or vegetables for a cheerful touch.
Faux Stone Sphere
Use layered gray, tan, and cream paint to mimic stone. This works well if you want the globe to blend into a naturalistic landscape rather than sparkle like it is auditioning for a garden disco.
Where to Place Garden Globes for the Best Effect
Placement matters. A beautiful globe can disappear if hidden behind tall plants or look awkward if dropped in the middle of a bare lawn. The goal is to make it feel discovered, not abandoned.
Near Pathways
Place a garden globe beside a walkway where visitors can notice it up close. A reflective globe near a path can catch movement and light, making the garden feel more alive.
In Flower Beds
Tuck a globe among low-growing flowers, groundcovers, or foliage plants. Use colors that repeat nearby blooms for a cohesive look. For example, a blue mosaic globe can echo salvia, hydrangeas, or blue-toned planters.
On a Pedestal
A pedestal adds height and drama. This works especially well for reflective gazing balls or detailed mosaics you want people to notice. Make sure the pedestal is stable and the globe is secure, especially in windy areas.
In Containers
Mini globes look fantastic in large planters. Add one beside trailing plants, succulents, herbs, or compact annuals. It instantly makes a container garden feel designed rather than merely watered.
Design Tips for Better DIY Garden Globes
The most successful DIY garden art usually follows a few design rules, even when it looks relaxed.
Repeat Colors from the Garden
Choose globe colors already present in your outdoor space. If your patio cushions are navy, add navy glass gems. If your garden has orange daylilies, use amber tile pieces. Repetition helps handmade decor look intentional.
Mix Texture, Not Chaos
A globe can combine shiny glass, matte ceramic, and rough stone, but too many competing textures can feel busy. Let one material be the star and use others as supporting actors.
Think About Scale
A tiny globe may vanish in a large bed, while a huge sphere can overwhelm a small balcony planter. Use larger globes for open beds and smaller globes for containers, steps, shelves, or fairy gardens.
Maintenance and Weatherproofing
Outdoor garden globes need occasional care. Wipe reflective surfaces with a soft cloth. Check mosaic pieces after storms. Reseal grout when it starts absorbing water or looking chalky. Move fragile glass globes indoors before extreme freezes, hail, or severe wind.
If you live in a hot, dry area, avoid placing highly reflective or clear glass globes where they focus strong sunlight onto dry mulch, leaves, fabric, or other flammable materials. Use common sense with placement: decorative sparkle is lovely; accidental trouble is not part of the aesthetic.
Budget-Friendly Ways to Make Garden Globes
You do not need a luxury craft budget. Check thrift stores, garage sales, recycling bins, local giveaway groups, and leftover home-improvement materials. Old bowling balls, chipped plates, glass vase fillers, cracked tiles, unused grout, and outdated lamp globes can all become garden art.
One smart approach is to build a “materials box” over time. Save broken ceramic pieces, leftover beads, mirror scraps, and small tiles. When enough materials collect, you can create a globe with a story instead of buying everything at once.
Common Mistakes to Avoid
Using Indoor Glue Outdoors
Indoor craft glue may soften, peel, or fail in rain and heat. Always look for outdoor-rated adhesive when your globe will live outside.
Skipping Surface Prep
Paint and adhesive need a clean, slightly rough surface. Skipping sanding or cleaning may cause peeling and loose pieces later.
Forgetting Drainage and Stability
If a globe sits in a planter, do not block drainage holes. If it sits on a stand, make sure it cannot roll away. A garden globe should decorate the yard, not begin a solo journey down the driveway.
Ignoring Cure Times
Adhesive, grout, sealer, paint, and concrete all need time to cure. Rushing can trap moisture, weaken the finish, or cause decorations to shift. Patience is cheaper than redoing the whole project.
Project Experiences: What DIYers Learn After Making Garden Globes
The first thing many people discover when making DIY garden globes is that round objects are surprisingly opinionated. A ball does not want to sit still. It rolls, turns, slides, and generally behaves like it has somewhere important to be. The easiest fix is to place the globe in a bowl, bucket, flowerpot, towel nest, or old wreath form while decorating it. That one small trick can make the project feel calmer immediately.
Another common experience is learning that “random mosaic” is not as random as it looks. The prettiest mosaic garden globes often have quiet planning behind them. DIYers who lay out colors first usually get better results than those who glue pieces directly from the bag. A good method is to sort materials by color and size, then begin with the larger pieces. Smaller pieces can fill gaps later. This creates a balanced pattern without needing a complicated sketch.
People also learn that outdoor projects are less forgiving than indoor crafts. A picture frame mosaic can look great with basic supplies, but a garden globe must deal with rain, sun, temperature changes, soil, sprinklers, and the occasional squirrel with parkour ambitions. That is why exterior adhesive, proper grout, and sealer matter. Saving a few dollars on the wrong glue can lead to loose gems after the first season.
Concrete spheres teach a different lesson: simple does not always mean mess-free. Mixing concrete is easy in concept, but the dust and grit get everywhere if you are careless. Working outdoors or in a well-ventilated area, wearing gloves and eye protection, and preparing the mold before mixing makes the job much smoother. Many beginners also add too much water because they expect the mix to pour like pancake batter. A thicker mix usually produces a stronger sphere and fewer problems.
Painted globes are often the most satisfying beginner project because they create fast results. However, they still need prep. Cleaning and sanding a bowling ball before priming can make a big difference. Several light coats of paint usually look better than one heavy coat. A clear outdoor topcoat helps protect the design, especially if the globe sits in direct sun.
Placement is another lesson learned by trial and error. A globe that looks bold on the worktable may disappear in a crowded flower bed. Many gardeners place the globe, step back, move it three feet, step back again, and repeat this little dance until it feels right. Morning and afternoon light can change the effect too. A reflective globe may look magical in one spot at 8 a.m. and completely invisible at noon.
The most enjoyable part is that DIY garden globes improve with personal details. A mosaic made from a cracked teacup, a painted ball inspired by favorite flowers, or a concrete sphere grouped with stones from the yard feels more meaningful than generic decor. The project does not need to be perfect. In fact, small imperfections often make handmade garden art more charming. Gardens are living spaces, not museum shelves. A little wobble, sparkle, and personality fit right in.
Conclusion
DIY garden globes are one of the easiest ways to add charm, color, reflection, and personality to an outdoor space. Whether you choose a mosaic bowling ball, a sleek concrete sphere, a painted galaxy globe, or a tiny planter accent, the project can be adapted to your style and budget. The key is to use outdoor-friendly materials, prepare surfaces properly, seal when needed, and place each globe where it can shine.
A garden does not have to be perfect to be beautiful. Sometimes all it needs is a handmade sphere tucked between the flowers, catching the light like it knows a secret. And honestly, if your backyard suddenly looks more interesting because you glued glass gems to an old bowling ball, that is not just DIY. That is garden magic with a hardware-store receipt.


