Table of Contents >> Show >> Hide
- Why Braids Work So Well for Afro-Textured Hair
- Before You Start: Prep Like a Pro
- Braiding Basics: The Hand Skills That Make Everything Easier
- How to Cornrow (Classic, Scalp-Braided Style)
- How to Do Box Braids (The Go-To Black Braided Hairstyle)
- How to Do Knotless Braids (A Gentler Alternative)
- Black Braided Hairstyles to Try (With Who They’re Best For)
- Maintenance: How to Keep Braids Fresh Without Wrecking Your Scalp
- Taking Braids Down: Don’t Rush the Finale
- Choosing the Right Style for Your Hair Goals
- Conclusion
- Real-World Experiences With Braids (What People Commonly Learn the Hard Way)
Braids aren’t just a hairstylethey’re a whole vibe, a time-saver, and (when done right) a protective style that helps
afro-textured hair keep its moisture and length. They’re also an art form with deep cultural roots across Africa and
the African diaspora. Translation: treat the craft with respect, take your time, and don’t “freestyle” your way into
tight braids that snatch your edges into retirement.
This guide walks you through how to braid African hair step-by-step, what to prep, what styles to consider, and how
to maintain Black braided hairstyles so they look fresh without sacrificing scalp comfort or hair health.
Why Braids Work So Well for Afro-Textured Hair
Afro-textured (often called coily or kinky-curly) hair can be more prone to dryness because natural oils from the scalp
don’t travel down the strand as easily as they do on straighter hair types. Braids can help by reducing daily
manipulation, protecting the ends, and keeping styles neat for weeks.
Key phrase: when done right. Too much tension, too much weight, or keeping braids in too long turns
a protective style into a “protective style… from your own hairline.”
Before You Start: Prep Like a Pro
1) Start with a clean, hydrated foundation
Clean scalp + moisturized hair = better braids. Wash and condition before braiding day, and fully dry the hair.
If you’re using extensions, clean hair also helps you avoid buildup and itch later.
2) Detangle gently (yes, even if you “hate detangling”)
Work in sections. Use a wide-tooth comb or detangling brush on damp hair with conditioner or a slip-heavy detangler.
Detangling reduces breakage and makes parting cleaner.
3) Stretch the hair (optional, but helpful)
Many braiders lightly stretch hair with heat (blow-drying) or no-heat methods (banding, twists) to reduce tangles and
improve parting. If you use heat, use a protectant and keep it moderateyour ends are not auditioning for a crispy
commercial.
4) Gather your tools
- Rat-tail comb (for clean parts)
- Clips (to hold sections)
- Moisturizer/leave-in (light, not greasy)
- Edge control or braiding gel (use sparingly to avoid flakes)
- Rubber bands (optional; avoid tight ones at the root)
- Extensions (optional): Kanekalon/synthetic or human hair
- Satin scarf/bonnet for nighttime maintenance
5) If you’re using synthetic braiding hair: reduce itch risk
Some people get irritation from chemical coatings on synthetic braiding hair. A common preventative step is soaking
the hair in a diluted apple cider vinegar (ACV) rinse, then rinsing and air-drying before installation. Also consider
a simple patch test on skin if you’re sensitive.
Braiding Basics: The Hand Skills That Make Everything Easier
The three-strand braid (the building block)
- Separate a section of hair into three equal strands: left, middle, right.
- Cross the left strand over the middle (left becomes the new middle).
- Cross the right strand over the middle (right becomes the new middle).
- Repeat, keeping tension consistentnot tight enough to hurt, not loose enough to unravel.
- Secure the end with a small elastic or by dipping ends (for certain extension types).
Pro tip: Consistency beats speed. Your hands will get faster naturally. Your scalp should never have to “toughen up.”
Parting: the secret sauce of neat braids
Clean parts make braids look professional. Decide on your pattern (straight parts, triangle parts, diamond parts, or
freestylebut still intentional). Use clips to keep sections separated. If your parts look like a lightning bolt,
that’s fine if it’s a style choice. If not… slow down.
How to Cornrow (Classic, Scalp-Braided Style)
Cornrows braid hair close to the scalp by feeding in hair as you move along a row. They’re the base for many styles:
feed-in braids, Ghana braids, stitch braids, braided ponytails, and under-wigs.
Step-by-step cornrow technique
- Create a clean row part from front to back. Clip the rest away.
- At the front of the row, take a small section and split into three strands.
- Start a few stitches of a regular three-strand braid.
-
Now “feed” hair into the braid: each time you cross an outer strand over the middle, pick up a little hair from the
row and add it to that strand before crossing. - Continue down the row, adding hair evenly to keep the cornrow centered and neat.
- When you reach the end of the row and no hair remains to add, finish with a regular braid and secure.
Tension check (non-negotiable)
If it feels too tight while you braid, it will feel even tighter later. Cornrows should be secure, not painful.
Excessive tension can contribute to traction alopecia over time (especially around edges and the hairline).
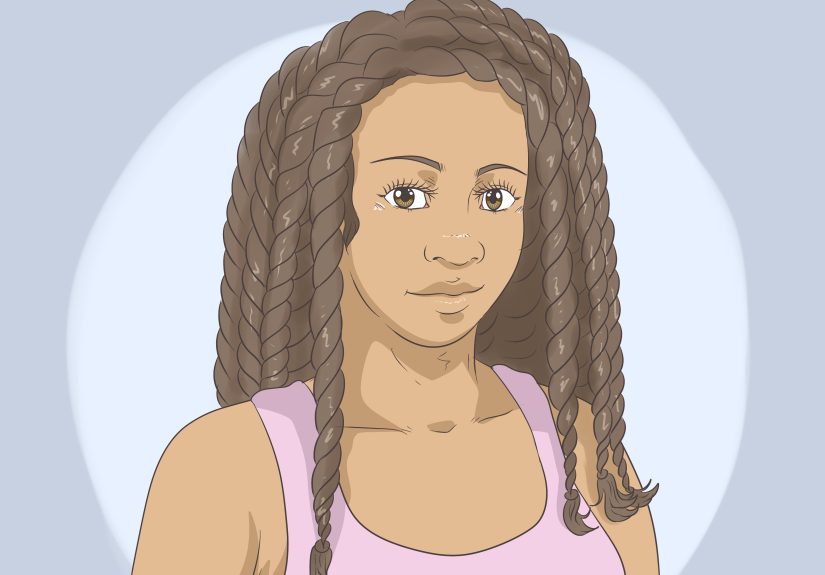
How to Do Box Braids (The Go-To Black Braided Hairstyle)
Box braids are individual braids typically made with square (or “boxy”) parts. They’re versatile, long-lasting, and
easy to stylebuns, ponytails, half-up looks, you name it.
Step-by-step box braids with extensions
- Part hair into small squares/rectangles. Clip sections you’re not working on.
- Moisturize lightly at the root and smooth with a small amount of braiding gel if desired.
-
Attach extension hair (traditional method): split the extension into two pieces and anchor around the base of your
natural hair, creating three strands total to braid with. -
Braid down in a consistent pattern. Keep tension steadytight enough to hold, but never tight enough to cause bumps,
redness, or soreness. - Repeat section-by-section. Take breaks. Your arms will complain like they’re paying rent.
- Finish ends: elastic, hot water dip, or sealed ends depending on hair type and desired finish.
Box braid sizing: small vs. medium vs. jumbo
- Small: longest install time, longest-lasting look, but can be heavier if too many braids are packed in.
- Medium: great balance of time, versatility, and scalp comfort.
- Jumbo: fastest install, bold look, but can slip sooner and may feel heavy if extensions are thick.
How to Do Knotless Braids (A Gentler Alternative)
Knotless braids start with your natural hair first, then the extension hair is fed in gradually. The result is flatter
at the root, usually more comfortable, and often lighter on the scalp.
Step-by-step knotless braids (conceptual walkthrough)
- Part a section (box/triangle/diamondyour choice).
- Start braiding with only your natural hair for a few stitches.
- Add small pieces of extension hair gradually as you braid down.
- Continue adding until you reach your desired thickness, then braid down normally.
- Seal the ends based on the extension type and finish you want.
If you’re new, knotless braids can feel tricky at first (managing multiple small add-ins). Try practicing on bigger
sections before going micro.
Black Braided Hairstyles to Try (With Who They’re Best For)
1) Fulani braids
A mix of cornrows and individual braids, often with beads or hair jewelry. Great if you want a style with personality
and a protective base.
2) Feed-in braids / Ghana braids
Sleek cornrow styles that gradually get thicker by feeding in hair. Ideal for braided ponytails, buns, or a clean
everyday look that photographs beautifully.
3) Lemonade braids
Side-swept feed-in braids (popularized in pop culture). Great for statement stylingbut make sure side tension isn’t
too tight around the hairline.
4) Senegalese twists / Passion twists
Twists instead of traditional braids. Senegalese twists are usually smoother; passion twists are more textured and
“undone” in a cute way.
5) Faux locs / goddess locs
Loc-inspired protective styles. Gorgeous and versatile, but be mindful of weight and installation method to protect
edges.
6) Boho braids
A braid style with curly pieces left out for a soft, romantic look. Beautiful, but slightly higher-maintenance (those
curls need love).
Maintenance: How to Keep Braids Fresh Without Wrecking Your Scalp
Cleanse the scalp (yes, while braids are in)
A healthy scalp matters. Focus shampoo on the scalp using diluted cleanser or a nozzle bottle, massage gently, rinse
thoroughly, and dry well. Many people wash every 1–2 weeks, but adjust for workouts, sweat, and product use.
Moisturize lightly and regularly
Use a light leave-in spray or water-based moisturizer on your hair and a scalp-friendly serum/oil sparingly. Heavy
grease can build up quickly in braids and cause itching.
Night routine: satin is your best friend
- Wrap with a satin scarf or wear a bonnet to reduce frizz.
- Try a loose braid-down or pineapple/bun method for longer styles.
- If you have boho curls, gently separate and protect curls before wrapping.
How long should you keep braids in?
There isn’t one perfect number, but many stylists recommend a window around 4–8 weeks for many braid
styles, depending on braid size, hair health, scalp condition, and maintenance. Going much longer can increase
tangling at the roots, buildup, and breakage during takedown.
Red flags: signs your braids are too tight or too heavy
- Headache, throbbing scalp, or pain that doesn’t improve after 24–48 hours
- Small bumps/irritation along parts
- Edges that look strained or feel tender
- Thinning around the hairline over time
If you notice these issues, loosen the style (or remove it). Persistent hair loss or scalp inflammation is worth a
dermatologist visittraction-related hair loss can worsen if the stress continues.
Taking Braids Down: Don’t Rush the Finale
The takedown is where good hair days are made… or snapped in half. Plan time, be patient, and set yourself up for
success.
- Moisturize braids lightly to soften shed hair and reduce friction.
- Cut extensions carefully (only where you’re sure your natural hair ends).
- Unravel gently. Detangle each section as you godon’t wait until the end.
- After removal, detangle again, then cleanse to remove buildup.
- Deep condition. Your hair just did weeks of “no-touch living.” Treat it kindly.
Choosing the Right Style for Your Hair Goals
Want length retention? Medium knotless braids or well-installed box braids with low tension can help reduce daily
manipulation. Want a sleek look for events? Feed-in braids or cornrow-based updos are a strong choice. Want something
textured and playful? Passion twists or boho braids bring softness and movement.
Example decisions that save regret:
- If your edges are sensitive: choose knotless, larger parts, and lighter hair.
- If you sweat a lot: choose a style that’s easy to cleanse (cornrows or medium box braids).
- If you’re new to DIY: start with two cornrows or chunky box braids before attempting micro braids.
Conclusion
Learning how to braid African hair is part technique, part patience, and part listening to your scalp. The best Black
braided hairstyles aren’t just prettythey’re comfortable, well-prepped, and maintained with simple routines that keep
your scalp clean and your hair moisturized. Start with the basics, keep tension low, and choose styles that fit your
lifestyle. Your hairline will thank you in a language that sounds suspiciously like “still thriving.”
Real-World Experiences With Braids (What People Commonly Learn the Hard Way)
People often assume braiding is “set it and forget it,” but the lived reality is more like “set it and remember it
politely every few days.” One of the most common first-time experiences is underestimating how much parting matters.
The braids might be technically fine, but if the sections aren’t clean and consistent, the whole look can feel a little
chaoticlike your hair had a group project and nobody agreed on the plan. A lot of beginners end up redoing the first
few braids multiple times, not because they can’t braid, but because their hands are learning tension control in real
time.
Another frequent experience: the “Is this normal tightness or am I being bullied by my own hairstyle?” question.
Plenty of people report that some snugness can happen right after installationespecially around the nape or hairline
but actual pain, bumps, or headaches are a sign to speak up or loosen things immediately. Many longtime braid-wearers
say they’ve learned to advocate for comfort in the chair: asking for less tension, choosing knotless over traditional
roots, or going up a size to reduce weight. Comfort isn’t a luxury; it’s scalp care.
Itch is another big “first braid season” lesson. Sometimes it’s just dryness and needs a light, water-based spray.
Other times, people discover they’re sensitive to synthetic braiding hair coatings and feel relief after pre-soaking
extensions or switching materials. And then there’s the classic “I used way too much product” momentwhere scalp
buildup makes you feel like your roots are wearing a winter coat in July. The experience most people land on is a
simple routine: keep products light, cleanse the scalp regularly, and dry thoroughly so you don’t trap moisture at the
roots.
Nighttime maintenance is also a real-life turning point. Many people learn that satin protection isn’t optional if you
want braids to look fresh. The first time someone sleeps without a scarf and wakes up with frizz, flyaways, and edges
doing interpretive dance, they usually become a bonnet believer. For boho braids, people often report that the curly
pieces need extra caregentle separation, light moisturizing, and protection at nightotherwise they can tangle or look
tired faster than expected.
Finally, the takedown experience: everyone learns that removing braids is not a “quick task.” People commonly report
finding a surprising amount of shed hair (which is normal when hair hasn’t been combed daily), but rushing the
detangling step is where breakage happens. The most positive takedown experiences tend to involve patience, detangling
in sections, and deep conditioning afterward. The overall theme from real braid routines is simple: braids can be
protective, beautiful, and convenientwhen you treat them like a hairstyle that still needs care, not a pause button on
hair health.


