Table of Contents >> Show >> Hide
- Why Before-and-After Makeovers Hit So Hard
- Choose the Right Piece: The “Good Bones” Checklist
- Prep Like a Pro: The Unsexy Step That Makes the Makeover
- Makeover Techniques That Create Real “Before-and-After” Drama
- 1) The Color Shift: Paint That Looks Intentional (Not Accidental)
- 2) The Wood Glow-Up: Refinish, Restain, or Gel Stain for a Fresh Species-Vibe
- 3) Texture Upgrades: Cane, Fluting, and “Wait…That’s Not New?” Details
- 4) Upholstery Refresh: The Fastest “New Furniture” Trick
- 5) Hardware and Function Upgrades: Small Changes, Big Payoff
- 6) Distressing, Waxing, and Antiquing: Use the “Salt” Rule
- 7) Veneer Rescue and Repairs: Fix the Damage Without Making It Worse
- 8) Metal and Outdoor Furniture: The Makeover Nobody Brags About (But Everyone Enjoys)
- Five Impressive Before-and-After Makeover Scenarios (With Specific Game Plans)
- Finishing Touches That Separate “DIY” From “Designer”
- Common Mistakes (So You Don’t Have to Learn the Hard Way)
- Budget and Time: What to Expect
- Real-World Experiences With Furniture Makeovers (500+ Words of Lessons, Wins, and “Oops” Moments)
- Conclusion: Your Next “Before” Can Be Someone Else’s “After”
There are two kinds of furniture in this world: the kind you buy because it’s perfect, and the kind you buy because it’s
almost perfect (and your brain immediately starts whispering, “I could fix that…”).
If you’ve ever dragged home a scuffed dresser, a wobbly side table, or a chair that looks like it survived three moves and one
emotional support cat, you already understand the magic of a great before-and-after furniture makeover.
The best transformations aren’t just about covering scratches with paint. They’re about turning “meh” into “HOW is this the same piece?”
with smart prep, a few design decisions, and techniques that actually hold up in real life (meaning: kids, pets, elbows, keys, and coffee mugs).
This guide breaks down the most impressive makeover strategiesplus specific project examplesso your next “rescue” doesn’t become a “regret.”
Why Before-and-After Makeovers Hit So Hard
A great makeover works because it combines three things humans can’t resist: a dramatic contrast, a clear story, and a little bit of
“I can’t believe someone gave this away.” Visually, you’re changing at least one of the big three: color,
texture, or silhouette. Practically, you’re often improving function (sticky drawers, sagging seats,
outdated hardware). Financially, you’re upgrading a piece for a fraction of the cost of buying newespecially if you start with solid construction.
The secret: impressive results usually come from boring steps done well. Prep isn’t glamorous, but it’s the reason your finish
doesn’t chip the first time someone looks at it too aggressively.
Choose the Right Piece: The “Good Bones” Checklist
Not every thrift-store find deserves a second chance. Some pieces are a glow-up waiting to happen; others are a cautionary tale.
Before you commit, look for these signs you’re starting with a winner:
- Solid frame: A sturdy dresser carcass, stable legs, and joints that aren’t turning to dust.
- Repairable damage: Scratches, water rings, and chipped finish are manageable; crumbling particleboard is not your friend.
- Drawers and doors that can be fixed: Minor sticking is fine. A drawer that’s shaped like a banana is… a hobby you didn’t ask for.
- Veneer awareness: Veneer can be beautiful, but it requires a lighter touch (especially when sanding).
- Potential for impact: Strong lines, interesting details, or a classic shape that will shine with modern color or hardware.
Pro tip: If you’re buying a piece solely because it’s cheap, pause and ask: “Is it cheap because it’s ugly, or cheap because it’s falling apart?”
One of those is a fun project. The other is unpaid labor.
Prep Like a Pro: The Unsexy Step That Makes the Makeover
Most makeover fails aren’t “bad paint.” They’re “paint applied over years of mystery wax, cooking grease, hand oils, and vibes.”
Prep is how you get adhesionand adhesion is how you get durability.
Step 1: Clean like you mean it
Start with a degreasing cleaner suitable for furniture (especially kitchen pieces). Pay extra attention to handles, drawer fronts,
and edges where hands live. Rinse or wipe down if your cleaner requires it, and let everything dry fully.
Step 2: Scuff sand (not necessarily “strip to bare wood”)
Many projects only need a scuff sand to dull the sheen and give primer something to grip. Think: light abrasion, not aggressive demolition.
Use a sanding sponge for curves and edges and be especially gentle on veneer so you don’t sand through the thin top layer.
Step 3: Prime with purpose
Primer isn’t optional when you’re dealing with slick finishes, knots, stains, laminate, or big color changes. A good primer blocks bleed-through,
improves adhesion, and helps you use fewer paint coats. Thin, even coats beat thick ones every time.
Safety note: watch for lead paint risks
If you’re working on older itemsespecially anything that might have been painted decades agobe cautious about sanding dust.
Lead-based paint was banned for residential use in the late 1970s, and disturbing old paint can create hazardous dust. If you suspect lead,
avoid dry sanding and consider professional guidance or lead-safe work practices.
Makeover Techniques That Create Real “Before-and-After” Drama
The most impressive transformations usually combine one hero change (like a bold color, wood finish shift, or texture upgrade)
with two supporting changes (hardware, sheen level, legs, upholstery, or styling). Here are the techniques that reliably deliver.
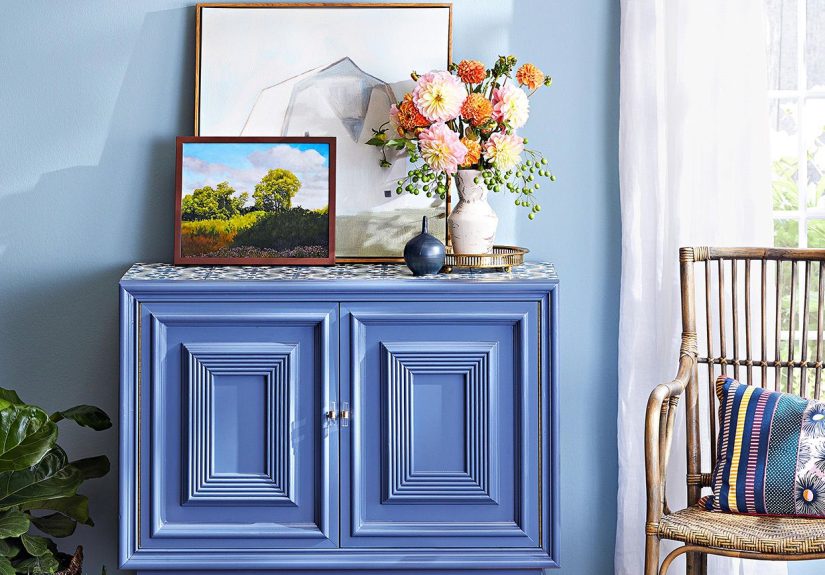
1) The Color Shift: Paint That Looks Intentional (Not Accidental)
Painting is the fastest way to transform a piece, but the best paint jobs look smooth and “furniture-like,” not like a wall paint experiment.
For a polished finish:
- Use thin coats: Two to three thin coats often look better than one thick coat.
- Sand lightly between layers: A quick, gentle sand after primer (and sometimes between paint coats) helps eliminate texture and dust nibs.
- Choose your finish level: Matte hides flaws, satin feels modern, semi-gloss is durable but shows prep mistakes.
- Seal high-traffic surfaces: Tabletops and dresser tops benefit from a protective topcoat, depending on the paint system used.
Want instant “custom furniture” energy? Paint the body one color and the drawers another (or do a tonal two-color look: deep navy body, smoky blue drawers).
Add upgraded pulls and suddenly your thrift-store dresser has “designer collab” confidence.
2) The Wood Glow-Up: Refinish, Restain, or Gel Stain for a Fresh Species-Vibe
Sometimes the most impressive “after” is wood that looks richer, warmer, and more current. If you love wood grain but hate the orange tone,
you can refinish traditionally (sanding and staining) or use gel stain techniques that can update an existing finish with careful prep.
- Traditional refinish: Best for solid wood pieces where you can sand evenly and build a durable finish.
- Gel stain refresh: Useful when you want to change tone without fully stripping, but prep cleaning and scuff sanding still matter.
- Topcoat matters: Water-based polyurethane stays clearer; oil-based finishes can add warmth.
A dramatic example: an “orange” oak nightstand becomes a modern light oak look with a toned finish and simple black pulls. Suddenly it belongs in 2026.
3) Texture Upgrades: Cane, Fluting, and “Wait…That’s Not New?” Details
Texture is a makeover cheat code. It reads expensive because it adds depth and shadowwithout needing a complicated color palette.
Popular texture upgrades include:
- Cane webbing: Great for drawer fronts, cabinet doors, and panel inserts for a breezy, high-end look.
- Reeded or fluted trim: Adds vertical rhythm to plain surfaces (think: IKEA hack energy, but elevated).
- Rattan/woven panels: Adds warmth and “collected” character.
- Fabric inset panels: A soft, tailored look for cabinet doors or side panels.
A simple formula that consistently looks premium: matte paint + cane drawer fronts + understated hardware.
It’s the furniture equivalent of a crisp white shirt and great jeans.
4) Upholstery Refresh: The Fastest “New Furniture” Trick
Reupholstering a removable dining chair seat is one of the highest-impact, lowest-drama projectsespecially if the chair frame is solid.
The basic flow is straightforward:
- Remove the seat base from the chair.
- Pull old staples and remove the existing fabric (save it as a pattern).
- Replace or add foam/batting if needed.
- Center your new fabric, staple from opposite sides, and keep tension even.
- Fold corners neatly, trim excess, and reattach the seat.
Patterned fabric turns “basic chair” into “statement chair.” If you’re nervous, start with a textured solid (bouclé, linen-look, or performance fabric)
and let your paint color do the talking.
5) Hardware and Function Upgrades: Small Changes, Big Payoff
Hardware is the jewelry of furniture. Swapping dated knobs for modern pulls can change the entire personality of a dresser in 10 minutes.
Functional upgrades can be even more satisfying:
- Drawer glide fixes: Waxing runners, tightening joints, or replacing slides can make a piece feel new.
- New feet or legs: Mid-century legs can lift a chunky piece and visually “lighten” it.
- Soft-close add-ons: Not always necessary, but it’s a delight if the piece is used daily.
- Felt pads: Quiet luxury is also… not scratching your floors.
6) Distressing, Waxing, and Antiquing: Use the “Salt” Rule
Distressing can look gorgeous when it’s intentional, subtle, and consistent with the style of the piece.
It can also look like your furniture lost a fight with a set of keys. The difference is restraint.
Focus wear on natural touch pointsedges, corners, handlesand keep it cohesive.
7) Veneer Rescue and Repairs: Fix the Damage Without Making It Worse
Veneer can be repaired, patched, and made beautiful again, but it requires patience and careful technique.
The key is controlled repair: stabilize loose veneer, patch missing sections with matching grain when possible,
and avoid aggressive sanding that breaks through.
8) Metal and Outdoor Furniture: The Makeover Nobody Brags About (But Everyone Enjoys)
Outdoor sets often look tired from rust, sun fade, and chipped paint. A thoughtful refreshcleaning, rust removal, metal primer,
and a durable exterior paintcan make a patio feel like a whole new room.
Five Impressive Before-and-After Makeover Scenarios (With Specific Game Plans)
Makeover #1: The “Thrifted Dresser to Coffee Bar” Transformation
Before: A scratched, dated dresser with mismatched knobs and sticky drawers.
Plan: Paint the body a deep, moody color; add modern pulls; convert top drawer into a pull-out tray.
- Deep clean and scuff sand for adhesion.
- Prime to block stains and even out the surface.
- Paint with thin coats; lightly sand after primer for smoothness.
- Seal the top for drink durability.
- Add a tray insert and cord hole management at the back.
After: A “boutique hotel” coffee station that looks custom-built, not thrifted.
Makeover #2: The “Cane Chair Glow-Up”
Before: A dated cane-back chair with worn finish and questionable fabric.
Plan: Paint the frame a crisp modern color; reupholster the seat with a bold textile; refresh or replace cane as needed.
- Disassemble removable parts for clean paint lines.
- Paint the frame with controlled coats to avoid drips on curves.
- Reupholster the seat using the old fabric as a template.
- Finish with felt pads and a subtle protective topcoat where needed.
After: A high-end accent chair looklight, airy, and intentionally styled.
Makeover #3: The “Laminate Nightstand That Pretends to Be Real Wood”
Before: A shiny laminate nightstand that screams “college apartment.”
Plan: Properly prep and prime, then paint or use a finish strategy that creates a wood-adjacent look.
- Clean and lightly sand to reduce slickness.
- Use a bonding primer designed for tricky surfaces.
- Paint in a soft neutral, then add wood-toned legs or warm hardware for contrast.
After: A modern piece that reads calm and intentional, not “I needed something by Friday.”
Makeover #4: The “Orange Oak Table to Modern Warm Neutral” Shift
Before: Solid oak with a warm finish that has gone full pumpkin spice.
Plan: Sand and refinish (or tone strategically) to modernize the color while preserving grain.
- Sand progressively and evenly, staying mindful of edges.
- Test stain tones on the underside first.
- Apply a durable topcoat suitable for dining use.
After: The same table, but suddenly it belongs with modern decor instead of living permanently in 1998.
Makeover #5: The “Outdoor Metal Set Revival”
Before: Rust spots, faded paint, and a general “neglected patio” mood.
Plan: Remove loose paint and rust, prime bare metal, repaint with an exterior-grade finish.
- Brush off rust and flaking paint; clean thoroughly.
- Prime exposed areas for adhesion and rust resistance.
- Paint in thin coats to prevent drips on metal tubing.
After: A patio set that looks refreshed and cared forlike you have your life together (even if you don’t, and that’s fine).
Finishing Touches That Separate “DIY” From “Designer”
The difference between a decent makeover and a jaw-dropping one is often finish quality:
- Leveling: Light sanding between coats for a smoother feel.
- Dust control: Vacuum, tack cloth, and patience. Dust is sneaky.
- Cure time: Dry-to-touch isn’t the same as fully cured. Give finishes time before heavy use.
- Sheen consistency: Mixing matte and satin on the same plane can look patchy unless it’s intentional.
- Hardware alignment: Measure twice. Crooked pulls are the fastest way to “handmade” in the wrong direction.
Common Mistakes (So You Don’t Have to Learn the Hard Way)
- Skipping cleaning: If paint peels, grime is usually the villain.
- Sanding veneer like it’s solid oak: Veneer needs a gentle approach.
- Rushing coats: Impatience creates fingerprints, dents, and regret.
- Using the wrong primer: Slick surfaces require the right bonding strategy.
- Over-distressing: If it looks like you attacked it with keys, it’s probably too much.
Budget and Time: What to Expect
A typical painted furniture makeover often lands in the “one good weekend” categoryunless you’re repairing veneer, changing stains,
or doing complex upholstery. Costs vary, but most DIYers spend more on supplies than on the actual thrifted piece:
primer, paint, sandpaper, and hardware add up. The upside is you’ll keep leftover supplies for future projects, which is DIY math for:
“This is basically free now.” (It’s not, but let’s enjoy the delusion responsibly.)
Real-World Experiences With Furniture Makeovers (500+ Words of Lessons, Wins, and “Oops” Moments)
If you talk to people who do before-and-after furniture makeovers regularly, you’ll notice a pattern: everyone starts out thinking the transformation
is mostly about the pretty part (paint color! new fabric! fancy pulls!). Then the first project teaches them the same plot twist:
the “before” has secrets.
The most common experience is discovering the grime layer. A piece can look “not that bad” in a thrift store and then, under good lighting,
reveal hand oils around the knobs, a sticky film on the top, and a mystery scent that can only be described as “basement-adjacent.”
Cleaning becomes less of a step and more of a spiritual cleansing ritual. People learn quickly that skipping this part is like putting fresh sheets
on a bed covered in cookie crumbs: technically possible, emotionally incorrect.
Another classic experience: the first time someone sands between coats and realizes the finish suddenly feels smoother and more expensive.
It’s a small moment, but it’s powerfullike discovering that you can fold a fitted sheet, except it’s actually achievable.
This is also when many DIYers develop a new respect for dust control. You paint a coat, walk away, come back, and somehow the air has delivered
tiny lint particles like it’s a group project and nobody agreed on the rules.
Hardware swaps are where people get their first big dopamine hit. You can take an okay-looking dresser and, with the right pulls, make it look
shockingly intentional. But this is also where beginners learn about measurement reality. Someone, somewhere, has drilled one hole slightly too high,
stepped back, and thought, “Maybe nobody will notice.” Spoiler: everybody notices. The experience teaches the value of templates, careful marking,
and the humble power of “measure twice, drill once.”
Upholstery projects come with their own set of lessons. The first time someone tries to staple fabric evenly, they discover that “tight enough”
is an art. Too loose and it wrinkles. Too tight and the pattern skews or the corners bunch. But once you do it a couple of times, you get faster
and suddenly you start seeing every store-bought chair as “just a frame with fabric I could change.” This is the moment your friends become both
impressed and slightly nervous, because you’re looking at their dining chairs like a stylist.
People also talk about the emotional experience of the “ugly middle.” Almost every makeover has a stage where the piece looks worse than before:
patchy primer, sanded areas, half-painted sections, drawers scattered around like a furniture crime scene. The experienced DIYers learn to expect this
phase and not panic. The beginners learn it once, panic anyway, then learn it again.
Finally, the most consistent real-world lesson is patience with curing time. Dry-to-touch feels like permission to put everything back immediately.
But the finish isn’t fully tough yet, which is how you end up with a perfectly preserved fingerprint in your topcoata tiny fossil of impatience.
Seasoned furniture flippers plan their projects around downtime: paint early, let it rest, assemble later. They also learn that “done” includes
practical upgrades like felt pads, drawer adjustments, and protective topcoats on surfaces that will see daily use.
In the end, the best experience isn’t just having a prettier piece. It’s the moment you put it in your space and realize: you didn’t just update furniture
you built skill. You can see construction differently, spot potential faster, and design with more confidence. Also, you now own three types of sandpaper
and will absolutely mention grit numbers in casual conversation. Welcome to the club.
Conclusion: Your Next “Before” Can Be Someone Else’s “After”
Creative and impressive before-and-after furniture makeovers aren’t about perfectionthey’re about smart choices. Choose a solid piece, prep thoroughly,
pick a hero technique (paint, stain, texture, upholstery), and finish with details that look intentional. The result is furniture with character, function,
and a storyplus the satisfaction of knowing you saved something from the curb and made it genuinely beautiful.


