Table of Contents >> Show >> Hide
- What You’ll Make (Two Rose Styles)
- Materials & Tools
- Quick & Easy Video Steps (Style 1: Full-Bloom Tissue Paper Rose)
- Quick & Easy Video Steps (Style 2: Spiral Tissue Paper Rose)
- How to Make Your Roses Look More Real (Not Like Fancy Party Puffs)
- Troubleshooting: When Your Rose Has… Feelings
- Decor Ideas (Where Tissue Paper Roses Shine)
- Safety & Kid-Friendly Notes
- How to Store Tissue Paper Roses (So They Don’t Get Squished)
- Frequently Asked Questions
- Wrap-Up: Your Quick Rose Game Plan
- of Real-World “Been-There” Experiences (So Yours Turn Out Better)
Tissue paper roses are the craft world’s cheat code: they look fancy, cost pocket change, and they don’t die the moment you turn your back (unlike that “low-maintenance” plant you definitely didn’t overwater). Whether you need party décor by tonight, a last-minute gift topper, or a photo backdrop that screams “I have my life together,” this tutorial will walk you through two reliable ways to make rosesplus stems, shaping tricks, and fixes for the most common “why does mine look like a crumpled receipt?” moments.
We’ll do this in a video-style format with quick timestamps, so you can follow along like you’re watching a short DIY reelminus the part where the creator magically finishes a perfect rose after a single jump cut.
What You’ll Make (Two Rose Styles)
- Style 1: Full-Bloom Tissue Paper Rose (Fast + Fluffy) built from stacked sheets, accordion folds, and “petal fluffing.” Great for bouquets, backdrops, and centerpieces.
- Style 2: Spiral Tissue Paper Rose (More “Rose-y” + Detailed) made by rolling and shaping strips/petals. Perfect for corsages, gift toppers, and smaller arrangements.
Materials & Tools
Pick your method, then grab the basics:
Must-Haves
- Tissue paper (standard gift tissue works great; 6–10 sheets per bloom)
- Scissors (sharp = cleaner petals, fewer jagged “sad fringe” edges)
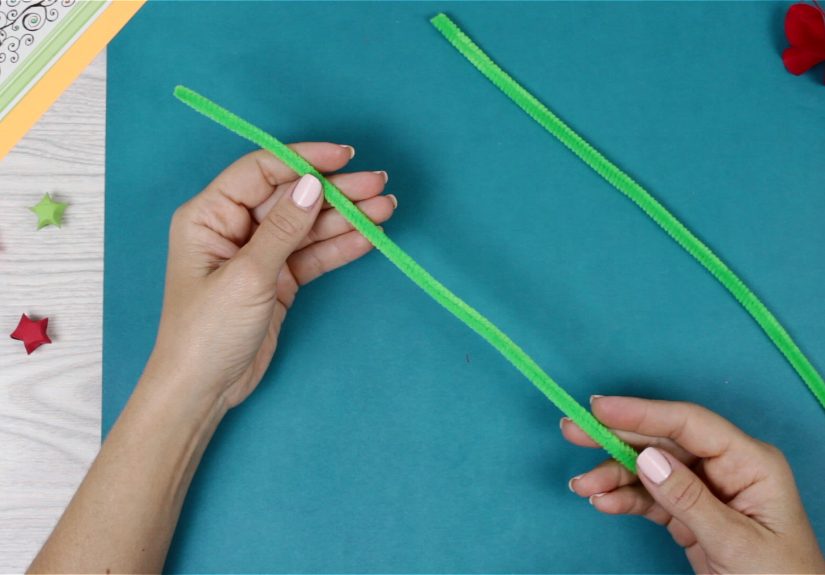
- Floral wire or pipe cleaners (pipe cleaners are kid-friendly and forgiving)
- Optional ruler (for neat cuts) and pencil (for quick guides)
Nice-to-Haves (For a More Realistic Rose)
- Floral tape (green) for wrapping stems
- Hot glue or tacky craft glue
- Green tissue paper or crepe paper (leaves + stem wrap)
- A wooden skewer (for sturdy stems) if you’re making a bouquet
Pro tip: If tissue paper is clinging to everything like it pays rent, wash and dry your hands. Static + tissue paper = chaotic romance.
Quick & Easy Video Steps (Style 1: Full-Bloom Tissue Paper Rose)
This is the fastest method for big, dramatic roses. You’ll stack sheets, accordion-fold, tie the center, trim petal edges, then fluff.
Video Timeline
00:00 Choose Your Size
- Large rose: Start with full sheets (often around 20" x 30"). Makes big blooms for décor.
- Medium rose: Cut sheets in half.
- Small rose: Cut to rectangles (for example, roughly postcard-sized) for gift toppers.
Rule of thumb: Bigger paper = bigger bloom. More sheets = fuller bloom.
00:20 Stack the Tissue Paper
Stack 6–10 sheets neatly. Alternate colors for an ombré effect (light in the middle, deeper shades outside), or keep it monochrome for classic roses.
00:45 Accordion Fold
Fold the stack back and forth like a fan. Aim for ½" to 1" folds. Smaller folds create more “petal density” and a fluffier rose; larger folds look looser and airier.
01:30 Secure the Center
Pinch the folded stack at the center. Wrap floral wire (or a pipe cleaner) around the middle and twist tightly. Leave a long tail for a stem if you want a bouquet.
01:55 Shape the Petal Ends
With the stack still folded, trim both ends:
- Rounded ends = softer, rose-like petals.
- Pointed ends = more “dahlia” or starburst.
- Scalloped ends = extra frilly, romantic bloom.
02:20 Create the Rose “Cup” (The Secret Sauce)
To make this look like a rose (not a pom-pom in disguise), do two things:
- Round the ends (already done).
- Curve the petals upward as you fluff (don’t just pull layers straight out).
02:40 Fluff Like You Mean It (But Gently)
Separate layers one at a time, pulling tissue from the center outward. Work on one side first, then flip and repeat. As you pull each layer, gently cup it upward to create a rose bowl shape.
03:30 Finish the Stem
Wrap the wire/pipe cleaner with floral tape. If you want a sturdier stem, twist the wire around a skewer first, then tape over it. Add a couple of simple leaves cut from green tissue or crepe paper.
Quick & Easy Video Steps (Style 2: Spiral Tissue Paper Rose)
This method makes a more classic rose silhouettegreat for smaller roses, bouquets, and gift toppers. It takes a bit more shaping, but the look is worth it.
Video Timeline
00:00 Prep a Strip (or Petals)
Option A (fast): Cut a tissue paper strip about 2"–4" wide and 18"–30" long (you can tape strips together).
Option B (prettier): Cut several rounded petal shapes in 2–3 sizes (small for center, bigger for outer petals).
00:30 Make the Bud
Roll a tiny pinch of tissue tightly to form a bud. Add a dot of glue so it doesn’t unravel like it’s trying to escape your craft table.
01:00 Wrap and Rotate
Wrap the strip around the bud, slightly angling downward as you go. Every half-turn, pinch the base and let the top edge flare outward. That pinch creates the classic rose “spiral.”
01:45 Add Petals (If Using Petal Shapes)
Glue petals around the bud, overlapping them like shingles. Keep the base snug and let the tops loosen as you build outward. Mix sizes so it looks natural.
02:30 Curl for Realistic Edges
Very gently curl the outer petal edges around a pencil or by running scissors lightly along the edge (carefultissue paper is dramatic and tears easily). Curl outward for a blooming rose; curl inward for a tighter bud look.
03:10 Secure the Base
Twist floral wire under the base or wrap the base tightly with floral tape. Hide messy glue with a small green paper “calyx” (a star-shaped piece wrapped around the base).
How to Make Your Roses Look More Real (Not Like Fancy Party Puffs)
Use Color Like Nature Does
- Center lighter, outside darker: A soft gradient mimics real petals.
- Two-tone edges: Layer a lighter sheet on top of a darker one, then round-triminstant dimension.
Petal Density = Rose Personality
- 6 sheets: airy, delicate blooms
- 8 sheets: classic full rose
- 10+ sheets: extra lush (also slightly harder to fluff)
Shape Matters More Than You Think
If you only do one thing: cup petals upward while fluffing (Style 1) or flare the top edge outward while wrapping (Style 2). That’s what reads “rose.”
Troubleshooting: When Your Rose Has… Feelings
Problem: It keeps tearing
- Use fewer sheets at once and fluff slower.
- Switch to slightly thicker “gift tissue” (some packs are sturdier).
- Round your cutssharp corners snag and rip more easily.
Problem: It looks like a pom-pom, not a rose
- Round the ends more.
- Fluff upward into a cup shape instead of straight out.
- Try a two-tone stack (darker outer layers).
Problem: The center is loose
- Tighten the wire/pipe cleaner twist.
- Add a dab of glue at the center folds.
- Wrap floral tape around the base to lock everything down.
Problem: It won’t stand up straight
- Reinforce with a skewer inside the stem and tape over it.
- Use floral wire that’s thicker, or double up wire.
Decor Ideas (Where Tissue Paper Roses Shine)
- Party backdrops: Mix sizes and cluster like a flower wall.
- Table centerpieces: Pop 3–5 roses in a jar with filler paper.
- Gift toppers: One small spiral rose beats a bow (and quietly flexes your skills).
- Wreaths: Glue a bunch onto a foam or cardboard ring for a statement piece.
- Wedding décor: Great for bridesmaid bouquets and aisle accents that won’t wilt.
Safety & Kid-Friendly Notes
If crafting with kids, swap floral wire for pipe cleaners (no sharp ends) and use tacky glue instead of hot glue. Also: assign “scissors duty” to the kid who doesn’t run with them like they’re in an action movie.
How to Store Tissue Paper Roses (So They Don’t Get Squished)
- Store in a large box with light tissue padding between blooms.
- Transport upright if possible; if not, add a collar of paper around the bloom.
- For dust: a gentle puff of cool air (not a leaf blower, unless you enjoy chaos).
Frequently Asked Questions
How long does one tissue paper rose take?
Style 1 can be 5–10 minutes once you get the hang of it. Style 2 is usually 10–20 minutes depending on how detailed you go.
Can I make these without glue?
Yesespecially the accordion method. Wire/pipe cleaner and floral tape can do most of the holding. Glue is just the “insurance policy.”
What’s the best tissue paper for realistic roses?
Standard gift tissue works well. If you want a higher-end look, choose tissue that feels slightly thicker and less slick. Some specialty tissue varieties hold curls more easily.
Wrap-Up: Your Quick Rose Game Plan
If you need fast décor, go with the Full-Bloom Accordion Rose. If you want a classic rose shape, choose the Spiral Rose. Either way, the magic is in the shaping: rounded edges, gentle curls, and a little patience while fluffing.
of Real-World “Been-There” Experiences (So Yours Turn Out Better)
Here’s what crafters consistently run into when learning how to make tissue paper rosesplus the tiny adjustments that make a huge difference. Think of this as the behind-the-scenes footage your future self wishes you had.
1) The first bloom is always a little weirdand that’s normal. Most people start by pulling the tissue layers too aggressively because the paper feels lightweight, so it must be tough… right? Wrong. Tissue paper is like a dramatic actor: it performs beautifully, but only if you handle it gently. The trick is to separate layers slowly near the center, then pull outward. If you tear a layer, don’t panic. A slightly ragged petal edge can actually look more realistic, especially on the outside petals.
2) Static cling is real, and it will humble you. Tissue paper loves to stick to your hands, sleeves, and emotional stability. If your layers are clinging together like they’re in a romantic comedy, wash and dry your hands, and try working on a smooth surface. Some crafters lightly rub their hands together to reduce cling, and others keep a clean, dry cloth nearby to wipe their fingers before fluffing.
3) The “pom-pom problem” happens to everyone. When a rose looks like a pom-pom, it’s usually because the petals are being pulled straight out instead of shaped upward into a cup. The fix is simple: as you fluff each layer, curl it upward and pinch lightly near the base to create a bowl. You can even compress the center a bit to mimic a rose bud. Suddenly, your flower reads “romantic rose” instead of “cheerleader accessory.”
4) People underestimate color layering. A single flat pink can look cute, but if you want the “wait, is that real?” effect, stack a lighter shade on top with deeper shades underneath. When you fluff, the lighter center pops and the darker outer layers look like mature petals. If you’re short on colors, flip a sheet so the slightly different side faces outsmall contrast still helps.
5) Glue is not a personality trait. More glue doesn’t equal better results. Too much glue stiffens tissue paper and can cause shiny spots. The best approach is “dot, don’t drown.” Use tiny dabs at the base, especially for spiral roses. For the accordion style, the wire/pipe cleaner does most of the structural workglue is optional insurance.
6) The craft table gets messy fastplan for it. Tissue scraps multiply like rabbits. Keep a small bin nearby for offcuts so you don’t lose your main petals under a confetti avalanche. Bonus: saving scraps lets you make tiny buds for filler flowers later.
Bottom line: The moment your hands learn “gentle separation + upward cupping,” tissue paper roses go from frustrating to ridiculously fun. And yesby the third flower, you’ll be making them while watching TV like it’s a totally normal hobby (because it is).


