Table of Contents >> Show >> Hide
- Before You Start: The 3-Minute Game Plan
- The 11 Easy Ways to Remove Caulk Residue
- Way #1: Dry scrape with a plastic scraper (or an old gift card)
- Way #2: Use a razor blade scraper (only on the right surfaces)
- Way #3: Grab a caulk removal tool (the “why didn’t I buy this sooner” option)
- Way #4: Score and peel (utility knife + patience + optional needle-nose pliers)
- Way #5: Apply a commercial caulk remover gel (especially for silicone)
- Way #6: Scrub with mineral spirits (great for that invisible silicone “film”)
- Way #7: Wipe with isopropyl (rubbing) alcohol for a clean, residue-free finish
- Way #8: Use denatured alcohol for finished or painted surfaces (when appropriate)
- Way #9: Heat it up (hair dryer or gentle heat gun)
- Way #10: White vinegar for mild residue and cleanup (especially on tile and glass)
- Way #11: Gentle abrasion (baking soda paste or a melamine sponge)
- Surface-Specific Cheat Sheet (Because Not Everything is Tile)
- Common Mistakes That Make Caulk Residue Worse
- How Clean is “Clean Enough” Before Re-Caulking?
- Real-World Experiences: What Homeowners Run Into (and What Usually Works)
- Conclusion
Caulk residue is the glitter of home improvement: you think you’ve cleaned it up, and thenbamthere it is,
clinging to tile like it pays rent. Whether you’re re-caulking a shower, scraping a window frame, or undoing
a “quick fix” from a previous era (aka last weekend), the goal is the same: get the old caulk and that stubborn
film off completely so the new bead actually sticks.
This guide gives you 11 easy, proven methods for removing caulk residueespecially silicone residuewithout
turning your bathroom into a chemistry lab or your patience into confetti. You’ll also get surface-specific
tips (tile, glass, fiberglass, acrylic, wood) and a “don’t-do-this” list that can save you from scratches,
cloudy finishes, and that special kind of regret you only feel after using the wrong solvent.
Before You Start: The 3-Minute Game Plan
1) Figure out what you’re dealing with (silicone vs. latex/acrylic)
If the caulk feels rubbery and peels in stretchy strips, it’s often silicone. If it feels more like dried
paint and crumbles or scrapes into flakes, it may be latex/acrylic. Silicone is usually the bigger diva:
it doesn’t dissolve easily, it smears, and it leaves a film that can prevent new caulk from bonding.
2) Pick the gentlest method that works
Start with mechanical removal (scraping) and then graduate to softeners and solvents as needed. Going straight
to “the strongest thing under the sink” is how tubs get cloudy and homeowners learn new vocabulary.
3) Safety and setup (quick but important)
- Ventilate the area (open a window, run the fan).
- Wear gloves and eye protection, especially when scraping overhead or using solvents.
- Spot-test any chemical on a hidden area first (particularly on acrylic, fiberglass, painted surfaces, and stone).
- Keep blades at a shallow angle to avoid gouges and scratches.
The 11 Easy Ways to Remove Caulk Residue
Use one method or combine a few. In real life, caulk residue rarely leaves on the first polite request.
Way #1: Dry scrape with a plastic scraper (or an old gift card)
Best for: Tile, glass, laminate, fiberglass, acrylic (low scratch risk).
- Let the caulk fully dry if it’s smeary. Soft residue can spread instead of lifting.
- Hold a plastic scraper (or an old credit card) at a shallow angle.
- Push gently along the residue line. Work in short strokes and wipe the edge frequently.
Pro tip: If residue “balls up” instead of lifting, switch to Way #9 (heat) or Way #5 (gel remover),
then come back to plastic scraping.
Way #2: Use a razor blade scraper (only on the right surfaces)
Best for: Glass and hard, glossy tile. Avoid: Acrylic and many fiberglass surrounds.
- Use a fresh razor blade in a holder (safer and steadier than a loose blade).
- Wet the surface lightly with soapy water to reduce chatter and dragging.
- Hold the blade nearly flat and shave the residue off with slow, controlled strokes.
Pro tip: “Nearly flat” is the magic. Too steep and you scratch. Too flat and you just skate around,
like a Zamboni with stage fright.
Way #3: Grab a caulk removal tool (the “why didn’t I buy this sooner” option)
Best for: Corners, tight seams, tub-to-tile joints, and baseboards.
A 3-in-1 caulk tool (or similar remover tool) helps score, lift, and scrape without switching tools every 30 seconds.
It’s also more beginner-friendly than going full samurai with a utility knife.
- Use the pointed edge to get under a lifted section.
- Pull the bead away in strips when possible.
- Use the flat edge to scrape remaining residue.
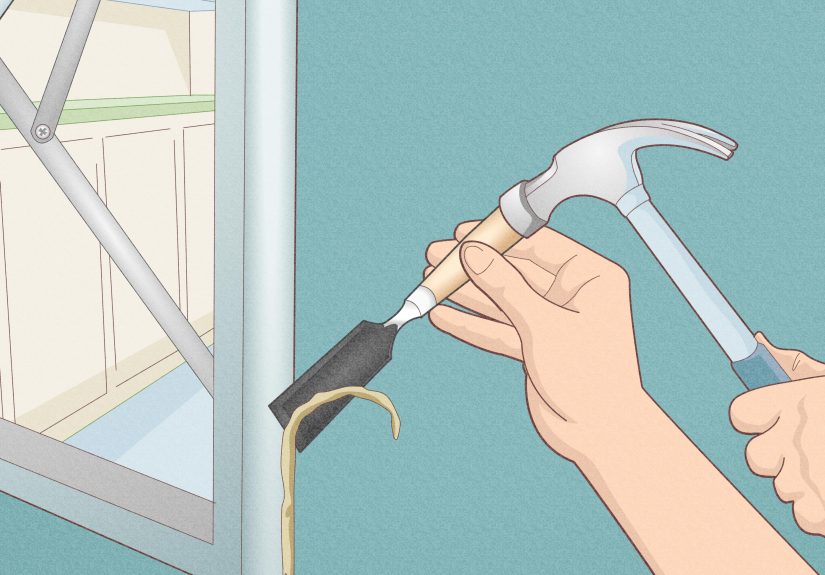
Way #4: Score and peel (utility knife + patience + optional needle-nose pliers)
Best for: Thick beads of old caulk, especially in bathrooms.
- Run a utility knife along both edges of the caulk bead to break the bond.
- Lift one end and peel the bead out slowly.
- Use needle-nose pliers to pull stubborn strips without shredding them.
Pro tip: Peeling is your best friend. The more you remove in strips, the less residue you have to fight later.
Way #5: Apply a commercial caulk remover gel (especially for silicone)
Best for: Silicone residue and stubborn leftover streaks after scraping.
Many removers are formulated to soften old caulk and reduce the “rubbery smear” effect. Follow label directions closely:
dwell time matters. Too short and nothing happens; too long and you’re just marinating disappointment.
- Scrape off as much as possible first (Way #1–#4).
- Apply remover gel to the residue line.
- Wait the recommended time.
- Scrape again with plastic (or razor for glass/tile) and wipe clean.
Way #6: Scrub with mineral spirits (great for that invisible silicone “film”)
Best for: Tile, glass, some metals; also useful as a prep wipe when surfaces allow it.
Mineral spirits can help loosen residue and remove the oily/filmy layer that can stop new caulk from adhering.
Use it with a non-scratch pad when appropriate, and always spot-test first.
- Dampen a rag (don’t pour directly onto seams where it can run everywhere).
- Rub the residue line firmly.
- Use a non-scratch pad for extra bite on durable surfaces.
- Wipe again with a clean rag and let the area dry fully.
Way #7: Wipe with isopropyl (rubbing) alcohol for a clean, residue-free finish
Best for: Final cleanup on many surfaces; especially helpful before re-caulking.
Rubbing alcohol is commonly recommended to remove remaining residue and help prep the area so new silicone bonds well.
It flashes off quickly, which means less waiting and fewer “why is this still wet?” moments.
- Apply alcohol to a clean cloth.
- Wipe the seam thoroughly.
- Let it dry completely before applying new caulk.
Way #8: Use denatured alcohol for finished or painted surfaces (when appropriate)
Best for: Some painted, lacquered, or finished surfaces where mineral spirits may not be ideal.
Denatured alcohol is often suggested as an alternative cleaner, especially when you want strong degreasing without
leaving oily residue. Still: test first, because finishes vary and surprises are rarely fun.
- Spot-test in an inconspicuous area.
- Wipe residue with a dampened cloth.
- Follow with a dry cloth and allow the surface to fully air out.
Way #9: Heat it up (hair dryer or gentle heat gun)
Best for: Rubberized silicone residue that won’t scrape clean.
Gentle heat can soften silicone residue and make it easier to lift. A hair dryer is the safer “starter setting.”
Heat guns work too, but keep them moving and don’t cook one spot like it owes you money.
- Warm the residue for 20–40 seconds.
- Scrape with plastic (or razor on glass/tile).
- Repeat in small sections until clean.
Way #10: White vinegar for mild residue and cleanup (especially on tile and glass)
Best for: Light silicone haze and general cleaning after scraping.
Vinegar is a mild option that can help with cleanup and residue on certain surfaces. It’s not a miracle dissolver,
but it can be a useful “soften-and-wipe” step when you’re almost done and don’t want harsher chemicals.
- Soak a paper towel in vinegar and press it onto the residue line for a few minutes.
- Wipe and scrape gently.
- Rinse with water and dry.
Way #11: Gentle abrasion (baking soda paste or a melamine sponge)
Best for: Stubborn residue on durable surfaces when scraping/solvents aren’t enough.
- Baking soda paste: Mix baking soda with a small amount of water into a paste, rub lightly, then rinse.
- Melamine sponge (Magic Eraser-style): Works like ultra-fine sanding. Use gentle pressure and test first.
Pro tip: Melamine sponges can dull glossy finishes if you go too hard. Think “polishing,” not “scrubbing a cast-iron pan.”
Surface-Specific Cheat Sheet (Because Not Everything is Tile)
Tile and grout
- Start: Plastic scraper (Way #1) or caulk tool (Way #3).
- Escalate: Razor scraper (Way #2) on glossy tile; avoid scraping grout aggressively.
- Finish: Mineral spirits or rubbing alcohol wipe (Ways #6–#7), then dry.
Glass (shower doors, mirrors, windows)
- Best combo: Razor scraper + rubbing alcohol (Ways #2 and #7).
- Avoid: Aggressive scouring pads that can create micro-scratches and haze.
Fiberglass and acrylic tubs/surrounds
- Start: Plastic scraper only (Way #1) and a caulk tool (Way #3).
- Escalate carefully: Gel remover (Way #5) after spot-testing.
- Finish: Gentle wipe-down (Way #7) if compatible; dry completely.
Natural stone (marble, granite)
- Go gentle: Plastic scraper, mild cleaner, and spot-test everything.
- Avoid: Acids (including vinegar) on many stones; they can etch the finish.
Painted drywall and trim
- Start: Score-and-peel (Way #4) to avoid tearing paint.
- Clean: Consider denatured alcohol only if spot-tested safe (Way #8).
- Reality check: Sometimes repainting the edge is faster than chasing perfection.
Common Mistakes That Make Caulk Residue Worse
- Skipping the “film” cleanup: Silicone residue can prevent new caulk from sticking, leading to early peeling.
- Using the wrong blade on the wrong surface: Razors and acrylic are not friends.
- Rushing re-caulking: Solvents need time to evaporate fully before you apply new caulk.
- Mixing chemicals: Don’t combine cleaners/solvents. Keep it simple, rinse, and ventilate.
How Clean is “Clean Enough” Before Re-Caulking?
Here’s the practical standard: no visible chunks, no rubbery streaks, and no slick film when you run a fingertip
across the seam (after it’s dry). If you can still feel slippery residue, do another wipe-down (often rubbing alcohol
or mineral spirits where appropriate), then let it dry fully. Your future selfwho does not want to recaulk again in three monthswill be grateful.
Real-World Experiences: What Homeowners Run Into (and What Usually Works)
Let’s talk about the part no one admits: caulk residue removal is rarely a single-method victory lap. It’s more like
a relay race where you pass the baton from “scrape” to “soften” to “wipe,” while questioning every DIY decision you’ve ever made.
Here are a few common scenarios and the strategies that tend to save the day.
The “Shower Door Smear”: You scrape off the bead on the glass, step back feeling accomplished, and then notice a cloudy,
slightly rubbery haze that laughs at paper towels. This is where a razor scraper (kept nearly flat) shines, followed by a rubbing alcohol
wipe to remove the last film. The big lesson: the bead is only the first boss. The residue is the final boss with better dialogue.
The “Acrylic Tub Oops”: Someone (not naming names) reaches for a metal blade on an acrylic surround. Now there’s residue
and a scratch that catches the light forever. In acrylic/fiberglass zones, plastic scraping and patience are the safe path.
If the residue is stubborn, a commercial gel remover can helpafter a spot-testthen you come back with plastic tools. If you need a little
extra power, gentle heat from a hair dryer often makes the residue roll up instead of smear.
The “Corner Gunk Trap”: Corners collect everything: old caulk, soap scum, and the emotional weight of your weekend plans.
A caulk removal tool earns its keep here because it can get into tight seams without you doing origami with your wrists. After you lift what you can,
a careful solvent wipe (often rubbing alcohol, or mineral spirits if the surface allows) helps remove the invisible layer that keeps new caulk from bonding.
The “I Used a Remover and Now It’s Gooey”: This happens when the remover softens the caulk but you don’t remove it in time,
or you apply too much and it spreads. The fix is not panicit’s sectioning. Work in smaller areas, scrape softened material off promptly,
wipe with a clean rag, and repeat. Think “controlled cleanup,” not “mop the whole seam and hope.”
The “Residue That Only Shows When It’s Dry”: When everything is wet, it looks perfect. Then it dries and you spot faint streaks.
This is where a final wipe-down matters. On many durable surfaces, rubbing alcohol is a solid closer. On others, a careful mineral spirits scrub
can reveal and remove what water-based cleaning missed. The takeaway: the last 10% of cleanup is what makes the next caulk job last.
If you remember just one real-world rule, make it this: scrape first, soften second, wipe last. Caulk residue removal isn’t about brute force.
It’s about using the right level of persuasionlike negotiating with a toddler, but stickier.
Conclusion
Caulk residue doesn’t have to win. Start with the gentlest scraping method, use a remover or heat when silicone gets stubborn,
and always finish with a compatible wipe-down so your new caulk bonds properly. With a little strategy (and a lot less rage-scrubbing),
you can get a clean seam that looks sharp and stays sealed.


