Table of Contents >> Show >> Hide
- What Makes Bread “Artisan”?
- Key Ingredients for Homemade Artisan Bread
- Tools You’ll Love (But Don’t Have to Overthink)
- Remodelaholic-Style No-Fuss Artisan Bread Recipe
- Pro Tips for Your Best Artisan Bread Yet
- Easy Variations to Customize Your Loaf
- How to Serve and Store Artisan Bread
- Artisan Bread as a Home Project (Remodelaholic-Style)
- Real-Life Artisan Bread Experiences: What You Learn After a Few Loaves
There are DIY projects that change the way your home looks… and then there are DIY projects
that make your whole house smell so good the neighbors “just happen” to stop by.
Homemade artisan bread is absolutely in the second category.
Think of this loaf as the shiplap of your kitchen: simple ingredients, a little patience,
and suddenly everything feels warmer, cozier, and a bit more gourmet. The best part?
Artisan bread looks fancy but is secretly one of the easiest home “projects” you can tackle,
even if your last baking attempt involved a smoke alarm.
In true Remodelaholic style, this guide shows you how to make a gorgeous, crackly,
bakery-style artisan bread at home, using basic tools you probably already own.
We’ll walk through what makes bread “artisan,” share a no-fuss recipe, and load you up
with real-life tips so your loaf turns out beautifully rusticnot accidentally brick-like.
Ready to turn four simple ingredients into the star of your next cozy weekend at home?
Let’s bake.
What Makes Bread “Artisan”?
“Artisan” isn’t a secret code for complicated. In the bread world, it usually means:
short ingredient list, longer fermentation, and a hands-on (but not hard) approach.
Simple, Honest Ingredients
Most artisan bread recipes stick to four basic ingredients:
flour, water, yeast, and salt. No oils, no eggs, no long list of
additives you can’t pronounce. That stripped-down formula leaves plenty of room for
flavor to develop naturally during fermentation and baking.
Slow Fermentation for Big Flavor
Instead of “rush baking” a loaf in an hour, artisan bread often uses a longer rise,
sometimes 8–18 hours. This slow fermentation lets the yeast work gradually,
building a more complex flavor with subtle tang and sweetness, plus that open,
irregular crumb we all love in bakery loaves.
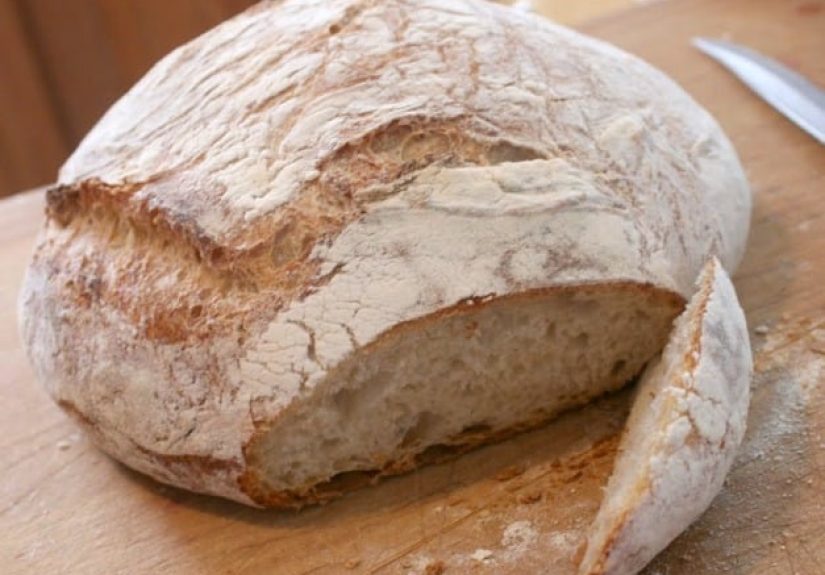
Crust, Crumb, and Character
Artisan bread is all about texture:
a crisp, usually deeply browned crust and a chewy, moist interior with visible air pockets.
It’s not supposed to look machine-made; the loaf can be slightly funky, rustic, and charming.
In other words, if it looks like it came from an expensive bakery instead of your
Tuesday-night kitchen, you’re on the right track.
Key Ingredients for Homemade Artisan Bread
Before you preheat your oven, take a minute to get familiar with the building blocks of
a great loaf. Understanding the basics will make you more confident and help you troubleshoot
if anything goes sideways (which, in bread-land, happens to everyone).
Flour: Bread vs. All-Purpose
You can make artisan bread with either bread flour or
all-purpose flour:
-
Bread flour has more protein (gluten-building power), which helps create
extra chew and larger holes in the crumb. -
All-purpose flour still makes a beautiful loaf, often with a slightly
softer interior and a bit less chew.
Many home bakers love a mix: mostly all-purpose with a portion of bread flour or even
some whole wheat for flavor and color.
Water and Dough Hydration
Hydration is simply the ratio of water to flour in your dough, expressed as a percentage.
Classic artisan loaves often sit around 70% hydration or higher, which means the dough is
wetter and stickierbut that’s exactly what creates a moist interior and open crumb.
If you’re new to higher-hydration doughs, start in the 65–70% range. The dough will feel
tacky and loose compared to sandwich bread, but with a few simple folding techniques
you’ll get the hang of it quickly.
Yeast: Tiny but Mighty
For a beginner-friendly artisan loaf, instant yeast or
active dry yeast works perfectly. You only need a small amount
slow fermentation does the heavy lifting. If you eventually want to move into the world of
sourdough, the basic techniques you learn here will transfer beautifully.
Salt: Non-Negotiable
Salt doesn’t just season the bread; it controls fermentation and strengthens the gluten
structure. Skipping it will give you a bland loaf that can over-proof quickly.
Use kosher or sea salt and measure accurately.
Tools You’ll Love (But Don’t Have to Overthink)
Artisan bread doesn’t require a professional bakery setup. A few simple tools make
the process easier and more consistent:
- Large mixing bowl – Room for the dough to rise and bubble.
-
Dough scraper or spatula – Helps you handle sticky dough
without adding too much extra flour. -
Dutch oven or heavy lidded pot – The home baker’s secret weapon.
The lid traps steam, helping the loaf rise high and develop a shatteringly crisp crust. -
Kitchen scale (optional but awesome) – Weighing flour and water
improves consistency from loaf to loaf. -
Sharp knife or bread lame – For scoring the top before baking
so the loaf expands where you want it to.
Remodelaholic-Style No-Fuss Artisan Bread Recipe
This is a flexible, dependable artisan bread formula designed for everyday home kitchens.
You can mix it at night, bake it the next day, and feel like a bakery magician
without kneading for hours.
Basic Artisan Bread Formula
Ingredients (1 medium loaf):
- 3 cups (about 390 g) all-purpose or bread flour
- 1 1/2 teaspoons fine sea salt
- 1/2 teaspoon instant or active dry yeast
- 1 1/2 cups (about 360 g) lukewarm water
This gives you a relatively high-hydration dough, perfect for a rustic, open crumb and
chewy texture. If the dough feels extremely soupy on your first attempt, reduce the water
slightly next time or add just a spoonful or two of extra flour as needed.
Step-by-Step Instructions
1. Mix the Dough
In a large bowl, whisk together the flour, salt, and yeast. Add the water and stir with a
spoon or spatula until no dry flour remains. The dough will look shaggy and stickythis is
exactly what you want. Resist the urge to “fix” it with more flour.
2. Let Time Do the Work
Cover the bowl with plastic wrap or a reusable cover and let it rest at room temperature
for 10–18 hours. When it’s ready, the surface will be dotted with bubbles and the dough
will have expanded noticeably. It should wobble a bit when you jiggle the bowl.
3. Shape Gently
Lightly flour your work surface and use a dough scraper to ease the dough out of the bowl.
It will still be sticky. Gently fold the edges toward the center a few times to form a
rough ball, using as little extra flour as possible. Flip it so the smooth side faces up
and tuck the edges under to tighten the shape.
Place the dough on a piece of lightly floured parchment paper or in a floured towel-lined
bowl. Cover and let it rise again for about 45–60 minutes while you preheat the oven.
4. Preheat Your Dutch Oven
Place your empty Dutch oven (with lid) in the oven and preheat to
450°F (230°C) for at least 30 minutes. This creates a mini steam oven
that gives your artisan bread that professional-looking crust.
5. Score and Bake
Carefully remove the hot pot from the oven. Lift the dough using the parchment paper
and lower it into the pot. Use a sharp knife or bread lame to make a few shallow slashes
across the topthis helps control how the loaf expands.
Cover with the lid and bake for about 30 minutes. Then remove the lid and bake another
10–15 minutes until the crust is deep golden brown and the loaf sounds hollow when
tapped on the bottom. Let it cool on a wire rack for at least 30 minutes before slicing.
(Yes, waiting is hard. Yes, it’s worth it.)
Pro Tips for Your Best Artisan Bread Yet
Learn to Love Sticky Dough
High-hydration artisan dough is naturally tacky. Instead of dumping in extra flour,
keep your hands lightly damp or oiled and use a dough scraper whenever possible.
This helps maintain a moist crumb and airy texture while still letting you handle
the dough confidently.
Use Stretch-and-Fold Instead of Heavy Kneading
If you want a bit more structure, you can gently stretch and fold the dough a few times
during the first couple of hours of fermentation. Every 30–45 minutes, grab one side of
the dough, stretch it up, and fold it over itself. Rotate the bowl, repeat a few times,
and then tuck it back in to rest. This builds gluten strength without turning the process
into a full workout.
Let Steam Work Its Magic
The reason Dutch oven bread looks so impressive is simple: steam. Trapping moisture
around the loaf for the first part of baking keeps the crust soft while the bread expands,
then dries out to become crisp and crackly. If you don’t have a Dutch oven, you can mimic
the effect by placing a metal pan on the lower rack and pouring in hot water as you put
the bread in the oven, quickly closing the door to trap the steam.
Don’t Rush the Cool-Down
Cutting into hot bread releases steam from the interior and can make the crumb gummy.
Let the loaf cool until it’s just slightly warm. Meanwhile, enjoy that “fresh bakery”
scent filling your home and accept all compliments from family members pacing in the kitchen.
Easy Variations to Customize Your Loaf
Once you’ve mastered the basic formula, you can start customizing your bread the way
you’d customize a room makeover.
Herb and Garlic Artisan Bread
Add 2–3 teaspoons of dried herbs (like rosemary, thyme, or Italian seasoning) and
a couple of minced garlic cloves to the flour before mixing in the water.
The result: a fragrant loaf that pairs perfectly with soups and pasta nights.
Seeded Country Loaf
Stir in a mix of sunflower seeds, pumpkin seeds, or sesame seeds for texture and
nutty flavor. Sprinkle extra seeds on top after shaping for a “bakery display”
look that makes your loaf feel extra special.
Partial Whole Wheat Version
Replace 20–30% of the white flour with whole wheat flour. You’ll get a slightly
denser crumb and deeper flavor while keeping the loaf relatively light and airy.
If the dough feels stiff, add a splash more water to maintain that artisan-style softness.
How to Serve and Store Artisan Bread
Serving Ideas
- Slice thick pieces and serve with good olive oil and flaky salt.
- Toast slices and top with avocado, eggs, or roasted vegetables.
- Use slightly stale slices for grilled cheese or panini (they hold up beautifully).
- Turn the last bits into croutons or breadcrumbszero waste, maximum flavor.
Storing Your Loaf
Artisan bread is best the day it’s baked, but you can keep it wrapped in a clean kitchen
towel or in a bread box at room temperature for 1–2 days. Avoid sealing it in plastic
unless you prefer a softer crust. For longer storage, slice the bread, freeze it in a
freezer-safe bag, and toast slices straight from frozen whenever you want fresh bread again.
Artisan Bread as a Home Project (Remodelaholic-Style)
On Remodelaholic, projects are all about turning “real life” homes into spaces you love
often on a realistic budget and schedule. Artisan bread fits that same philosophy.
You’re taking simple staples, investing a little time, and transforming them into something
beautiful and useful that makes home feel special.
Bake a loaf while you paint a room, install a new light fixture, or reorganize a closet.
The dough quietly does its thing while you work, and when you’re done,
you’re rewarded with warm slices and butter instead of just a to-do list.
It’s a pretty great trade.
Real-Life Artisan Bread Experiences: What You Learn After a Few Loaves
The first time you make artisan bread, it might feel a little like assembling flat-pack
furniture without instructionsyou’re pretty sure it will work out, but there’s a moment
of doubt when everything looks messy. Here are some “experience notes” that many home
bakers discover after a few tries (and that can save you a little trial and error).
1. The “Too Sticky” Panic Is Normal
Almost everyone has a first-loaf story that goes like this:
you mix the dough, it looks like a sticky swamp, and you’re convinced you did something wrong.
But with artisan bread, sticky is actually a good sign. That extra moisture is what creates
the chewy, open crumb you see in bakery loaves. Over time, you’ll learn the difference
between “properly wet” and “soupy,” but at the beginning, trust the process more than
your instincts.
2. Your Kitchen Has Seasons, Too
In summer, dough rises faster; in winter, it moves like it’s on a coffee break.
After a few bakes, you’ll start noticing how your home’s temperature and humidity
change your rise times. On cold days, you might tuck the bowl in the oven with just
the light on or choose a longer, overnight rise. On hot days, you may check the dough
earlier so it doesn’t over-proof and collapse. You’re not just following a recipeyou’re
learning to read the dough and your environment.
3. Every Loaf Tells a Story
That loaf with the giant crater on one side? It’s the one you forgot to score.
The super-flat one? Probably over-proofed while you binged another episode.
The one with a pale crust? Likely needed more heat or time with the lid off.
Each “imperfection” is feedback. The more you bake, the easier it becomes to connect
the final loaf to what happened along the wayand tweak things next time.
4. Family and Friends Don’t Care If It’s Perfect
You may notice every little detail about your loaf, but most people only see
“warm, homemade bread.” They’re thrilled if it’s rustic, slightly lopsided,
or dramatically crackedit looks artisanal, not flawed. Once you realize that,
baking becomes more fun and less stressful. Your home becomes “that house that
always smells amazing,” and nobody asks whether your crumb is Instagram-perfect.
5. Artisan Bread Becomes a Ritual
After a few successful loaves, you might find yourself planning bakes like mini
home rituals. Maybe Friday night becomes “mix the dough” night, and Saturday morning
is “fresh bread and coffee” time. Maybe you always bake a loaf on days you tackle
a big DIY project as your built-in reward. That rhythm turns artisan bread from
a one-time experiment into a comforting habit that anchors busy weeks.
Over time, you’ll tweak the basic recipe to fit your life:
slightly more water in dry weather, a bit of whole wheat for flavor,
extra herbs when you’re serving pasta, or a double batch when guests come over.
In true Remodelaholic fashion, you’ll slowly “remodel” the recipe so it fits your
home and routines perfectly. And every time someone asks,
“You really baked this yourself?” you can smile and say,
“Yepand it was way easier than it looks.”
SEO JSON META


