Table of Contents >> Show >> Hide
- Why These Messes Stick Like They Own the Place
- Before You Start: The “Don’t Make It Worse” Rules
- Your Toolkit: Minimal vs. “I Like Nice Things”
- The Safest Order of Operations (AKA: The Workflow That Saves Paint)
- How to Remove Bugs (Without Turning Your Hood Into a Swirl Museum)
- How to Remove Road Tar (The Right Way, Not the “WD-Whatever” Way)
- How to Remove Tree Sap (Nature’s Signature Move)
- Clay Bar: The “Only If Needed” Upgrade
- Aftercare: Re-Protect the Paint (Because Solvents Don’t “Respect Boundaries”)
- Special Cases: Matte Paint, Wraps, and PPF
- Common Mistakes (So You Don’t Learn the Hard Way)
- Troubleshooting: When Things Get Weird
- Prevention: Make the Next Cleanup Way Easier
- Conclusion
- Extra: Real-World Experiences That Make This Guide Click (500+ Words)
Bugs. Tar. Tree sap. Three tiny villains with the combined power of turning a freshly washed car into a sticky
crime scene. If you’ve ever tried to “just scrub it off,” you already know the plot twist: the gunk laughs,
your clear coat cries, and swirl marks move in like they’re paying rent.
The good news: you don’t need a detailing PhD (or a ritual involving three microfiber towels and a full moon).
You need the right order of operations, gentle chemistry, and a little patiencelike you’re negotiating with
a toddler who’s covered in syrup.
Why These Messes Stick Like They Own the Place
Bug splatter
Bug residue is a lovely cocktail of proteins and other organic compounds that can bond to paint as it dries
especially after highway heat bakes it in. The longer it sits, the more it behaves like “insect epoxy.”
Road tar
Tar is petroleum-based and sticky by design. On hot days, it softens, flicks up from freshly paved roads, and
plants itself on your rocker panels like it’s auditioning for a permanent role.
Tree sap
Sap is basically nature’s adhesive. Fresh sap can be removed with gentler methods, but once it cures, it turns
into a stubborn resin that may require targeted solvents and a careful touch.
Before You Start: The “Don’t Make It Worse” Rules
- Work on a cool surface in the shade. Heat makes chemicals flash-dry and increases the chance of streaking or hazing.
- Never scrape dry gunk. Dry scraping is how you create scratches that look like you fought a raccoon.
- Let chemistry do the heavy lifting. Dwell time beats elbow grease. Every time.
- Use clean microfiber and plenty of lubrication. Dirt trapped in a towel is basically sandpaper with better marketing.
- Spot-test first. Especially if you have matte paint, vinyl wrap, or paint protection film (PPF).
Your Toolkit: Minimal vs. “I Like Nice Things”
Minimum essentials
- pH-balanced car shampoo
- Microfiber wash mitt and several clean microfiber towels
- A dedicated bug-and-tar remover (automotive safe)
- Isopropyl alcohol (ideally diluted; more on that soon)
- A spray bottle (for diluted alcohol or rinse water)
- Wax/sealant/ceramic spray for aftercare
Nice-to-haves (that make the job easier)
- Foam sprayer or foam cannon (optional but satisfying)
- Bug sponge or dedicated soft bug scrub pad (paint-safe)
- Clay bar or clay mitt + clay lubricant
- Detail spray for light lubrication and touch-ups
- Finishing polish (for etching or faint haze)
The Safest Order of Operations (AKA: The Workflow That Saves Paint)
Step 1: Rinse first (remove the loose grit)
Start with a thorough rinse to knock off dust and grit. If you rub contaminants into paint, you’re basically
giving your car an exfoliating treatment it did not request.
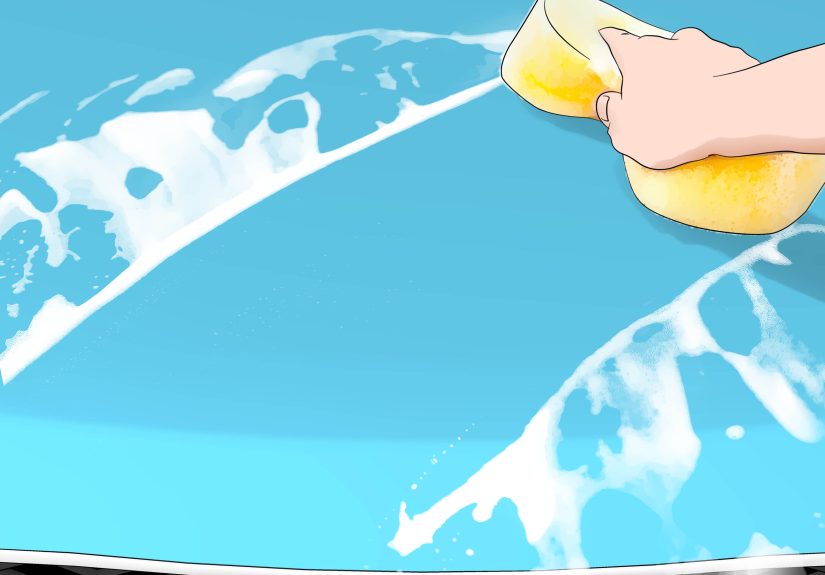
Step 2: Do a proper wash (yes, even if you “only have a few spots”)
Wash with car shampoo using a gentle top-to-bottom technique. Bugs, tar, and sap are easier to treat when the
surrounding surface is cleanbecause you’re not dragging road grime through the area you’re trying to save.
Step 3: Pre-soften the problem spots (the “soak, don’t attack” phase)
If you’re dealing with dried bug splatter, lay a damp microfiber towel over the area for a couple minutes.
This rehydrates residue and reduces the need for aggressive wiping. Think of it as a spa day for your front bumper.
How to Remove Bugs (Without Turning Your Hood Into a Swirl Museum)
Method A: Bug-and-tar remover + gentle wipe
- Spray the product on the affected area (don’t soak the entire carspot treat).
- Let it dwell per label guidance. If it starts to dry, reapply lightly.
- Gently wipe with a clean microfiber towel using straight-line motions.
- Rinse the area, then wash that panel again quickly to remove residue.
Method B: Bug sponge (only after chemical softening)
A bug sponge can help on stubborn front-end buildup, but only when the residue is softened first. Use light
pressure and keep it lubricated. If it feels grabby, stopadd more product or water, not more force.
When bugs won’t budge
If bug remains have lightly etched the clear coat (you’ll see a faint “shadow” after cleaning), that’s not
dirt anymoreit’s surface damage. You may need a finishing polish (by hand or machine) to restore clarity.
How to Remove Road Tar (The Right Way, Not the “WD-Whatever” Way)
What tar needs
Tar responds best to tar removers because they’re designed to dissolve petroleum-based contamination. The goal
is to melt it offso you don’t grind it across the paint like a crayon made of asphalt.
Step-by-step tar removal
- After washing, dry the panel lightly so you can see the tar specks clearly.
- Spray tar remover directly onto the tar spots.
- Allow a short dwell time so the tar softens.
- Wipe gently with microfiber, flipping to a clean side often.
- Repeat rather than rubbing harder. Tar usually yields in layers.
- Rinse and re-wash that panel.
Pro tip: avoid the smear spiral
If tar smears, you’re either wiping too soon, using too little product, or using a towel that’s already
contaminated. Add a little more remover, let it dwell, and wipe again with a fresh microfiber.
How to Remove Tree Sap (Nature’s Signature Move)
Start gentle: wash + warm soften
Fresh sap sometimes comes off with a normal wash and a soft microfiber towel. If it’s stubborn, warming the
sap slightly (sun-warmed panel or a hair dryer on low, at a safe distance) can help soften it. Don’t cook the paint.
Alcohol method (paint-safe when used thoughtfully)
- Mix a diluted isopropyl alcohol solution (for example, roughly 1:1 with water for a milder approach).
- Apply to a microfiber towel (don’t pour directly on the paint).
- Press the towel on the sap for 20–60 seconds to soften the resin.
- Wipe gently. If it resists, repeat the press-and-lift instead of scrubbing.
- Rinse, then wash the area again.
When sap leaves a “ghost spot”
Old sap can etch or stain. If the sap is removed but the outline remains, a finishing polish may improve it.
If the paint feels rough after removal, that’s bonded contaminationsee the clay step next.
Clay Bar: The “Only If Needed” Upgrade
Clay is great for removing bonded contaminants that washing doesn’t touch. But it’s not step one for basic bug
splatter. Clay can cause micro-marring if used incorrectly, so treat it like a precision tool, not a magic eraser.
How to clay safely
- Wash the car first. Clay is not a substitute for washing.
- Use a dedicated clay lubricant (or a very slick detail spray).
- Glide with light pressure until the surface feels smooth.
- Fold/refresh the clay to a clean side often.
- Wipe residue and inspect. If you see haze, a quick finishing polish can restore gloss.
Aftercare: Re-Protect the Paint (Because Solvents Don’t “Respect Boundaries”)
Most tar/sap removers (and alcohol) can weaken or strip waxes and sealants. After you remove bugs, tar, and sap,
apply protection to the treated areas:
- Quick option: spray wax or ceramic spray sealant
- Longer-lasting: traditional wax or synthetic paint sealant
- Best defense: a quality coating (professional or DIY) if you’re committed to maintenance
Special Cases: Matte Paint, Wraps, and PPF
- Matte/satin finishes: avoid polishing (it can create shiny spots). Use matte-safe cleaners only.
- Vinyl wrap: spot-test and avoid harsh solvents. Use wrap-approved bug/tar removers.
- PPF: generally durable, but still avoid aggressive rubbing. Let chemicals dwell and wipe gently.
Common Mistakes (So You Don’t Learn the Hard Way)
- Using kitchen scrubbers or “mystery sponges” that feel like they were engineered to remove paint.
- Scraping with fingernails, plastic cards, or anything “kind of sharp but probably fine.” (It’s not fine.)
- Letting product dry on the surface.
- Using a dirty towel “just for one more wipe.”
- Skipping protection afterward, then wondering why the next cleanup is harder.
Troubleshooting: When Things Get Weird
“It’s clean, but I still see spots.”
Likely etching or staining. Try a mild finishing polish (gloss paint only). If the defect remains, it may need
professional correction.
“It keeps smearing.”
Use more product, allow more dwell time, and switch to a fresh microfiber. Smearing is often “not enough chemistry”
combined with “too much wiping.”
“The surface feels rough even after cleaning.”
That’s bonded contamination. Clay (with proper lubrication) is the next step, followed by protection.
“My windshield is streaky after bug remover.”
Wash/rinse thoroughly, then finish with a dedicated glass cleaner. Some bug removers leave a film that needs a
proper glass wipe-down.
Prevention: Make the Next Cleanup Way Easier
- Wash sooner after road trips. Fresh residue removes faster than “baked-on road lasagna.”
- Keep a quick-detail kit in the trunk: microfiber + detail spray + a small bug sponge.
- Maintain protection: wax/sealant/coating makes contaminants less clingy.
- Park smarter: avoid sap-heavy trees when possible, especially in heat.
Conclusion
Removing bugs, tar, and sap from your car isn’t about brute forceit’s about the right sequence: rinse, wash,
soften, dissolve, gently wipe, then protect. When you let products do the work (and you keep your towels clean),
you’ll save your finish, avoid scratches, and keep your car looking like it didn’t just lose a fight with the outdoors.
Extra: Real-World Experiences That Make This Guide Click (500+ Words)
Most “how to remove bug splatter” articles assume your car has a few polite little dots on the bumper. Real life
is rarely that courteous. Real life is a 900-mile road trip where your front end collects enough insects to qualify
as a wildlife documentary.
One common scenario: you drive through a stretch of warm evening highway, and by the time you stop for gas, the
front bumper looks like it’s wearing a crunchy sweater. The temptation is to grab the nearest paper towel and go to
town. That’s where swirl marks are born. The better move is to treat it like dried food on a plate: soak first, wipe later.
A damp microfiber towel laid over the bugs for a couple minutes rehydrates the mess so it releases without drama.
Then a bug-and-tar remover finishes the job with minimal agitation.
Another classic: fresh roadwork in summer. You don’t even see the tar happenyou just notice black specks along the
lower doors the next day. People panic and start scrubbing, which turns individual specks into long smears. The trick
is patience and “small bites.” Spray a tar remover on a small section, wait briefly, then lift with microfiber.
Flip towels frequently. Tar is a smear artist; don’t hand it a paintbrush.
Tree sap experiences usually begin with: “I parked in the shade because I’m a responsible adult.” Then you return to
your car and discover the tree has signed your hood in twelve sticky autographs. Fresh sap can sometimes wash off.
But once it cures, the winning strategy is press-and-lift. Put diluted isopropyl alcohol on a microfiber towel and
hold it on the spot so the resin softens, then wipe gently. If you rub aggressively right away, you’re just spreading
sap into a wider, shinier problem.
Cold weather adds a twist. Sap and tar can harden like candy, and bug residue can cling stubbornly. In these cases,
warmth helpseither a sun-warmed panel or a careful, low-heat approach (like a hair dryer used conservatively). The goal
isn’t to heat the paint; it’s to make the contaminant less brittle so chemistry can work. Then you’re back to the same
fundamentals: dwell time, gentle wipe, rinse, re-wash.
Finally, the “I cleaned it but it still looks wrong” moment. This happens when the contamination is gone, but the paint
shows a faint outlineoften from etching (bugs) or staining (sap). That’s when cleaning stops and correction begins.
A light finishing polish can often improve clarity on glossy paint, but matte finishes and wraps are a different game.
The real lesson from experienced DIYers and pros alike: remove contaminants early, and you’ll spend minutes, not hours.
The best detailing hack isn’t a secret chemicalit’s timing.


