Table of Contents >> Show >> Hide
- What the Camera Module V3 Actually Is (in non-marketing English)
- Quick Specs You’ll Actually Use
- The “Do You Need It?” Decision Test
- Compatibility and Cabling: the “Wait, Why Doesn’t It Fit?” Section
- Software Reality Check: It’s rpicam + libcamera + Picamera2 Now
- Real Scenarios: When V3 Is the Right Tool (and When It Isn’t)
- Camera Module V3 vs. Common Alternatives
- Buying Checklist: What to Order So You Don’t Rage-Refresh Forums
- FAQ (Quick, Useful Answers)
- Experience Notes: From the “I Built It So You Don’t Have To” Zone
- Conclusion
The Raspberry Pi Camera Module V3 is one of those tiny upgrades that looks boring on paperuntil you
realize it can save you from a surprising number of “why is my image blurry?” emotional breakdowns.
If you’re building anything that needs a reliable, compact camera with autofocus, this little board can
feel like cheating. If you’re not? It can feel like buying a cappuccino machine when you only drink water.
Let’s figure out which person you are, with real specs, real trade-offs, and a few specific project examples.
No fluff, no “revolutionary synergy,” and absolutely no pretending your Raspberry Pi is a Hollywood camera rig.
What the Camera Module V3 Actually Is (in non-marketing English)
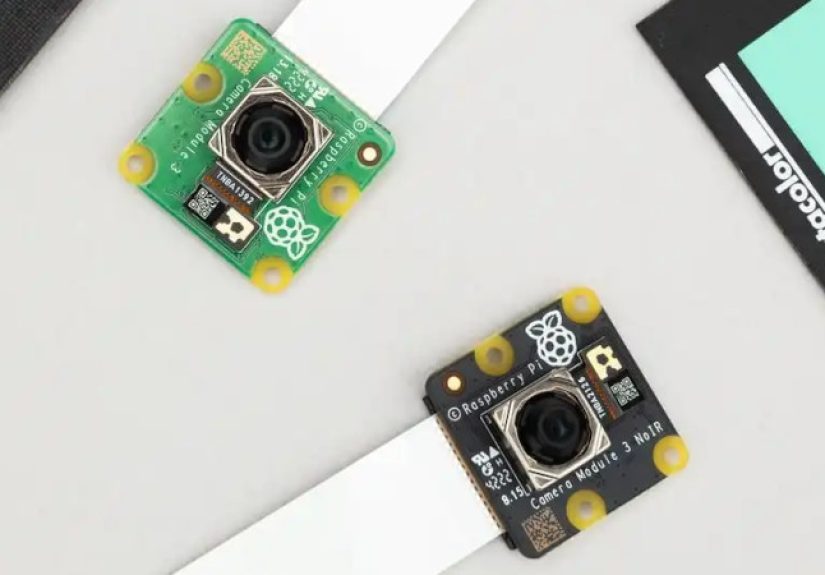
The Raspberry Pi Camera Module V3 (often called “Camera Module 3”) is the official compact camera board
for Raspberry Pi computers. It’s built around a 12-megapixel Sony IMX708 sensor and brings three upgrades
that matter in the real world: autofocus, HDR support, and a choice of
standard vs. wide-angle lenses.
The big idea: you get “phone camera vibes” in a maker-friendly package
Earlier Raspberry Pi camera modules were great for fixed-focus projects (like a security camera pointed at
one spot forever). But as soon as you wanted to focus on something closer, or capture subjects at different
distances, things got… awkward. V3 adds phase-detection autofocus, which is a fancy way of saying it can
focus quickly without you manually twisting a tiny lens like a watchmaker.
Quick Specs You’ll Actually Use
Here’s what matters most when deciding whether to buy Camera Module V3:
- Resolution: 11.9MP (4608 × 2592)
- Pixel size: 1.4µm × 1.4µm
- Common video modes: 1080p50, 720p100, 480p120
- Autofocus: Phase Detection Autofocus (PDAF)
- HDR: Supported (HDR output up to 3MP mode)
- Lens options: Standard or Wide
- IR filter options: Regular (IR cut) or NoIR (infrared-sensitive)
Standard vs. Wide: don’t guesspick based on the room
The “standard” version is closer to a normal view. The “wide” version is what you want if the camera is
close to the action (like inside a robot, mounted on a door, or pointed at a whole room) and you need to
see more without stepping back through a wall.
| Variant | Diagonal FOV | Horizontal FOV | Vertical FOV | Typical focus range |
|---|---|---|---|---|
| Standard | 75° | 66° | 41° | 10cm to infinity |
| Wide | 120° | 102° | 67° | 5cm to infinity |
Translation: if you’re doing close-up work (think tiny electronics, plant leaves, LEGO crimes), the wide
module focusing down to ~5cm is genuinely helpful. If you want less distortion and a more “normal” look,
the standard lens is the calmer choice.
The “Do You Need It?” Decision Test
You probably do need the Camera Module V3 if…
-
Your subject distance changes. Robots that drive around, a camera that watches a desk,
a classroom demo, or anything where “fixed focus” is a gamble. -
You want a compact, official, CSI-connected camera. CSI cameras are low-latency,
don’t hog USB bandwidth, and are well supported by Raspberry Pi’s modern camera stack. -
You want NoIR for night-ish projects. NoIR variants remove the infrared cut filter,
so you can pair them with IR LEDs for nighttime monitoring or wildlife cameras. -
You care about HDR in harsh lighting. If your scene has bright windows and dark corners
(aka “every room ever”), HDR can help reduce blown highlights and crushed shadows. -
You want long-term parts availability. The official product brief indicates production
planned into 2030, which matters for repeatable builds and long-running deployments.
You can probably skip it if…
-
You’re just doing basic video chat. A decent USB webcam can be simplerespecially if you
already own one and don’t need the CSI form factor. -
You need interchangeable lenses or “real” optics. The Raspberry Pi High Quality (HQ)
camera exists for that. Camera Module V3 is compact; HQ is flexible. -
Your project uses the legacy Raspberry Pi camera stack. If you’re still clinging to old
commands like raspistill/raspivid for dear life, Camera Module V3 is not the best choice. Modern Pi camera
software has moved on. -
You need a global shutter. If you’re capturing fast motion and can’t tolerate rolling-shutter
artifacts, you’re shopping in a different aisle.
Compatibility and Cabling: the “Wait, Why Doesn’t It Fit?” Section
Camera Module V3 uses a 15-pin ribbon cable connector (the classic Raspberry Pi camera cable).
Many Raspberry Pi boards have a matching CSI connector, so it’s straightforward.
Raspberry Pi 5 (and some smaller boards) may need an adapter cable
Newer boards and compact models can use different camera connectors or sizesso you may need the correct
ribbon cable/adapter (for example, a 22-pin to 15-pin cable for Raspberry Pi 5). This isn’t hard, but it’s
a very common “why is my camera not detected?” moment.
Physical fit: same mounting holes, taller lens
The PCB footprint and mounting holes are designed to match the older Camera Module 2, so many brackets fit.
But the V3 lens assembly is taller, so certain tight cases or low-profile mounts designed for older modules
can clash. If you’re squeezing this into a 3D-printed enclosure that was designed five years ago, measure twice.
Software Reality Check: It’s rpicam + libcamera + Picamera2 Now
If you remember the old “enable camera in raspi-config and run raspistill” days… welcome to the future.
Raspberry Pi’s modern camera stack is built around libcamera. On newer Raspberry Pi OS releases,
the recommended command-line tools are typically the rpicam-* apps (renamed from libcamera-*),
and the recommended Python library is Picamera2.
Quick sanity test (command line)
Once your camera is connected properly and your OS is updated, you can use a simple “hello” preview to confirm
the camera is detected.
Basic autofocus behavior (what to expect)
Autofocus is not magicit’s just very convenient physics. You’ll get the best results when:
- The scene has contrast (flat white walls are autofocus kryptonite).
- Your subject has enough light (dim light slows focusing and increases noise).
- You pick the right lens variant (wide is great up close, standard looks more natural).
Python projects: Picamera2 makes the camera feel “scriptable”
If you’re doing computer vision, timelapse automation, triggered captures, or camera tuning,
Picamera2 is typically the friendliest route. It’s designed as the modern Python interface for the Raspberry Pi camera system.
Real Scenarios: When V3 Is the Right Tool (and When It Isn’t)
1) Desk document scanner / overhead camera
Autofocus is a huge win here. Documents shift, hands move, lighting changes, and you don’t want to babysit focus.
The standard lens is usually better unless the camera is mounted very close and you need the extra field of view.
2) Robotics and moving platforms
If your robot approaches objects at different distances (navigation, obstacle inspection, QR code scanning),
autofocus saves you from choosing between “sharp near” and “sharp far.” Pair it with consistent lighting and you’ll
get much more reliable captures.
3) Night monitoring / wildlife camera
Choose a NoIR variant if you plan to use infrared illumination. Without IR light, NoIR can look
weird (colors get strange under normal lighting), but with IR LEDs it becomes a great low-light monitoring tool.
4) Timelapse builds
Camera Module V3 is compact, light, and easy to mount. HDR can help when day-to-night transitions create harsh exposure changes.
For pure timelapse of a fixed scene, autofocus isn’t requiredbut it’s still nice if your camera position can shift slightly.
5) “I want cinematic bokeh!”
If your dream is buttery background blur and lens swaps, the HQ camera (with interchangeable lenses) is a better bet.
Camera Module V3 is about convenience and compactness, not building a tiny arthouse film studio.
Camera Module V3 vs. Common Alternatives
Here’s the practical comparison that matters when you’re spending real money (or at least “maker money,” which is real money
but with more zip ties):
| Option | Best for | Why you’d pick it | Why you wouldn’t |
|---|---|---|---|
| Camera Module V3 | General projects, robotics, compact builds | Autofocus + HDR + official support, CSI connection | No lens swaps, rolling shutter limitations |
| Camera Module V2 | Fixed-focus, legacy builds | Often cheaper, plenty good for many basic uses | No autofocus, older sensor, less flexible |
| HQ Camera | Optics/lens flexibility, better control | Interchangeable lenses, different creative options | Bigger, heavier, more expensive once you add a lens |
| USB Webcam | Video chat, quick setups | Plug-and-play, works with lots of software | Uses USB bandwidth, often higher latency, less “embedded” |
| 3rd-party CSI camera (e.g., specialized modules) | Niche needs (different sensors/features) | More sensor choices, sometimes special features | Support/compatibility varies; can require extra tuning |
Buying Checklist: What to Order So You Don’t Rage-Refresh Forums
-
Pick the lens:
- Standard: more natural perspective, less distortion.
- Wide: more coverage, better for tight spaces and close-up builds.
-
Pick IR or NoIR:
- Regular (IR cut): normal colors in normal light.
- NoIR: best with IR lighting for night monitoring or special sensing.
- Confirm your cable: Your Raspberry Pi model determines whether you need a specific ribbon or adapter cable.
- Update Raspberry Pi OS: Modern camera features (including V3 support) expect the modern camera stack.
- Plan your mount: The board fits many mounts, but the lens height can conflict with older cases.
FAQ (Quick, Useful Answers)
Is the Camera Module V3 “good enough” for computer vision?
For many projects, yes. It’s sharp, consistent, and well supported. The bigger question is lighting and lens choice.
Many “bad CV results” are actually “bad lighting results wearing a fake mustache.”
Should I get the wide version by default?
Only if you know you need a wide field of view. Wide lenses can introduce distortion, which can be annoying for
documents, faces, or anything where straight lines should stay straight. For general-purpose use, standard is often safer.
Does NoIR mean it’s a night-vision camera?
Not by itself. NoIR means it can “see” infrared light because it doesn’t have an IR-cut filter. For true night use,
you typically add IR illumination (IR LEDs). Otherwise, you’ll just get odd colors in normal lighting.
Experience Notes: From the “I Built It So You Don’t Have To” Zone
Makers who switch to Camera Module V3 often report the same first impression: “Wait, autofocus just… works?”
And then, about 30 minutes later: “Why does autofocus sometimes focus on the wrong thing like it’s emotionally attached
to the background?” Both reactions are normal.
The biggest quality-of-life improvement is that V3 reduces the amount of physical fiddling. In older modules, if your
project moved from “photograph something across the room” to “inspect a label up close,” you were stuck choosing a focus
compromise or manually adjusting lenses. With V3, you can build projects where the camera distance changesrobots, desk cams,
interactive artwithout turning setup into a tiny screwdriver hobby.
A common real-world lesson: autofocus loves contrast and hates ambiguity. If you point the camera at a low-contrast surface
(plain wall, foggy window, dim scene) it may hunt. The easiest fix isn’t a software trick; it’s lighting and framing. Add
light. Add texture. Put the subject where it stands out. Even a cheap LED panel can make autofocus faster and images cleaner.
If you’re doing night projects with the NoIR version, the “aha” moment is realizing you need IR light sources in the scene.
Once you add IR LEDs, the NoIR module feels like it unlocks a whole new mode of use.
Another frequent experience: cables and connectors cause more camera “bugs” than software does. People plug in the ribbon cable
upside down, use the wrong adapter, or slightly mis-seat the connector and then blame the universe. The CSI ribbon cable is
unforgivingif the contacts aren’t aligned correctly, you can get “no camera detected” errors that look like driver issues.
The fix is almost always mechanical: reseat, confirm orientation, confirm the correct cable for your Pi model, and reboot.
Wide-angle is also a personality choice. Wide sees more, which is fantastic for door cams, room monitoring, and robots. But it can
exaggerate perspective and curve lines at the edges. In maker terms: wide makes your 3D-printed enclosure look like it’s melting in
a Salvador Dalí painting. If you’re doing document capture or want more natural framing, standard is often easier to live with.
Finally, the best “experience-based” advice is to treat the camera like part of a system, not a standalone gadget. The best results
come from pairing V3 with thoughtful lighting, stable mounting, and software settings that match your goal (still photos vs streaming
vs timelapse). When you do that, Camera Module V3 isn’t just a nicer sensorit’s a smoother build process.
Conclusion
You need the Raspberry Pi Camera Module V3 if your project benefits from autofocus, HDR, compact mounting, and official CSI camera
supportespecially for robotics, monitoring, timelapse, and “camera distance changes a lot” builds. You can skip it if you’re doing
simple webcam tasks, need interchangeable lenses, or want a specialized sensor for niche imaging.
The V3 isn’t the “best camera ever.” It’s the camera that makes Raspberry Pi projects feel less like improvisational hardware comedy
and more like you planned things. Which is a nice change.


