Table of Contents >> Show >> Hide
- Why Replace a Light Switch?
- Tools You’ll Need
- Step 1: Turn Off the Power
- Step 2: Remove the Old Light Switch Cover Plate
- Step 3: Unscrew the Switch from the Box
- Step 4: Disconnect the Wires
- Step 5: Connect the New Light Switch
- Step 6: Install the New Switch in the Wall Box
- Step 7: Attach the Cover Plate
- Step 8: Turn the Power Back On
- Common Mistakes to Avoid
- Safety Tips for Working with Electricity
- Real-Life Experience: Replacing a Light Switch
- Conclusion
Replacing a light switch might sound like a daunting task, but it’s actually a fairly simple DIY project that anyone with basic tools can handle. Whether you’re dealing with a faulty switch, outdated style, or just want to upgrade your home’s look, learning how to replace a light switch is an essential skill. In this guide, we’ll walk you through the process from start to finish, providing clear instructions, safety tips, and even sharing some useful experiences from people who’ve been there.
Why Replace a Light Switch?
Light switches can break over time due to wear and tear, or you might simply want to update your home’s interior design. Perhaps your current switch is old, out of style, or not functioning properly. In any case, replacing a light switch is a small but impactful way to improve your home’s functionality and aesthetics. But before you begin, let’s look at the steps involved in replacing a light switch safely and effectively.
Tools You’ll Need
Before you start, make sure you have the following tools on hand:
- Screwdriver (flathead and Phillips)
- Voltage tester
- Wire stripper
- New light switch
- Electrical tape (optional)
- Needle nose pliers (optional)
These are the basic tools you’ll need to remove the old switch and install the new one. The voltage tester is essential for ensuring that there’s no electrical current running through the switch before you begin working.
Step 1: Turn Off the Power
The most important step when working with electrical components is to ensure your safety. Always turn off the power to the circuit at the main electrical panel. This will prevent any accidental shocks or injuries while you’re working on the switch. Once the power is off, double-check using a voltage tester to confirm that the switch is no longer live. Never skip this step!
Step 2: Remove the Old Light Switch Cover Plate
Use your flathead screwdriver to remove the screws holding the cover plate in place. Once the screws are removed, gently pull the cover plate off. You may need to wiggle it a little, but be careful not to damage the wall or the plate. Keep the screws safe because you’ll need them later when installing the new plate.
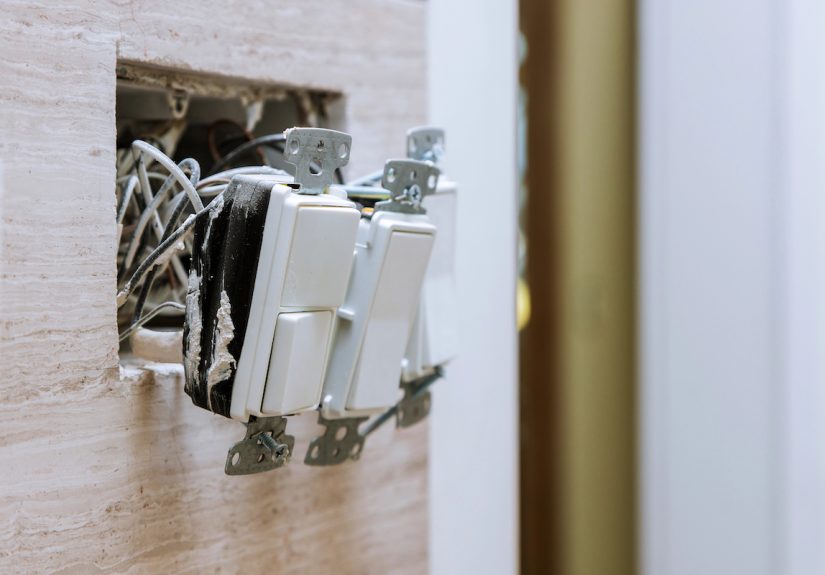
Step 3: Unscrew the Switch from the Box
Now that the cover plate is off, use your screwdriver to remove the screws that hold the light switch itself in place. Once the screws are removed, carefully pull the switch out of the wall box. Be careful not to let the wires get caught on anything as you pull the switch out. If the wires are too tight, gently pull them loose to give yourself more space to work.
Step 4: Disconnect the Wires
At this point, you’ll see the wires connected to the old switch. You should see at least two wirestypically a black (hot) wire and a white (neutral) wire. There may also be a green or bare copper wire for grounding. Use your screwdriver to loosen the screws holding the wires in place, and then carefully disconnect them. If you’re unsure about which wire goes where, take a photo of the connections for reference later.
Step 5: Connect the New Light Switch
Now that the old switch is removed, it’s time to connect the new one. Start by attaching the ground wire (if present) to the green screw on the new switch. Then, connect the black (hot) wire to one of the brass screws, and the white (neutral) wire to the silver screw. Tighten each screw securely, ensuring the wires are wrapped tightly around the screws to ensure a good connection.
If your new switch has a different setup than the old one, refer to the manufacturer’s instructions or seek guidance from an expert at your local hardware store.
Step 6: Install the New Switch in the Wall Box
Once the wires are securely connected, gently push the new switch back into the wall box. Make sure the switch is level and aligned properly before securing it with screws. Don’t overtighten the screws, as this could damage the switch or the box.
Step 7: Attach the Cover Plate
Now that the switch is secured in the wall, place the cover plate over the switch and screw it back into place. Be careful not to overtighten the screws here, either. The cover plate should sit flush against the wall, and the screws should hold it securely in place.
Step 8: Turn the Power Back On
With the switch and cover plate securely in place, go back to your electrical panel and turn the power back on. Test the new switch by flipping it on and off to ensure that it works properly. If the switch operates as expected, congratulations! You’ve successfully replaced your light switch.
Common Mistakes to Avoid
While replacing a light switch is straightforward, there are a few common mistakes you’ll want to avoid:
- Not turning off the power: Always make sure the circuit is off before working on any electrical components.
- Improper wire connections: Make sure wires are securely attached and not loose. Loose connections can cause the switch to malfunction.
- Forgetting the ground wire: If your switch has a ground wire, make sure it’s properly connected to prevent electrical hazards.
Safety Tips for Working with Electricity
When working with electrical components, safety should always be your top priority. Here are some additional tips:
- Wear rubber-soled shoes to avoid grounding yourself.
- Use a voltage tester frequently to ensure the power is off.
- If you’re unsure about anything, call a licensed electrician for assistance.
Real-Life Experience: Replacing a Light Switch
Replacing a light switch isn’t just about following instructionsit’s also about learning from real experiences. For instance, one homeowner shared their experience of replacing an old, malfunctioning switch in their kitchen. They noted how they felt a sense of accomplishment when the switch worked perfectly after installation, making the effort worthwhile. Another homeowner discussed how they updated their home’s light switches with sleek new models to match their modern décor. They found the process to be a simple and cost-effective way to enhance their home’s aesthetic.
On the other hand, some individuals have shared how they ran into trouble when they didn’t check the wiring properly. They ended up needing to redo the installation after discovering that the connections were loose, which led to flickering lights. It was a learning experience, and they now emphasize how important it is to double-check everything before sealing up the switch plate!
Conclusion
Replacing a light switch is a manageable DIY project that can enhance both the functionality and appearance of your home. By following the steps outlined in this guide and taking necessary safety precautions, you can replace your switch with confidence. Whether it’s for a repair or an upgrade, learning how to replace a light switch is a valuable skill to add to your home improvement repertoire.
sapo: Replacing a light switch is easier than you think! This step-by-step guide will walk you through everything you need to know, from tools to safety tips, so you can complete your DIY project with confidence.


