Table of Contents >> Show >> Hide
- What You’ll Learn
- Why Styrofoam Ceiling Tiles Are the Ultimate Ceiling “Cover Story”
- Safety First: Fire Ratings, Fixtures, and the “Don’t Be a Headline” Checklist
- Choosing Styrofoam Ceiling Tiles That Won’t Look Like a Science Fair Project
- Prep Work That Actually Matters (and the Stuff You Can Skip)
- How to Install Styrofoam Ceiling Tiles (Glue-Up Method)
- Tools & materials
- Step 1: Find your “center” and snap your lines
- Step 2: Dry-fit a few tiles (yes, it’s worth it)
- Step 3: Apply adhesive the right way
- Step 4: Install your first tile like it’s the only tile that matters
- Step 5: Build out in rows, checking alignment constantly
- Step 6: Cut tiles cleanly around lights, vents, and edges
- Step 7: Finish the perimeter
- Finishing Tricks That Make It Look Expensive
- Troubleshooting: When the Tiles Start Acting Like Tiles
- Cost, Time, and “Is It Worth It?”
- Conclusion
- Real-World Experiences (): What DIYers Learn the Hard Way
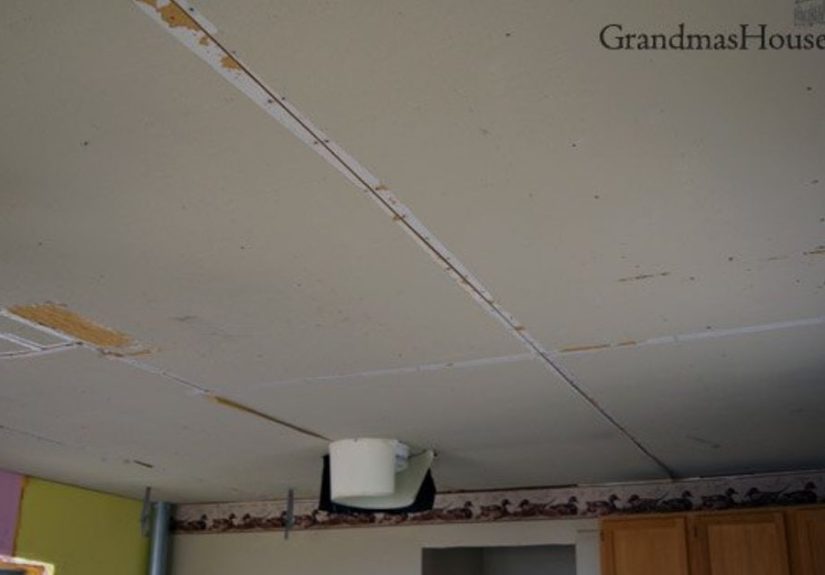
Every house has that ceilingthe one that looks like it survived three decades of smoke, a leaky plant experiment, and a brief misunderstanding with a textured roller. Maybe it’s popcorn. Maybe it’s cracked plaster. Maybe it’s a suspicious constellation of water stains that forms the face of someone judging you.
If scraping, sanding, and re-drywalling sounds like a weekend you’d rather not remember, styrofoam ceiling tiles (also sold as polystyrene or foam ceiling tiles) can be a surprisingly effective “put a hat on it” solution. They’re lightweight, DIY-friendly, and capable of turning “repair needed” into “wait… is that decorative?”
Why Styrofoam Ceiling Tiles Are the Ultimate Ceiling “Cover Story”
The big wins
Styrofoam ceiling tiles are popular for one main reason: they’re a shortcut that can still look intentional. Foam tiles can:
- Hide visual chaos fast (stains, hairline cracks, old texture, questionable patch jobs).
- Add pattern and depth so your ceiling looks designed instead of merely tolerated.
- Install without special toolsusually a utility knife, adhesive, and patience.
- Keep the load light (helpful on older ceilings where heavy materials feel risky).
When foam tiles are a bad idea
Foam tiles are a cover-up, not a miracle. They’re not the right move if:
- You have an active leak or recurring moisture. Fix water issues first, always.
- The ceiling is soft, crumbly, or unstable (loose popcorn texture, flaking plaster, sagging drywall). Adhesive can’t bond to “dust pretending to be a surface.”
- You need a code-compliant finish for a specific occupancy or jurisdiction. (Translation: check local rules if this is not a typical single-family living space.)
- You hate repeating patterns and the thought of aligning rows makes your eye twitch.
If your ceiling is structurally sound but aesthetically offensive, foam ceiling tiles can be a smart, budget-friendly makeoverespecially in basements, bedrooms, rentals you own, or any room where you want maximum impact with minimum demolition.
Safety First: Fire Ratings, Fixtures, and the “Don’t Be a Headline” Checklist
1) Fire performance isn’t optionallook for a rating
Foam and polystyrene products vary widely. Some are decorative only. Others are tested for interior finish performance. When shopping, look for products that clearly state a fire rating (often discussed as “Class A” under ASTM E84/UL 723). If a listing is vague“fireproof!” with no test standardtreat that like a “trust me, bro” handshake and keep scrolling.
2) Don’t trap heat around fixtures
Recessed lights, older can lights, heat lamps, and some ceiling fans can create heat that doesn’t play nicely with decorative coverings. Before installing foam tiles:
- Confirm light fixtures are rated for their use and are not overheating.
- Keep tiles trimmed cleanly around fixture bases (no foam touching hot surfaces).
- Use proper trim rings, escutcheons, or fixture-specific covers where needed.
- If in doubt, swap old fixtures for cooler LED options before you tile.
3) Popcorn ceilings: asbestos is the plot twist
If your home is older and you suspect your textured ceiling may contain asbestos, don’t scrape or sand it casually. Many homeowners choose covering methods specifically to reduce disturbance. The safe path is testing and/or professional guidance if you’re planning work that could release fibers. Covering can be a practical option when handled responsiblyespecially if you avoid aggressive prep that damages the existing texture.
Quick safety checklist
- Fix leaks and stains at the source (roof, plumbing, HVAC) before covering.
- Confirm the ceiling surface is stable enough to bond to (no flaking, peeling, or crumbling).
- Choose tiles with clear fire-performance documentation when possible.
- Keep foam away from heat sources; upgrade old fixtures if needed.
- When in doubt, ask your local building department or a licensed pro.
Choosing Styrofoam Ceiling Tiles That Won’t Look Like a Science Fair Project
Tile styles: what actually looks good
The most flattering foam ceiling tiles mimic classic patternscoffers, tin-like relief, beadboard squaresbecause the texture reads as “design” instead of “cover-up.” For low ceilings, avoid patterns with deep, heavy shadows. A shallower relief can feel cleaner and taller.
Size and layout: your ceiling isn’t as square as you think
Most rooms are subtly out of square. If you start installing tiles from one wall and the room is crooked, the last row will look like it’s doing the limbo. A better approach: plan a centered layout so cut tiles are balanced on opposite sides.
Pro tip: buy extra. Even careful DIYers sacrifice a few tiles to mis-cuts, weird corners, or the classic “I measured from the wrong end” moment. Ordering 10–15% extra is cheap insurance.
Glue-up vs. grid (drop ceiling)
- Glue-up foam ceiling tiles: best for covering an ugly ceiling without lowering height much. Faster, cleaner look when done well.
- Drop ceiling (grid) tiles: better if you need access to wiring/ducts, want sound control, or your ceiling is too uneven to glue to directly.
If your ceiling is very uneven, a grid or furring strips can create a flat plane first. Foam tiles love flat planes the way houseplants love daylight.
Prep Work That Actually Matters (and the Stuff You Can Skip)
Clean like you mean it
Adhesive fails for two reasons: bad glue, or a dirty ceiling. Kitchens and basements are repeat offenders because grease and dust form an invisible anti-stick layer. Vacuum cobwebs, wipe off grime, and let the surface dry completely.
Stabilize loose texture
Foam tiles can sometimes go over popcorn texture, but only if it’s secure. If the popcorn crumbles when you brush it, you’re trying to glue tiles to a ceiling made of breadcrumbs. Options:
- Encapsulate with a suitable primer/sealer to lock down dust and improve adhesion.
- Skim coat to create a flatter surface (more work, better results).
- Add a new substrate (thin drywall, plywood, or furring strips) if the ceiling is too rough or unstable.
Mark a layout you can trust
Don’t eyeball it. Use chalk lines to establish perpendicular guides. A good layout prevents “drifting” rows that scream “I installed this at 1 a.m.”
How to Install Styrofoam Ceiling Tiles (Glue-Up Method)
The exact directions vary by brand, but the workflow is consistent. Read your tile’s instructions first, then use this as the practical playbook.
Tools & materials
- Styrofoam/polystyrene ceiling tiles (plus 10–15% extra)
- Foam-safe ceiling tile adhesive or mastic (per manufacturer guidance)
- Caulk gun (if using tube adhesive)
- Chalk line, tape measure, pencil
- Utility knife with sharp blades (change often)
- Straightedge, framing square, and scissors (some foam cuts cleaner with scissors)
- Step ladder, safety glasses
- Optional: lightweight molding/edge trim for the perimeter
Step 1: Find your “center” and snap your lines
Measure the room length and width, find the midpoint of each, and snap two perpendicular chalk lines that cross at the center. That intersection is your starting reference. You’re aiming for balanced cuts at the walls, not a full tile on one side and a sad 1-inch strip on the other.
Step 2: Dry-fit a few tiles (yes, it’s worth it)
Hold tiles up along your chalk lines without glue. Check how the pattern lands at the perimeter. If the edge pieces will be ridiculously thin, shift your layout lines by half a tile and recheck. Ten minutes of dry-fitting can save you from a whole-room redo.
Step 3: Apply adhesive the right way
Follow the adhesive pattern recommended by the tile manufacturer. Common approaches include:
- Dots or mounds at corners and center (good for slightly uneven surfaces).
- An “X” pattern plus perimeter support (good for consistent contact).
- Notched trowel spread (best for panels or when full coverage is required).
Important: some adhesives (especially solvent-heavy ones) can damage foam. Use products explicitly compatible with polystyrene/foam.
Step 4: Install your first tile like it’s the only tile that matters
Press the first tile into place at your chalk-line intersection. Align carefully, then press firmly. Hold for a moment so it grabs. Every tile after this one is basically a vote for “straight” or “why is my pattern wandering?” Make the first vote count.
Step 5: Build out in rows, checking alignment constantly
Work outward from the center along your chalk lines. Every few tiles, step down and check alignment from different angles. Tiny errors multiply across a ceiling faster than opinions in a group chat.
Step 6: Cut tiles cleanly around lights, vents, and edges
For cutouts, measure twice and mark clearly. For round fixtures, trace a template on the tile (cardboard helps) and cut slowly. Replace blades oftenfoam tears when your blade is dull, and torn edges are forever (or at least until you move).
Step 7: Finish the perimeter
Most rooms end with cut tiles along the walls. For a polished finish:
- Add simple crown molding or edge trim to hide cut edges.
- Use paintable caulk sparingly where needed (especially if the ceiling/walls are wavy).
- Keep patterns aligned even on cut piecesyour eyes will notice if the design “breaks” at the wall.
Finishing Tricks That Make It Look Expensive
Paint (only if the tiles are meant to be painted)
Many foam ceiling tiles are paintable, but paint choice matters. Water-based paints (latex/acrylic) are commonly recommended, while solvent-based sprays can melt foam. If you’re painting:
- Use thin coatstwo light coats beat one heavy coat that fills detail.
- Consider spraying with an HVLP sprayer (with the right paint) to preserve crisp patterns.
- Test paint on a spare tile first. Always.
Use trim to “frame” the ceiling
A modest perimeter molding can upgrade the entire look. It also hides slight cut imperfections, which is great because ceilings are not the place for perfectionism to take up a hobby.
Match the room’s vibe
If your walls are modern and minimal, pick a simpler tile pattern. If you’ve got classic trim, consider a coffered or tin-style relief. The goal is harmony, not “Victorian opera house meets minimalist loft.”
Troubleshooting: When the Tiles Start Acting Like Tiles
Problem: Tiles won’t stick
- Likely cause: dust, grease, flaking paint, or unstable texture.
- Fix: clean thoroughly; use primer/sealer to stabilize; switch to a manufacturer-approved adhesive; consider a new substrate.
Problem: Seams look obvious
- Likely cause: misalignment, uneven ceiling plane, or inconsistent pressure.
- Fix: align from chalk lines; press evenly; use trim and careful touch-up paint; avoid forcing tiles into place if the ceiling is badly uneven.
Problem: The pattern “drifts”
- Likely cause: starting from a wall in an out-of-square room.
- Fix: restart from a centered layout; shift reference lines so perimeter cuts are balanced.
Problem: Ceiling still looks uneven in certain light
- Likely cause: raking light highlights bumps and dips.
- Fix: choose a slightly deeper pattern to disguise imperfections; add soft lighting; consider furring strips or a grid if the ceiling is truly wavy.
Cost, Time, and “Is It Worth It?”
Foam tiles are often chosen because they sit in the sweet spot between “cheap and quick” and “looks like you tried.” The tile cost varies by design and rating, but the overall project is typically far less than full ceiling replacement.
Time-wise, most DIYers can complete a small room in a day if the ceiling is flat and prepped. Bigger rooms or complicated layouts (lots of fixtures, odd angles, soffits) can stretch into a weekend. The install is light work physically, but mentally it rewards slow, careful alignment.
As for value: a cleaner ceiling improves the whole room. Buyers notice ceilings more than you think. Even if you’re not selling, you’ll notice the difference every time you look upespecially when your brain stops whispering, “Is that a water stain… shaped like Florida?”
Conclusion
Covering up a very ugly ceiling with styrofoam ceiling tiles can be a smart, practical upgrade when your ceiling is structurally sound but visually tragic. The keys are simple: choose quality tiles (preferably with clear fire-performance info), prep the surface so adhesive can actually bond, plan a centered layout, and take your time with the first few tiles. Do that, and you won’t just hide the problemyou’ll give the room a new “finished” identity.
And if anyone asks why you didn’t just scrape the whole ceiling? Smile calmly and say, “Because I enjoy my weekends,” and then offer them a ladder.
Real-World Experiences (): What DIYers Learn the Hard Way
People who cover an ugly ceiling with foam ceiling tiles tend to report the same handful of experiencesalmost like a shared rite of passage, except with more adhesive and less chanting. First, there’s the moment of optimism: the boxes arrive, the tiles look crisp, and you suddenly believe your ceiling can become a classy design feature instead of an overhead apology. This optimism is healthy. It is also temporary.
The next common experience is discovering that ceilings have personalities. Some are smooth and cooperative, like a well-trained golden retriever. Others are textured, dusty, or slightly greasy (kitchen ceilings, we’re looking at you). DIYers often learn that “clean enough” is not clean enough. A ceiling can look clean and still sabotage adhesion with a film of old smoke residue or airborne cooking oils. The ones who succeed usually treat cleaning as the real first step: vacuum, wipe, let dry, then prime if the surface seems suspicious. It’s not glamorous, but neither is watching a tile slowly peel off like it’s trying to escape.
Another universal lesson is that layout is everything. Many first-timers start at a wall because it feels logicalwalls are straight, right? Except walls are often not straight, and rooms are rarely perfectly square. DIYers frequently report a slow, dawning horror when the pattern drifts and the last row becomes a collection of skinny, uneven slivers that look like the ceiling lost a bet. The fix is usually planning from the center with chalk lines and dry-fitting a few tiles before committing. People who do this feel smug later. People who don’t do this become extremely skilled at muttering.
Cutting around fixtures is where confidence goes to get humbled. Light boxes, vents, smoke detectors, and ceiling fans create a lot of “measure twice, cut once” situationsexcept the “once” can turn into “three times” if you’re learning as you go. A common success strategy is making templates from cardboard, labeling which direction the tile faces (patterns have a “right way up”), and keeping extra blades on hand so cuts stay clean. DIYers also learn to avoid forcing tiles into place; foam dents, edges tear, and the ceiling remembers.
Finally, many people say the finishing details are what transform the project from “DIY” to “done.” Adding simple perimeter trim or molding hides small cut imperfections and makes the ceiling look intentional. Painting (when recommended by the manufacturer) can unify sheen and color, but most experienced DIYers test paint on a spare tile first because foam has a long memory for bad decisionsespecially solvent-based ones. The shared takeaway is reassuring: the project isn’t hard, but it rewards patience. If you go slow, keep lines straight, and respect prep work, that ugly ceiling really can become the part of the room people complimentwithout anyone ever needing to know what was under it.


