Table of Contents >> Show >> Hide
- What Is an Electrical Insulator (and Why It’s So Weirdly Beautiful)?
- Why Insulators Make Surprisingly Great Planters
- Sourcing Insulators Without Paying “Collector Prices”
- Clean It Like You Mean It (But Don’t Sandblast Your Treasure)
- The Big Decision: Drainage (Because Plants Hate Swimming Pools)
- Best Plants for an Insulator Planter
- Step-by-Step: Glass Insulator Planter (No Drilling Version)
- Step-by-Step: Porcelain Insulator Planter (Outdoor-Friendly Styling)
- Design Ideas That Look Intentional (Not Accidental)
- Care and Maintenance (Keep It Cute, Keep It Alive)
- Common Mistakes (And How to Avoid Becoming a Plant Apology Tour)
- FAQ: Safety, Materials, and “Can I Plant Edibles in This?”
- Conclusion: A Tiny Planter With a Big Backstory
- Real-World Experiences: What It’s Actually Like Living With an Insulator Planter
There are two kinds of people in this world: the ones who see an old electrical insulator and think,
“historic hardware,” and the ones who think, “tiny plant mansion.” If you’re reading this, congratulationsyou’re
in the second group. Turning a vintage glass or porcelain insulator into a planter is one of those projects that
looks like you spent hours curating an “artful vignette,” when really you just gave a retired piece of utility
history a new job: holding a succulent and silently judging your watering habits.
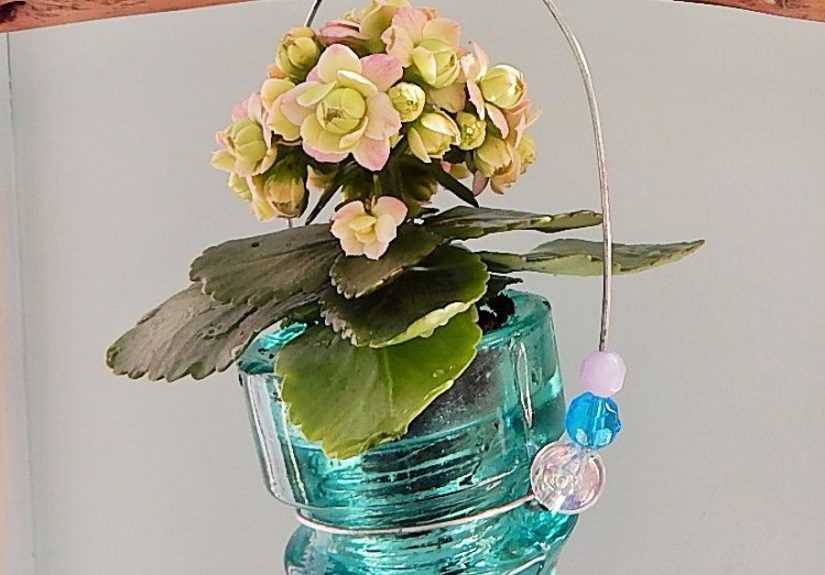
An insulator turned planter is equal parts conversation piece, upcycled décor, and practical
container gardening. The shape is already perfect for a small plant, the material is built to live outdoors,
and the colorsseafoam green, cobalt blue, smoky ambermake your windowsill look like it has a personal stylist.
The trick is doing it in a way that keeps plants alive (and keeps your furniture from becoming a swamp).
What Is an Electrical Insulator (and Why It’s So Weirdly Beautiful)?
Electrical insulators were designed to keep wires from touching and “sharing” electricity with things that should
not be electrifiedlike wooden poles, metal brackets, and, ideally, people. Early systems for telegraph and
telephone lines used glass insulators because glass doesn’t conduct electricity and sheds moisture quickly. Later,
porcelain became common because it’s strong, weather-resistant, and takes a glaze that helps water roll off.
In other words: these things were engineered to handle storms, sun, and decades of outdoor life. That’s the exact
résumé you want in a planter. Your pothos is lucky, honestly.
Why Insulators Make Surprisingly Great Planters
- They’re built for the outdoors: Glass and glazed porcelain tolerate moisture and sun far better than many decorative pots.
- They’re naturally sculptural: The ridges and curves were designed for performance, but they look like modern art.
- They’re the perfect “small plant” size: Ideal for succulents, mini herbs, starter plants, and propagation.
- They’re a story you can display: A vintage insulator planter says, “I decorate with history,” without saying, “I own a museum gift shop.”
Sourcing Insulators Without Paying “Collector Prices”
You can find glass and porcelain insulators at flea markets, architectural salvage shops, antique stores, estate
sales, and online marketplaces. Prices range from “sure, take it” to “this is apparently the Hope Diamond, but
for glass.” If your goal is a planter (not a museum-grade collectible), you can shop smarter by focusing on
condition and stability instead of rare markings.
What to look for
- No cracks: Chips can be okay for rustic charm, but cracks are a deal-breakerespecially if you plan to drill.
- A stable base: Some insulators sit flat; others wobble. A wobbly planter becomes a gravity experiment.
- A usable opening: Make sure the top “cup” is deep enough for soil or a nursery pot insert.
- Material matters: Glass is great for cachepot-style planting; porcelain is excellent for outdoor displays and can be easier to camouflage in garden styling.
Clean It Like You Mean It (But Don’t Sandblast Your Treasure)
Most old insulators just need a gentle spa day: warm water, mild dish soap, and a soft brush. Avoid harsh
abrasives that can scratch glass or dull glossy glaze. If there’s mineral haze (hello, “lived on a pole for 40
years” patina), a small amount of white vinegar in the soak can help loosen depositsthen rinse thoroughly and
dry completely.
Bonus tip: if you’re going to use it indoors, line your sink with a towel before washing. The insulator is tough,
but your sink is basically a ceramic boxing ring.
The Big Decision: Drainage (Because Plants Hate Swimming Pools)
Here’s the truth container gardeners learn sooner or later: drainage isn’t optional. Most plants
can’t sit in waterlogged soil without root problems. Insulators, by design, were not created with your fern’s
feelings in mindso you’ll need a plan.
Option 1: The “Two-Pot” Method (Recommended for Beginners)
Treat the insulator as a decorative outer pot (a cachepot). Put your plant in a small nursery pot with drainage
holes, then nest it inside the insulator. When you water, you can lift the nursery pot out to drain fully in the
sink, then return it once it stops dripping.
- Pros: No drilling. No cracking. Easy to swap plants seasonally.
- Cons: You need a nursery pot that fits nicely, and you have to remember to drain it.
Option 2: Drill a Drainage Hole (For the Patient and the Prepared)
If you want your insulator to function like a traditional planter, you can drill a drainage hole using the right
tools and a slow, careful approach. For glass, you’ll typically use a diamond bit and keep the drilling area wet
to reduce heat and cracking. For glazed porcelain, diamond bits also work wellagain, slow speed, steady hands,
and water to keep everything cool.
- Pros: True planter function; easier daily care outdoors.
- Cons: Risk of cracking; you’ll need tools and patience.
Option 3: Go Soil-Free (Cute, Low-Risk, and Very Forgiving)
If you love the idea of greenery but hate the idea of soggy soil, consider:
- Air plants: Nest them with a little moss or decorative gravel (no soil needed).
- Propagation display: Use the insulator as a water vessel for pothos or philodendron cuttings.
- Dried or preserved arrangements: Zero watering, maximum bragging rights.
Best Plants for an Insulator Planter
Because insulators are usually small, think “miniature” and “slow-growing.” Also consider whether you’re doing
true drainage or using the two-pot method.
Great picks
- Succulents and small cacti: Compact roots, low water needs, and they look amazing against colored glass.
- Mini herbs: Thyme, oregano, or chivesbest with a nursery pot insert for easy drainage.
- Baby houseplants: Small pothos starts, peperomia, or hoya cuttings (again: drainage matters).
- Moss accents: Use as a topper for a finished look (don’t treat moss as a substitute for proper watering habits).
If you’re tempted to make a tiny “sealed terrarium” in an insulator: proceed carefully. Glass can trap moisture,
and without drainage that can turn into a root-rot reality show. If you want the terrarium vibe, keep it airy and
use plants that tolerate drier conditions.
Step-by-Step: Glass Insulator Planter (No Drilling Version)
1) Pick your insert pot
Measure the insulator’s opening and choose a nursery pot that sits snugly without forcing it. If it’s slightly
loose, small silicone bumpers or discreet shims can stabilize it.
2) Add a smart base layer (not “rocks for drainage”)
The goal is stability and airflownot the old myth that rocks magically fix drainage. If you need lift, use a
couple of small spacers so the inner pot isn’t sitting in leftover water at the bottom of the insulator.
3) Use the right potting mix
Skip garden soil. Choose a quality potting mix, and for succulents add cactus mix or extra perlite/pumice for
faster drying. Your plant roots want oxygen as much as they want water.
4) Plant, top-dress, and style
Plant as you normally would, then finish with a thin top-dress layer (small stones, moss, or bark) for a clean,
designed look. Wipe fingerprints off the glass and pretend you didn’t just become “a person who top-dresses.”
5) Water like a grown-up
Lift the inner pot to water and drain completely. For succulents, wait until the soil dries out. For herbs, keep
it evenly moist but never soggy.
Step-by-Step: Porcelain Insulator Planter (Outdoor-Friendly Styling)
Porcelain insulators can look fantastic in a garden because they blend with stone, wood, and metal. They also
make excellent “micro planters” in grouped displays.
1) Choose placement first
Decide if it will sit on a shelf, hang from a bracket, or mount to a board. That choice affects stability and how
you’ll manage drainage.
2) Use the two-pot method for easy swaps
A small nursery pot insert lets you rotate seasonal plants (spring herbs, summer succulents, fall mums-as-babies,
winter greens) without stressing the porcelain or your schedule.
3) Mount or group for impact
Try a reclaimed wood plank with multiple insulators as a wall feature, or cluster three insulators of different
sizes like a “tiny planter family.” You’ll create a focal point without buying a single trendy pot that costs as
much as a small appliance.
Design Ideas That Look Intentional (Not Accidental)
- Window ledge lineup: Group three glass colors (green, clear, amber) with matching plant shapes.
- Kitchen herb station: Use inserts so you can water in the sinkyour basil will thank you.
- Desk-sized zen corner: One blue insulator + one haworthia + one small book stack = “I have my life together” energy.
- Outdoor “found object” garden: Place porcelain insulators among rocks and grasses for a subtle industrial-meets-nature look.
Care and Maintenance (Keep It Cute, Keep It Alive)
Watering
If your insulator planter has no drainage hole, never water directly into the insulator unless you can drain it.
Overwatering is the #1 reason small planters become plant cemeteries. Use the two-pot method, or keep watering
measured and infrequent for drought-tolerant plants.
Light
Glass can amplify heat in direct sun. If your insulator sits in a hot south-facing window, watch for sunscald and
faster soil drying. Bright, indirect light is the “safe default” for many houseplants.
Soil and fertilizer
Small containers exhaust nutrients faster. Use a light hand with fertilizerespecially for succulents. A
slow-release option or occasional diluted feeding is usually enough.
Common Mistakes (And How to Avoid Becoming a Plant Apology Tour)
- Mistake: No drainage and “hope.” Fix: Use an insert pot or drill a hole safely.
- Mistake: Filling the bottom with rocks “for drainage.” Fix: Use proper drainage holes and a good potting mix.
- Mistake: Too much soil in a tiny container. Fix: Choose small plants with modest roots and repot when needed.
- Mistake: Treating succulents like ferns. Fix: Let them dry between waterings.
- Mistake: Wobbly display placement. Fix: Use bumpers, a base, or group in a tray for stability.
FAQ: Safety, Materials, and “Can I Plant Edibles in This?”
Are vintage insulators safe for plants?
In general, glass and glazed porcelain are durable materials for decorative planting. If you’re using an insulator
purely as a planter or cachepot, the main “safety” concerns are practical: stability, drainage, and preventing
water damage to surfaces.
What about lead in glazes?
Lead concerns most often come up with certain traditional or improperly fired ceramic glazes intended for food use.
If you’re unsure about an old glazed ceramic piece (especially if it’s not clearly an industrial insulator), play
it safe: use the two-pot method, avoid edible plants, and treat the insulator as decorative. When in doubt, a
removable liner keeps soil and roots separated from the ceramic surface.
Do I really need a drainage hole?
For most plants, yesor you need a functional workaround like the two-pot method. Plants need oxygen around their
roots, and consistently wet soil pushes oxygen out. Good drainage is less “extra credit” and more “basic life
support.”
Conclusion: A Tiny Planter With a Big Backstory
An insulator turned planter is the kind of project that makes your home feel curated without
feeling precious. You’re rescuing a functional artifact, keeping it useful, and giving it a new role that’s
honestly more photogenic than “holding wires on a rainy day.”
Whether you go full DIY and drill a drainage hole, or keep it simple with a nursery pot insert, the best version
of this project is the one you’ll maintain easily. Pick the right plant, respect drainage, and enjoy the quiet
satisfaction of turning yesterday’s infrastructure into today’s décor.
Real-World Experiences: What It’s Actually Like Living With an Insulator Planter
People who try an insulator planter for the first time almost always have the same “wow” moment: the color is even
better in real life. Online photos don’t fully capture how vintage glass catches daylightespecially the classic
green and aqua pieces. On a windowsill, the ridges throw little shadows and highlights that make even a tiny
rosette succulent look like it’s starring in a home décor commercial. The second “wow” moment usually arrives a
week later: “Oh right… drainage.”
In DIY circles, the most successful setups tend to be the simplest: a snug nursery pot insert, a gritty potting
mix, and a plant that forgives forgetfulness. Succulents are the obvious winners because they don’t demand daily
attention, and their roots won’t bully the container in two months. People who try thirsty plants (like certain
ferns) in a non-draining insulator often end up learning container science the hard way. The soil stays wet longer
than expected, roots get cranky, and suddenly you’re googling “why does my plant look offended.”
Another common experience is the “wobble surprise.” Some insulators have a base that’s just slightly uneven, and
once you add a plantplus damp soil weightit can feel like your décor is doing a slow-motion lean. The fix is
almost comically easy: clear bumpers, a discreet ring of museum putty, or placing the insulator in a shallow tray
with a few stones around it to brace it. After that, people start intentionally designing “insulator groupings”
because the tray trick looks styled, not rescued.
Drilling is where stories split into two categories: calm triumph or dramatic regret. The calm triumph crowd tends
to do three things: they use a diamond bit, they keep the area wet, and they go slowreally slow. They treat it
like a patient craft, not a power tool sprint. The dramatic regret crowd usually rushes, presses too hard, or
tries to drill a piece with hidden stress cracks. The good news is you don’t need to drill to succeed. Plenty of
long-term “I still love this” insulator planters are insert-based, because it makes watering and plant swaps
painless. It’s also how people avoid committing their favorite insulator to a high-stakes DIY moment.
The final real-life lesson is that insulators age gracefully as décor. Even when plants change, the insulator
still looks goodso people rotate what’s inside depending on season or mood. Succulent in summer, tiny evergreen
sprig in winter, propagation cutting in spring. It becomes a reusable “plant stage,” which is honestly the dream:
a planter that stays stylish even when your plant choices are… experimental.


