Table of Contents >> Show >> Hide
- What Is a Nail Set?
- Where Nail Sets Shine (And Where They Don’t)
- Anatomy of a Nail Set: The Small Details That Matter
- Types of Nail Sets
- Nail Set Sizes: Picking the Right Tip Without Guessing
- How to Use a Nail Set (Step-by-Step)
- Best Practices for Cleaner Results
- Common Mistakes (So You Don’t Have to Learn Them the Loud Way)
- Nail Set vs. Nail Gun Depth Settings: Do You Still Need One?
- Buying a Nail Set: What to Look For
- Care and Maintenance: Make It Last (and Safer)
- Safety Notes You Should Actually Follow
- Quick FAQ
- Real-World Experiences: of “Yep, That Happened” (and What It Taught Me)
- Conclusion
If finish carpentry had a secret handshake, the nail set would be part of itright after the “pretend you meant to do that” shrug.
This small, unassuming tool (also called a nail punch) is what turns “I installed trim” into “wow, that looks professionally installed.”
In plain terms: a nail set helps you sink a nail head slightly below the surface so you can fill the tiny divot and make the fastener disappear.
Think of it as giving your nails a little basement apartment so your wood surface can stay smooth, paintable, and drama-free.
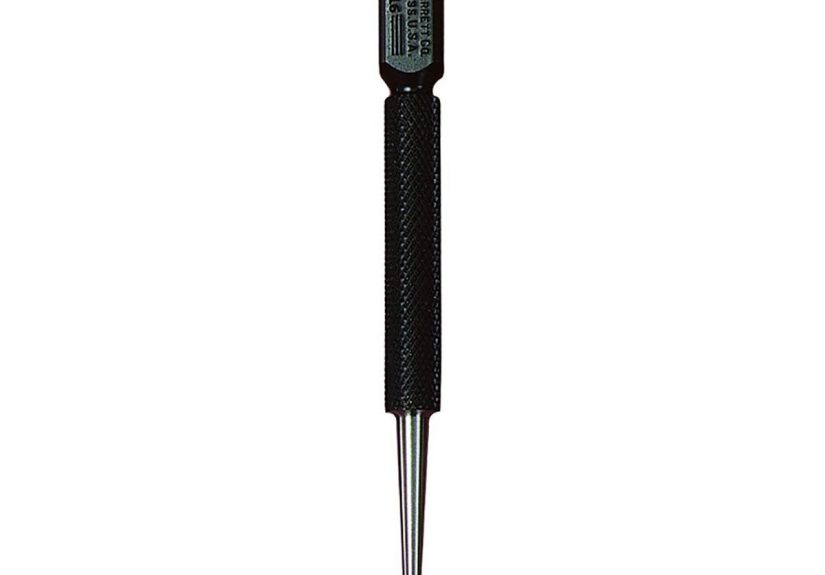
What Is a Nail Set?
A nail set is a short steel tool with a narrow tip on one end and a flat striking head on the other.
You place the tip on the head of a finish nail (or brad/pin, depending on size), then tap the tool with a hammer to drive the nail just below the wood surface.
The goal isn’t to bury the nail into the next dimensionit’s to countersink it just enough to hide it with putty, filler, or a tiny plug.
Why Not Just Hit the Nail with the Hammer?
Because hammers are enthusiastic. They’re great at driving nails, but not great at stopping politely at “nearly flush.”
The last couple taps often leave a crescent-shaped dent around the nail headlike your trim got headbutted by a tiny horseshoe.
A nail set concentrates force directly on the nail head, reducing collateral wood bruising.
Where Nail Sets Shine (And Where They Don’t)
Nail sets are most commonly used in trim carpentry, molding, baseboards, door and window casing,
wood flooring face-fastening, and fine woodworking where a clean finish matters.
They also come in handy during repairs when a nail pops up just enough to snag a sock (and your dignity).
- Great for: finish nails, trim nails, brads, pin nails (with the right size tip), light furniture work, touch-ups, tight spots.
- Not ideal for: big framing nails, structural fastening, situations where the wood is so soft you’ll crater it no matter what.
- Questionable but possible: some metalwork or hardware tasksjust know a nail set isn’t a universal punch, and the tip can slip.
Anatomy of a Nail Set: The Small Details That Matter
A nail set looks simple, but its design is doing quiet, important work.
Typically it’s a tapered steel shaft with a flat or slightly concave tip sized to match nail heads.
Many are knurled for grip, and better ones feel stable in your hand instead of spinning like a tiny baton.
Tip Shape: Flat vs. Concave
A slightly concave tip helps “cup” the nail head so the tool doesn’t skate off to the side mid-strike.
Less skating means fewer accidental dents and fewer moments where you whisper, “I am so glad nobody is watching me.”
Hard Tip, Softer Head (Yes, Really)
In quality nail sets, the tip is hardened to resist wear, while the striking end is often tempered differently so it won’t chip or shatter from hammer blows.
This balance is why decent nail sets survive years of use without turning into a mushroom-shaped hazard.
Types of Nail Sets
1) Traditional Nail Set (Hammer-Driven)
This is the classic: place tip on nail head, tap with hammer.
It’s inexpensive, reliable, and perfect for most DIY and pro trim work.
If you can swing a hammer, you can use this.
2) Spring-Loaded Nail Set (Hammerless “Snap” Style)
Spring-loaded nail sets store energy and release it in a quick impactno hammer swing required.
They’re especially useful in tight spots where a hammer can’t fit, or when you want one hand to stabilize trim while the other operates the tool.
Some versions are double-ended, giving you two tip sizes in one tool.
3) Specialty and Combo Tools
You’ll also see combo tools that pair a nail setter function with a center punch or include interchangeable tips.
These can be handy, but if trim work is your main goal, a dedicated nail set (or a small set of sizes) is usually the simplest win.
Nail Set Sizes: Picking the Right Tip Without Guessing
Nail sets come in different tip diameters. The trick is matching the tip to the nail head:
too large and you’ll dent surrounding wood; too small and it can slip off the nail head and leave a “mystery dimple” next to it.
| Common Nail Set Tip Size | Often Used For | What It’s Best At |
|---|---|---|
| 1/32″ | Pin nails | Delicate trim, tiny fasteners, minimal filler |
| 1/16″ | Brads / small finish nails | General trim touch-ups, casing returns, small moldings |
| 3/32″ | Finish nails / trim nails | Baseboards, door casing, larger moldings |
| 1/8″ (and up) | Larger finish nails | Heavier trim or situations with slightly larger nail heads |
For most homeowners, a 3-piece set (small/medium/large) covers nearly everything.
If you do mostly furniture or very fine trim, adding a smaller size (or a dual-tipped precision setter) is worth it.
How to Use a Nail Set (Step-by-Step)
-
Drive the nail close to flush.
Hammer the nail until the head is just slightly proud of the surfaceclose, but not leaving a crater. -
Choose the correct nail set tip.
Match the tip diameter to the nail head so it sits centered and stable. -
Position the tip on the nail head.
Keep the tool as vertical as the situation allows. If you’re setting a nail in angled trim, follow the nail’s angle. -
Tap with controlled strikes.
Use light-to-moderate taps. You’re finishing, not forging. -
Stop at the right depth.
Aim for about 1/32″ to 1/16″ below the surfacejust enough for filler or putty. -
Fill and finish.
Use wood filler for paint-grade trim, color-matched putty for stained wood, or a tiny plug for the stealthiest look.
Pro Tip: Protect the Wood (Especially Soft Pine)
Softwoods dent easily. If you’re working with pine or primed MDF trim, use lighter taps and consider a quick strip of painter’s tape around the nail head area.
It won’t make you invincible, but it can reduce “oops” marks.
Best Practices for Cleaner Results
Keep the Tool Centered
Nail sets work best when they’re centered on the nail head.
If the tip is off-center, it can skid, leaving a second dent that looks like your nail tried to dodge responsibility.
Use the Right Hammer (Small Is Often Better)
A standard claw hammer works, but a smaller trim hammer or light hammer can give you better control.
The best strike is the one that lands exactly where you intendedwithout ringing your knuckles like a doorbell.
Back Up Fragile Trim
Thin trim pieces can flex when you tap a nail set, especially near edges.
If possible, support the trim from behind (or make sure it’s firmly seated) to reduce movement and prevent cracks.
Common Mistakes (So You Don’t Have to Learn Them the Loud Way)
- Using the wrong size tip: Too big dents the wood; too small slips and leaves extra marks.
- Over-driving the nail: If you bury it too deep, you’ll need more filler (and sanding) and might weaken a small trim piece.
- Hammering before you’re stable: If your hand position is awkward, reset. Most mishaps happen during “I’ll just do it quick.”
- Skipping filler strategy: Paint-grade trim loves filler; stain-grade trim usually prefers color-matched putty or plugs.
Nail Set vs. Nail Gun Depth Settings: Do You Still Need One?
Even if you use a finish nailer, a nail set still earns a place in your tool pouch.
Nailers sometimes leave nails slightly proud (especially when air pressure varies or the wood gets dense), and a nail set is the fastest fix.
It also helps when you choose hand nailing for delicate pieces or when you’re doing a small repair and don’t want to drag out power tools.
Buying a Nail Set: What to Look For
- Clear size markings: You shouldn’t need a microscope to tell which one you’re holding.
- Comfortable grip: Some sets have cushioning or flared grips that help protect your hand from glancing blows.
- Quality steel: A durable tip stays crisp; a cheap tip deforms and slips more often.
- Starter set vs. specialty: Start with a 3-piece set; add spring-loaded or specialty tools if your projects demand it.
Care and Maintenance: Make It Last (and Safer)
Nail sets don’t need much, but they do appreciate basic respect.
If the striking end starts to “mushroom” outward, dress it with a file (or replace the tool) so metal fragments don’t become surprise confetti.
Keep the tip clean and avoid using it as a pry bar, chisel, or “universal poking device.”
Every tool hates that job, including this one.
Safety Notes You Should Actually Follow
Any time you’re striking metal with metal, there’s potential for chips or fasteners to bounce.
Wear eye protection (look for impact-rated safety eyewear markings like Z87/Z87+), keep bystanders out of the line of fire,
and make sure your hammer and tools are in good condition.
If you’re teaching a younger DIYer, this is a great moment to model “safe looks cool” (because it does).
Quick FAQ
How deep should I set a finish nail?
Usually just a hair below the surfaceabout 1/32″ to 1/16″so filler can level it.
Deeper isn’t better; it just creates more work and can weaken thin trim.
Can I use a nail set on stained wood?
Yes, but be strategic about hiding the divot. Color-matched putty helps, and tiny wood plugs can be nearly invisible if you match grain and species.
Do I need a spring-loaded nail set?
Not strictly. It’s a “nice-to-have” for tight spaces and quick touch-ups.
If you do lots of trim in corners or near obstructions, spring-loaded can feel like a cheat code.
What if the nail set keeps slipping?
Usually it’s the wrong tip size, an off-center position, or a deformed tip.
Try a larger size (if appropriate), reset carefully, and make sure the tip isn’t damaged.
Real-World Experiences: of “Yep, That Happened” (and What It Taught Me)
The first time I used a nail set on baseboards, I thought, “This is adorablelike a tiny metal pencil.”
Ten seconds later, I discovered two universal truths: (1) finish nails love to stop 1/64″ above flush just to annoy you,
and (2) your hammer will absolutely leave a dent in freshly primed trim the moment you start feeling confident.
The nail set fixed the proud nails instantly, but it also revealed something sneaky: precision isn’t about strengthit’s about calm.
On a door casing project, I learned the value of matching tip size the hard way. I grabbed a nail set that was too small, lined it up “close enough,” and tapped.
The tool slipped, leaving a second dimple right next to the nail head. Now the nail hole had a little buddy.
Could I fill both and sand? Yes. Did it feel like my trim had developed an unexpected beauty mark? Also yes.
After that, I started treating nail sets like drill bits: pick the right size, and everything gets easier.
Then there was the time I was installing a narrow piece of decorative molding near a corner where swinging a hammer felt like trying to play tennis in a phone booth.
That’s when I finally understood why spring-loaded nail sets have fans. With the spring tool, I didn’t need a full swingjust a controlled “pull and snap.”
It was still a two-hand operation, but it reduced the awkward angles that usually lead to accidental dents.
If you’ve ever tried to set nails behind a radiator pipe or near a cabinet side panel, you know the joy of a tool that works in cramped spaces.
My most surprisingly useful nail-set moment happened during a repair, not an install. A finish nail in trim had worked slightly loose over time and was catching on dust cloths.
I didn’t want to pull it (risking splintering the trim), and I didn’t want to drive it deeper with a hammer (risking denting the wood).
The nail set solved it in two light taps. Tiny fix, big satisfaction. It’s the kind of tool that earns respect by saving you from small-but-infuriating problems.
Finally, there’s the finish strategy lesson: what you do after setting the nail matters as much as setting it.
For paint-grade trim, a good filler, a quick sand, and paint makes the hole vanish.
For stain-grade work, the same filler can look like a sad beige freckle. That’s when I started experimenting with color-matched putty and, for special projects, tiny wood plugs.
When the grain lines up, those plugs are almost magicallike the nail hole never existed and you definitely didn’t spend 20 minutes finding the perfect scrap piece.
The nail set is the quiet hero at the start of that whole illusion. And if your goal is clean trim that looks like it grew there naturally,
it’s one of the most satisfying little tools you can own.
Conclusion
A nail set isn’t flashy, battery-powered, or likely to star in an action moviebut it is the difference between “nailed on” and “finished.”
Whether you’re setting a few proud nails after using a finish nailer, hand-nailing delicate trim, or making fasteners disappear before paint,
this tool gives you control right where it counts: the final millimeter.
Keep a small set of sizes, use light, accurate taps, and you’ll get cleaner results with less filler, less sanding, and fewer “why is there a dent?” mysteries.


