Table of Contents >> Show >> Hide
- Quick Diagnosis: Figure Out What’s Actually Broken
- Tools & Supplies You’ll Actually Use
- Repair #1: Stop a Leak at the Basket Strainer (Most Common Farmhouse Sink Leak)
- Repair #2: Fix a Leaking P-Trap or Slip-Joint Connection
- Repair #3: Fix a Leaky or Drippy Faucet (Handle, Spout, or Base)
- Repair #4: Reseal the Sink-to-Counter Joint (Caulk/Silicone)
- Repair #5: Stabilize a Loose Farmhouse Sink (Support & Mounting Fixes)
- Repair #6: Fix Chips, Scratches, and “What Is That Stain?” by Sink Material
- When to Call a Plumber (or a Countertop Pro)
- Prevent the Next Sink Emergency
- Conclusion
- DIY Repair Diaries: of Real-World Experiences (So You Don’t Repeat Them)
A farmhouse (a.k.a. apron-front) kitchen sink is basically the pickup truck of the kitchen: it hauls everything,
looks rugged, and somehow still gets blamed when there’s a puddle under it. The good news? Most farmhouse sink
“repairs” are really three categories: stopping leaks, stabilizing the heavy beast, and fixing cosmetic battle scars.
This guide walks you through diagnosis and DIY fixes that actually hold upwithout turning your cabinet into a
swamp or your weekend into a regret montage.
Quick Diagnosis: Figure Out What’s Actually Broken
Step 1: Identify the type of problem
- Water under the sink = drain, P-trap, disposal, supply lines, or faucet connections.
- Water on the countertop edge or cabinet face = failed caulk/silicone seal (or splashing that’s finding a weakness).
- Sink feels loose or “thunks” when you set down a pot = support/mounting issue (common with heavy fireclay or cast iron).
- Chips, scratches, stains = surface repair and better daily habits (yes, habits… we’ll be gentle about it).
Step 2: Do the 2-minute leak map
- Dry everything under the sink with a towel.
- Place paper towels under: the drain basket, each slip-joint nut, disposal outlet, dishwasher hose, and the shutoff valves.
- Run water for 60 seconds, then stop and watch. The first wet paper towel is your culprit.
Tools & Supplies You’ll Actually Use
You don’t need a rolling toolbox to fix a sink. You do need the right basics so you’re not improvising with a butter knife
and pure optimism.
- Bucket + old towels (the bucket is for water; the towels are for your dignity)
- Adjustable wrench or channel-lock pliers
- Screwdriver set, utility knife, plastic scraper
- Plumber’s putty (or stain-free putty) and/or 100% silicone (kitchen & bath)
- PTFE (Teflon) tape for threaded connections (not slip joints)
- Replacement parts as needed: basket strainer, rubber slip-joint washers, P-trap kit, supply lines
- Caulk gun, rubbing alcohol, microfiber cloth
- Optional but nice: headlamp (because under-sink lighting is historically terrible)
Repair #1: Stop a Leak at the Basket Strainer (Most Common Farmhouse Sink Leak)
If water appears right under the drain opening, the basket strainer seal is usually the villain. This is especially common
when putty dries out, the locknut loosens, or someone “fixed” it by cranking it down like they were tightening lug nuts.
Symptoms
- Drips form directly under the drain opening (above the P-trap).
- Leak worsens when the sink is full or when you drain a full basin.
How to fix it
- Shut off water if you’ll be bumping supply lines, and put a bucket under the trap.
- Remove the P-trap (hand-loosen slip nuts if possible). Expect some waterthis is normal and not a moral failing.
- Loosen and remove the strainer locknut from underneath. Hold the strainer body from above so it doesn’t spin.
- Scrape off old putty/silicone from the sink opening and clean with alcohol. The surface must be clean and dry.
-
Choose your sealant:
- Stainless/metal sinks: plumber’s putty is typical.
- Stone/composite or surfaces that can stain: use stain-free putty or silicone per manufacturer guidance.
- Reinstall the strainer: press the flange down evenly, install gaskets/washer/locknut below, and tighten snugly.
- Wipe off squeeze-out around the flange on top.
- Reassemble the trap and test: fill the sink, let it sit, then drain while watching for drips.
Pro tip: Tighten in small increments. Over-tightening can deform parts, split gaskets, oron brittle surfacesrisk cracking.
Snug and even beats “Hulk tight.”
Repair #2: Fix a Leaking P-Trap or Slip-Joint Connection
If the leak is lowerat the curved trap, the tailpiece, or where pipes meetyour issue is usually a misaligned joint, a
cracked washer, or a nut that’s either loose or cross-threaded.
Fast fixes that work
- Hand-tighten first: Most slip-joint nuts seal with compression washers. Hand-tight + a small extra turn is often enough.
- Realign the pipes: If the trap is pulling sideways, it will leak. Loosen, reposition, then retighten.
- Replace washers: If the washers are flattened, split, or missing, replace them (cheap, effective, sanity-saving).
- Replace the trap if it’s cracked, corroded, or a confusing puzzle of adapters.
Important: Do not use putty on slip-joint washers. Putty is for flanges and non-pressurized sealsyour trap seals by washer compression.
Repair #3: Fix a Leaky or Drippy Faucet (Handle, Spout, or Base)
A faucet can leak in a few classic ways: dripping from the spout, leaking around the handles, or seeping underneath onto the deck/counter.
Many repairs are as simple as replacing an O-ring, washer, or cartridgeafter you shut off the valves and stop the fountain show.
Basic approach
- Turn off the hot and cold shutoff valves under the sink and open the faucet to relieve pressure.
- Identify the faucet type (cartridge, compression, ball, ceramic disk).
- Disassemble carefully (take photos as you go so reassembly isn’t a guessing game).
- Replace worn parts (O-rings, seat washers, springs, or the whole cartridge if needed).
- Reassemble and test for leaks at the handle and base.
Shortcut for success: Bring the old cartridge/washer to the hardware store for an exact match. “Close enough” is how you earn a sequel to the same leak.
Repair #4: Reseal the Sink-to-Counter Joint (Caulk/Silicone)
Farmhouse sinks often get blamed for leaks that are actually failed caulk. Water creeps into tiny gaps, then drips down the cabinet face or
wets the countertop substrate. If you see darkened wood, musty smell, or a peeling bead of sealant, it’s time to recaulk.
How to reseal like you mean it
- Remove old sealant with a plastic scraper/utility knife. Don’t gouge the counter.
- Clean the area with rubbing alcohol and let it dry completely (silicone hates damp surfaces).
- Tape the edges if you want a clean line (future-you will be grateful).
- Apply 100% silicone (kitchen & bath) in a steady bead.
- Tool the bead with a wet finger or caulk tool, then remove tape.
- Let it cure per the tube before heavy water exposure.
Note: Plumber’s putty is not a substitute for silicone at the sink-to-counter seam. Putty seals, but it isn’t an adhesive and doesn’t handle movement the same way.
Repair #5: Stabilize a Loose Farmhouse Sink (Support & Mounting Fixes)
This is where farmhouse sinks differ from standard drop-in sinks: many are heavy enough to demand real structural support, not just clips and hope.
If the sink shifts, it can stress plumbing connections, break caulk lines, and even contribute to countertop seam problems.
Warning signs you have a support problem
- The sink “drops” slightly when filled.
- Caulk line repeatedly cracks or separates.
- You hear creaking/settling, or the apron looks out of square with the cabinet face.
- Plumbing suddenly doesn’t line up the way it used to.
DIY stabilization steps (safe version)
- Empty the sink and remove everything from the cabinet.
- Support the sink from below temporarily using a sturdy platform and shims (do not jack directly against fragile sink surfaces).
- Inspect the existing support: look for cracked rails, sagging plywood, loose fasteners, or water-damaged cabinet sides.
-
Add or rebuild support using one of these methods:
- Plywood deck + side cleats: a thick plywood platform fastened to cabinet sides, sitting under the sink basin.
- 2×4 ledger rails: rails on both sides that carry the load, plus a front rail where possible.
- Adjustable sink support hardware: useful when the countertop is already installed and you need fine adjustment.
- Recheck level front-to-back and side-to-side before removing temporary supports.
- Retest plumbing alignment so pipes aren’t forced into a crooked connection.
When to stop DIY: If the countertop is separating, the cabinet is rotten, or the sink is crackedpause and call a pro. Structural sink repairs can get expensive when done twice.
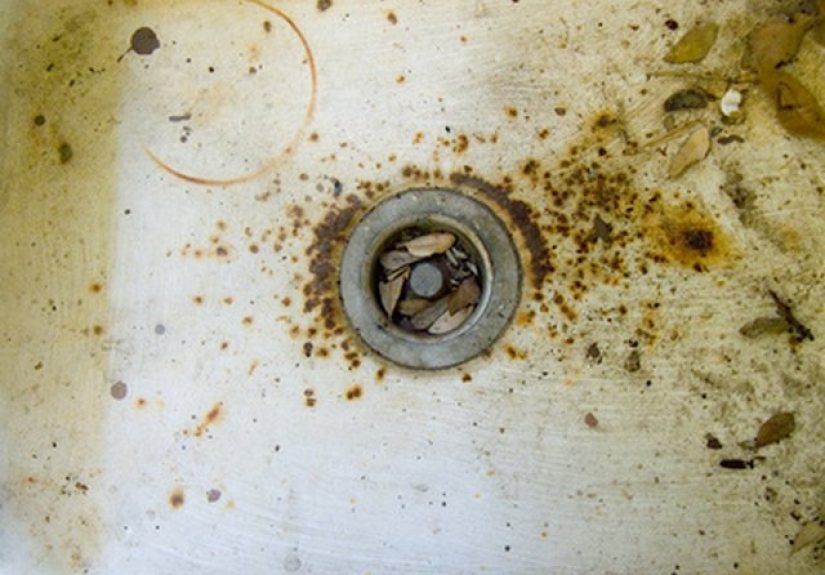
Repair #6: Fix Chips, Scratches, and “What Is That Stain?” by Sink Material
The repair depends heavily on what your farmhouse sink is made of. Treat stainless like fireclay and you’ll create new problems. Treat fireclay like stainless and you’ll just waste polish.
Fireclay / Vitreous China (glazed ceramic)
- Routine marks: use non-abrasive cleaners and soft sponges; rinse and dry to prevent mineral buildup.
- Small chips: use a color-matched repair kit or porcelain touch-up product designed for glazed surfaces.
- Cracks through the body: cosmetic fillers may hide it briefly, but a structural crack usually points toward replacement (or manufacturer service).
Enameled Cast Iron
- Gray scuffs: often metal transferuse a cleaner made for enameled cast iron and a soft cloth.
- Chips exposing metal: fix promptly to prevent rust. Clean, dry, and use an appropriate enamel repair product per instructions.
- Rust spots: address early; don’t “sand forever” and remove more enamel than necessary.
Stainless Steel
- Light scratches: many manufacturers recommend buffing with the grain using approved polishing compounds and pads.
- Stains/rust specks: avoid steel wool; use non-scratch pads and stainless-safe cleaners; rinse thoroughly and dry.
- Best daily habit: rinse and wipe dry to reduce water spots and keep the finish consistent.
Granite Composite (like SILGRANIT)
- Daily cleaning: dish soap, soft sponge, circular motions, rinse, dry with microfiber.
- Hazy stains/limescale: a deeper weekly clean helps; avoid harsh abrasives and metal scrub pads.
- Scratches: often more “appearance” than damagecleaning and drying can reduce visibility; follow manufacturer care advice.
Copper/Brass (less common, but very farmhouse-y)
- Patina is normal (it’s not dirty; it’s “character”).
- Use gentle soap and avoid acidic/alkaline cleaners that can strip finishes or create uneven coloring.
When to Call a Plumber (or a Countertop Pro)
- You see leaks coming from inside the wall or the shutoff valves won’t fully close.
- Multiple drains back up at once (possible venting or main line issues).
- The sink is cracked, the countertop seam is opening, or the cabinet structure is water-damaged.
- You need to remove/reinstall a garbage disposal and you’re not confident with the wiring and alignment.
- Repairs keep failing in the same spot (that’s a symptom, not a mystery).
Prevent the Next Sink Emergency
- Use a bottom grid or rack to reduce impact and scuffs (especially on fireclay and enamel).
- Don’t let harsh chemicals camp out in the sink for long periods; rinse well after cleaning.
- Dry it more often than you thinkwater spots and mineral buildup are sneakier than they look.
- Listen for changes: a new creak, a new smell, a new driptiny clues save big repairs.
Conclusion
Repairing a farmhouse kitchen sink isn’t one jobit’s a quick decision tree: seal the drain, align the plumbing, recaulk the perimeter,
and make sure the sink is actually supported like the heavy-duty centerpiece it is. Start with the leak map, fix the simplest failure point first,
and don’t “tighten harder” as your primary strategy. Your sink will keep doing its joband your cabinet will stay pleasantly non-aquatic.
DIY Repair Diaries: of Real-World Experiences (So You Don’t Repeat Them)
1) The “It’s Just a Tiny Drip” that turned into a cabinet sauna. One of the most common stories with farmhouse sinks starts with a
faint damp smell and a barely-wet paper towel. The leak was the basket strainerso small it only appeared when the sink was full. Over weeks,
it wicked into the cabinet floor and swelled the particleboard. The fix wasn’t fancy: new strainer, fresh putty, careful tightening. The lesson:
slow leaks are more dangerous than big leaks because they don’t trigger panicjust quiet damage.
2) The over-tightened strainer that caused a “mystery leak.” Another classic: someone tightened the strainer nut with heroic effort,
thinking “tighter = better.” The gasket distorted, the flange didn’t seat evenly, and the leak returnedworse. The redo repair worked only after
everything was disassembled, cleaned to bare surface, and tightened gradually while checking alignment. The lesson: compression seals want even pressure,
not maximum pressure. Plumbing is a relationship, not a wrestling match.
3) The loose farmhouse sink that kept cracking the caulk. A homeowner recaulked three times and blamed “bad silicone.”
The real issue was movement: the heavy sink wasn’t fully supported, so it settled just enough to break the seal line. Once a proper support deck and
side rails were added, the caulk finally stayed intact. The lesson: caulk is not structural support. If the sink moves, the caulk losesevery time.
4) The stainless sink “scratch panic” that wasn’t actually a crisis. People notice stainless scratches under bright light and assume
the finish is ruined. In many cases, it’s a mix of metal transfer marks plus fine scratches that blend over time. Cleaning properly and buffing lightly
with the grain improved the appearance a lot. The lesson: stainless is meant to be used. Aim for “clean and consistent,” not “museum glass perfection.”
5) The fireclay chip that became invisible (and the crack that didn’t). Minor chips on glazed sinks can often be touched up convincingly
with the right kit and patiencethin layers, proper cure time, and realistic expectations about color matching. But when someone tried to “repair” a structural
crack with filler, it held… until temperature changes and daily use reopened it. The lesson: cosmetic repairs can look great; structural cracks usually need
manufacturer guidance or replacement. Knowing which problem you have saves money and frustration.


