Table of Contents >> Show >> Hide
- Quick Table of Contents
- 3 simple rules that keep any system working
- 27 Clever Craft Storage Ideas
- 1) Install a pegboard “tool wall” for grab-and-go supplies
- 2) Add clear cups or jars to corral small tools (and stop “tiny item drift”)
- 3) Convert a rolling cart into a mobile “project station”
- 4) Use cube shelving with bins for category-based storage
- 5) Turn magazine files into standing storage for vinyl, paper pads, or sketchbooks
- 6) Use a file sorter for cardstock, finished prints, and “works in progress”
- 7) Store ribbon spools on a dowel rod (with a built-in dispenser vibe)
- 8) Use a tiered stand to display small bottles and jars
- 9) Try drawer dividers for tiny chaos: beads, findings, and accessories
- 10) Use clear, stackable bins for backstock and bulky supplies
- 11) Create a “wrap station” with vertical storage
- 12) Use an over-the-door organizer for light, grabby items
- 13) Add shallow wall shelves for paints, inks, and display-worthy tools
- 14) Use a magnetic strip for metal tools
- 15) Corral washi tape in clear drawers (or shallow trays)
- 16) Store markers and pens uprightby type, not just color
- 17) Build a “glue + adhesive zone” with a spill-proof bin
- 18) Use lidded boxes for “messy media” (glitter, flocking, powders)
- 19) Make a “current project tray” to prevent half-finished pileups
- 20) Use a lazy Susan (turntable) for quick-access supplies
- 21) Store fabric in folded “mini bolts” to maximize shelf space
- 22) Use binder rings to tame stencil sets and sample swatches
- 23) Store thread, floss, or cord in a divided organizer with labels
- 24) Use under-bed storage for low-frequency supplies
- 25) Create a “kid craft cabinet” with easy-to-clean containers
- 26) Turn an unused closet into a craft supply command center
- 27) Use “zones” to keep your craft space functional and calm
- Real-life experiences: what actually works long-term (and what doesn’t)
- Conclusion
Crafting is magic. Craft storage is… the part where the magic tries to escape the room and take over your entire home.
If you’ve ever bought “just one more” roll of washi tape and suddenly found it multiplying like it pays rent, this guide is for you.
Below are 27 practical, good-looking, real-life-friendly craft storage ideasbuilt for everything from tiny apartments to full-blown craft rooms.
Before we dive in: the best craft organization systems do three things(1) make supplies easy to see, (2) make them easy to reach, and (3) make them easy to put back.
If your system fails at step three, you don’t have storageyou have a museum exhibit you never visit.
Quick Table of Contents
- 3 simple rules that keep any system working
- 27 clever craft storage ideas
- Real-life experiences (what actually sticks long-term)
- Wrap-up + SEO tags
3 simple rules that keep any system working
Rule #1: Store by “how you craft,” not by “what you bought”
Group supplies by the way you use them: “paper crafts,” “painting,” “sewing,” “kid crafts,” “gift wrap,” “Cricut/vinyl,” etc.
When everything for one hobby lives together, projects start faster and cleanup takes less willpower (and fewer dramatic sighs).
Rule #2: Make the “most used” stuff the easiest to grab
Your daily essentials should be one-hand reachable: scissors, tape runner, glue, ruler, pens/markers, and your “where did I put that” tool (usually tweezers).
Put backstock and seasonal items up high, down low, or behind doors.
Rule #3: Label like your future self is a stranger
If a bin says “STUFF,” it will become a black hole. Labels should be specific: “Acrylic Paint,” “Embroidery Floss,” “CardstockNeutrals,” “Hot GlueSticks,” “Stamps + Ink Pads.”
Bonus: labeling is the closest thing adults have to gold stars.
27 Clever Craft Storage Ideas
1) Install a pegboard “tool wall” for grab-and-go supplies
Pegboards are the MVP of craft room organization because they use vertical space and keep tools visible. Add hooks for scissors and rulers, cups for pens/brushes, and small baskets for tape and glue.
Put the most-used tools at eye level so crafting feels effortless.
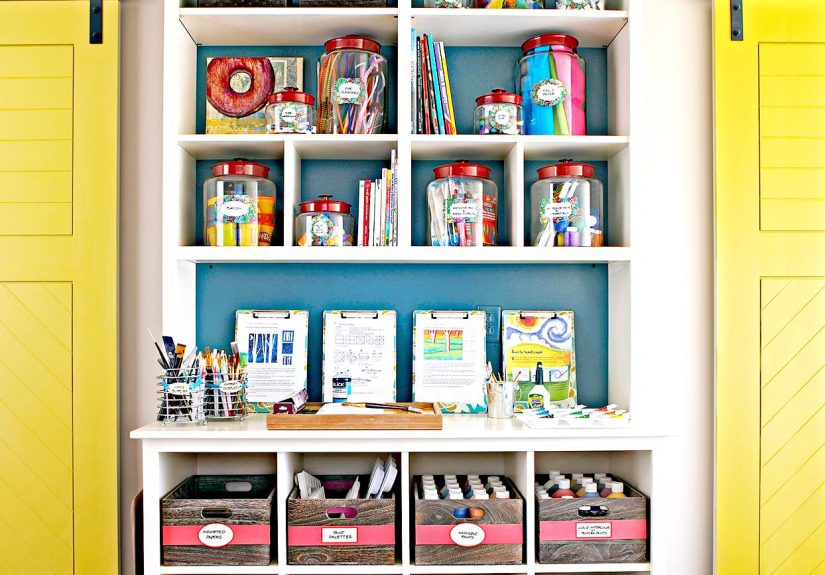
2) Add clear cups or jars to corral small tools (and stop “tiny item drift”)
Clear containers make it easy to find what you needespecially small items like paintbrushes, bone folders, crochet hooks, or blending tools.
Keep jars on a tray so you can lift the whole set when you need workspace back.
3) Convert a rolling cart into a mobile “project station”
Rolling carts are perfect for crafts because projects are rarely loyal to one table. Use the top tier for tools, the middle for current project supplies,
and the bottom for refills. Roll it next to your desk, couch, or dining tablethen park it away when guests come over and you want to look like a person with hobbies, not a glitter-powered tornado.
4) Use cube shelving with bins for category-based storage
Cube shelves work because they’re flexible: one cube per category, hobby, or family member. Slide in fabric bins for messy supplies,
or clear bins if you prefer “see everything.” Mix open and closed storage so your room can be functional and calming.
5) Turn magazine files into standing storage for vinyl, paper pads, or sketchbooks
Vertical storage saves space and protects edges. Magazine holders are ideal for 12×12 scrapbook paper pads, cutting mats, heat-transfer vinyl rolls,
or drawing pads. Label the spines so you can grab “CardstockBrights” in one second flat.
6) Use a file sorter for cardstock, finished prints, and “works in progress”
An upright file organizer can keep paper projects from bending. Assign slots to “To Cut,” “To Glue,” “To Mail,” and “Done.”
This is especially helpful if you batch-make cards or printables.
7) Store ribbon spools on a dowel rod (with a built-in dispenser vibe)
Slide ribbon spools onto a rod mounted under a shelf or inside a cabinet. Add a small cutter (or keep scissors nearby) and you’ve basically created a ribbon boutique.
It prevents unraveling and keeps colors visiblebecause yes, you do need 14 shades of “basically pink.”
8) Use a tiered stand to display small bottles and jars
Tiered organizers (often used for spices) keep paint bottles, glitter jars, embossing powders, or ink re-inkers visible. The “stadium seating” effect means you won’t forget what you ownand won’t buy duplicates you discover later like an archaeological artifact.
9) Try drawer dividers for tiny chaos: beads, findings, and accessories
Beads, jewelry findings, buttons, and mini embellishments love to migrate. Drawer dividers or small compartment trays keep categories separated.
Tip: divide by “type” (jump rings, clasps) or by “project kit” (everything for that bracelet in one spot).
10) Use clear, stackable bins for backstock and bulky supplies
Stackable bins are great for items you don’t need daily: extra glue sticks, resin molds, seasonal stamps, party craft supplies, or overflow yarn.
Clear bins let you see what’s inside; a label tells you where it goes backboth matter.
11) Create a “wrap station” with vertical storage
Gift wrap rolls store best upright in a tall bin or slender container. Use a hanging organizer for ribbons, tags, and tape.
Keep a small basket nearby for scissors, double-sided tape, and your emergency “I need a bow in 10 seconds” supplies.
12) Use an over-the-door organizer for light, grabby items
Over-the-door pockets are ideal for kid crafts, glue bottles, markers, yarn skeins, stencils, or small paint sets.
It’s an easy storage win for small spacesespecially if you don’t want to drill holes.
13) Add shallow wall shelves for paints, inks, and display-worthy tools
Shallow shelves keep items from hiding behind each other. Line up paint bottles by color family, organize inks by type,
and store frequently used tools where you can see them. If it’s beautiful, you’ll maintain it longer.
14) Use a magnetic strip for metal tools
Magnetic strips can hold small metal scissors, tweezers, craft knives (safely positioned), and metal rulers.
Keep it high enough that little kids can’t grab sharp items, and you’ll free up drawer space instantly.
15) Corral washi tape in clear drawers (or shallow trays)
Washi tape is adorable. It’s also a tiny cylinder that rolls into unknown dimensions when left unattended.
Shallow drawers or trays keep rolls visible and stop them from bouncing into the abyss.
16) Store markers and pens uprightby type, not just color
Upright storage prevents tips from drying unevenly (depending on the marker type) and makes selection faster.
Separate alcohol markers, brush pens, gel pens, and fineliners so you’re not grabbing the wrong tool mid-project.
17) Build a “glue + adhesive zone” with a spill-proof bin
Keep liquid glues, Mod Podge, spray adhesive, and tape refills in one contained bin or caddy. If something leaks,
cleanup stays inside the binnot across your shelf like a modern art installation you didn’t plan.
18) Use lidded boxes for “messy media” (glitter, flocking, powders)
Glitter is basically craft confetti with a long-term lease. Store it in a lidded container with a dedicated scoop
and a small microfiber cloth. Keeping messy media contained saves your sanityand your carpet.
19) Make a “current project tray” to prevent half-finished pileups
A tray or shallow bin dedicated to your active project keeps parts together: instructions, tools, pieces, and notes.
When life happens, you can move it off your workspace without losing the plot (or the tiny pieces).
20) Use a lazy Susan (turntable) for quick-access supplies
Turntables are perfect for bottles and small tools: paint, inks, glues, stamp cleaners, or kid supplies.
Spin to find what you needno digging, no knocking over six items like you’re playing craft Jenga.
21) Store fabric in folded “mini bolts” to maximize shelf space
Fold fabric around cardstock or thin boards so pieces stack neatly and stay visible. File them vertically in a bin
(like a fabric library) so you can flip through prints without unfolding everything.
22) Use binder rings to tame stencil sets and sample swatches
Hole-punch stencils (where appropriate) or store them in punched sleeves, then keep sets on binder rings.
This works for color swatches, crochet stitch samples, and paper templates tooeverything stays together.
23) Store thread, floss, or cord in a divided organizer with labels
Embroidery floss and thread are easiest to manage when each color has a home. Use compartment boxes or floss bobbins,
then label by color number or shade. It turns a tangled drawer into “I am absolutely a professional.”
24) Use under-bed storage for low-frequency supplies
Under-bed bins are great for seasonal craft kits, large rolls, extra canvases, bulk cardstock, or foam sheets.
Choose flat, lidded containers and label the front edge so you can pull exactly what you want.
25) Create a “kid craft cabinet” with easy-to-clean containers
If kids craft in your home, dedicate one cabinet or shelf to kid-safe supplies: washable markers, glue sticks, paper, stickers.
Use containers that can survive spills, and store anything sharp or messy higher up.
26) Turn an unused closet into a craft supply command center
A closet can hold shelves, drawers, hanging organizers, and bins without visually cluttering your room.
Sort by category, label clearly, and keep your most-used supplies at chest height for maximum ease.
27) Use “zones” to keep your craft space functional and calm
The most organized craft rooms aren’t just tidythey’re designed. Create zones: cutting, assembling, painting, sewing, packing/shipping.
When each zone has the right storage nearby, you stop carrying supplies across the room like a craft nomad.
Real-life experiences: what actually works long-term (and what doesn’t)
If you’ve ever reorganized your craft supplies and felt like a productivity wizardonly to watch the system collapse two weeks laterwelcome to the club.
The “best” craft storage idea isn’t the prettiest one on the internet. It’s the one you’ll still use when you’re tired, busy, and halfway through a project.
Based on common patterns in real homes and heavily used craft spaces, here’s what tends to stick.
First, visibility beats perfection. Closed bins look clean, but if everything is hidden, you’ll forget what you own and buy duplicates.
Many crafters land on a hybrid approach: display the pretty, frequently used items (markers, paints, ribbons) and hide the chaotic backstock (extra glue, bulk paper, overflow yarn).
That mix keeps the room inspiring without turning it into a supply avalanche.
Second, friction is the enemy. If you need to open three lids, remove two stacks, and unlatch a container to access scissors,
you’ll stop putting scissors away. The most durable systems make the “put back” step ridiculously easyopen-top cups for tools,
a labeled “adhesives” bin you can grab with one hand, or a rolling cart that doesn’t require you to re-shelve ten items after every session.
Your craft room should work like a kitchen: the spatula lives near the stove for a reason.
Third, projects need a parking spot. A huge chunk of craft clutter isn’t “stuff”it’s active projects.
A dedicated project tray (or two) makes a difference because it prevents the classic “half a project on every surface” problem.
When you can slide a tray onto a shelf, you protect your work, keep pieces together, and reclaim your workspace without losing momentum.
Fourth, labels are not optional if more than one person uses the suppliesor if you do multiple crafts.
Vague bins become junk drawers. Specific labels become a map. Some crafters even label by “function” (Cutting Tools, Fasteners, Finishing)
rather than by brand or material. The goal is to find things quickly and to know exactly where they go back.
Finally, your system will changeand that’s a win. Crafting hobbies evolve.
Maybe today it’s watercolor and hand lettering, and next month it’s embroidery, then suddenly you own a heat press “because it was on sale.”
Choose storage that adapts: cube shelving, adjustable bins, pegboards, rolling carts, and drawer dividers.
The more flexible your craft supply storage, the less often you’ll need to start over from scratch.
Conclusion
Craft storage doesn’t have to be complicated. Pick a few “big wins” (pegboard, rolling cart, labeled bins), then build from there.
When your tools are easy to see and your supplies are easy to put away, you spend less time hunting and more time making.
And that’s the whole pointbecause creativity should be messy in the fun way, not in the “where did my scissors go again?” way.


