Table of Contents >> Show >> Hide
- Before You Set Anything: A Quick Rodent Reality Check
- Way #1: Use Snap Traps (Fast, Effective, No DramaIf Placed Correctly)
- Way #2: Use Live-Catch Traps (When You Prefer Capture Without a Snap)
- Way #3: “Catch the Problem,” Not Just the Rodent (Exclusion + Targeted Trapping + When to Call a Pro)
- After You Catch One: Clean Up Safely (And Don’t Skip This Part)
- What Not to Do (Because the Internet Will Suggest It Anyway)
- of Real-World Experiences (Composite Scenarios People Commonly Run Into)
- Conclusion: The Rodent Doesn’t Get to Win the Lease Agreement
Hear that tiny scritch-scratch at 2 a.m.? Congratulationsyour home may have a new roommate who doesn’t pay rent,
doesn’t do dishes, and absolutely will not respect your snack boundaries.
Whether it’s a mouse, a rat, or the mysterious “small creature” your cat keeps staring at like it owes money, the goal is the same:
catch it safely, remove it responsibly, and make your house a terrible place for rodents to hang out in the future.
The best approach is an integrated one: catch + clean + close the doors. If you only trap but don’t seal entry points,
you’re basically running an all-inclusive rodent hotel with free breakfast.
Before You Set Anything: A Quick Rodent Reality Check
1) Confirm you’re dealing with a rodent (and not your imagination)
Common signs include droppings, chewed packaging, gnaw marks, shredded paper/fabric (nesting material), smudgy rub marks along walls,
and noises in walls or ceilingsespecially at night. If you spot these, skip the “maybe it’s just the house settling” phase and move straight
to action.
2) Safety first (especially if there are kids or pets)
- Keep traps away from pets and little kids. Curious paws and fingers can get hurt.
- Wash hands after handling traps and avoid direct contact with droppings.
-
If you’re a teen dealing with this at home, it’s smart to loop in an adultnot because you can’t handle it,
but because cleanup and trap placement can involve sharp parts and sanitizers.
3) Do a 10-minute “snack audit”
Rodents show up for three things: food, water, and shelter. Before you trap, reduce the payoff:
store pantry foods in hard containers, clean crumbs, secure trash, and don’t leave pet food out overnight.
Fewer snacks = fewer repeat customers.
Way #1: Use Snap Traps (Fast, Effective, No DramaIf Placed Correctly)
Snap traps are popular for a reason: they’re affordable, widely available, andwhen used correctlyquick.
The secret is not “more cheese.” The secret is placement.
How snap trapping works (and why walls matter)
Rodents usually travel along edgeswalls, cabinets, pipesbecause it feels safer than crossing open spaces.
So if you set a trap in the middle of the floor, you’re basically setting it in the rodent equivalent of an empty parking lot:
technically possible, emotionally unlikely.
Practical snap-trap setup tips that actually help
- Place traps along walls and in areas where you’ve seen droppings or chewing.
- Use a tiny smear of bait (common choices include nut butter). A small amount makes them work for it.
- Use multiple traps rather than one “hero trap.” Rodents don’t line up politely.
-
If the rodent seems cautious, many pest experts recommend a short “getting used to it” period:
set a baited trap without triggering it for a day, then set it normally. (This can reduce trap-shy behavior.)
When snap traps are the best choice
- You want a quick resolution (and you don’t want to figure out what to do with a live rodent).
- You’ve identified a clear travel route (behind the stove, along baseboards, near a pantry corner).
- You can keep traps out of reach of pets and small children.
Common snap-trap mistakes (a.k.a. “Why is nothing happening?”)
- Too much bait. If it can be stolen easily, it will belike office donuts.
- Traps too far apart. If activity is high, tighten your spacing in active zones.
- Traps in open areas. Rodents often avoid exposed spaces.
- Ignoring the entry point. Catching one doesn’t stop the next one from visiting.
Humor break: If you’ve been using “ultrasonic repellers” and hoping rodents will hear the vibe and leave…
I admire your optimism. Most evidence-based guidance puts prevention, exclusion, and physical trapping ahead of gimmicks.
Way #2: Use Live-Catch Traps (When You Prefer Capture Without a Snap)
Live-catch traps can be appealing if you want to avoid lethal trapping. They’re also useful if you’re not sure what you’re dealing with
(mouse vs. small rat) and want a clear look before deciding next steps.
Types of live-catch traps
- Single-catch live traps: small boxes or tubes that close once the rodent enters.
- Multi-catch traps: can capture more than one mouse over time in high-activity areas.
Live-trap success depends on two things
- Frequent checks. A live trap isn’t a “set it and forget it” tool. Check often.
- Smart placement. Just like snap traps, place along walls and near activity.
What most people don’t think about (but should)
If you live-catch a rodent, you now have a decision to make. In many places, relocating wildlife can be restricted or discouraged,
and releasing too close to home often means it comes back. If you’re unsure, the most responsible move is to
contact local animal control or a licensed pest professional for guidance on what’s appropriate where you live.
When live-catch is a good fit
- You’re dealing with one occasional “sneaker” rodent, not a full infestation.
- You can check traps frequently and handle the next steps responsibly.
- You’re prioritizing a non-lethal approach and have a clear plan for what happens after capture.
Quick reality check: If you keep catching rodents but new ones show up, that’s not a “trap problem.”
That’s an entry point problem.
Way #3: “Catch the Problem,” Not Just the Rodent (Exclusion + Targeted Trapping + When to Call a Pro)
This third “way” is the grown-up, long-term fix: you trap what’s inside, then you make sure more can’t get in.
Think of it as the difference between mopping up water and turning off the faucet.
Step A: Inspect like you’re auditioning for a detective show
Rodents can squeeze through surprisingly small openings. A practical inspection includes checking:
around plumbing, behind appliances, garage door corners, vents, crawl spaces, under sinks, and gaps in door sweeps.
Step B: Seal entry points (this is where “rodent-proofing” happens)
- Close gaps around pipes, vents, and utility lines.
- Repair screens and add proper covers where needed.
- Use durable materials (rodents can chew softer stuff).
- Fix door sweeps and weather stripping so there’s no easy under-door access.
If you’re not sure where they’re coming in, a professional can often find entry points quickly because they do this daily,
not just when a rodent decides to audition for your ceilings.
Step C: Keep trappingbut more strategically
While you’re sealing, continue trapping in the highest-activity areas. This shortens the time you’re sharing your home with the
“tiny freeloading parkour athlete” currently exploring behind your fridge.
When it’s time to call a pro
- You hear activity in walls/ceilings consistently.
- You’re seeing droppings daily or in multiple rooms.
- There are nests, widespread chewing, or repeat sightings.
- You can’t safely place traps away from pets/kids.
- You suspect a rat problem (often requires more robust methods and exclusion work).
Also worth saying plainly: avoid “DIY poison adventures.” Besides safety concerns for pets and people, it can create bigger problems
(like odor if a rodent dies in an inaccessible space). Physical trapping + exclusion is typically the cleaner, more controlled route.
After You Catch One: Clean Up Safely (And Don’t Skip This Part)
Cleanup matters because droppings and urine can carry germs. The key point from public-health guidance:
don’t sweep or vacuum dry droppingsthat can stir particles into the air.
A safer cleanup approach
- Ventilate the area if possible.
- Wear disposable gloves (and wash hands afterward).
- Wet the area first with a disinfectant solution and let it soak briefly before wiping.
- Dispose of cleaning waste in a sealed or covered trash container.
If you’re using strong disinfectants, follow label directions and involve an adult if needednobody wants “rodent cleanup”
to turn into “why are my eyes burning?”.
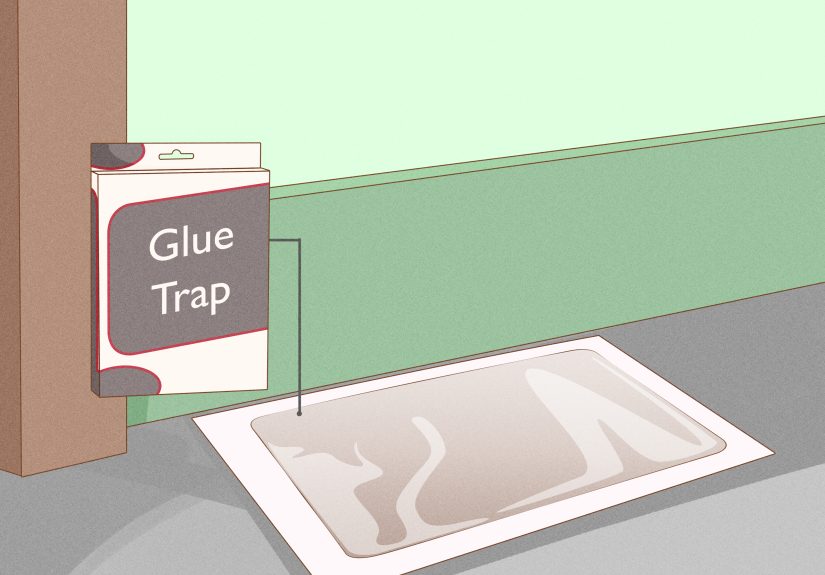
What Not to Do (Because the Internet Will Suggest It Anyway)
-
Glue traps: widely criticized as inhumane, and some jurisdictions are moving to restrict or ban them.
Even when legal, they can trap non-target animals and create a distressing situation. -
Relying on gimmicks alone: “magic” repellents, random scents, and ultrasonic devices typically don’t replace
real prevention and trapping. - Ignoring the entry point: if you don’t seal access, you’re playing rodent whack-a-mole.
of Real-World Experiences (Composite Scenarios People Commonly Run Into)
The most consistent “experience” homeowners report isn’t the moment of catching the rodentit’s the emotional roller coaster
before that happens. It usually starts with denial: “That’s not a mouse… it’s probably just the house making sounds.”
Then comes the bargaining stage: “If I clean the kitchen really well, surely it’ll leave out of respect.” (It will not.)
After that, people reach the action stage: searching the pantry for chewed cereal boxes like they’re solving a crime.
One common scenario: a single mouse shows up in the kitchen during a cold snap. The household puts out one trap in the middle
of the floor with a heroic chunk of cheese like it’s a cartoon. Nothing happens for days. Frustration grows. Then someone moves
the trap to the baseboard behind the stovewhere droppings were foundand uses a tiny smear of bait. Suddenly, success. The lesson
people take away is almost always the same: placement beats creativity. Rodents don’t wander around announcing themselves; they move
along edges and in tight spaces where they feel covered.
Another frequent experience is “trap shyness” (or what people interpret as trap shyness). Someone sets a trap, finds the bait gone,
and assumes the rodent has a PhD in engineering. Often it’s simpler: the bait was easy to steal, the trap was placed where the rodent
didn’t naturally travel, or there weren’t enough traps to cover the main routes. Many people report better results after they reduce the
bait to a smear and add multiple traps along the same wall runespecially behind cabinets or near the pantry corner where activity is obvious.
A third scenario involves a live-catch trap. People like the idea, until they wake up and realize they now have a living, stressed animal in a box.
That’s when the “what now?” panic kicks in. The most responsible households tend to plan this part ahead: they check local guidance, contact a local
animal control resource if needed, and avoid impulsive decisions. In homes with kids, adults often choose snap traps insteadnot out of cruelty, but
because the practical reality of handling a live rodent can be more stressful and complicated than expected.
The last experience is the one most people wish they had started with: sealing entry points. Many report catching one rodent, feeling victorious,
and then hearing scratching again a week later. That’s the moment the lightbulb goes on: catching is step one, but exclusion is the “game over” move.
Once households seal gaps, improve door sweeps, and store food properly, they often describe a noticeable shiftnot just fewer rodents, but fewer creepy
midnight noises and a calmer sense that their home is back under their control. The biggest takeaway people share is simple and oddly empowering:
if you remove food access and close the door, most rodent problems shrink fastand staying rodent-free becomes dramatically easier.
Conclusion: The Rodent Doesn’t Get to Win the Lease Agreement
Catching a rodent in your house isn’t about one perfect trapit’s about using the right method for your situation and backing it up with prevention.
Choose your approach (snap trap, live-catch trap, or a pro-supported plan), place traps where rodents actually travel, clean up safely, and seal entry points.
Do those four things and you’ll stop dealing with “one mouse” that mysteriously turns into “a whole situation.”


