Table of Contents >> Show >> Hide
- What Is a Lateral Pelvic Tilt (and Why Should You Care)?
- Why It Happens: Functional vs. Structural Causes
- Before You Start: Quick Self-Checks (Not a Diagnosis)
- The 5 Best Exercises for Lateral Pelvic Tilt
- How to Put It Together: A Simple Weekly Plan
- Stretching: Helpful, But Not the Whole Story
- FAQ: Real Questions People Ask (Usually While Googling in Their Socks)
- Real-Life Experiences (500+ Words): What People Commonly Notice When Working on Lateral Pelvic Tilt
- Conclusion
Ever look in the mirror and think, “Why does my waistband look like it’s trying to exit the building at a diagonal?” If one hip seems higher than the other (or one pant leg mysteriously feels longer), you might be dealing with a lateral pelvic tiltsometimes called pelvic obliquity or “uneven hips.”
The good news: many cases are functional (muscle strength, control, and habits), not a permanent structural issue. The better news: you don’t need a wizardjust a smart plan and a little consistency. This guide breaks down five exercises that target the muscles most responsible for keeping your pelvis level, plus a practical routine, form cues, and what to expect along the way.
What Is a Lateral Pelvic Tilt (and Why Should You Care)?
A lateral pelvic tilt means one side of your pelvis sits higher than the other. Think of your pelvis like a serving tray: if it tips sideways, everything stacked on top (your spine) and everything hinged below (your hips, knees, and ankles) may have to compensate.
Common signs people notice include:
- One hip looks higher in photos or mirrors.
- Your waistband or belt line slopes.
- One pant leg drags or wrinkles differently.
- Recurring one-sided low back tightness, hip discomfort, or a “pinchy” feeling on one side.
- A tendency to stand with more weight on one leg (the “casual flamingo”).
It’s not just cosmetic. A persistent side-to-side pelvic tilt can influence gait (how you walk), single-leg stability, and load distribution through the low back and hips.
Why It Happens: Functional vs. Structural Causes
1) Functional (most exercise-friendly)
Functional lateral pelvic tilt often comes from muscle imbalance and motor control: one side’s hip stabilizers are underperforming, while the other side may be doing overtime. The usual suspects include the gluteus medius/minimus (outer hip abductors), deep core stabilizers, and sometimes the quadratus lumborum (a low-back/side-body muscle that can “hike” the pelvis).
2) Structural (needs professional evaluation)
Sometimes the pelvis tilts because the body is adapting to something structurallike a true leg length discrepancy, spinal curve (scoliosis), or certain hip joint issues. Exercises can still help you move better, but they won’t “stretch your femur longer,” no matter how motivated you are.
If your hip height difference appeared suddenly, follows an injury, or comes with numbness, weakness, night pain, fever, unexplained weight loss, or pain that keeps escalatingget evaluated. And if you strongly suspect a meaningful leg length difference, a clinician can confirm it properly and guide options.
Before You Start: Quick Self-Checks (Not a Diagnosis)
Try these simple checks to guide your focus:
- Mirror check: Stand naturally and look at your belt line. Do you shift weight to one leg? Many people “lock” into their stronger side without realizing it.
- Single-leg stance: Hold onto a wall lightly, lift one foot, and see if your pelvis drops or hikes. A noticeable drop can hint at hip abductor control issues.
- Walking clue: Film a short walk from behind (phone on a stable surface). If your pelvis wobbles side-to-side, your hip stabilizers may be asking for backup.
The goal of the exercises below is to build the “level pelvis” skillstrength + controlespecially during single-leg work, because walking is basically a series of one-leg balances that happen really fast.
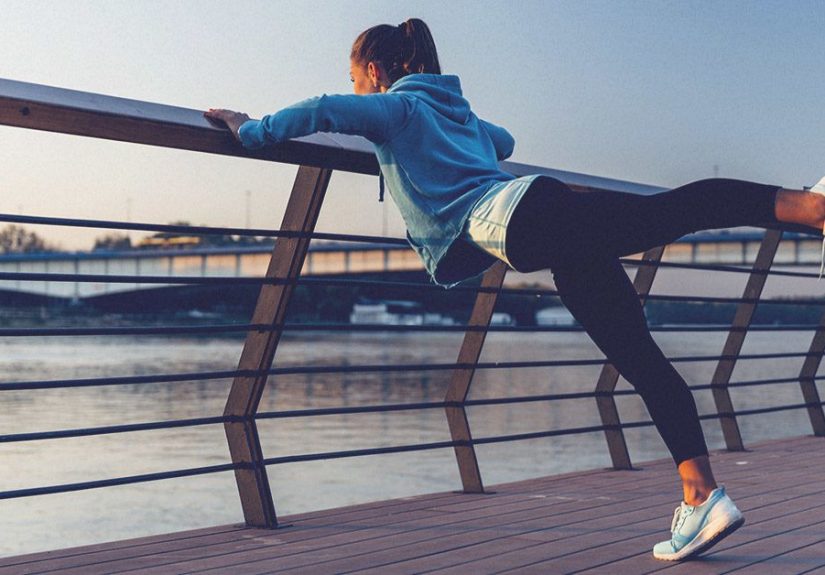
The 5 Best Exercises for Lateral Pelvic Tilt
These movements emphasize hip abductor strength, core stability, and pelvic control. Do them slowly. If you rush, your stronger side will happily “help,” which is not what we’re paying it for.
Exercise 1: Clamshell (Slow and Controlled)
Why it helps: The clamshell targets the gluteus medius/minimus and hip external rotatorskey players in pelvic stability.
How to do it:
- Lie on your side with hips and knees bent. Stack your shoulders and hips (no rolling backward).
- Keep feet together and lift the top knee like a clamshell opening.
- Pause briefly at the top without twisting your pelvis.
- Lower slowlycontrol is the point.
Form cues: “Hips stay stacked.” “Move from the hip, not the low back.”
Common mistakes: Rolling backward, letting the pelvis rotate open, speed-running the reps.
Dosage: 2–3 sets of 8–12 reps per side, 3–4 days/week.
Make it harder: Add a mini band above the knees or increase the pause at the top to 2–3 seconds.
Exercise 2: Side Plank (Knee Version) with Hip Abduction
Why it helps: Lateral pelvic tilt is a “frontal plane” problem (side-to-side). Side planks train your side-body core (obliques) while your outer hip works to keep the pelvis levelexactly the combo you want.
How to do it:
- Set up on your side with forearm under shoulder, knees bent.
- Lift hips so you form a straight line from shoulder to knee.
- Keeping the pelvis steady, lift the top knee (or top leg if progressing) slightly away from the bottom knee.
- Lower with control while maintaining the plank.
Form cues: “Ribs down.” “Hips forward.” “Don’t let the top hip roll back.”
Common mistakes: Shoulder shrugging, pelvis twisting, holding breath like it owes you money.
Dosage: 2 sets of 6–10 reps per side, or 15–25 seconds holds, 3 days/week.
Make it easier: Do a plain side plank hold first (no leg movement). Or shorten the hold time.
Exercise 3: Banded Lateral Walk (a.k.a. Monster Walk’s Responsible Cousin)
Why it helps: Lateral walks load the hip abductors in a functional stance. The band provides constant tension, nudging the glutes to stabilize your pelvis with each step.
How to do it:
- Place a loop band above your knees (easier) or at ankles (harder).
- Take a small athletic stance: hips back slightly, knees soft, chest tall.
- Step sideways with controlno wobbling hips, no knee collapse.
- Bring the trailing foot in slowly without letting the band “snap” you together.
Form cues: “Small steps, steady hips.” “Knees track over toes.” “Stay level like a table.”
Common mistakes: Huge steps (compensation), knees diving inward, turning it into a weird sideways shuffle.
Dosage: 2–3 rounds of 8–12 steps each direction, 3 days/week.
Make it harder: Put the band lower (ankles/feet) or add a 2-second pause on each step.
Exercise 4: Hip Hike on a Step (Pelvic Level-Up Training)
Why it helps: This teaches your hip abductors to control the pelvis in single-leg stance the exact skill needed to reduce side-to-side “pelvic wobble” when walking or running.
How to do it:
- Stand on a step with one foot; the other leg hangs off the side.
- Keep the standing knee softly bent and your torso tall.
- Let the free hip drop slightly (controlled), then “hike” the pelvis up by using the standing-side hip.
- Move slowly and keep shoulders levelno leaning to cheat.
Form cues: “Tall spine.” “Pelvis moves; shoulders stay calm.”
Common mistakes: Leaning the torso, pushing off the hanging leg, rushing the motion.
Dosage: 2–3 sets of 8–12 reps per side, 3 days/week.
Make it easier: Hold a wall for balance and use a smaller range of motion.
Exercise 5: Single-Leg Bridge (or Marching Bridge)
Why it helps: Bridges build glute strength while teaching your pelvis to stay stable as you shift load. A marching or single-leg bridge adds a stability challenge that exposes (and trains) the side-to-side control you want.
How to do it (marching bridge option):
- Lie on your back, knees bent, feet flat.
- Brace your core gently and lift into a bridge (hips up, ribs not flared).
- Keeping hips level, lift one foot a few inches (a “march”), then set it down.
- Alternate sides without letting the pelvis drop or rotate.
Form cues: “Belt line stays level.” “Move the leg; don’t twist the hips.”
Common mistakes: Overarching the low back, letting one hip sag, pushing with the hamstrings only.
Dosage: 2–3 sets of 6–10 marches per side (or 6–10 single-leg reps), 2–4 days/week.
Make it easier: Do a standard two-leg bridge hold for 15–30 seconds.
How to Put It Together: A Simple Weekly Plan
You don’t need a 90-minute “pelvis pilgrimage.” You need consistency and progressive challenge. Here’s a straightforward plan that fits into real life.
3-Day/Week Routine (15–20 minutes)
- Clamshell: 2–3 x 8–12/side
- Side plank (knee) + hip abduction: 2 x 6–10/side (or 15–25 sec holds)
- Banded lateral walk: 2–3 rounds of 8–12 steps each way
- Hip hike on step: 2–3 x 8–12/side
- Marching bridge: 2–3 x 6–10 marches/side
Progression Tips (Weeks 1–4)
- Weeks 1–2: Prioritize form. Slow reps, smaller range, more pauses.
- Weeks 3–4: Add band resistance, longer holds, or extra setsonly if your pelvis stays level.
- Rule of thumb: If your form collapses, you’re practicing compensation, not correction.
Stretching: Helpful, But Not the Whole Story
Many people try to “fix uneven hips” by stretching everything in sight like they’re kneading pizza dough. Mobility can help if you’re stiff, but strength and control are usually the missing ingredients. If you feel very tight on one side (often the low back/side body or inner thigh), gentle stretching can be a useful add-on just don’t let it replace strengthening.
Quick add-ons (optional):
- Side-body stretch: Reach overhead and gently side-bend away from the tight side.
- Adductor (inner thigh) rock-back: On hands and knees, extend one leg to the side and rock hips back gently.
FAQ: Real Questions People Ask (Usually While Googling in Their Socks)
How long does it take to improve a lateral pelvic tilt?
Many people notice better awareness and steadier single-leg control in 2–4 weeks with consistent practice. Visual changes can take longer, and structural factors may limit what “level” looks like. Think “better movement” first, “perfect symmetry” second.
Can I fix lateral pelvic tilt with stretching alone?
Stretching may reduce discomfort, but lasting change typically needs strength + coordinationespecially in the hip abductors and core. If you only stretch, your body often returns to its default under load (standing, walking, stairs).
What if I feel pain during these exercises?
Mild muscle effort or “working” sensations are normal. Sharp pain, joint pinching, numbness, or symptoms that worsen afterward are not. Scale back range, reduce resistance, or stop and seek professional input if symptoms persist.
Real-Life Experiences (500+ Words): What People Commonly Notice When Working on Lateral Pelvic Tilt
When people start working on lateral pelvic tilt, the first “aha” moment is usually not visualit’s behavioral. Many realize they’ve been living on one hip. You know the stance: one knee locked, one hip popped, and the pelvis basically saying, “I’m going to hang out over here forever.” The moment you start paying attention, you catch yourself doing it while brushing your teeth, scrolling your phone, or waiting for the microwave to finish its dramatic countdown performance.
In the first week, it’s common to feel awkward rather than strong. People often report that the clamshell feels easy on one side and strangely difficult on the otherlike the weaker side is trying to send a Slack message to the brain, but the Wi-Fi is down. That’s normal. The goal early on is not max effort; it’s clean reps. Slowing down feels “too easy” until you realize slow reps expose the exact wobbles you’ve been hiding for years.
With side planks, a classic experience is discovering that your shoulder gets tired before your hip does. That doesn’t mean the exercise is “wrong”it means you need the knee version, shorter holds, or more rest. People who stick with it often notice that daily movements start to feel more stable: carrying groceries, stepping off a curb, or climbing stairs stops feeling like a one-sided negotiation between your hip and low back.
The banded lateral walk is where reality checks happen. Many people begin with huge steps and quickly realize the band is forcing their knees to cave inward or their hips to sway. The most successful “experience” here is accepting smaller, controlled steps. When you do it right, you’ll feel the outside of your hips workingnot your lower back doing interpretive dance. A lot of people also notice that once their glute medius wakes up, their feet and knees track more naturally, especially if they tend to collapse inward when they squat or go downstairs.
Hip hikes create a different kind of awareness: they teach you what a level pelvis actually feels like. People often say, “I didn’t realize I lean to one side when I stand on one leg.” That’s the point. After a couple of weeks, many report they can balance longer without gripping the ground with their toes or clenching their jaw like they’re trying to crack a walnut. (Jaw clenching, by the way, is not a core strategy.)
Bridgesespecially marching bridgestend to reveal asymmetry fast. A very common experience is that one side cramps in the hamstring, while the other side actually uses the glute. That usually improves when people adjust their setup: feet a little closer to the hips, ribs down, and pushing evenly through the whole foot rather than just the heels. Over time, people often describe a “more even” feel in their hips when they walkless hip hiking, less side-to-side sway, and fewer moments where the low back feels like it has to stabilize everything alone.
Finally, the most consistent experience of all: progress is rarely linear. Some days you feel stable and strong; other days, you feel wobbly for no obvious reason. That doesn’t mean you’re failingit means your nervous system is learning. If you keep the doses reasonable, prioritize form, and stay consistent, most people find that their pelvis becomes more predictable under load. And honestly, “predictable” is underrated. Predictable is what lets you exercise, walk, work, and live without constantly thinking about your hips like they’re a high-maintenance houseplant.
Conclusion
Lateral pelvic tilt can feel like a stubborn, lopsided mysteryuntil you treat it like what it often is: a strength-and-control problem that shows up most during single-leg tasks. Focus on the big movers and stabilizers: hip abductors, glutes, and your side-body core. Work slowly, stay consistent, and measure success by how you move not by whether you can achieve perfect mirror symmetry by next Tuesday.


