Table of Contents >> Show >> Hide
- 1. Planting Your Hydrangea in the Wrong Spot
- 2. Letting the Soil Stay Soggy (or Bone-Dry)
- 3. Pruning at the Wrong Time
- 4. Ignoring Winter and Frost Damage
- 5. Overfeeding with the Wrong Fertilizer
- 6. Ignoring Soil pH and Expecting Magic Color Changes
- 7. Crowding, Planting Too Deep, or Neglecting the Roots
- How to Set Your Hydrangeas Up for Success
- Real-Life Hydrangea Lessons from the Garden
- Final Thoughts: Happy Hydrangeas, Happy Gardener
Hydrangeas are the drama queens of the shrub world. When they’re happy, they explode with big, cloud-like blooms.
When they’re unhappy, they sulk with crispy leaves, floppy stems, and absolutely zero flowers. If your hydrangeas
look more “sad salad” than “garden showpiece,” chances are a few common care mistakes are holding them back.
The good news? Most hydrangea problems come down to fixable issues: wrong light, soggy soil, mistimed pruning,
or fertilizer that’s more leaf-factory than bloom-booster. Once you understand what your hydrangeas actually want,
they become surprisingly easy shrubs to growand they’ll reward you with armfuls of blossoms year after year.
Let’s break down seven of the biggest hydrangea mistakes gardeners make and how to fix each one so your plants
can finally thrive.
1. Planting Your Hydrangea in the Wrong Spot
Think of hydrangeas as sun-sensitive celebrities: they love the spotlight, but not a harsh midafternoon paparazzi
attack. Most common garden hydrangeas (especially bigleaf and mountain types) want morning sun and
afternoon shade or bright dappled light. Too much hot afternoon sun can scorch leaves and wilt blooms,
while heavy, deep shade often means strong foliage but very few flowers.
Signs Your Planting Location Is the Problem
- Leaves look bleached, crispy, or droopy by late afternoon.
- Plant is tucked under dense trees and produces lots of leaves but almost no blooms.
- The side of the house feels like a brick oven in summer and your hydrangea sits right in it.
Ideally, hydrangeas should get several hours of gentle morning sun and then protection from intense afternoon rays.
In cooler northern climates, some varieties tolerate more sun. In hotter southern zones, that same amount of sun
can be too much, especially on reflective surfaces like near driveways or south-facing walls.
How to Fix a Bad Location
-
Move the plant in spring or fall. Transplant when the weather is mild and the plant is less
stressed. Dig a wide hole, keep as much root ball as you can, and water consistently after the move. -
Use shade from structures or companion plants. Small trees, fences, or shade sails can soften
harsh afternoon sun. -
Choose varieties that match your light. Panicle hydrangeas tolerate more full sun, while
bigleaf and oakleaf hydrangeas are better with partial shade.
2. Letting the Soil Stay Soggy (or Bone-Dry)
Hydrangeas have “hydra” right in the nameof course they love water. But they don’t love living in a swamp.
Constantly soggy soil can suffocate roots and invite root rot, while bone-dry soil leaves them drooping and stressed.
The trick is moist, well-drained soil, not mud and not dust.
How Overwatering Shows Up
- Yellowing or browning leaves that feel soft or limp rather than crispy.
- Wilting, even though the soil feels very wet.
- Foul-smelling or slimy soil around the root zone.
How Underwatering Shows Up
- Leaves that droop and perk up only temporarily after watering.
- Crispy brown edges on leaves and smaller blooms.
- Soil that pulls away from the sides of the container or planting hole.
Instead of frequent, shallow watering, hydrangeas prefer deep soakings that reach the roots,
followed by a chance for the top inch or two of soil to dry slightly. In most climates, that means about an inch of
water per week during the growing season, more often in containers or extreme heat.
Watering Fixes That Actually Work
-
Stick your finger in the soil. If the top inch is dry, it’s time to water. If it’s still wet,
wait. -
Improve drainage. Mix compost into heavy clay, avoid planting in obvious low spots, and don’t
let containers sit in saucers full of water. -
Mulch is your friend. A 2–3 inch layer of organic mulch (shredded bark, leaves, or pine straw)
helps keep moisture levels more consistent and protects roots from temperature swings.
3. Pruning at the Wrong Time
If your hydrangea grows lots of lush, healthy leaves but no blooms, mistimed pruning is often the main culprit.
Different types of hydrangeas bloom on different kinds of wood:
- Bigleaf (macrophylla) and oakleaf hydrangeas: mostly bloom on old wood (last year’s stems).
- Panicle and smooth hydrangeas: bloom on new wood (the current season’s growth).
- Reblooming varieties: often flower on both old and new wood.
If you cut old-wood bloomers hard in late fall, winter, or early spring, you’re probably removing the flower buds
your plant already made for next summer. That’s like throwing away next year’s bouquet by accident.
Pruning Rules That Keep Blooms Coming
-
Know what you’re growing. Check the plant tag or look up the variety so you know if it blooms
on old wood, new wood, or both. -
For old-wood bloomers: Only prune immediately after flowering in summer. Remove dead wood,
weak stems, and a small portion of the oldest stems to improve shape. -
For new-wood bloomers: Prune in late winter or very early spring. You can cut them back more
heavily to encourage strong, new flowering stems. -
When in doubt, go light. It’s almost always safer to remove only dead or clearly damaged stems
than to give your hydrangea a severe haircut.
4. Ignoring Winter and Frost Damage
In colder climates, hydrangea buds can be zapped by winter cold or surprise spring frosts. The plant comes back
just fine, but the flower buds on old wood are gone, which means a leaf-only performance all season.
How Cold and Frost Hurt Hydrangeas
-
Back-to-back harsh winters can kill buds that formed the previous summer, especially on bigleaf
hydrangeas. - Hard late frosts can damage tender new growth and flower buds that have already started to swell.
- Exposed locations (like windy corners or isolated spots in the yard) make bud damage more likely.
Cold-Weather Protection Strategies
-
Plant in more sheltered sites. Near a fence, wall, or evergreen hedge often creates a slightly
warmer microclimate. -
Mulch generously in fall. A thicker layer of mulch helps moderate soil temperature and protect
roots. -
Cover during late frosts. Use frost cloth, old sheets, or lightweight blankets to protect buds
if a cold snap is forecast in spring. -
Choose varieties suited to your zone. Some bigleaf hydrangeas have been bred for improved
bud hardiness in colder regions.
5. Overfeeding with the Wrong Fertilizer
If you’ve been showering your hydrangeas with lawn fertilizer and getting nothing but gigantic leaves, you’ve
discovered a classic problem: too much nitrogen, not enough balance.
Hydrangeas do appreciate nutrients, but they don’t need constant heavy feeding. Overfertilizingespecially with
high-nitrogen productsencourages lots of green foliage at the expense of blooms. It can also stress roots and
make plants more vulnerable to pests and diseases.
Smarter Fertilizer Habits
-
Test your soil first. A simple soil test tells you what’s missing (or what you have too much of),
so you’re not guessing. -
Use a balanced, slow-release fertilizer. Look for something formulated for flowering shrubs
rather than high-nitrogen lawn food. -
Feed moderately. Often, one spring feeding is enough for the season, especially if you’re using
compost and mulch. -
Skip fertilizing stressed plants. If your hydrangea is wilted, waterlogged, or recently moved,
focus on water and soil health before adding fertilizer.
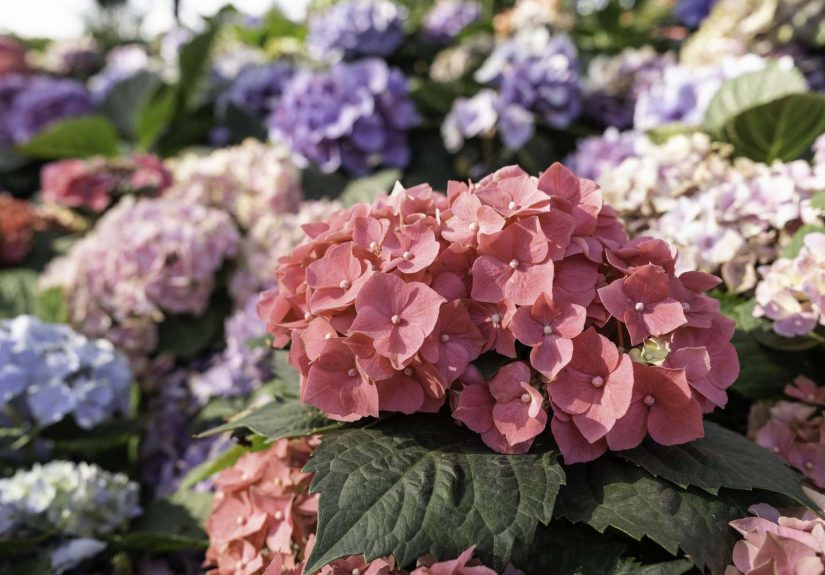
6. Ignoring Soil pH and Expecting Magic Color Changes
If you’ve sprinkled random products around your hydrangeas hoping they’ll “just turn blue,” you’re not alone.
Color change is one of the most misunderstood parts of hydrangea care.
Only certain typesmainly bigleaf and some mountain hydrangeaschange color based on soil pH and aluminum
availability. In simple terms:
- Acidic soil (around pH 5.5 or lower): more likely to produce blue blooms.
- Neutral to alkaline soil (around pH 6.5 and above): more likely to produce pink blooms.
- In-between pH: often results in purple or mixed blue-and-pink flowers.
Trying to change color too quickly by dumping lots of lime or aluminum sulfate around your plant can backfire,
causing nutrient imbalances or root damage.
How to Work With pH, Not Fight It
- Always start with a soil test. Knowing your current pH lets you adjust slowly and safely.
-
For bluer flowers: gradually acidify soil with products for acid-loving plants, or add amendments
like aluminum sulfate as directed on the label. - For pinker flowers: use garden lime to raise pH over time and reduce aluminum availability.
-
Be patient. Color changes happen over seasons, not overnight. Focus on plant health first; color
is the bonus.
7. Crowding, Planting Too Deep, or Neglecting the Roots
Hydrangeas may look like soft, fluffy shrubs above ground, but below the surface, they need room to stretch out.
Planting too deep, crowding them against a foundation, or wedging them under thirsty trees can cause chronic
stress that shows up as fewer blooms and slow growth.
Root-Related Mistakes to Avoid
-
Planting too deep: The top of the root ball should be level with or slightly above the surrounding
soil, not buried. -
Crowding shrubs: Planting hydrangeas too close together or too close to walls limits airflow,
encourages disease, and often leads to over-pruning just to keep them in bounds. -
Root competition: Planting under large trees can mean your hydrangea is always thirsty and in
deep shade, battling big roots for every drop of water.
Better Planting Practices
-
Give them space. Many hydrangeas eventually reach 4–6 feet wide or more. Plant accordingly so you
don’t have to constantly chop them back. -
Loosen and amend the planting area. Dig a hole wider than the root ball and mix in compost to
improve texture and drainage. -
Protect the root zone. Mulch, consistent watering, and avoiding heavy foot traffic on the root
area keep plants happier long term.
How to Set Your Hydrangeas Up for Success
When you step back, thriving hydrangeas all have a few things in common:
- A location with gentle morning sun and protection from harsh afternoon heat.
- Moist but well-drained soil, with regular deep watering during dry spells.
- Pruning that respects whether the plant blooms on old or new wood.
- Protection from extreme winter cold and surprise spring frosts where needed.
- Moderate, balanced feeding based on actual soil needsnot guesswork.
- Soil pH that’s understood and adjusted slowly if you care about color.
- Plenty of room for roots and branches to grow without constant hacking back.
Nail those basics and most hydrangea “mysteries” disappear. Your shrubs will reward you with bigger, longer-lasting
blooms and healthier foliage.
Real-Life Hydrangea Lessons from the Garden
Every gardener has at least one hydrangea story that starts with, “I thought I killed it…” and ends with a happy
surprise. While the science and how-to guides are essential, lived experience in the garden is what really makes
the information stick.
Picture a new homeowner who plants three bigleaf hydrangeas in a tight row against a blazing west-facing brick
wall. The first summer, they look decent. By the second year, the leaves are fried by July, the soil dries out
faster than a puddle on a sidewalk, and each shrub manages only a bloom or two. The gardener’s first instinct:
“I need more fertilizer.” In reality, those plants are begging for a different location, not more food.
After moving them to a spot with morning sun and afternoon shade, adding a thick layer of mulch, and watering
deeply once or twice a week instead of spritzing them daily, the shrubs rebound. It takes a full season for them
to settle in, but by year three, they’re covered in blooms. The big lesson: sometimes the bravest move is
digging up a struggling plant and giving it a fresh start in the right place.
Another common story centers on pruning. A gardener who loves “tidy” plants decides to cut hydrangeas back hard in
late winter, just like they do with roses. The plants leaf out beautifully in springlush, green, and full of
promise. Summer arrives… and there are no flowers. Frustrated, the gardener looks up hydrangea care and discovers
that their variety blooms on old wood. By cutting everything back, they literally removed the buds that were
already formed.
The next year, they resist the urge to prune heavily and only remove dead stems right after the plants finish
blooming. Suddenly, the hydrangeas are loaded with flowers again. That experience drives home a powerful point:
hydrangeas don’t always want a haircut just because you’re ready for yardwork. Timing matters more
than enthusiasm.
Soil pH experiments teach another kind of patience. Gardeners who dream of deep blue hydrangeas sometimes dump
products around their plants, hoping for instant color change. The more measured approach is slower but safer:
test the soil, make small adjustments, and wait a season or two. Along the way, they learn that healthy roots and
consistent care matter more than chasing a specific shade. Many end up loving the surprisesmixed pink and blue
blooms on the same shrub can be more charming than any carefully controlled color.
The overall pattern in these stories is simple: when hydrangeas struggle, they’re usually sending clues. Wilting at
midday but perking up at night might mean they’re just coping with heat. Constant drooping with wet soil points to
drainage problems. Leaves that emerge fine but turn black or brown after a late frost reveal cold damage, not a
mysterious disease. Once gardeners start reading these signals instead of treating every problem with “more water”
or “more fertilizer,” their hydrangeas respond beautifully.
So if your shrubs are not thriving yet, don’t assume you’ve failed. Most hydrangea success stories are built on a
little trial and error, a willingness to move a plant, and a habit of paying attention to the detailslight,
water, soil, and timing. Combine those lessons with the seven mistake fixes above, and your hydrangeas can go from
frustrating to fantastic in just a season or two.
Final Thoughts: Happy Hydrangeas, Happy Gardener
Hydrangeas might look high-maintenance, but once you stop making the seven big mistakeswrong light, poor watering,
mistimed pruning, ignoring winter damage, overfertilizing, misunderstanding soil pH, and crowding the rootsthey
become some of the most reliable, generous shrubs in your yard.
Treat them less like fragile divas and more like long-term garden partners: give them the right spot, steady care,
room to grow, and a little seasonal protection. In return, they’ll give you armloads of blooms, better curb appeal,
and a yard that looks like it belongs in a magazine every summer.


