Table of Contents >> Show >> Hide
- Quick Table of Contents
- Before You Hit Record: 6 Quick Choices That Save Your Sanity
- 1) Record a Webcam Video with the Windows Camera App
- 2) Record Your Screen Fast with Snipping Tool
- 3) Use Xbox Game Bar for Built-In Recording (Apps & Games)
- 4) Record (and Quickly Edit) with Microsoft Clipchamp
- 5) Record Like a Pro with OBS Studio (Free)
- 6) Record Your Screen Using PowerPoint (Yes, Really)
- 7) Capture Gameplay with NVIDIA ShadowPlay / Share Overlay
- 8) Record with AMD Radeon Software (Record & Stream / ReLive-Style)
- 9) Record and Share Fast with Loom (Screen + Webcam)
- Choosing the Best Way to Record a Video on a PC (Quick Recommendations)
- Real-World Recording Lessons (The “Why Is This Happening?” Section)
- Conclusion
Recording a video on a PC used to mean one of two things: (1) installing mysterious software from a website that looks like it time-traveled from 2006, or
(2) pointing your phone at your monitor like it’s a campfire ghost story. Luckily, modern PCsespecially Windows 11 machinescome with solid built-in
options, and the best third-party tools are easier than ever.
In this guide, you’ll learn nine easy, practical ways to record video on a PCwhether you’re capturing your screen, your webcam, your gameplay,
or all three at once. You’ll also get quick “best for” recommendations, step-by-step setup, and the little gotchas that make people yell “WHY IS THERE NO AUDIO?”
into the void.
Quick Table of Contents
- Windows Camera app (webcam video)
- Snipping Tool (fast screen recording)
- Xbox Game Bar (game/app recording)
- Microsoft Clipchamp (record + edit)
- OBS Studio (most control)
- PowerPoint Screen Recording (surprisingly useful)
- NVIDIA ShadowPlay/Share Overlay (instant replay)
- AMD Radeon Record & Stream (ReLive-style capture)
- Loom (shareable screen + webcam videos)
Before You Hit Record: 6 Quick Choices That Save Your Sanity
No matter which screen recorder you use, your results depend on a few basics. Think of this as the “pre-flight checklist” that prevents turbulence,
tears, and unintentional karaoke from a background tab.
- Decide what you’re recording: full screen, a window, or a selected region.
- Pick your audio: system audio, microphone, or both (and make sure the correct mic is selected).
- Choose quality: 1080p is usually the sweet spot; 4K is great but heavy.
- Close noisy tabs: your recording doesn’t need surprise autoplay ads.
- Check storage: video files grow fastespecially long recordings.
- Do a 10-second test: confirm audio, cursor visibility, and that you’re recording the right thing.
1) Record a Webcam Video with the Windows Camera App
Best for: talking-head videos, quick updates, simple webcam recordings (no screen capture needed).
If your goal is to record you (not your screen), Windows’ built-in Camera app is the fastest “open-and-go” option. No overlays. No scenes.
No accidental recording of your desktop chaos. Just you and your beautifully imperfect lighting.
How to do it
- Open the Camera app from the Start menu.
- Switch to Video mode.
- Confirm the correct camera is selected (especially if you have an external webcam).
- Hit Record, talk like a human, then stop when you’re done.
- Find your file in your default Camera save location (commonly under your Pictures/Camera Roll).
Why it’s great (and where it’s not)
- Pros: simple, built-in, good for quick webcam clips.
- Cons: limited controls; not designed for screen recording, multi-track audio, or pro editing workflows.
2) Record Your Screen Fast with Snipping Tool
Best for: quick tutorials, bug reports, short how-to videos, “look at this weird thing my computer is doing” evidence.
Snipping Tool isn’t just for screenshots anymore. On modern Windows 11 builds, it can record a selected area of your screen and save an MP4perfect
for short, clean screen recordings without installing anything.
How to do it
- Open Snipping Tool.
- Select Record (video mode), then choose New.
- Drag to select the area you want to capture.
- Click Start (there’s usually a short countdown).
- Click Stop, then save your MP4 (or send it to an editor if offered).
Pro tips
- Audio: if your Snipping Tool version supports it, enable mic/system audio before recording.
- Keep it short: Snipping Tool shines for quick clips, not hour-long sessions.
- Record the smallest area possible: tighter capture = clearer focus and smaller file sizes.
3) Use Xbox Game Bar for Built-In Recording (Apps & Games)
Best for: gameplay clips, recording a specific app window, quick recordings with audio on Windows.
Xbox Game Bar is the “it’s already there” recorder for Windows. It’s especially handy for games and many apps. The one big caveat:
it typically records an active app, not your entire desktopso it’s great when it works, and confusing when it refuses.
How to do it
- Open the game or app you want to capture.
- Press Win + G to open Game Bar.
- Open the Capture widget.
- Click Record (or press Win + Alt + R).
- Stop recording, then open the saved file from the Captures folder.
Common limitations (aka “Why won’t it record?!”)
- Some areas like the Windows desktop or File Explorer may not be recordable via Game Bar.
- If the Record button is disabled, check permissions, updates, or Game Bar settings.
- It records what you do in an appso switch apps carefully (or don’t).
4) Record (and Quickly Edit) with Microsoft Clipchamp
Best for: beginners who want a friendly interface, webcam + screen capture, and quick edits in the same place.
Clipchamp is like the helpful friend who says, “Record your screen… and while you’re here, let’s trim the awkward start where you stared at the button.”
It’s built around simple recording plus easy editing, which is exactly what most people want when they say “I need a video by lunch.”
How to do it
- Open Clipchamp (web or app, depending on your setup).
- Choose a screen, webcam, or screen + camera recording option.
- Allow permissions for microphone/camera if prompted.
- Record your clip, then drop it into the timeline.
- Trim, add captions or callouts, then export (often MP4).
Why people like it
- Low learning curve: record, trim, exportdone.
- Great for explainers: add text, music, simple transitions.
- Bonus: you can record multiple takes without turning your PC into a film studio.
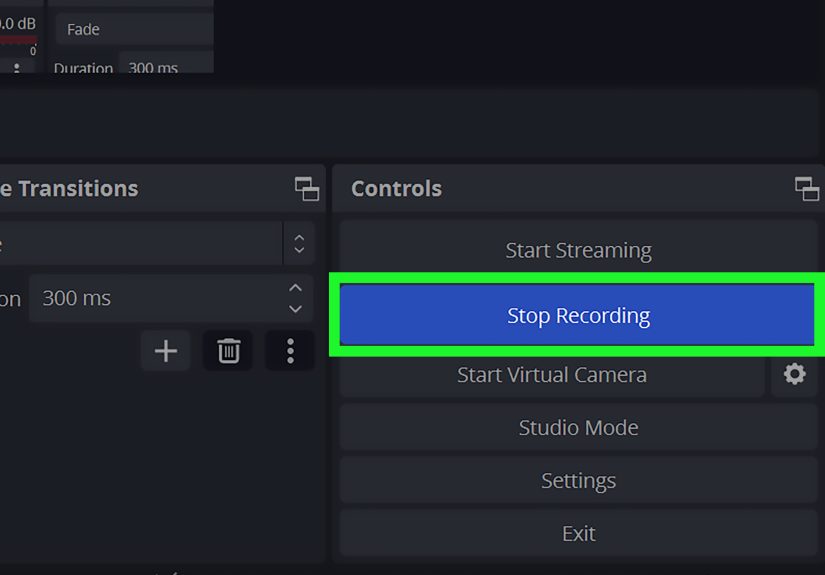
5) Record Like a Pro with OBS Studio (Free)
Best for: creators who want maximum control: scenes, multiple audio sources, webcam overlays, higher quality settings.
OBS Studio is the Swiss Army knife of screen recording. You can capture a display, a window, a game, your webcam, and multiple microphones,
then arrange it all like a directorwithout paying a dime. The trade-off is that OBS has options. Lots of options. (Don’t worryyou only need a few to start.)
A simple “first recording” setup
- Install and open OBS Studio.
- Create a Scene (think: your layout).
- Add a Source:
- Display Capture for full screen
- Window Capture for a specific app
- Game Capture for many games
- (Optional) Add Video Capture Device for your webcam (picture-in-picture).
- Check audio meters: Desktop Audio + Mic/Aux should move when you talk/play sound.
- Click Start Recording, then stop when finished.
Settings that matter most
- Resolution: 1920×1080 is plenty for most tutorials.
- Frame rate: 30 fps for tutorials; 60 fps for smooth gameplay.
- Encoder: hardware encoding (when available) reduces CPU stress.
6) Record Your Screen Using PowerPoint (Yes, Really)
Best for: educators, office users, slide-based tutorials, quick narrated walkthroughs.
PowerPoint has a built-in screen recorder that’s shockingly effective when you want to capture a short demo and drop it directly into a slide.
It’s not a full production studio, but it’s perfect for “here’s how to do the thing” videos inside training decks.
How to do it
- Open PowerPoint and go to the slide where you want the recording.
- Click Insert > Screen Recording.
- Select the area you want to capture.
- Enable audio and/or cursor recording if those options are available.
- Record, stop, and the video lands right inside your slide.
When PowerPoint is the right call
- You already live in slides and want the recording embedded.
- You need something quick for training, not a cinematic masterpiece.
- You want fewer moving parts (and fewer apps) in your workflow.
7) Capture Gameplay with NVIDIA ShadowPlay / Share Overlay
Best for: NVIDIA GPU users who want easy, low-performance-impact gameplay recording and “instant replay” clips.
If your PC has an NVIDIA GeForce GPU, ShadowPlay (often accessed through the NVIDIA overlay/Share features) is built for recording games with minimal fuss.
The killer feature is Instant Replay: it’s always buffering in the background so you can save the last X minutes after something awesome happens.
(Or after you accidentally win. It happens.)
How to do it (typical flow)
- Open the NVIDIA overlay (commonly Alt + Z).
- Choose Record to start/stop manually, or enable Instant Replay.
- Adjust quality settings: resolution, frame rate, and bit rate.
- Record your gameplay and locate saved clips in your capture folder.
Why it’s popular
- Hardware-assisted capture: typically lighter on performance than generic recorders.
- Instant Replay: great for highlights without recording everything.
- Simple hotkeys: easy to use mid-game.
8) Record with AMD Radeon Software (Record & Stream / ReLive-Style)
Best for: AMD GPU users who want built-in recording and streaming tools with customizable hotkeys.
AMD’s Radeon Software includes recording tools (often grouped under “Record & Stream” features). If you have an AMD GPU, this is one of the easiest ways
to capture gameplay with hotkeys and GPU-accelerated recordingno extra software required for basics.
How to do it
- Open AMD Software (Adrenalin edition on many systems).
- Find the Record & Stream settings (or search within settings for “Record”).
- Turn recording features On and set hotkeys you’ll actually remember.
- Choose audio sources (mic/system), quality, and file location.
- Start recording, play/do the thing, then stop and review your clip.
Best use cases
- Gameplay capture without heavy setup
- Quick highlight clips
- Users who prefer GPU-native recording options
9) Record and Share Fast with Loom (Screen + Webcam)
Best for: work updates, async team communication, product walkthroughs, “here’s what I mean” videos you can share instantly.
Loom is built for a modern reality: you don’t want to export, compress, upload, and send a 1.7GB file just to explain where the button is.
Loom lets you record your screen, webcam, or bothand then share a link like a civilized person.
How to do it
- Install Loom (desktop app or browser extension, depending on your preference).
- Pick your capture mode: screen only, camera only, or screen + camera.
- Select the window or screen you want to record.
- Check mic input, then start recording.
- Stop and share the video (often via an automatically generated link).
What makes Loom “easy”
- Sharing is the point: it’s designed for quick collaboration.
- Great for feedback loops: “Watch this and tell me if I’m missing something.”
- Less file juggling: fewer downloads and attachments.
Choosing the Best Way to Record a Video on a PC (Quick Recommendations)
Here’s the simplest way to pick a tool without spiraling into a 47-tab research situation:
- Need a webcam-only video? Use Windows Camera (fastest).
- Need a quick screen clip? Use Snipping Tool (lightweight).
- Recording a single app or gameplay? Use Xbox Game Bar (built-in) or NVIDIA/AMD (GPU tools).
- Want record + edit in one place? Use Clipchamp.
- Want the most control and best quality tuning? Use OBS.
- Need to put a recording into a slide deck? Use PowerPoint.
- Need instant sharing for work? Use Loom.
Real-World Recording Lessons (The “Why Is This Happening?” Section)
Let’s talk about what happens after you choose a screen recorderwhen real life shows up with muddy audio, missing files, and the kind of pop-up
that appears only when you start recording. These are the most common “in the wild” scenarios people run into while trying to record a video on a PC,
plus a few fixes that don’t require a computer science degree or a dramatic monologue.
Lesson #1: Audio is a two-headed monster. One head is your microphone. The other head is system audio. Some tools handle both easily,
others default to one, and a few will happily record silence while showing you an audio meter that looks suspiciously confident. The move:
do a 10-second test clip and play it back. If your voice sounds like you’re calling from inside a soup can, switch the microphone input.
If the computer audio is missing, confirm the recorder is allowed to capture system sound. And if you hear an echo? You’re probably recording the mic
plus speakers. Use headphones or mute one source.
Lesson #2: “Where did my recording go?” is a classic. Many apps save to a default folder like Videos/Captures or a project library inside the app.
The problem is that “default” often means “somewhere you will not think to look at 1:00 AM.” Get in the habit of checking the save location
before you start, especially if you’re recording a long session. Bonus tip: rename files right away. “Recording (12).mp4” is the digital equivalent
of a junk drawer.
Lesson #3: Notifications and pop-ups love attention. You can be halfway through a brilliant tutorial when your PC decides to inform you
that your printer is low on ink (a printer you don’t own). Before recording, enable Focus/Do Not Disturb, close chat apps, and hide anything private.
If you’re recording for work, assume your screen will display your most embarrassing bookmark at the worst possible moment. It’s not paranoia.
It’s experience.
Lesson #4: Performance issues aren’t personal. If your recording is choppy, your PC isn’t judging youit’s just overloaded.
Reduce the capture resolution (1080p instead of 4K), lower the frame rate (30 fps is fine for most tutorials), and close heavy apps.
If you have a GPU, enable hardware encoding in your recorder (OBS and GPU tools often support this). Also, record to a drive with enough free space;
when storage is low, Windows starts acting like it’s carrying groceries and someone just asked it to sprint.
Lesson #5: The “perfect tool” is the one you’ll actually use. People often download powerful software and then avoid recording because
the setup feels like assembling furniture without instructions. If you record once a month, a built-in tool like Snipping Tool or Game Bar might be
the best choice. If you record daily (tutorials, training, content), invest time in OBS or a workflow tool like Clipchamp/Loom. Your future self will thank you.
Your past self will still be confused, but your future self will be grateful.
Lesson #6: Your first take is allowed to be bad. Recording video on a PC gets easier fast, but only if you let yourself start.
The fastest improvement is consistency: use the same mic setup, the same window layout, and the same export settings. You’ll spend less time troubleshooting
and more time actually making videos. And if you mess up? Congratulationsyou have joined the rest of humanity. Just trim it out like a professional.
Conclusion
Recording a video on a PC doesn’t have to be complicated. If you want the quickest built-in options, start with Windows Camera (webcam),
Snipping Tool (fast screen clips), or Xbox Game Bar (games/apps). If you need better editing and a smoother workflow,
Clipchamp is a solid step up. For full creative control and pro-quality capture, OBS Studio is the heavyweight champ.
And if you want easy sharing for work or school, Loom keeps things simple.
The best method is the one that matches your goal: quick clip, polished tutorial, gameplay highlights, or shareable explainers.
Pick one, run a 10-second test, and press record. You’ve got this.


