Table of Contents >> Show >> Hide
- What Is Glass Silvering, Exactly?
- Before You Start: Safety Comes First
- Tools and Materials You’ll Typically Need
- How to Make Mirrors by Silvering Glass: 8 Steps
- Step 1: Choose the Right Glass
- Step 2: Set Up a Dust-Free Workspace
- Step 3: Clean the Glass Like Your Reflection Depends on It
- Step 4: Apply the Surface Prep or Sensitizer
- Step 5: Prepare the Silvering Chemistry Correctly
- Step 6: Apply the Silver Evenly
- Step 7: Rinse, Inspect, and Dry Carefully
- Step 8: Protect the Silver with Backing
- Common Problems and How to Avoid Them
- Is DIY Silvering Better Than Buying a Mirror?
- Conclusion
- Experience: What Making a Silvered Mirror Actually Feels Like
- SEO Tags
If you have ever looked into a mirror and thought, “Wow, this is just shiny chemistry with excellent confidence,” you are not wrong. A traditional glass mirror is essentially a sheet of glass with a reflective metal layer on the back. In classic silvering, that reflective layer is silver, deposited onto spotless glass by a chemical reaction. Sounds elegant, right? It is. It is also the kind of project that punishes shortcuts with streaks, bald spots, and the emotional damage of seeing your own disappointed face in a half-mirror.
This guide explains how to make mirrors by silvering glass in eight practical steps, with a focus on the real-world process: preparation, cleanliness, silvering, rinsing, drying, and protecting the finish. Because the chemistry can involve hazardous materials, this article is written as a high-level, safe, and realistic roadmap. For actual production, use a reputable commercial mirror-silvering kit or follow professional lab procedures and safety documentation exactly. Think of this article as the friendly expert at your shoulder saying, “Yes, you can do thisbut maybe not with a coffee mug and pure optimism.”
What Is Glass Silvering, Exactly?
Silvering glass is the process of depositing a thin layer of metallic silver onto glass so it becomes reflective. Most household mirrors are back-surface mirrors, which means the silver sits on the back of the glass. That arrangement protects the reflective layer from scratches and everyday wear. Commercial mirrors often add more protection after silvering, such as copper and specialized backing paint, because silver is a star performer in reflectivity but not especially thrilled about corrosion, moisture, or abuse.
The heart of the process is simple in theory: a silver-bearing solution and a reducing system react so metallic silver forms and bonds to properly cleaned glass. The phrase properly cleaned is doing a lot of heavy lifting here. In mirror-making, cleanliness is not next to godliness. It is godliness.
Before You Start: Safety Comes First
If you are silvering glass for the first time, use a commercial spray silvering or mirror-silvering kit designed for glass. Professional systems typically include the silver solution, reducer, surface prep chemicals, and application instructions. They exist for a reason: this project is chemistry, not arts and crafts pretending to be chemistry.
You will also need gloves, eye protection, strong ventilation, distilled water, lint-free wipes, and a clean work surface. Do not improvise with mystery cleaners, random acids, or homemade chemistry recipes from internet rabbit holes. Many silvering systems rely on chemicals that can irritate skin, damage eyes, or create disposal issues if mishandled. Also, the classic silver mirror chemistry is not something you mix, forget, and rediscover later like old salad dressing. Fresh solutions matter.
Tools and Materials You’ll Typically Need
- A clean sheet of float glass or polished glass cut to size
- A commercial mirror-silvering kit or professional silvering system
- Distilled water
- Glass cleaner or polishing compound approved for silvering prep
- Lint-free cloths, microfiber cloths, or laboratory wipes
- Nitrile gloves, protective eyewear, and protective clothing
- Plastic trays, spray bottles, or application equipment specified by the kit
- A drying rack or dust-free drying area
- Mirror backing paint or protective backing coat
For older or imperfect glass, you may also need a polishing compound such as cerium oxide to refine the surface before silvering. Tiny defects in the glass can show up dramatically once the reflective layer is added, which is mirror-making’s way of saying, “I amplify everything, including your bad prep.”
How to Make Mirrors by Silvering Glass: 8 Steps
Step 1: Choose the Right Glass
Start with smooth, high-quality glass. New float glass is usually the easiest option because it is flat, consistent, and free of the scratches and coatings that can sabotage adhesion. Avoid glass with plastic films, oily residues, deep scratches, or mysterious treatment layers unless your silvering system specifically says it can handle them.
If your goal is a decorative mirror for a frame, cabinet, or wall feature, ordinary clear float glass is usually the best choice. If your goal is a deliberately aged or antique look, you still start with good glass; you distress the finish later. Beginning with flawed glass and hoping it will look “vintage” is how you end up with “accidentally tragic.”
Step 2: Set Up a Dust-Free Workspace
Mirror silvering is one of those projects where the room matters almost as much as the chemistry. Work in a clean, well-ventilated area with stable temperature and low dust. Lay out your tools before mixing or applying anything. The process moves more smoothly when you are not sprinting across the room in gloves trying to locate a spray bottle that has suddenly joined the witness protection program.
Keep your glass horizontal or at the angle recommended by your kit. Make sure the support surface is level, padded if necessary, and absolutely clean. A single grain of grit under the glass can turn a calm project into a crack-and-regret situation.
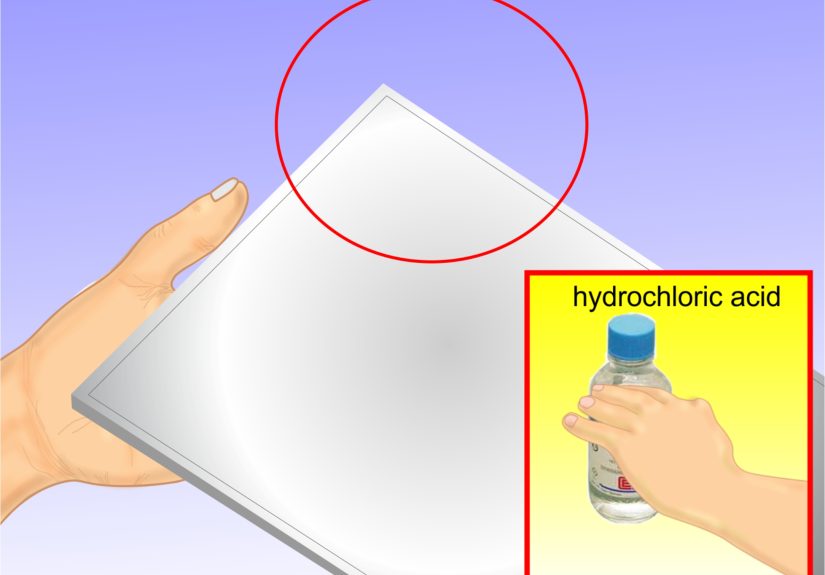
Step 3: Clean the Glass Like Your Reflection Depends on It
Because it does. Thorough cleaning is the most important step in the entire project. Any grease, detergent film, fingerprints, mineral deposits, or dust can prevent the silver from depositing evenly. That leads to fisheyes, streaks, cloudy areas, and patches where the mirror simply refuses to mirror.
Wash the glass using a cleaner or polishing method recommended for silvering. In many systems, the process includes scrubbing, rinsing with distilled water, and sometimes polishing with a glass-safe abrasive to remove microscopic contamination. Do not assume ordinary household glass cleaner is enough. Some everyday cleaners leave a film behind, which is fantastic for ruining silver adhesion and terrible for everything else.
After cleaning, rinse thoroughly with distilled water and handle the glass only by the edges or with clean gloves. At this point, the glass should be chemically clean, not merely “looks clean under forgiving lighting.”
Step 4: Apply the Surface Prep or Sensitizer
Many mirror-silvering systems use a prep step or sensitizer to encourage even silver deposition and better adhesion. In traditional processes, sensitizing may involve compounds such as stannous chloride. In kit-based systems, it may be packaged as a prep coat, wetting agent, or sensitizer solution.
Apply this exactly as directed by the manufacturer or professional procedure. The goal is to create a surface that welcomes the silver layer instead of acting like an overbooked hotel receptionist. Skip this step when your system requires it, and you may still get some silver, but it will often be less uniform, less bright, and less durable.
Step 5: Prepare the Silvering Chemistry Correctly
This is the stage where mirror-making stops being “cleaning glass” and becomes “chemistry with consequences.” The classic silvering reaction uses a silver compound and a reducing agent so metallic silver forms on the glass surface. Some traditional methods use ammoniacal silver chemistry reduced by compounds such as sugars or aldehydes. Commercial kits simplify this by packaging separate parts that are combined or sprayed in a controlled way.
Follow the instructions precisely. Use distilled water if required. Mix only what you need, use it fresh, and never assume “close enough” is good enough. Chemistry is many things, but it is not sentimental. If your instructions call for two matched spray bottles, equal pressure, specific dwell times, or immediate use, do exactly that.
And please do not stash leftovers for later. Fresh silvering chemistry behaves better. Old silvering chemistry behaves like it has read too many dramatic memoirs.
Step 6: Apply the Silver Evenly
Now comes the fun part: turning clear glass into a mirror. Depending on the system, you may pour, flood, or spray the silvering solutions onto the prepared glass. The goal is even coverage. Work smoothly, avoid puddling unless the method calls for it, and keep the entire active surface wet during deposition if that is part of the protocol.
You should start seeing the reflective layer develop as the reaction proceeds. This part feels a bit magical the first time, which is fair, because it is chemistry doing theater. Resist the urge to poke the surface, wipe at it, or overwork it. Let the silver develop as directed.
If the finish appears uneven, the usual culprits are poor cleaning, incomplete wetting, old chemistry, contamination, or uneven application. The silver layer is brutally honest. It does not flatter your shortcuts.
Step 7: Rinse, Inspect, and Dry Carefully
Once the silver has developed, rinse the mirror thoroughly with distilled water to remove residual chemistry. Do this gently but completely. The silver layer is still vulnerable, especially before backing is applied. Handle the piece with care and avoid rubbing the fresh silver directly.
Let the mirror dry in a dust-free environment. Some systems allow careful handling with clean gloves after rinsing, but do not assume the finish is ready for a victory lap. Inspect the surface once dry. A good silvered mirror should look even, reflective, and continuous, without large cloudy patches or obvious pinholes.
If you are aiming for a decorative or artisan mirror, slight character may be acceptable. If you want a crisp bathroom-style mirror, your standards should be higher. There is a difference between charming variation and “why does my face look haunted?”
Step 8: Protect the Silver with Backing
The silver layer alone is not the end of the story. It needs protection. In industrial mirror-making, the silver is often followed by a copper layer and then specialized mirror backing paint. In smaller-scale work, protective backing paint is the practical next step. This shields the silver from abrasion, moisture, and corrosion.
Apply the backing product recommended for silvered mirrors, not just any paint lurking in your garage from a 2017 trim project. Mirror backing products are designed to adhere properly and help preserve the reflective layer. Let the backing cure fully before framing, mounting, or transporting the mirror.
At that point, congratulations: you have made a mirror by silvering glass, which is a wonderfully classy sentence to say out loud at least once.
Common Problems and How to Avoid Them
Cloudy or dull finish
Usually caused by inadequate cleaning, contaminated rinse water, or chemistry that was mixed incorrectly or allowed to age too long.
Pinholes or bald spots
Often the result of dust, fingerprints, detergent film, or incomplete wetting of the glass surface.
Peeling or weak adhesion
This can happen when the surface was not fully clean, the sensitizer step was skipped, or the backing was applied before the silver layer was properly rinsed and dried.
Tarnishing later on
Silver needs protection. If the backing is poor or moisture reaches the metal layer, the mirror can degrade over time, especially around the edges.
Is DIY Silvering Better Than Buying a Mirror?
For most people, no. Buying a finished mirror is faster, cheaper, and dramatically less likely to involve gloves and existential questions. But making your own mirror can be worth it when you want a custom size, a handmade finish, an antique effect, or simply the satisfaction of understanding how mirrors are really made.
It is also a fascinating project for artists, prop makers, conservators, and advanced DIYers who enjoy combining craftsmanship with chemistry. The appeal is not just the final object. It is the process itself: precision, patience, and the oddly thrilling moment when ordinary glass begins to look back at you.
Conclusion
Learning how to make mirrors by silvering glass is part chemistry lesson, part finishing technique, and part exercise in discipline. The eight essential steps are straightforward: choose good glass, create a clean workspace, clean the surface thoroughly, apply the proper prep, prepare the silvering chemistry correctly, apply it evenly, rinse and dry with care, and protect the silver with a backing coat.
The real secret is not some mystical formula. It is meticulous prep and respect for the process. Silvering glass rewards patience more than bravado. If you treat it like precision work instead of a casual weekend experiment, you can create a beautiful custom mirror with serious old-world appeal and modern shine.
Experience: What Making a Silvered Mirror Actually Feels Like
The first time you try to silver glass, the experience is equal parts exciting and humbling. On paper, the process sounds almost suspiciously neat: clean the glass, apply the chemistry, wait for silver to form, rinse, dry, admire brilliance, become unbearably smug. In reality, the emotional journey is more nuanced. It begins with confidence, takes a sharp turn into obsession over fingerprints, and ends with you evaluating a sheet of glass like a jeweler inspecting a diamond under courtroom lighting.
One of the biggest surprises for beginners is how physical the project feels. You expect chemistry to be the main event, but handling the glass, arranging the workspace, and keeping everything clean takes up most of your attention. You become deeply aware of dust. Dust is everywhere. Dust is on the table, in the air, and somehow apparently traveling interdimensionally just to land on the one surface that must remain perfect. After silvering, many people never look at a mirror the same way again. They look at it and think, “That finish survived an outrageous amount of nonsense.”
Another common experience is learning that “clean” and “silvering clean” are not the same thing. The glass may look spotless to the naked eye and still fail the process because of invisible residue. This is where many first attempts go sideways. You may get a patchy reflection, streaks, or a mirror that looks like it has opinions. Oddly enough, that frustration becomes part of the appeal. The project teaches patience very quickly. When you redo the cleaning step and suddenly get a more even result, the improvement feels genuinely satisfying. It is the kind of progress you can see instantly.
There is also a theatrical moment during the silvering phase itself. As the reflective coating develops, the glass seems to transform from ordinary material into an object with personality. That transition is surprisingly memorable. Even people who understand the chemistry still describe it as magical, and honestly, they have a point. Watching a mirror appear where there was only transparent glass a moment earlier is delightfully dramatic.
With more experience, makers also become less obsessed with perfection and more appreciative of control. A flawless modern mirror is wonderful, but many artisans grow to love slight variation, especially in decorative work. Tiny differences in tone or edge character can make a handmade mirror feel richer and more alive. The process becomes less about chasing factory sameness and more about understanding what kind of finish you want. That shift is where skill turns into style.
In the end, the experience of making a mirror by silvering glass is not just about producing a reflective surface. It is about learning how preparation affects outcomes, how delicate good craftsmanship can be, and how rewarding it feels to create something functional and beautiful with your own hands. Yes, it can be fussy. Yes, it can be messy. But when you finally hold up a finished mirror and it reflects cleanly back at you, the whole process feels wonderfully worth it.


