Table of Contents >> Show >> Hide
- What Is a Deconstructed Couch, Exactly?
- Before You Start: Is Your Couch Worth Saving?
- Tools and Materials You’ll Want Nearby
- Step-by-Step Deconstructed Couch Tutorial
- Step 1: Photograph Everything Like a Furniture Detective
- Step 2: Remove the Dust Cover and Start Stripping
- Step 3: Decide What Will Stay Exposed
- Step 4: Inspect the Frame, Webbing, and Springs
- Step 5: Refinish the Exposed Wood
- Step 6: Choose Fabric That Works Hard and Looks Good
- Step 7: Cut New Panels Using the Old Ones as Templates
- Step 8: Rebuild in Reverse Order
- Step 9: Add the Deconstructed Details
- Styling a Deconstructed Couch So It Looks Intentional
- Common Mistakes to Avoid
- Is a Deconstructed Couch Worth the Work?
- Extra Experience: What a Deconstructed Couch Project Actually Feels Like
A deconstructed couch is what happens when a traditional sofa gets a little rebellious and a lot more interesting. Instead of hiding every inch of its structure under layers of upholstery, it shows off selected parts of the frame, lining, webbing, or wood. The result is relaxed, textural, a little rustic, a little European, and very much the kind of furniture that makes guests say, “Wait… did you buy that like this, or are you just wildly talented?”
The good news is that creating one is possible for a determined DIYer. The less-good news is that this is not a 20-minute craft you knock out between laundry loads. A deconstructed couch project takes patience, photos, labeling, staple-pulling stamina, and enough humility to admit that upholstery has been humbling confident people for generations. Still, if your couch has solid bones and you want a one-of-a-kind piece with exposed character, this tutorial will walk you through the process in a way that feels doable.
What Is a Deconstructed Couch, Exactly?
In design terms, a deconstructed couch usually means a sofa with some of its inner or structural elements intentionally visible. That might include exposed wood framing, unfinished-looking burlap or muslin on the outside back, visible tack detailing, or a mix of polished upholstery and raw materials. The style works because it contrasts soft fabric with sturdy structure. In plain English: it looks fancy and casual at the same time, which is annoyingly hard to do well and incredibly satisfying when you pull it off.
Some deconstructed sofas lean farmhouse. Others feel French country, cottage, Belgian-inspired, or modern rustic. The common thread is texture and restraint. This is not the moment for twelve competing patterns and a fringe explosion. It is the moment for linen, cotton blends, aged wood, nailhead trim, and confident editing.
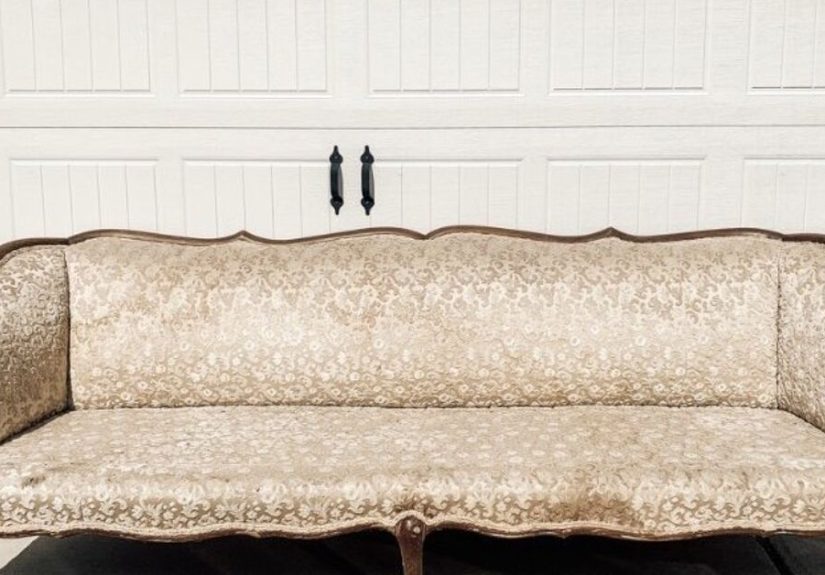
Before You Start: Is Your Couch Worth Saving?
Not every couch deserves a second act. Some sofas are held together by hope, a prayer, and one suspiciously committed staple. A good candidate for a deconstructed couch makeover should have a sturdy frame, relatively sound joinery, and a shape you actually like. If the frame is cracked, badly warped, or made from flimsy materials that flex every time someone sits down, walk away. Slowly. Dramatically, if needed.
Look for these green flags:
1. A solid hardwood or sturdy engineered frame
If the couch feels strong and doesn’t wobble, that is a promising start. The whole point of a deconstructed look is to reveal parts of the structure, so the structure needs to be worth seeing.
2. Cushions and suspension that can be repaired
Flattened foam, tired batting, stretched webbing, and worn springs are annoying, but fixable. A broken frame is a different story. That is not “character.” That is a problem.
3. A classic shape
Rolled arms, camel backs, shelter silhouettes, and vintage-inspired frames often look especially good in a deconstructed treatment. If the sofa already has visible wood trim or elegant lines, even better.
Tools and Materials You’ll Want Nearby
Get your supplies together before you start, because nothing kills momentum like hunting for pliers while your living room looks like a furniture crime scene.
You will likely need a staple remover, flathead screwdriver, needle-nose pliers, staple gun, heavy-duty staples, upholstery fabric, scissors, drop cloths, tack strip or decorative trim, batting, foam if replacement is necessary, muslin or burlap for the exposed sections, sandpaper, stain or wax for exposed wood, and a vacuum. Gloves and a dust mask are also smart, especially if you are working on an older couch full of mystery dust from previous centuries. Or 2009. Same energy.
Step-by-Step Deconstructed Couch Tutorial
Step 1: Photograph Everything Like a Furniture Detective
Before you remove a single staple, take photos of the couch from every angle. Then take close-ups of corners, seams, pleats, folds, tack strips, cushion construction, and the underside. Take more photos than you think you need. Future You will not remember how that arm panel wrapped around the frame. Future You will confidently think, “I got this,” and then stare at loose fabric like it is written in ancient code.
Label every piece as it comes off. Use painter’s tape or a marker on the reverse side. Keep left and right panels separate. Save anything that can act as a pattern template.
Step 2: Remove the Dust Cover and Start Stripping
Most couches are easiest to begin from the underside. Remove the black dust cover first, then start taking off the outermost upholstery in reverse order of how it was originally installed. Go slowly. Pull staples carefully. Try not to rip the old fabric pieces if you plan to use them as cutting guides for the new fabric.
This phase is where the project starts to look worse before it looks better. That is normal. Every successful couch makeover contains a short period where the piece resembles a haunted prop from a theater basement.
Step 3: Decide What Will Stay Exposed
This is the defining design decision. A deconstructed couch does not mean “remove everything and hope for vibes.” It means intentionally exposing certain elements while reupholstering the rest.
You might expose:
the outside back in burlap or muslin, selected side panels, portions of the wood frame, the front rail, or decorative tacking along the edges.
You probably do not want to expose:
crumbling foam, damaged padding, sharp staples, lumpy innards, or anything that makes the couch uncomfortable or unsafe.
A smart approach is to upholster the seat, inside back, and arms fully, then use neutral burlap or muslin on the outside back or side sections for that deconstructed effect. This creates contrast without turning the sofa into a visual cry for help.
Step 4: Inspect the Frame, Webbing, and Springs
With the couch opened up, inspect the structure. Tighten loose joints. Reglue where necessary. Replace broken webbing or damaged springs. If the seat sinks like a canoe in a storm, fix the support now. Deconstructed style is charming. Deconstructed comfort is not.
If the foam is compressed or misshapen, replace it. Add fresh batting to soften edges and create a smoother, fuller finish. Batting is one of those unsung heroes that rarely gets the spotlight but absolutely saves the day.
Step 5: Refinish the Exposed Wood
If your couch has visible wood arms, legs, or trim, give them the respect they deserve. Sand lightly, clean off dust, then stain, wax, or seal depending on the look you want. Dark walnut feels classic and grounded. Natural oak reads lighter and more Scandinavian. A weathered finish can lean cottage or farmhouse. Whatever you choose, make it look intentional, not “I forgot to finish this part and called it artisanal.”
Step 6: Choose Fabric That Works Hard and Looks Good
Fabric choice can make or break this project. If the sofa is for everyday use, prioritize durability first and romance second. Yes, linen is gorgeous. No, not every pale, delicate fabric is prepared for actual life.
For a balanced result, consider:
Cotton blends: comfortable, classic, and often family-friendly.
Performance fabrics: excellent for kids, pets, snacks, accidental coffee acrobatics, and general humanity.
Polyester blends or microfiber-style options: easier maintenance and better stain resistance.
Velvet performance upholstery: more practical than many people assume, especially in newer performance versions.
Leather accents or full leather upholstery: durable and handsome, though pricier and less forgiving if you want a soft cottage look.
If possible, choose upholstery fabric with a durable rub count suited to frequent use. And for the love of all things comfortable, order swatches first. A fabric that looks “warm ivory” online can arrive looking suspiciously like printer paper under your living room lights.
Step 7: Cut New Panels Using the Old Ones as Templates
Lay the old fabric pieces flat and cut the new ones with enough seam allowance. Pay attention to grain direction, stripe alignment, and pattern placement. This is not the step to freestyle with blind optimism. Accuracy matters.
If you are using burlap or muslin for the outer exposed areas, cut those pieces neatly and plan where your tacks, trim, or nailheads will sit. Raw texture is beautiful. Ragged edges that look accidental are less beautiful.
Step 8: Rebuild in Reverse Order
Reupholstery is usually a reverse-engineering project. Put the couch back together in the opposite order from teardown. Start with inside sections that need to be secured first, then work your way outward. Pull fabric evenly and staple from the center outward to help avoid puckering.
Keep checking symmetry as you go. One crooked arm panel can throw off the entire sofa. If something looks weird, fix it immediately. Upholstery has a cruel sense of humor: the thing you ignore because “it’s probably fine” will become the only thing your eye sees forever.
Step 9: Add the Deconstructed Details
Now comes the style layer. Install burlap, muslin, or another intentionally rustic fabric on the outside back or selective outer panels. Add decorative tacks, nailhead trim, or exposed seams only where they enhance the design. The best deconstructed couches are edited. They show just enough of the understructure to feel special, not so much that they look unfinished.
If you love a softer look, use a natural linen-like upholstery fabric on the main seating surfaces and a subtly textured neutral on the exposed sections. If you want more drama, pair warm wood with deep olive, tobacco, charcoal, or muted blue upholstery.
Styling a Deconstructed Couch So It Looks Intentional
Once the upholstery is done, styling matters. Because this sofa already has visual texture, keep the rest of the look balanced. Add pillows, but do not turn the couch into a decorative avalanche. Use one patterned pillow, one solid with texture, and maybe a lumbar for structure. A soft throw adds ease, especially if the couch has exposed wood or burlap that could otherwise feel a little stiff.
Deconstructed couches tend to look best with natural materials nearby: wood tables, woven baskets, aged brass, linen curtains, pottery, or vintage rugs. Think layered, not cluttered. The couch should feel like the star, not like it wandered into a room full of competing monologues.
Common Mistakes to Avoid
Making it too literal
You are creating a design feature, not peeling your sofa like an onion and calling it a day. Exposure should be selective.
Ignoring comfort
A beautiful couch that feels like sitting on a stack of regret is not a win. Replace foam and repair support if needed.
Using weak fabric
Pretty fabric that cannot survive real life is just expensive optimism. Always choose upholstery-grade materials for seating surfaces.
Skipping cleanup and prep
Remove old staples, vacuum thoroughly, and smooth your base layers. Upholstery is a detail sport.
Forgetting maintenance
Vacuum the couch regularly, check the care code before cleaning, and blot spills instead of rubbing them deeper into the fabric like you are trying to preserve them for future generations.
Is a Deconstructed Couch Worth the Work?
If you love customized furniture, textural interiors, and the thrill of saying “I made that,” then yes, absolutely. A deconstructed couch tutorial is really part upholstery lesson, part design exercise, and part character-building program. You end up with a sofa that feels collected rather than cookie-cutter, and that is hard to buy off a showroom floor.
It is also a smart way to revive an older couch with solid bones. Instead of fighting to make it look brand new, you lean into charm, craftsmanship, and contrast. That is often what makes the final piece feel more elevated. A little wood, a little raw texture, a little tailored fabric, and suddenly the sofa has a whole backstory.
Extra Experience: What a Deconstructed Couch Project Actually Feels Like
There is a very specific emotional arc to making a deconstructed couch, and it deserves to be discussed honestly. At first, the project feels romantic. You imagine yourself gently removing a few panels, revealing beautiful wood, choosing a chic neutral fabric, and becoming the sort of person who casually says things like, “Oh, that old sofa? I rebuilt it over the weekend.” Then you pull off the first dust cover and discover approximately nine thousand staples, two decades of lint, and evidence that furniture builders are both brilliant and mildly terrifying.
After that, things get interesting. You start noticing how well a couch is actually engineered. You see the layers, the order, the logic, the way each piece supports the next. The project stops being just a style makeover and starts becoming a lesson in construction. It gives you a new appreciation for good furniture because you realize a comfortable sofa is not magic. It is structure, tension, padding, fabric, and craftsmanship working together in a very specific order.
Then comes the turning point: the moment the wood has been cleaned, the new fabric is cut, and one section goes back on correctly. Suddenly the couch no longer looks doomed. It looks promising. That is the moment the project gets addictive. You begin imagining how it will look in the room, how the exposed frame will catch the light, how the texture of the outer burlap or muslin will contrast with smooth seat cushions. Even the mistakes become part of the story. The slightly awkward first corner, the panel you had to redo, the trim that taught you patience and maybe a few new vocabulary words.
What makes the experience memorable is that a deconstructed couch never feels generic when it is done. It reflects your decisions. You chose what to expose, what to soften, what to stain, what to streamline, and what to leave imperfect. That last part matters. A great deconstructed couch often has a lived-in, layered quality that feels more human than factory-perfect furniture. It looks thoughtful. It looks storied. It looks like someone paid attention.
And perhaps the best part is practical: every time you sit down, you know exactly what is under you. You repaired the support. You selected the fabric. You gave the frame another life. That is satisfying in a way flat-pack furniture can only dream about. So yes, the process is messy, slow, and occasionally humbling. But it is also creative, hands-on, and surprisingly rewarding. By the end, you do not just have a couch. You have a piece with personality, a better understanding of upholstery, and a highly specific confidence boost that says, “I can absolutely look at old furniture and see potential now.” Which is wonderful, except for the fact that you may never pass a thrift store sofa again without mentally redesigning it.


