Table of Contents >> Show >> Hide
- Why Use a Basic Seed Tray?
- What You Need Before You Start
- How to Plant Seeds in a Basic Seed Tray: 15 Steps
- Step 1: Read the Seed Packet Like It Holds State Secrets
- Step 2: Choose a Clean Tray With Drainage
- Step 3: Use a Seed-Starting Mix, Not Garden Soil
- Step 4: Pre-Moisten the Mix
- Step 5: Fill the Cells Without Packing Them Too Tightly
- Step 6: Level the Surface
- Step 7: Make Planting Holes at the Proper Depth
- Step 8: Sow the Right Number of Seeds Per Cell
- Step 9: Cover the Seeds Correctly
- Step 10: Label Everything Immediately
- Step 11: Water Gently So You Do Not Launch the Seeds
- Step 12: Cover the Tray and Keep It Warm
- Step 13: Move Seedlings Under Strong Light the Moment They Sprout
- Step 14: Keep Moisture Consistent and Thin the Extras
- Step 15: Harden Off Before Transplanting Outdoors
- Common Mistakes to Avoid
- Best Crops to Start in a Seed Tray
- Practical Example: A Beginner-Friendly Seed Tray Setup
- Experience and Lessons Learned From Using a Basic Seed Tray
- Conclusion
Starting seeds in a basic seed tray is one of those gardening skills that feels suspiciously simple at first. You put seed in dirt, add water, and wait for magic, right? Well, yesbut also no. Seed starting is less “wave a wand and hope” and more “create a tiny five-star hotel for baby plants.” The good news is that you do not need a greenhouse, a farm, or a suspiciously expensive grow room to get great results. A plain seed tray, a good seed-starting mix, and a little attention can take you from dry seeds to sturdy seedlings ready for the garden.
If you have ever planted seeds only to end up with a tray of mush, a tray of nothing, or a tray of pale, dramatic sprouts that look like they need emotional support, this guide is for you. Below, you will learn exactly how to plant seeds in a basic seed tray in 15 practical steps, plus the real-world tips that make the process easier for beginners and a lot less annoying for experienced gardeners.
Why Use a Basic Seed Tray?
A basic seed tray helps you start a lot of plants in a small space while keeping moisture, temperature, and spacing more consistent. It is efficient, tidy, and much easier to manage than a random collection of yogurt cups lined up on a windowsill like an abandoned science project. Seed trays are especially useful for vegetables, herbs, and flowers that benefit from an early indoor start, such as tomatoes, peppers, basil, marigolds, and lettuce.
What You Need Before You Start
Before planting seeds in a seed tray, gather your materials so you are not sprinting across the kitchen with dirty hands looking for plant labels. You will need a basic seed tray or cell tray with drainage, a watertight bottom tray if possible, sterile seed-starting mix, seeds, water, labels, and a bright light source. A humidity dome and heat mat can be helpful, but they are optional, not sacred relics.
How to Plant Seeds in a Basic Seed Tray: 15 Steps
Step 1: Read the Seed Packet Like It Holds State Secrets
Before you touch the tray, read the seed packet. It tells you the sowing depth, expected germination time, preferred temperature, and whether the seed needs light or darkness to sprout. This matters because seeds are not all tiny green overachievers. Lettuce and petunia seeds are often surface-sown or barely covered, while larger seeds such as cucumbers or beans need a deeper planting depth. The packet also helps you decide whether this crop even belongs in a tray or should be direct-sown outdoors later.
Step 2: Choose a Clean Tray With Drainage
A basic seed tray should be clean and have drainage holes. Reusing old trays is fine, but wash them well first. Leftover soil, algae, or mystery crust from last season can invite disease, especially damping-off, which is the gardening equivalent of having your seedlings ghost you after a strong start. If your tray has individual cells, even betteryou will disturb roots less when it is time to transplant.
Step 3: Use a Seed-Starting Mix, Not Garden Soil
This is one of the most important steps. Use a lightweight seed-starting mix rather than scooping soil from the yard. Garden soil is too heavy, may compact easily, and can carry pests or disease organisms. A good seed-starting mix is fine-textured, drains well, and still holds enough moisture for germination. Think fluffy, not muddy. You are growing seedlings, not making bricks.
Step 4: Pre-Moisten the Mix
Pour the seed-starting mix into a tub or bowl and add water before filling the tray. Stir until the mix is evenly damp, like a wrung-out sponge. Not dripping. Not dust-dry. Just comfortably moist. Pre-moistening makes it easier to fill cells evenly and helps tiny seeds stay put instead of floating into weird corners after the first watering.
Step 5: Fill the Cells Without Packing Them Too Tightly
Fill each cell or section of the seed tray with the moistened mix. Gently tap the tray to settle the medium, then top off any low spots. Do not cram the mix down like you are paving a driveway. Roots need air as much as they need water. If the mix is packed too tightly, seedlings may struggle to emerge and roots may not grow well.
Step 6: Level the Surface
Once the cells are filled, level the surface with your fingers or a flat tool. A smooth surface gives you more even sowing depth and a neater planting job overall. It also helps when you are sowing fine seed, because tiny seeds have a talent for rolling into the one crater you forgot to fix.
Step 7: Make Planting Holes at the Proper Depth
Use a pencil tip, chopstick, or your fingertip to make shallow holes in each cell according to the seed packet directions. A good general rule is to plant seeds about two to three times as deep as the seed is wide, unless the packet says otherwise. Very tiny seeds may only need a light press onto the surface. Large seeds need a little more depth. Planting too deep is one of the fastest ways to end up staring at a tray and wondering whether you accidentally planted invisible seeds.
Step 8: Sow the Right Number of Seeds Per Cell
For most home gardeners, sowing one to two seeds per cell is enough. If you are working with older seed or a crop with lower germination rates, sow two or three. This gives you insurance without turning each cell into a full-contact root wrestling match. For example, one tomato seed per cell is often enough if the seed is fresh, while onions or some flowers can be sown a bit more generously.
Step 9: Cover the Seeds Correctly
Cover the seeds lightly with additional seed-starting mix if the crop needs darkness to germinate. If the seed needs light, do not bury it; simply press it gently into the surface so it has good contact with the mix. This step sounds small, but it is where a lot of good intentions go sideways. Tiny seeds do not need a blanket thick enough for winter.
Step 10: Label Everything Immediately
Do not trust your memory. Not even a little. Label each row, section, or tray as soon as you plant it. Use the plant name and the date. “I will definitely remember which one is basil and which one is pepper” is the kind of sentence that creates chaos two weeks later. Labels save time, reduce confusion, and help you track what germinated well.
Step 11: Water Gently So You Do Not Launch the Seeds
After sowing, water carefully. A misting bottle, fine rose watering can, or bottom watering method works best. The goal is to moisten the mix fully without washing seeds into neighboring cells like tiny freeloaders. Bottom watering is especially useful once seeds are in place because it keeps the surface from being disturbed while the mix absorbs water from below.
Step 12: Cover the Tray and Keep It Warm
If you have a clear humidity dome or plastic cover, place it over the tray to help retain moisture during germination. Set the tray in a warm location appropriate for the crop. Many seeds germinate best in warm conditions, especially tomatoes, peppers, and eggplant. That said, warmth is for germination; once seedlings emerge, they usually do better with bright light and slightly cooler air so they grow stocky instead of stretched and floppy.
Step 13: Move Seedlings Under Strong Light the Moment They Sprout
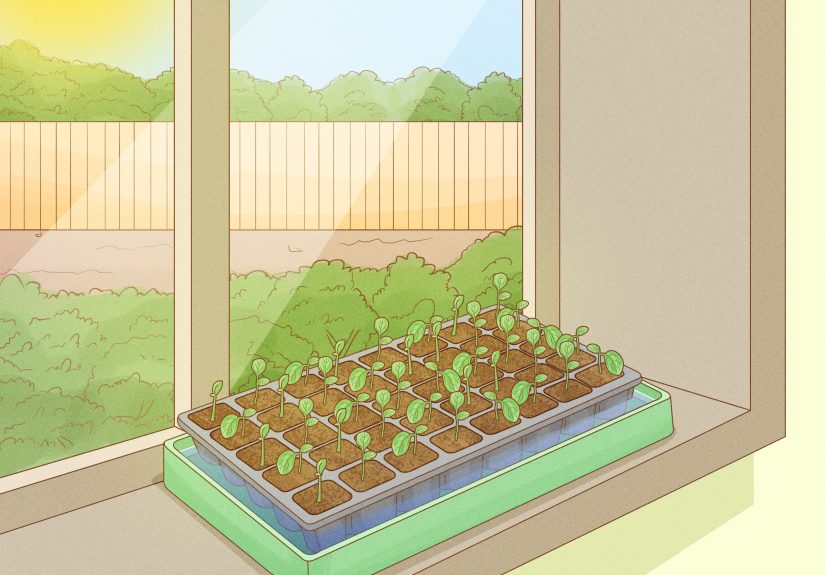
This is the turning point between sturdy seedlings and lanky green noodles. As soon as seedlings emerge, remove the cover and place them under grow lights or in the brightest setup you have. A sunny windowsill can work in a pinch, but it is often not bright enough for strong indoor seedlings, especially in late winter or early spring. Keep the light close enough to prevent stretching, and adjust it upward as the seedlings grow.
Step 14: Keep Moisture Consistent and Thin the Extras
Check the tray daily. The mix should stay evenly moist, not soaked and not bone-dry. Overwatering can invite disease; underwatering can kill young roots fast. Once seedlings develop, thin extras by snipping the weaker seedling at soil level rather than pulling it out. Pulling can disturb roots in the cell and punish the keeper seedling for absolutely no reason.
Step 15: Harden Off Before Transplanting Outdoors
When seedlings are large enough and outdoor conditions are suitable, do not move them straight from indoor comfort to the wild outdoors in one dramatic afternoon. Harden them off gradually over a week or more. Start with a few hours in a shaded, sheltered spot, then slowly increase time outdoors, light exposure, and wind exposure. This helps the plants adjust to sun, temperature swings, and air movement so they are less likely to flop, scorch, or sulk after transplanting.
Common Mistakes to Avoid
Even a perfect-looking tray can go wrong if a few basics are ignored. The most common mistake is overwatering. Seedlings need moisture, but they do not want to live in a swamp. Another frequent problem is weak light, which leads to leggy seedlings with thin stems. Planting seeds too deeply is also common, especially with tiny flower and herb seeds. Finally, skipping labels is how a tray of “mystery greens” is born.
Another beginner mistake is starting seeds too early. Bigger is not always better when it comes to transplants. If you start summer crops way too soon, they can outgrow the tray before outdoor conditions are safe. The result is root-bound, stressed seedlings that are annoyed with you before they even hit the garden bed.
Best Crops to Start in a Seed Tray
A basic seed tray works especially well for tomatoes, peppers, basil, celery, broccoli, cabbage, marigolds, zinnias, and many annual flowers. It can also be useful for lettuce, kale, and onions. Some fast-growing or root-sensitive crops, however, are often better direct-sown or started with extra care. Beans, peas, corn, carrots, beets, and radishes usually prefer to go straight into the garden rather than being pampered indoors for too long.
Practical Example: A Beginner-Friendly Seed Tray Setup
Let’s say you want to start tomatoes, basil, and marigolds indoors. Fill a 24-cell tray with pre-moistened mix. Sow one tomato seed in each of eight cells, two basil seeds in each of eight cells, and one marigold seed in each of the remaining eight cells. Label each section clearly. Water gently, cover with a dome, and place the tray in a warm room. As soon as sprouts appear, move the tray under bright light. Thin the basil later if both seedlings in a cell germinate. A setup this simple is enough to produce dozens of healthy transplants for containers, raised beds, or a backyard garden.
Experience and Lessons Learned From Using a Basic Seed Tray
The first time I planted seeds in a basic seed tray, I behaved with the confidence of someone who had watched exactly one gardening video and now considered myself a professional. I filled the tray with whatever potting mix I had lying around, sprinkled seeds like I was seasoning fries, gave everything a heroic blast of water, and put the tray on a sunny windowsill. For three days, I checked on it every few hours as if my attention alone could speed up germination. Then the tray either dried out too fast, stayed too wet, or grew seedlings so skinny they looked like they were apologizing for existing. It was a humbling little rectangle of soil.
That experience taught me that seed starting is not hard, but it is precise. Tiny differences matter. Using a lighter seed-starting mix instead of dense potting soil made a bigger difference than I expected. Pre-moistening the mix turned out to be one of those boring steps that saves a surprising amount of trouble later. The first time I skipped it, water pooled on top and shifted the seeds around. The next time I did it properly, everything stayed where it belonged and germination was much more even.
I also learned that lighting is the great truth-teller of indoor seed starting. A bright window feels generous to a human, but many seedlings strongly disagree. Once I switched to a simple grow-light setup and kept the light close to the tops of the seedlings, the plants stopped stretching like they were trying to escape. Their stems thickened, the leaves looked healthier, and the tray finally started to resemble a collection of future plants instead of a botanical emergency.
Another lesson came from labeling. Early on, I convinced myself I would remember everything. I did not. Basil and peppers are easy to tell apart eventually, but not when they first pop up and every seedling looks like “small green optimism.” Now I label every tray the moment I sow it, and that tiny habit saves confusion, especially when I am testing different varieties or planting on multiple days.
My favorite lesson, though, was about patience. Seed trays reward steady care more than dramatic intervention. You do not need to poke at the soil every hour, drown the cells because you feel guilty, or rush the seedlings outdoors on the first warm afternoon. The best results came when I checked moisture daily, thinned extras without sentimentality, and hardened plants off gradually before transplanting. That basic tray taught me to pay attention, stay consistent, and respect the fact that seeds already know what to do. They just need a decent place to get started.
Conclusion
Learning how to plant seeds in a basic seed tray is one of the easiest ways to become a more confident gardener. It gives you more control over timing, better variety choices, and the very satisfying experience of watching life emerge cell by cell. Keep the process simple: use a clean tray, a proper seed-starting mix, the correct sowing depth, steady moisture, and strong light after germination. Do that, and your basic seed tray stops being a plastic container and starts becoming a launch pad for your whole garden season.


