Table of Contents >> Show >> Hide
- Why Make a Fruit Pin Cushion Instead of Buying One?
- Choose Your Fruit: 5 Cute Styles That Work Great
- Materials and Tools
- DIY Fruit Pin Cushion: Step-by-Step (Works for Most Fruits)
- Make It Look Like a Real Fruit (Without Needing a Botany Degree)
- Bonus: Add a Tiny “Emery Berry” Needle Cleaner
- Tips for a Pin Cushion That Lasts
- Troubleshooting (So You Don’t “Rage-Quit” Over a Strawberry)
- Gift Ideas and Cute Variations
- Common DIY Fruit Pin Cushion Experiences (About )
- Conclusion
If your sewing pins currently live a chaotic life (rolling off the table, hiding in carpet, and occasionally reappearing inside your sock like a tiny betrayal),
it’s time to give them a proper home. A DIY fruit pin cushion is the perfect fix: it’s useful, adorable, and just whimsical enough to make
your sewing corner feel like a tiny craft farmers market.
In this guide, you’ll learn how to make a fruit-shaped pin cushionthink strawberry, tomato, orange slice, apple, pearusing simple sewing techniques and
beginner-friendly materials. We’ll also cover the “secret sauce” that experienced sewists love: smart stuffing choices (including options that help keep
needles cleaner and sharper over time).
Why Make a Fruit Pin Cushion Instead of Buying One?
1) It’s more practical than it looks
A pin cushion should be firm enough to hold pins upright and steady, but not so dense you have to wrestle your wrist to park a needle.
When you make your own, you control the firmness and the sizeso it actually fits your sewing style (and your desk, and your patience).
2) It’s a scrap-buster that feels fancy
Fruit shapes are basically the craft world’s version of “put a bow on it.” That tiny piece of cute fabric you’ve been hoarding? It was born to become
a strawberry. Those green felt scraps? Congratulationsyou have leaves.
3) You can add a needle-care upgrade
The classic tomato pin cushion often comes with a little strawberry attached. That mini strawberry is commonly filled with fine abrasive “emery” (or
similar materials) so you can jab your pins/needles in and out to help clean and polish them. You can build that feature into your own fruit set so your
tools stay in better shape longer.
Choose Your Fruit: 5 Cute Styles That Work Great
Strawberry (Beginner favorite)
Easy shape, forgiving seams, and it looks adorable even if it’s a little… “homegrown.” Add stitched “seeds” with embroidery floss or tiny beads.
Tomato (Classic, super functional)
The round tomato shape is a workhorse: lots of surface area for pins, stable on a table, and perfect for adding that attached “emery berry.”
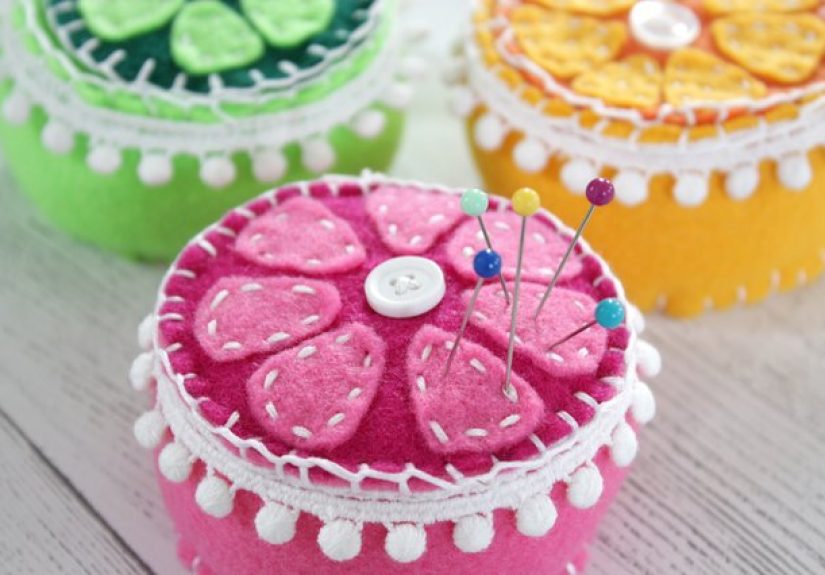
Orange or citrus slice (Great for felt)
Felt is your best friend here. You can layer wedges and segments with simple stitching, and the flat base keeps it from rolling around like an actual orange
(which, to be fair, has done nothing to deserve that comparison).
Apple (Cute on a desk)
Apples read as “teacher gift” in the best way. A small felt leaf + a little stem detail makes it instantly recognizable.
Pear (Fast and charming)
Pears are basically a circle and an oval that decided to be friends. Perfect for a quick make and a slightly taller pin cushion profile.
Materials and Tools
Fabric options
- Cotton quilting fabric: easy to sew, tons of prints, great for strawberries/tomatoes/apples
- Wool felt or craft felt: ideal for citrus slices and simple fruit shapes; doesn’t fray
- Canvas or linen: sturdier, more “heirloom” vibe (also shows pins well in lighter colors)
Stuffing options (pick one or mix)
- Polyester fiberfill: cheap, easy, lightweight
- Fabric scraps: eco-friendly, firm, great for a dense cushion
- Wool roving: naturally “grippy” and loved by many sewists for needle friendliness
- Crushed walnut shells (often sold as pet bedding): adds weight + firmness; excellent for pin cushions
- Fine sand: very firm and weighty (use a tightly woven fabric and double-stitch seams)
- Optional: emery sand/powder for a tiny attached “sharpener berry”
Basic tools
- Hand-sewing needle or sewing machine
- Thread (matching + contrast if you want cute details)
- Scissors
- Pins or clips
- Small funnel or rolled paper (helpful if using sand/walnut shells)
- Optional: embroidery floss, small buttons, beads
DIY Fruit Pin Cushion: Step-by-Step (Works for Most Fruits)
This method is a flexible “base recipe.” You’ll adjust the pattern piece shape depending on your fruit, but the construction stays almost the same.
If you can sew a curve (or at least politely negotiate with one), you can make this.
Step 1: Pick a finished size and make a simple pattern
A practical desk pin cushion is usually about 3–4 inches across. For a strawberry, you can draw a rounded heart-ish shape. For a tomato,
draw a circle. For a pear, draw a teardrop. For a citrus slice, draw two circles (one slightly smaller) plus wedge lines.
Add a ¼-inch seam allowance around the outside for woven fabrics. If you’re using felt, you can either add a small seam allowance or do a
neat whip stitch right on the edge without one.
Step 2: Cut fabric pieces
- Woven fabric fruit (strawberry/tomato/apple/pear): cut 2 identical pieces
- Felt citrus slice: cut 2 circle bases + inner circle + wedge/segment details
Step 3: Sew the body (leave a turning gap)
Place pieces right sides together (for woven fabric) and sew around the edge, leaving a 1½–2 inch opening. Use small stitches for curves.
If you’re machine sewing, slow down on tight curvesthis is not the time for “Fast & Furious: Seam Allowance Drift.”
Clip notches into the seam allowance around curves (don’t cut through stitching). Turn right side out and gently push curves smooth.
Step 4: Stuff it firmly (the secret to a great pin cushion)
Stuff in small amounts, packing evenly. A pin cushion should feel dense and supportive, not like a decorative throw pillow that had a rough day.
For a premium feel, many makers use a blendlike a base of polyfill with a core or bottom layer of walnut shells for weight.
If using sand or walnut shells, choose tightly woven fabric, stitch securely, and consider a double layer (or lining) to reduce leakage. A funnel (or rolled paper)
makes filling dramatically easier.
Step 5: Close the opening neatly
Use a ladder stitch (invisible stitch) by hand for a clean finish. Pull the thread snug so the seam disappears like magic. If you’re using felt and whip stitching,
keep your stitches even and close together.
Make It Look Like a Real Fruit (Without Needing a Botany Degree)
Strawberry details
- Add “seeds” with small straight stitches in light thread, tiny beads, or French knots.
- Make leaves from green felt: cut a simple star/leaf crown, stitch it on top.
- Add a tiny loop of ribbon if you want it to hang near your sewing machine.
Tomato details
- Create the classic tomato “sections” by adding a button on top and bottom and pulling thread tightly through the center several times.
- Add green felt leaves around the top button.
- Optional: attach a small strawberry “emery berry” (instructions below).
Citrus slice details (felt-friendly)
- Layer a slightly smaller circle on top for the “fruit flesh.”
- Stitch wedge lines from center outward to create segments.
- Use a lighter inner circle to mimic the pith and make it pop visually.
Apple and pear details
- Add a small felt leaf and a short stem (rolled felt or embroidery stitches).
- Use a subtle highlight stitch (a small curved line) to give dimension.
- If you want extra realism, use two close shades of fabric (but keep it simple if you’re new).
Bonus: Add a Tiny “Emery Berry” Needle Cleaner
If you want that classic tomato-and-strawberry combo, here’s how to make a tiny fruit that can hold emery (or similar abrasive material)
for light cleaning/polishing of pins and needles.
What you’ll need
- Small scrap of tightly woven cotton (or felt lined with cotton)
- Strong thread
- Emery sand/powder (or a ready-made “sharpening sand” sold for pin cushions)
- Optional: a pinch of polyfill to reduce dust movement
How to make it
- Cut two tiny strawberry-ish shapes (about 1–1.5 inches tall).
- Sew around the edge, leaving a small gap.
- Fill carefully (a tiny funnel helps). Don’t overfillkeep it firm but stitchable.
- Close the opening tightly with small stitches.
- Add two little felt leaves on top and stitch it to your main fruit pin cushion with a short cord or ribbon.
Important: If you use emery, keep it contained. Use tight fabric, strong seams, and consider a double layer. If you prefer a lower-mess option,
make the mini berry with wool roving or walnut shells instead and treat it as a “needle parking spot” rather than an abrasive cleaner.
Tips for a Pin Cushion That Lasts
Use lighter fabrics when possible
Pins and needles are easier to spot against lighter or mid-tone fabrics. Dark fabric looks dramatic, surebut it can turn “grab a pin” into a mini scavenger hunt.
Go firmer than you think
A squishy pin cushion gets floppy fast. Firm stuffing keeps pins upright and reduces wobble. If you can press your thumb in and it bounces back quickly, you’re in
the sweet spot.
Weight helps (especially for desk use)
A small amount of walnut shells or sand in the bottom half can keep your fruit from wandering around the table. Because yes, pin cushions can “walk.” Not by magic
by snagging on thread and sliding when you yank the spool. But still: suspicious.
Secure embellishments if it’s a gift
Buttons, beads, and tiny decorations are adorable, but they should be stitched on firmlyespecially if the pin cushion will be used around kids or pets.
Troubleshooting (So You Don’t “Rage-Quit” Over a Strawberry)
My fruit looks lumpy
Stuff in smaller increments and distribute evenly. For woven fabric, clipping curves before turning also helps smooth the shape.
My seams look wavy
Use a shorter stitch length on curves and slow down. If hand sewing, keep stitch size consistent and pull tension gently, not aggressively.
Stuffing is leaking (sand/walnut shells)
Switch to tighter fabric, add a lining, and double-stitch seams. Also make sure your opening is closed with tight, repeated stitches.
Gift Ideas and Cute Variations
- Fruit basket set: Make three mini fruits and bundle with a few nice pins and a small pair of embroidery scissors.
- Seasonal fruit: Peach in summer, apple in fall, citrus in winteryour sewing table gets a wardrobe too.
- Wrist pin cushion: Turn a tiny strawberry into a wearable pin cushion with elastic (handy for quilting and garment sewing).
- Magnetic add-on: Add a small magnet disk in a fabric pocket on one side (useful for holding needles briefly, but still keep a cushion area for pins).
Common DIY Fruit Pin Cushion Experiences (About )
People who make their first DIY fruit pin cushion often have the same surprise: the “cute” part is easy, but the “actually useful” part comes down
to structure. A strawberry can look perfect on the outside and still behave like a marshmallow if it isn’t stuffed firmly. Many crafters report that their first
attempt was under-stuffed because they were afraid of popping seams. The fix is simple: stronger stitching, smaller stuffing increments, and a commitment to firmness.
Pin cushions are one of the few crafts where “a little extra stuffing” is basically always the right answer.
Another common experience is discovering that weight matters. A lightweight polyfill tomato is adorable, but it can slide around while you sewespecially
if it’s sitting on a slick table or next to a tug-happy thread spool. Makers who switch to a blended fill (polyfill plus walnut shells, or polyfill plus a small sand
pocket) often say their pin cushion immediately feels more “professional.” It stays put, holds pins straighter, and doesn’t tip when you grab pins quickly.
Then there’s the “detail spiral.” You start by thinking, “I’ll just stitch a simple strawberry,” and suddenly you’re debating bead seeds versus embroidered seeds,
a leaf crown with three points versus five points, and whether the stem should be felt, embroidery floss, or a tiny wrapped wire. The most successful approach tends
to be: keep the first one simple, then make a second fruit where you test one fancy upgrade. That way, you get a functional tool immediately and still satisfy the
creative itch without turning your pin cushion into a three-week epic.
Stuffing choices also become a mini journey. Beginners often default to whatever is easiestpolyfill or scrap fabricand that’s totally fine. Over time, many sewists
experiment with wool roving, walnut shells, or combinations because they like the added firmness and the way pins “park” more securely. If someone tries sand or emery,
they often learn quickly that containment is everything: tight weave, strong seams, and careful filling. The experience usually ends with a practical rule of thumb:
abrasive or granular fillings are great, but only when your construction is equally serious.
Finally, lots of makers mention how satisfying it feels to finish this project because it’s instantly useful. The pin cushion goes straight into daily rotation, unlike
some crafts that live in a drawer waiting for their moment. A fruit pin cushion also tends to start conversationspeople notice it on a desk or sewing table, and it makes
a charming gift that feels personal without being complicated. It’s one of those small projects that quietly upgrades your whole sewing experience, one pin at a time.
Conclusion
A DIY fruit pin cushion is the rare craft project that’s equal parts cute, practical, and genuinely satisfying. Start with a simple strawberry or tomato,
stuff it firmly, and add details only after the base works well. If you want to level up, experiment with weighted stuffing or a tiny “emery berry” add-on. Either way,
your pins will finally have a homeand your sewing space will gain a little extra joy (with zero added calories).
Citations (for drafting/verification only; do not publish):
Tomato pincushion history and background:
Pincushion history + tomato/strawberry emery mention:
Needle/pin care with emery discussion:
Pincushion firmness/assembly guidance example:
Pattern variety and pincushion project context:


