Table of Contents >> Show >> Hide
- Why a DIY modern floor lamp is worth making
- What makes a floor lamp look modern?
- Materials and tools you may need
- How to plan your design before you cut anything
- Step-by-step: how to build a DIY modern floor lamp
- Important safety rules for a DIY lamp
- How to make your lamp look expensive
- Common mistakes to avoid
- Real-life experiences from DIY modern floor lamp projects
- Conclusion
If your living room feels like it’s lit by one sad ceiling bulb with commitment issues, a DIY modern floor lamp can fix that fast. It adds height, style, and useful light without asking you to open up a wall, rewire the house, or make peace with a lamp that looks like it came from a dentist’s waiting room in 1998. Better yet, building one yourself gives you control over the size, finish, shade, and overall vibe. You get modern design on your terms, which is always more satisfying than spending too much on something that is almost right.
A well-made modern floor lamp can work as task lighting by a reading chair, ambient lighting in a dark corner, or even a sculptural piece that makes the room feel more finished. The trick is combining clean lines with safe construction and smart material choices. That means choosing a stable base, using a lamp kit correctly, routing the cord neatly, and picking a bulb that gives you the glow you want without turning the shade into a tiny indoor sun.
Why a DIY modern floor lamp is worth making
Modern floor lamps are popular because they do two jobs at once: they light the room and they act like furniture. A good one adds warmth, texture, and vertical interest. It also helps layer a room’s lighting so you are not relying on a single overhead fixture for every mood, every task, and every regrettable late-night snack.
Making your own version gives you several advantages. First, you can customize the proportions. Store-bought lamps are often too short, too bulky, too shiny, or weirdly dramatic in a way that only works if you also own a marble penthouse and a dog named Claude. A DIY lamp lets you scale the height to your room and choose a base style that actually fits your furniture.
Second, you can control the finish. Want a matte black pipe look, a light oak Scandinavian style, a painted geometric base, or a warm walnut tripod? You are the boss. Third, you can often build a better-looking lamp for less money than a high-end modern design store charges for a lamp that still arrives with assembly instructions written by a cryptic raccoon.
What makes a floor lamp look modern?
Modern design usually comes down to restraint. The lamp should feel intentional, not overworked. Think clean silhouettes, simple geometry, limited ornament, and a material palette that feels current. Wood, black metal, brass accents, linen shades, and frosted glass all work well when used in a balanced way.
Popular modern floor lamp styles
Tripod lamp: This style uses three legs and a central post. It feels airy and architectural, and it works especially well in living rooms and bedrooms.
Box-frame lamp: A rectangular or open cube-style frame creates a clean, contemporary look that feels handmade without looking homemade.
Arc-inspired lamp: A curved arm can look very modern, though it is a more advanced build because balance matters more.
Minimal pole lamp: The simplest version is a sleek vertical body with a neat base and a drum or cone shade.
If you are building your first lamp, a tripod or box-frame design is usually the sweet spot. It looks sophisticated, gives you room to personalize the finish, and does not require engineering a moon mission.
Materials and tools you may need
Your exact list depends on the design, but most DIY modern floor lamp projects use a similar set of basics:
Common materials
Wood boards, dowels, or table legs for the base and body; a lamp kit with socket, cord, plug, and threaded hardware; wood glue; screws or brad nails; sandpaper; paint or stain; a lampshade; and an LED bulb.
Common tools
Miter saw or handsaw, drill and bits, screwdriver, measuring tape, clamps, sander or sanding block, wood filler, and safety glasses. Depending on the lamp kit, you may also need wire strippers and pliers.
The easiest route is to start with a plug-in lamp kit rather than trying to build a hardwired fixture from scratch. Lamp kits are designed to simplify the electrical side of the project, which is good news for anyone whose comfort zone ends somewhere around “I can confidently use painter’s tape.”
How to plan your design before you cut anything
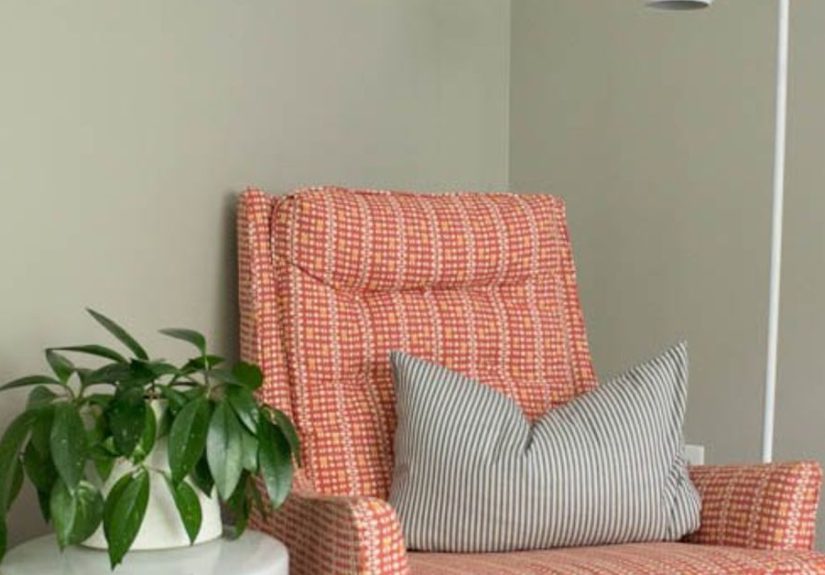
Before you start building, decide exactly what job your lamp needs to do. Is it a reading light beside an armchair? A soft corner lamp for ambience? A statement piece near a sofa? The answer affects the height, shade size, and bulb style.
Sketch the lamp from the front and side. You do not need art-school talent. A box with a line on top is enough. Focus on three questions:
1. Where will the light land?
A reading lamp should direct light toward a chair or sofa. A mood lamp can sit slightly behind furniture and throw a softer glow outward.
2. How stable will the base be?
This is not the place for wishful thinking. A floor lamp needs a sturdy footprint and weight low to the ground so it does not wobble every time someone walks past it like they are auditioning for a hallway tornado.
3. What shade will match the body?
Modern drum shades, cone shades, or globe-inspired silhouettes work best with simple lamp bodies. If the base is visually busy, choose a quieter shade. If the base is ultra-minimal, the shade can provide texture.
Step-by-step: how to build a DIY modern floor lamp
Step 1: Build the base or frame
Cut your wood pieces to size and dry-fit everything before gluing or fastening. For a tripod lamp, this means preparing the center post and cutting the legs so they meet cleanly. For a box-frame lamp, assemble the rectangular structure first and make sure it sits square on the floor.
Take your time here. Good lamp projects do not usually fail because of the finish color. They fail because the builder got impatient and created something that leans like it just heard bad gossip.
Step 2: Create the path for the lamp hardware
Most modern lamp builds need a neat way to run the cord and anchor the socket hardware. Typically, that means drilling a centered hole where the threaded rod or nipple will pass through. If your design hides the cord inside the body, make sure the route is smooth and does not pinch the wire.
This stage is where modern design gets its polished look. When the cord path is thoughtfully planned, the final lamp looks clean instead of improvised.
Step 3: Sand everything well
Sand all faces, edges, and cut ends before finishing. If you used wood filler, let it dry fully and sand again. Modern pieces look best when surfaces feel crisp but touchable. You want clean lines, not splinters with ambitions.
Step 4: Apply paint, stain, or clear finish
Choose a finish that matches the room. Matte black feels bold and contemporary. Natural oak or walnut stain leans warm and Scandinavian. Soft white can look clean and gallery-like. A clear matte finish is perfect if the wood grain is the main attraction.
Let the finish cure properly before installing the electrical parts. Rushing this step can leave fingerprints, smudges, and the kind of regret that shows up every time sunlight hits the lamp.
Step 5: Install the lamp kit
Feed the cord through the drilled opening and install the socket hardware according to the kit instructions. Most kits are fairly straightforward, especially for bottle lamps, wood lamps, and simple floor lamp builds. The socket usually secures with threaded parts, and the shade support attaches above it.
Keep the hardware straight and snug, but do not force anything. A modern lamp should feel precise, not bullied into existence.
Step 6: Add the shade and bulb
Once the socket is installed, add the shade and test the proportions before calling the project finished. A slightly too-small shade can make a tall lamp look awkward. A giant shade can make it look like it is wearing a sunhat indoors. Aim for balance.
Important safety rules for a DIY lamp
This is the grown-up part, but it matters. A beautiful lamp should also be a safe lamp.
Use the correct polarity
On many lamp cords, the ribbed wire is the neutral wire and connects to the silver terminal, while the smooth wire connects to the brass terminal. If that sentence makes your brain try to leave the room, stop and follow the instructions included with your specific lamp kit carefully.
Never exceed the socket’s maximum wattage
Always check the lamp socket or kit instructions for bulb limits. Higher-wattage bulbs create extra heat, which is exactly the kind of drama your lamp does not need.
Choose LED bulbs for modern builds
LED bulbs are usually the smartest choice for a DIY floor lamp. They are efficient, long-lasting, and much better for keeping heat down, especially if your shade is fabric or your design is compact.
Protect the cord
Do not run the cord where people will step on it, tuck it under rugs, crush it under furniture, or wrap it tightly around the lamp body. A neat cord path is part of good design and basic safety.
Unplug before making changes
If you need to adjust wiring, replace damaged parts, or swap hardware during the build, unplug the lamp first. Heroic confidence is not an approved safety device.
How to make your lamp look expensive
You do not need luxury-store pricing to get a polished result. What makes a DIY lamp look high-end is usually the small stuff:
Keep the silhouette simple
Modern design loves restraint. Avoid adding too many decorative elements just because you own a glue gun and feelings.
Use one standout material
Maybe it is beautiful wood grain, brushed brass, or a textured linen shade. Let one feature do the heavy lifting.
Match the finish to the room
If your room has black hardware, repeat that finish in the lamp. If the room is warm and organic, choose wood tones or soft metallics.
Hide visual clutter
Clean cable management, tight joinery, and a properly fitted shade make a huge difference. Most “designer” looks are really just well-edited looks.
Common mistakes to avoid
Making the base too light: A tall lamp with a flimsy base is one accidental elbow away from retirement.
Ignoring scale: The lamp should relate to nearby furniture in a way that feels intentional.
Using the wrong bulb tone: A harsh cool bulb can make your cozy modern lamp feel like a parking garage accessory.
Skipping the dry fit: Test the assembly before finishing so you can adjust angles, height, or shade proportion early.
Rushing the finish: Modern projects depend on clean surfaces. Sloppy paint or blotchy stain will always show.
Real-life experiences from DIY modern floor lamp projects
One of the most interesting things about making a DIY modern floor lamp is how quickly it teaches patience. On paper, the project looks simple: cut wood, add hardware, screw in bulb, bask in compliments. In real life, the little decisions are what shape the final result. Builders often discover that the first draft of the lamp is not quite right. The legs may be too wide, the shade may look too bulky, or the finish may clash with the room more than expected. That is not failure. That is the project doing what good DIY projects do: forcing you to notice details.
A common experience is realizing that lighting changes the mood of a room more dramatically than almost any other decor item. A dark corner that felt forgotten suddenly becomes a favorite reading spot. A living room that looked flat under overhead lighting starts to feel layered and warm. Even a bedroom can feel more restful when a floor lamp introduces softer light from the side instead of blasting everything from above like an interrogation scene.
Many DIYers also find that the build itself becomes part design lesson, part confidence boost. You learn to trust proportion. You see how a matte black finish feels sharper than glossy paint, or how natural wood can soften a modern shape. You learn that the shade matters more than you expected and that one inch in either direction can change the whole personality of the lamp. That kind of hands-on design experience carries over into other projects too, from shelving to side tables to wall decor.
There is also the satisfaction factor, which is hard to overstate. A store-bought lamp might look nice, but a lamp you built has a story. You remember choosing the wood, debating the stain, rerouting the cord, and stepping back after the first test glow like you had personally invented electricity. Guests notice it too. Handmade pieces tend to invite conversation because they have character. They feel considered. They do not just fill space; they contribute to it.
Of course, there are funny moments along the way. Plenty of people discover halfway through the project that the “simple” design they chose actually involves a suspicious number of angles. Others buy a shade that looks perfect in the store and hilariously oversized at home. Some finish the whole lamp, plug it in, and then realize the bulb temperature is all wrong, turning their carefully curated modern oasis into the emotional atmosphere of a convenience store. The good news is that these are fixable problems, and they are often how the best version of the lamp eventually emerges.
In the end, a DIY modern floor lamp is more than a lighting project. It is a compact way to practice craftsmanship, design judgment, and everyday problem-solving. It does not require a massive workshop or elite-level skills. It just rewards careful planning, safe assembly, and a willingness to tweak the details until the lamp feels right. When that final version clicks, you end up with something useful, stylish, and deeply personal. Not bad for a project that started with a few boards, a lamp kit, and the bold decision to stop living under one lonely ceiling fixture.
Conclusion
A DIY modern floor lamp is one of the most satisfying home projects because it blends form and function so well. You get practical lighting, custom style, and the pride of building something that looks tailored to your space. Keep the design simple, make the base stable, install the lamp kit carefully, and choose a quality LED bulb with a shade that suits the build. Do that, and your finished lamp will not just brighten a room. It will quietly prove that your taste is excellent and your toolbox is no longer just decorative.