Table of Contents >> Show >> Hide
- Before You Start: The Big Truth About Modeling Clay
- How to Harden Modeling Clay: 11 Steps
- Step 1: Identify the Type of Clay You Actually Have
- Step 2: Read the Packaging Like It Holds the Secrets of the Universe
- Step 3: Decide Whether Your Clay Can Be Hardened at All
- Step 4: Prepare the Clay Properly Before You Try to Harden It
- Step 5: Smooth Cracks, Seams, and Fingerprints Before Hardening
- Step 6: For Polymer Clay, Preheat the Oven and Use a Thermometer
- Step 7: For Polymer Clay, Bake Based on Thickness, Not Vibes
- Step 8: For Air-Dry Clay, Let Air Do the Job Slowly
- Step 9: Do Not Force-Dry the Piece Unless the Brand Specifically Allows It
- Step 10: Let the Piece Cool or Finish Drying Completely Before Judging It
- Step 11: Finish the Surface the Right Way
- Common Mistakes to Avoid
- Which Clay Should You Use if You Want a Hard Final Result?
- Final Thoughts
- Experience and Practical Lessons From Real Clay Projects
- SEO Tags
If you have ever finished a clay project, admired it for five glorious seconds, and then asked, “Okay… now how do I make this thing stay like this?” welcome. You are among friends. The tricky part is that “modeling clay” is a catch-all term. Some clays harden beautifully. Some need an oven. Some dry on their own. And some, rather rudely, never harden at all.
That means the real secret is not brute force, wishful thinking, or leaving your sculpture on a windowsill like it is “finding itself.” The secret is knowing what kind of clay you have and using the right hardening method for that specific material. Once you get that part right, the rest becomes much easier.
This guide walks you through exactly how to harden modeling clay in 11 practical steps, whether you are working with polymer clay, air-dry clay, or a product labeled simply as modeling clay. By the end, you will know what works, what does not, and how to avoid the classic disasters: cracks, scorch marks, sticky surfaces, and the heartbreaking “why is my clay still soft?” moment.
Before You Start: The Big Truth About Modeling Clay
Here is the not-so-glamorous but incredibly important truth: not all modeling clay is meant to harden. If you skip this part, you may spend hours trying to cure a clay that was designed to stay soft forever. That is like trying to toast ice cream. Ambitious, yes. Effective, no.
In general, clay used for crafts usually falls into three categories:
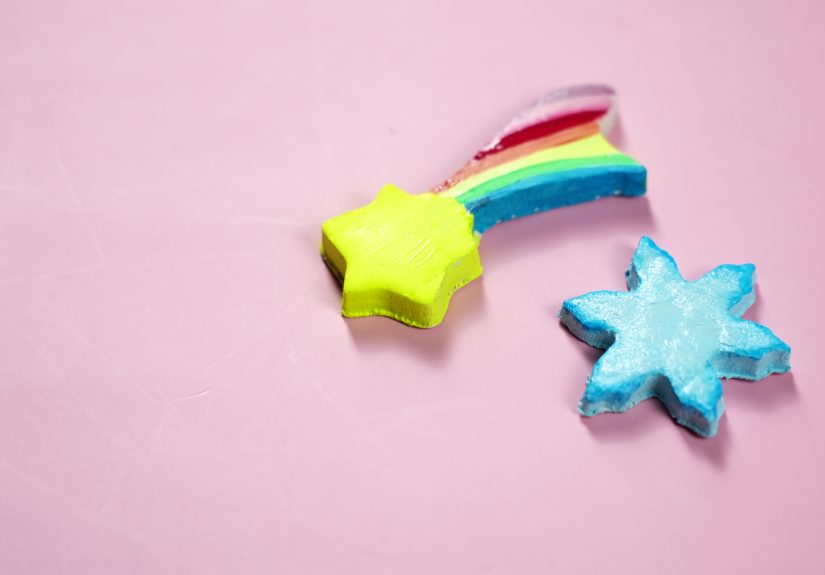
- Oil-based modeling clay or plasticine: stays soft and reusable; it does not harden permanently.
- Polymer clay: hardens when baked in an oven.
- Air-dry clay: hardens naturally as moisture evaporates.
So if you want to harden modeling clay successfully, the first step is not baking, sealing, painting, or panicking. It is identification.
How to Harden Modeling Clay: 11 Steps
Step 1: Identify the Type of Clay You Actually Have
Check the package first. If the label says polymer clay, oven-bake clay, or a brand known for polymer formulas, you will need heat curing. If it says air-dry clay, self-hardening clay, or no oven needed, it should harden on its own. If it says modeling clay, plasticine, or emphasizes reusability, it may be oil-based and may never harden permanently.
This is the most important step in the whole process because your hardening method depends entirely on the material. One clay loves a steady oven. Another wants time and airflow. Another wants to remain squishy forever and judge you silently.
Step 2: Read the Packaging Like It Holds the Secrets of the Universe
For once, the package instructions are not optional. They matter. Polymer clay brands vary in recommended temperature and baking time. Air-dry clay brands vary in drying speed, shrinkage, and finishing instructions. Some are better for detailed sculpture, while others are intended for kids’ crafts or simple decorative projects.
Pay attention to the recommended time, temperature, thickness limits, and finishing notes. If the package warns against microwaving, believe it. If it says to let the piece dry fully before painting, do that too. Clay is not difficult, but it is deeply unimpressed by impatience.
Step 3: Decide Whether Your Clay Can Be Hardened at All
If you discover you are using true oil-based modeling clay, you should know the answer right away: it will not permanently harden. Not with air, not with a household oven, not with prayers, and not with a heroic amount of spray sealer.
If you have oil-based clay and need a lasting final piece, you have a few realistic options. You can remake the piece in polymer clay or air-dry clay. You can also use the oil-based original as a sculpting model for making a mold or reference piece. In other words, oil-based clay is fantastic for practice, prototyping, and stop-motion-style work, but not for permanent display pieces.
Step 4: Prepare the Clay Properly Before You Try to Harden It
Good curing starts long before the clay hardens. With polymer clay, condition it thoroughly by kneading and warming it until it feels even and smooth. Poorly conditioned clay is more likely to crack or cure unevenly. With air-dry clay, knead it just enough to make it smooth and workable without drying it out.
Also, think about thickness. Extremely thick pieces are more likely to dry unevenly, stay soft inside, or crack along the way. If your sculpture is bulky, consider building it hollow or around a suitable armature if the clay type allows it. Thin, even sections cure more reliably than giant mystery lumps.
Step 5: Smooth Cracks, Seams, and Fingerprints Before Hardening
Once clay hardens, every tiny flaw becomes part of the official record. So deal with surface issues before curing. For air-dry clay, a small amount of water can help smooth seams. For polymer clay, gentle rubbing, smoothing tools, or soft brushes can help refine the surface.
This is also the time to attach pieces properly. Score and join parts when needed for air-dry clay, and make sure attachments are secure. If you wait until after hardening, you are moving from “crafting” into “tiny emergency repair work,” which is not as fun as it sounds.
Step 6: For Polymer Clay, Preheat the Oven and Use a Thermometer
If your clay is polymer clay, use a conventional oven or toaster oven according to the package instructions. Preheating matters because polymer clay cures best at a steady, accurate temperature. An oven thermometer is a smart move because many ovens run hotter or cooler than the dial says.
That matters more than most beginners expect. Underbaked polymer clay can look done while still being weak and brittle. Overheated clay can darken, scorch, or burn. That is why experienced crafters are so annoyingly correct about oven thermometers. They are not being dramatic. They are being right.
Step 7: For Polymer Clay, Bake Based on Thickness, Not Vibes
Polymer clay should be baked for the time and temperature recommended by the manufacturer, usually based on thickness. Do not guess. Do not pull it out early because it “looks done.” Polymer clay often firms up more as it cools, so warm clay can still seem slightly flexible right out of the oven.
Place your piece on parchment paper, cardstock, ceramic tile, or another oven-safe surface recommended for clay work. If you are making thin pieces or delicate details, tenting the piece loosely with foil or covering it with an inverted pan can help prevent scorching on the highest points.
And yes, this is where many projects go sideways. Not because clay is difficult, but because people decide that package directions are merely “suggestions from the weak.” They are not. Use the directions.
Step 8: For Air-Dry Clay, Let Air Do the Job Slowly
If your clay is air-dry, resist the temptation to rush it. Air-dry clay hardens as moisture leaves the piece, so it needs time, decent airflow, and patience. Place the project on a clean, dry surface and let it dry gradually. Depending on thickness and brand, this can take anywhere from overnight to several days.
Turn the piece carefully if needed so all sides can dry more evenly. Thicker pieces usually take much longer than thin ones. Small beads may dry quickly; a chunky figurine may still be damp inside when the outside feels firm. That is normal. Let the center catch up before painting or sealing.
Step 9: Do Not Force-Dry the Piece Unless the Brand Specifically Allows It
This is where many crafters accidentally create cracks. Blasting air-dry clay with too much heat can dry the outside too fast while the inside is still moist. The result is stress, splitting, warping, or a finish that looks like the clay had a very bad week.
Some brands may allow gentle low-temperature assistance, but unless the product instructions specifically say so, slow drying is the safer choice. Keep the piece away from direct blazing sun, heating vents, and random “I put it near the radiator because I’m innovative” experiments.
Step 10: Let the Piece Cool or Finish Drying Completely Before Judging It
Polymer clay should cool fully before you decide whether it cured properly. Fresh from the oven, it may still seem a little flexible, especially in thin areas. That does not automatically mean it failed. Let it cool completely first.
Air-dry clay must be fully dry before you paint, varnish, or glue on embellishments. If it still feels cool to the touch in thicker areas, it may still contain moisture. Give it more time. Decorating too soon can trap moisture, weaken the finish, or cause paint and sealers to behave badly.
Step 11: Finish the Surface the Right Way
Once the clay has hardened properly, you can move on to finishing. Air-dry clay can usually be painted once fully dry. Many crafters use acrylics because they are easy to control and dry reliably. A compatible acrylic varnish can add some protection, but it does not make air-dry clay waterproof for outdoor life in the rain.
Polymer clay is different. It is already a durable plastic once cured, so it does not always need sealing. In many cases, sanding and buffing create a better finish than slapping on a random mystery sealer. If you do use paint or glaze, make sure it is compatible with polymer clay.
Common Mistakes to Avoid
Even a simple clay project can go weird if you make one of these common mistakes:
- Baking oil-based modeling clay and expecting it to become permanent.
- Microwaving polymer clay.
- Ignoring thickness when setting baking time.
- Rushing air-dry clay with too much heat.
- Painting or sealing before the piece is fully cured or fully dry.
- Using very thick shapes without planning for even hardening.
- Skipping package directions because “all clay is basically the same.” It is not.
Which Clay Should You Use if You Want a Hard Final Result?
If your goal is a durable final piece, choose your clay based on the result you want:
- Choose polymer clay for jewelry, charms, detailed miniatures, ornaments, and smooth decorative pieces.
- Choose air-dry clay for simple sculptures, kid-friendly crafts, ornaments, bowls, and projects where you do not want to use an oven.
- Choose oil-based modeling clay only when you want a reusable sculpting material that stays soft.
That choice will save you more frustration than any single “hack” on the internet. The wrong clay can make you feel like you are failing, when really the material was just never meant to do what you asked.
Final Thoughts
If you want to harden modeling clay, the process is actually pretty straightforward once you stop treating all clay like one magical substance. Identify the type, follow the right curing method, respect drying and cooling times, and finish the piece only after it has truly set.
The biggest lesson is simple: the best hardening method depends on the clay itself. Polymer clay needs controlled baking. Air-dry clay needs time and patience. Oil-based modeling clay needs a different job description.
Do that, and your next clay project has a much better chance of becoming a lasting piece instead of a soft little tragedy on your craft table.
Experience and Practical Lessons From Real Clay Projects
One of the funniest things about working with clay is that people often assume the hard part is sculpting. It is not. Sculpting is the fun part. Hardening it correctly is where the craft starts acting like it has standards.
For beginners, the most common experience is buying something labeled “modeling clay,” making a cute figure, and then discovering three hours later that it is still exactly as soft as it was before dinner. That moment teaches a lesson fast: names on art supplies can be vague, and packaging matters. A lot. Once crafters learn the difference between air-dry clay, polymer clay, and oil-based clay, their success rate jumps almost immediately.
Another common experience is with polymer clay. Many people bake it once, pull it out, poke it instantly, and assume they ruined it because it still has a slight give. Then they panic, rebake it randomly, or decide clay is cursed. In reality, polymer clay often needs to cool completely before you judge it. That single bit of patience saves a shocking number of projects.
Air-dry clay brings a different kind of drama. It can look dry on the outside and still be damp inside, especially if the piece is thick. Beginners paint it too early, then wonder why the finish looks patchy or why the surface feels odd the next day. The experience usually teaches the same rule every time: when in doubt, wait longer. Clay is one of those materials that rewards patience and punishes shortcuts with unusual creativity.
There is also the issue of cracking. Almost everyone has a crack story. Sometimes it comes from clay that was too dry while being shaped. Sometimes it comes from rushed drying. Sometimes it comes from thick sections drying unevenly. And sometimes it comes from the universal crafting instinct to say, “This is probably fine,” right before it becomes very much not fine. After a few projects, experienced crafters learn to keep thickness more even, smooth joins better, and stop trying to speed-run chemistry.
Surface finishing creates another wave of learning. People often assume every clay piece needs a sealer, but that is not always true. Some finishes look better with simple paint. Some polymer clay pieces look best after sanding and buffing. Some air-dry pieces benefit from a light varnish for display. The practical lesson is that finishing should match the clay and the purpose of the object. A display figurine, a pair of earrings, and a kid’s craft project do not all need the same final treatment.
Over time, people who work with clay tend to become calmer makers. Clay teaches timing, restraint, and observation. You start noticing whether a piece still feels cool in the center, whether a seam needs one more pass, whether your oven runs hot, whether your design is too thick for graceful drying. These are not glamorous skills, but they are the reason good projects survive.
In the end, experience with hardening modeling clay comes down to one surprisingly comforting truth: most clay disasters are not personal failures. They are process failures. Once you understand the material and respect what it needs, the results become far more predictable. And that is great news, because it means your next project does not need luck. It just needs the right clay, the right method, and slightly less chaos.


