Table of Contents >> Show >> Hide
- Why 1950s Garden Benches Still Look Good Today
- Step One: Identify What You’re Working With (Before You Buy Paint Like a Gremlin)
- Don’t Skip This: Old Paint, Lead, and Dust Safety
- Cleaning: The Unsexy Step That Makes the Paint Job Look Expensive
- Rust Removal: Pick Your Drama Level
- Remove Old Paint from Metal Without Losing Your Mind
- Primer + Paint: The Combo That Makes (or Breaks) Outdoor Durability
- Powder Coating: The “1950s Look, Modern Toughness” Upgrade
- Rebuilding the Bench: Slats, Hardware, and the Comfort Factor
- Styling a Retro Garden Bench So It Looks Intentional
- Maintenance: Keep the Finish Fresh Without Babysitting It
- What Reviving a 1950's Bench Feels Like: of Hands-On Reality
- Conclusion
If your garden bench could talk, a true 1950s original wouldn’t whisper. It would announce itselfprobably in a glossy pastel and with the kind of confidence that makes you want to wear sunglasses indoors. The good news? You don’t need a time machine (or a convertible with tailfins) to get that vibe back. A revamped retro 1950’s garden bench is one of the most satisfying DIY upgrades you can do: it’s practical, it’s stylish, and it turns “old yard furniture” into “intentional outdoor décor.”
This guide breaks down how to revive a vintage or vintage-inspired benchespecially the metal and slatted styles that scream mid-century outdoor living. We’ll talk materials, safety, rust, primers, paint choices, powder coating, and stylingplus what the process actually feels like in real life (including the part where you realize you’ve been talking to a wire brush like it’s a coworker).
Why 1950s Garden Benches Still Look Good Today
The 1950s nailed outdoor design because it balanced two things that rarely get along: durability and delight. Postwar manufacturing made metal outdoor furniture more accessible, and designers leaned into shapes that looked light, modern, and optimistic. Think airy frames, gentle curves, and slats or latticework that let rain pass through instead of pooling like a tiny, rude birdbath.
The “retro” details you’re trying to preserve
- Materials: powder-coated or enamel-painted steel, wrought iron, wire, aluminum frames, and wood or metal slats.
- Silhouettes: slender legs, clean lines, occasional swoops or scrolls, and seats that look breezy instead of bulky.
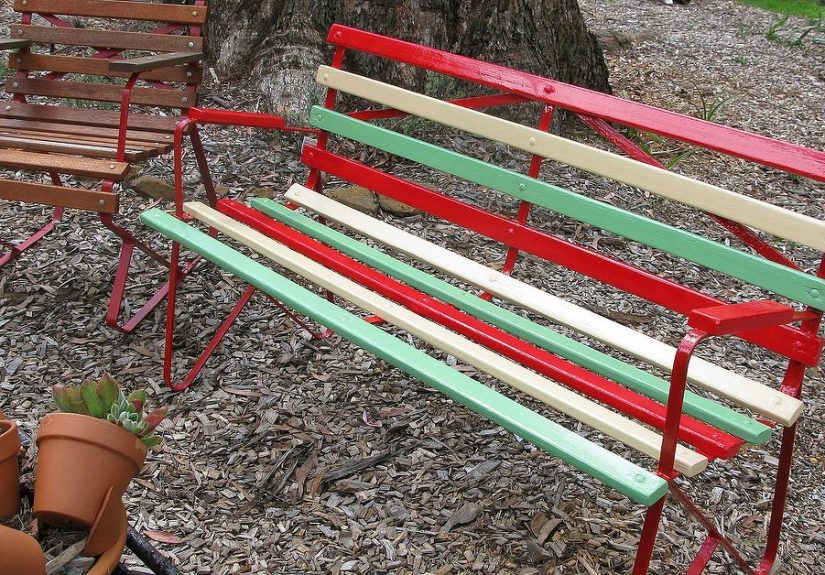
- Finishes: smooth, glossy color; sometimes a subtle sparkle; often “happy” hues (turquoise, mint, butter yellow, coral, white).
- Comfort logic: slightly springy seating, breathable surfaces, and room for a cushion without needing a full sofa situation.
Your goal in a vintage garden bench makeover isn’t to make it look brand-new in a sterile way. It’s to make it look like it’s been cared for like it belongs in a magazine spread where someone “casually” sets down lemonade without leaving a ring (we can dream).
Step One: Identify What You’re Working With (Before You Buy Paint Like a Gremlin)
A successful bench restoration starts with a quick “bench audit.” It saves money, prevents safety issues, and keeps you from painting over a problem that will reappear the first time someone sits down with a dramatic sigh.
Materials checklist
- Wrought iron / steel: heavy, sturdy, prone to rust if coating fails.
- Aluminum: lighter, won’t rust the same way, but can oxidize and needs the right prep and paint.
- Wood slats on metal frame: classic look; slats may need replacement even if the frame is perfect.
- Mixed metals or mystery alloys: not rare in older outdoor furnituretreat prep seriously so coatings adhere.
Safety and stability checks
- Does the bench wobble? Check feet, leg alignment, and loosened fasteners.
- Any cracked welds or stress points? Inspect joints closelyespecially where the seat meets the legs.
- Sharp edges, broken slats, or flexing sections? Fix these before refinishing.
- Does it feel tippy? Stability matters; benches that can tip are a real hazard.
If you discover major structural issues (like a frame that twists under light pressure), treat that as a repair project first. A gorgeous paint job does not magically replace physics.
Don’t Skip This: Old Paint, Lead, and Dust Safety
When you’re restoring older furniture, assume the coating is “unknown” until proven otherwise. That doesn’t mean panicit means you use smart precautions. Lead can be present in some older paints and surface coatings, and the risky part is the dust created when scraping, sanding, or blasting old finishes.
Practical precautions that don’t ruin your weekend
- Work outdoors or in a very well-ventilated area.
- Wear gloves and eye protection; use a properly fitted mask/respirator suitable for dust and fumes.
- Favor wet methods (wet sanding, damp wiping) to reduce airborne dust.
- Lay down a drop cloth you can fold inward to capture debris.
- Keep kids and pets away from the work zone until cleanup is complete.
If the bench is genuinely mid-century (or you just can’t tell), consider using an appropriate lead test option or having a pro evaluate itespecially if you plan to sand aggressively or hire abrasive blasting.
Cleaning: The Unsexy Step That Makes the Paint Job Look Expensive
Every great refinished outdoor bench has one thing in common: it was cleaned like it owed someone money. Dirt, chalky oxidation, sunscreen residue, and old grime can prevent primer and paint from bonding. Translation: you’ll be repainting in a month and pretending it was “always your plan.”
Basic cleaning routine
- Dry brush first: knock off loose dirt and flaking paint with a stiff brush.
- Wash: warm water + mild detergent, scrub with a non-scratch pad or soft brush.
- Rinse and dry fully: moisture trapped in seams is rust’s love language.
- Degrease: wipe down with an appropriate solvent or cleaner recommended for paint prep.
If you’re working with aluminum, avoid harsh cleaners that can worsen oxidation. When in doubt, gentle cleaning plus thorough rinsing beats “chemical warfare in a spray bottle.”
Rust Removal: Pick Your Drama Level
Rust is basically a structural gossipit spreads quietly until it’s suddenly everyone’s problem. The key is to remove it or stabilize it correctly before you prime and paint.
Level 1: Light surface rust (DIY-friendly)
- Wire brush or sanding to remove loose rust and flaking paint.
- Feather edges so you don’t create ridges that show through the finish.
- Wipe clean to remove dust.
- Use a rust-inhibiting primer and paint formulated for metal.
Level 2: Moderate rust (still DIY, just more elbow grease)
- Strip failing paint and work down to stable material.
- Consider a rust converter on affected spots when appropriate (especially if you can’t reach tight crevices).
- Prime immediately after prep to prevent flash rust.
Level 3: Heavy rust or multiple failing layers (the “call in reinforcements” option)
If the bench is heavily pitted or covered in stubborn coatings, professional sandblasting and powder coating can be a great route. It’s often the best way to get an even finish on intricate metalwork without brush marks and missed crevices.
Remove Old Paint from Metal Without Losing Your Mind
Old paint removal is where many projects go off the rails. Not because it’s impossiblebecause it’s boring. But doing it right is what separates a long-lasting finish from “looks good until the first rain.”
Options (from simplest to most intense)
- Hand sanding + scraping: good for small areas and loose paint; slow but controlled.
- Chemical strippers: effective, especially on thick layers; follow safety directions and neutralize/wash after use.
- Heat tools: can work on some paints, but fumes and fire risks make this a cautious, advanced move.
- Professional blasting: fastest for complex shapes; should be done with proper containment and safety controls.
Whatever method you choose, your job is the same: get to a surface that’s clean, dry, and stable enough for primer to grip. Paint sticks best when it’s not fighting yesterday’s mistakes.
Primer + Paint: The Combo That Makes (or Breaks) Outdoor Durability
Outdoor benches live hard lives. Sun, temperature swings, moisture, pollen, bird-related incidents… it’s a lot. A quality primer and the right paint are what let your revamped retro garden bench survive more than one season.
Primer rules for metal
- Use a rust-inhibiting primer on steel/wrought iron, especially where you’ve exposed bare metal.
- Prime immediately after prep to prevent new oxidation or rust forming.
- Follow dry times. Rushing primer is how you create paint that peels in satisfying sheetslike sunburn, but for furniture.
Paint choices that look retro but perform modern
- Exterior enamel (spray or brush) for a classic, durable finish.
- High-quality acrylic formulations can offer flexibility and resistance to cracking and fading.
- Metal-specific spray paints can be great for even coverageespecially on intricate designs.
Technique: how to avoid drips, rough texture, and regret
- Work in thin coats. Multiple light coats beat one heavy coat every time.
- Keep a consistent distance when spraying; overlap passes slightly.
- Let coats dry fully before the next onepatience is a durability multiplier.
- For slats or lattice, change angles so you don’t miss hidden surfaces.
Pro tip: a smooth finish is mostly prep and restraint. Your paint can be excellent, but it can’t outsmart grease, dust, or impatience.
Powder Coating: The “1950s Look, Modern Toughness” Upgrade
If you want the most durable finishand you’re okay outsourcing part of the jobpowder coating is worth considering. It’s commonly chosen for outdoor furniture because it can hold up extremely well, especially compared with bargain paint jobs.
When powder coating makes sense
- Your bench has lots of curves, mesh, or ornate metalwork that’s hard to paint evenly.
- You want a finish that can last many years with minimal maintenance.
- You’re willing to pay for professional prep (often blasting) and baking.
If your bench has that iconic “bright white steel” or “pastel enamel” mid-century vibe, powder coating can replicate that clean look while adding serious toughness.
Rebuilding the Bench: Slats, Hardware, and the Comfort Factor
A bench makeover isn’t just paint. The comfort details are what make it feel like a real piece of outdoor furniture instead of a decorative prop that nobody is allowed to sit on (like the “guest towels” no one may touch).
If your bench has wood slats
- Replace cracked or warped slats rather than trying to “paint them into submission.”
- Use rot-resistant wood for outdoor use and seal it properly.
- Pre-drill holes to prevent splitting, and use outdoor-rated fasteners.
Hardware refresh
- Swap rusty bolts and screws for outdoor-grade replacements.
- Add washers where needed to reduce wobble and distribute pressure.
- Consider rubber or nylon feet to protect patios and reduce rocking.
A stable bench feels “expensive” even if you rescued it from a curb. Wobble is the enemy of romance.
Styling a Retro Garden Bench So It Looks Intentional
Once the bench is restored, styling is where you turn “nice refurb” into “wow, this belongs here.” The 1950s aesthetic works because it’s cheerful, graphic, and unbothered by minimalism.
Easy styling wins
- Cushions: choose outdoor fabric in solids or bold stripes for a mid-century nod.
- Planters: pair with terracotta or glossy ceramic pots in complementary colors.
- Lighting: warm string lights or a simple lantern keeps the vibe welcoming.
- Placement: put it where people naturally pausenear a path, under shade, facing the garden.
The best compliment a restored bench can receive is: “Where did you buy that?” (Followed by your casual shrug, as if you didn’t spend a whole Saturday in a cloud of sanding dust.)
Maintenance: Keep the Finish Fresh Without Babysitting It
A retro outdoor bench restoration should last, but no finish is truly “set it and forget it.” A tiny maintenance routine goes a long way.
Simple care schedule
- Monthly: quick wash, check for chips or scratches.
- Seasonally: touch up small paint damage before rust starts.
- Winter / harsh weather: store under cover or use a breathable, well-fitted furniture cover.
Think of it like skincare. You don’t need a 14-step routine. You just need consistency and the occasional “oh no, I scratched it with the shovel.”
What Reviving a 1950’s Bench Feels Like: of Hands-On Reality
Here’s the part most tutorials skip: the emotional arc of a bench makeover. It usually begins with a burst of optimism that feels suspiciously like a home improvement show montage. You spot the benchmaybe at a yard sale, maybe on a neighbor’s curb with a “FREE” signand instantly picture it under twinkle lights, looking like it belongs next to a perfectly chilled pitcher of lemonade. Your brain fast-forwards to the “after” photo before your hands have even touched a screwdriver.
Then comes the first real moment of honesty: the grime. Outdoor furniture collects layers of lifepollen, dust, old sunscreen, mystery splatters, and the kind of sticky residue that makes you wonder if someone hosted a barbecue using only marshmallows and chaos. Cleaning feels like you’re scrubbing away a decade of backyard stories, and yes, it’s boring. But it’s also weirdly satisfying, like the bench is slowly reappearing from under a disguise.
Next, you meet rust in its natural habitat: seams, corners, and every spot your sanding block can’t reach. DIYers often describe this phase as “negotiation.” You don’t remove rust so much as you convince it to leave. You’ll wire-brush, vacuum, wipe, and then wire-brush again because somehow rust has friends. At some point you’ll step back, squint, and say, “That’s probably fine,” even though you know you’ll be thinking about that one stubborn pitted spot while trying to fall asleep.
Painting is where the project becomes fun againuntil it doesn’t. The first coat looks patchy and you briefly panic, forgetting that paint is a process and not a magic spell. Then the second coat starts to even things out, and suddenly you understand why people get emotionally attached to spray paint. There’s a momentusually around coat threewhen the bench crosses a line from “refinished” to “reborn.” It looks smooth. The color looks intentional. It reflects light in a way that says, “I am not your grandmother’s rusty yard seat, thank you very much.”
And finally, there’s the “sit test.” This is where you discover if the bench is truly ready for real life. A restored bench should feel solid, stable, and comfortable enough that someone can sit down without doing the cautious half-hover of distrust. When it passes, you’ll feel a ridiculous amount of pridebecause you didn’t just paint something. You rescued a piece of design history, gave it a second life, and upgraded your outdoor space with something that has personality.
The best part is that the bench becomes a magnet. People pause. They comment. They sit. And every time someone says it looks “so cool,” you get to enjoy the secret knowledge that it wasn’t cool because it was expensiveit was cool because you put in the work. (Also because 1950s design really was built different.)
Conclusion
A revamped retro 1950’s garden bench is equal parts design upgrade and practical outdoor improvement. With the right prep, a smart approach to rust, and a durable finishpaint or powder coatyou can restore mid-century charm without sacrificing modern performance. Treat it like a real project (not just a quick spray-and-pray), and you’ll end up with a bench that looks timeless, feels sturdy, and makes your outdoor space more inviting in a way that brand-new furniture sometimes can’t.


