Table of Contents >> Show >> Hide
- What Is Grout and Why Does It Matter?
- Tools and Materials You Need
- Choose the Right Type of Grout
- Pick the Right Grout Color
- How Long Should Tile Set Before Grouting?
- How to Prepare Tile Before Grouting
- How to Mix Grout
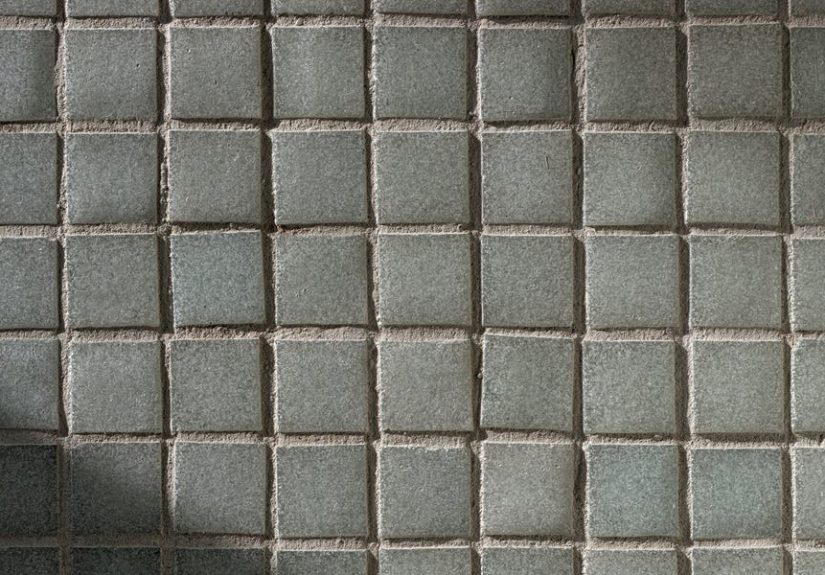
- How to Grout Tile Step by Step
- Grouting Wall Tile vs. Floor Tile
- How to Grout a Tile Backsplash
- Do Not Grout Corners and Movement Joints
- Should You Seal Grout?
- Common Grouting Mistakes to Avoid
- How Long Does Grout Take to Dry?
- How to Maintain Grout After Installation
- Real-World Experience: Practical Lessons from Grouting Tile
- Conclusion
Learning how to grout tile is the moment your tile project goes from “almost finished” to “look at me, I’m basically a renovation show host.” Grout fills the spaces between tiles, helps protect the edges, supports the finished surface, and gives your bathroom, kitchen backsplash, entryway, or floor that crisp, professional look. It is also the step where many DIYers suddenly become very quiet, because grout has a personality. It dries, smears, hazes, clumps, and occasionally behaves like it has weekend plans.
The good news? Grouting tile is not complicated when you understand the sequence: choose the right grout, prep the joints, mix properly, apply with a rubber float, clean at the right time, polish away haze, and let everything cure. The bad news? Skipping any of those steps can leave you with cracked grout, uneven joints, cloudy tile, or a floor that looks like it lost a fight with wet cement.
This in-depth guide explains how to grout tile the right way, with practical tips for floors, walls, backsplashes, showers, and small repair projects. Whether you are working with ceramic tile, porcelain tile, natural stone, mosaic sheets, or large-format tile, the process is mostly the same. The details are where the magic lives.
What Is Grout and Why Does It Matter?
Grout is the dense filling material pressed into the joints between tiles after the tile adhesive or mortar has cured. It is not just decorative filler. Grout helps lock the tile field together visually, keeps debris from collecting between tiles, and helps reduce water and dirt intrusion into the gaps.
That said, grout is not a waterproofing system by itself. In wet areas such as showers, the waterproofing should already exist behind or beneath the tile. Think of grout as the handsome jacket, not the raincoat. It improves the surface, but it should not be asked to do the job of a waterproof membrane.
Tools and Materials You Need
Before you open the grout bag or tub, gather your supplies. Grout waits for no one, especially when the room is warm and dry.
Basic tools
- Rubber grout float
- Margin trowel or mixing paddle
- Clean buckets
- Grout sponge
- Microfiber cloths
- Painter’s tape
- Utility knife or grout saw for cleaning joints
- Shop vacuum
- Knee pads for floor projects
- Nitrile gloves and safety glasses
Materials
- Appropriate grout for your tile and joint width
- Clean water, if using powdered grout
- Grout sealer, if required
- Color-matched silicone caulk for corners and changes of plane
- Grout haze remover, if needed after curing
Do not use a kitchen sponge unless you want your grout lines to look like they were cleaned with a nervous marshmallow. A proper grout sponge has rounded edges and the right density to smooth joints without digging them out.
Choose the Right Type of Grout
The best grout for tile depends on the joint width, tile material, room conditions, and how much maintenance you are willing to tolerate. Choosing the wrong grout can cause scratching, cracking, staining, or a very long afternoon of regret.
Sanded grout
Sanded grout contains fine sand, which helps it resist shrinkage in wider joints. It is commonly used for floor tile and joints wider than 1/8 inch. It is strong, affordable, and a solid choice for many ceramic and porcelain tile installations.
However, sanded grout can scratch polished marble, glass tile, soft stone, and some glossy surfaces. Always test in a hidden area first. Tile has feelings, and polished stone holds grudges.
Unsanded grout
Unsanded grout has a smoother texture and is usually recommended for narrow joints up to 1/8 inch. It is often used for wall tile, delicate tile, polished stone, and surfaces that may be scratched by sanded grout.
Because it lacks sand, unsanded grout can shrink in joints that are too wide. If your grout lines are large, do not ask unsanded grout to become a superhero. Use the right product from the beginning.
Epoxy grout
Epoxy grout is made from resin and hardener. It is highly stain-resistant, durable, and useful in kitchens, showers, laundry rooms, and other demanding areas. It is also more expensive and less forgiving during installation.
If standard cement grout is like pancake batter, epoxy grout is like pancake batter with a stopwatch. It sets on schedule and does not care that you wanted a snack break. Work in small areas and follow the manufacturer’s instructions closely.
Premixed grout
Premixed grout is convenient for small projects, backsplashes, and repairs. It saves mixing time and reduces guesswork. However, not every premixed grout is suitable for every location, such as steam showers, submerged areas, or exterior installations. Always check the label.
Pick the Right Grout Color
Grout color affects the entire look of a tiled surface. Matching grout creates a softer, more seamless appearance. Contrasting grout highlights the tile pattern. Darker grout can be practical for floors because it hides everyday dust and discoloration better than bright white grout.
For white subway tile, white grout looks classic and clean, while gray grout creates a sharper, more graphic style. For patterned tile, a neutral grout usually lets the design shine. For natural stone, test first because porous tile can absorb pigment and darken around the edges.
When in doubt, bring home a grout color chart and look at it in the actual room. Lighting changes everything. A warm gray in the store can become “mysterious basement fog” under your bathroom lights.
How Long Should Tile Set Before Grouting?
Most tile installations should cure for at least 24 hours before grouting, and some products or conditions require 48 hours or more. The exact waiting time depends on the mortar, adhesive, tile size, substrate, temperature, humidity, and manufacturer’s instructions.
Do not rush this step. If the tile is still moving, the grout joints will crack or crumble. A tile project is a little like baking bread: if you pull it too early, you may technically have something, but nobody is going to compliment the texture.
How to Prepare Tile Before Grouting
Good grout starts before the grout touches the tile. Preparation is the difference between smooth, even joints and a surface that looks like it was finished during an earthquake.
Remove tile spacers
Take out all spacers before grouting. Spacers left inside the joints can create shallow spots, uneven color, and weak grout coverage.
Clean the joints
Use a utility knife, grout saw, or margin trowel to remove dried mortar, adhesive, dust, and debris from the joints. The joints should be open, clean, and deep enough to accept grout. Vacuum thoroughly afterward.
Protect nearby surfaces
Use painter’s tape along cabinets, walls, trim, countertops, or fixtures. Grout is easier to control than paint, but it still has a talent for appearing where nobody invited it.
Dampen highly absorbent tile
Some porous tile may pull moisture from grout too quickly. Lightly dampening the tile surface with a sponge can help, but do not leave standing water in the joints. Wet joints can weaken grout and change color.
How to Mix Grout
If you are using powdered grout, read the package directions first. Different products have different water ratios, slake times, pot life, and cleanup windows.
- Add the recommended amount of clean water to a bucket.
- Gradually add grout powder.
- Mix with a margin trowel or low-speed drill paddle.
- Aim for a smooth, peanut butter-like consistency.
- Let the grout slake, or rest, if the product requires it.
- Remix briefly without adding extra water.
Do not make grout soupy. Too much water can weaken the grout, cause color problems, increase shrinkage, and make the joints powdery. If your grout looks like melted ice cream, it is not being “easy to spread.” It is being dramatic.
How to Grout Tile Step by Step
Step 1: Work in small sections
Start with an area of about 3 by 3 feet or 4 by 4 feet, depending on the tile size and grout type. Smaller sections are easier to control, especially on walls, textured tile, or warm days when grout firms up faster.
Step 2: Load the rubber grout float
Scoop grout onto the tile with your float. Hold the float at about a 45-degree angle and press the grout firmly into the joints. Move diagonally across the tile lines so the float does not scoop grout back out.
Step 3: Pack the joints completely
Use firm pressure to force grout into every joint. The goal is full joints with no air pockets or low spots. Move from several directions to make sure the grout fills the space evenly.
Step 4: Remove excess grout
Once the joints are packed, hold the float closer to a 90-degree angle and scrape diagonally across the tiles to remove excess grout from the surface. The cleaner you leave the tile now, the less haze you will battle later.
Step 5: Let the grout firm slightly
Wait until the grout begins to firm up before washing. This may take 5 to 30 minutes depending on the product, tile, humidity, and temperature. Follow the grout manufacturer’s timing. If you wash too early, you can pull grout from the joints. If you wait too long, you may need the strength of a medieval knight to remove the haze.
Step 6: First cleaning
Dampen a grout sponge and wring it until it is barely wet. Wipe the tile in light circular motions to loosen residue, then make gentle diagonal passes across the joints. Rinse the sponge often and change the water frequently.
The sponge should be damp, not dripping. Too much water can weaken the surface of cement grout and cause uneven color. If water is running down the wall or pooling on the floor, the sponge is too wet.
Step 7: Shape the grout lines
As you clean, use the sponge to lightly smooth the grout joints. The lines should be full, even, and slightly recessed below the tile surface. Avoid overworking them. Beautiful grout lines come from calm hands, not panic scrubbing.
Step 8: Final wipe
After the tile surface dries to a light haze, buff it with a clean microfiber cloth. If haze remains after the grout cures, use a grout haze remover that is safe for your tile type. Never use acidic cleaners on acid-sensitive stone such as marble, limestone, or travertine unless the product specifically allows it.
Grouting Wall Tile vs. Floor Tile
The basic method is the same, but gravity has opinions. For wall tile, mix grout slightly stiffer so it stays in the joints. Work from the bottom upward or in manageable zones, and protect countertops, tubs, and floors with drop cloths.
For floor tile, comfort and timing matter. Wear knee pads, keep buckets nearby, and plan your exit route before spreading grout. Nothing says “DIY learning experience” like grouting yourself into a corner and having to perform a suspicious crab-walk across fresh joints.
How to Grout a Tile Backsplash
A backsplash is one of the best beginner grouting projects because the area is smaller and easier to reach. Remove outlet covers, tape off countertops, and protect cabinets. Use unsanded grout for narrow joints or delicate tile, unless the grout manufacturer recommends otherwise.
Press grout diagonally into the joints with a float, clean carefully around outlets, and avoid filling the joint where the backsplash meets the countertop. That change of plane should be caulked with a flexible, color-matched silicone or sealant, not packed with rigid grout.
Do Not Grout Corners and Movement Joints
One of the most common tile mistakes is grouting inside corners, floor-to-wall transitions, tub edges, countertop seams, and other changes of plane. Tile assemblies expand, contract, and move slightly. Grout is rigid, so it can crack in these areas.
Use a flexible sealant, often 100% silicone, at movement joints and changes of plane. This helps absorb movement and keeps the installation looking clean longer. In simple terms: grout belongs between tiles on the same plane; caulk belongs where surfaces meet and movement is expected.
Should You Seal Grout?
Many cement-based grouts benefit from sealing after they cure. Sealer helps reduce staining and moisture absorption, especially in kitchens, bathrooms, and entryways. Some modern grouts are formulated to resist stains and may not require sealing. Epoxy grout typically does not need sealer.
Check your grout label. If sealing is recommended, wait the specified cure time before applying it. Use a small applicator bottle, brush, or roller, wipe excess from the tile, and allow the sealer to dry fully before using the area heavily.
Common Grouting Mistakes to Avoid
Using the wrong grout
Joint width matters. Tile material matters. Room conditions matter. Do not choose grout based only on the prettiest color sample.
Adding too much water
Extra water may make grout easier to spread, but it can lead to weak, blotchy, or cracked joints.
Cleaning too aggressively
Scrubbing hard with a wet sponge can remove grout from the joints and cause uneven lines.
Letting haze sit too long
Grout haze becomes harder to remove as it cures. Clean carefully during installation and buff the tile after the haze forms.
Grouting over dirty joints
Dust, spacers, and dried mortar prevent grout from bonding properly. Clean first, grout second, celebrate third.
How Long Does Grout Take to Dry?
Drying and curing are not always the same thing. Grout may feel dry within hours, but it often needs 24 to 72 hours or longer to cure before heavy use, sealing, or water exposure. Showers and wet areas may require additional cure time before use.
Temperature, humidity, tile porosity, joint depth, and grout type all affect curing. Always follow the product label. If the instructions say to wait three days before using the shower, believe them. The grout is not being lazy; it is becoming useful.
How to Maintain Grout After Installation
Once your grout has cured, routine care keeps it looking fresh. Sweep or vacuum tile floors regularly so grit does not grind into the joints. Clean with a pH-neutral tile cleaner rather than harsh acids or abrasive powders. In showers, improve ventilation, squeegee walls, and address mildew early.
If grout becomes stained, use a cleaner appropriate for the grout and tile type. For old, damaged, or crumbling grout, regrouting may be better than endless scrubbing. At some point, grout is not dirty; it is retired.
Real-World Experience: Practical Lessons from Grouting Tile
The first thing experience teaches you about grouting tile is that the job rewards patience more than muscle. Beginners often assume the hardest part is forcing grout into the joints. In reality, the real skill is timing. You need to apply enough grout, remove enough excess, wait long enough for the joints to firm, and clean soon enough to prevent a stubborn haze. It is a small dance, and the bucket is leading.
On a kitchen backsplash, for example, it is tempting to cover the whole wall quickly because the area looks manageable. But outlets, cabinet edges, accent tiles, and countertop seams slow everything down. Working in smaller sections keeps the grout from drying before you can clean it. A backsplash with glossy ceramic subway tile is forgiving, but a textured handmade tile can hold grout in every tiny groove. That is when a test area becomes your best friend.
Floor tile teaches another lesson: clean water matters. By the time you rinse a sponge ten times in one bucket, the water becomes grout soup. If you keep wiping with dirty water, you are not cleaning the tile; you are politely redistributing haze. Two buckets help: one for the first rinse and one for cleaner final rinsing. Change both often. Your future self, standing there with a microfiber cloth and lower-back opinions, will be grateful.
Another useful experience is to keep the sponge barely damp. Many people use too much water because it feels like water equals clean. With grout, too much water can wash pigment from the surface, weaken cement grout, and create blotchy joints. The sponge should glide, not drip. If your wall looks like it is crying, wring the sponge again.
Color choice is also more practical than people expect. Bright white grout looks stunning on day one, especially in photos. In real kitchens, mudrooms, and busy bathrooms, it may require more maintenance than a darker neutral. Light gray, warm gray, beige, or soft taupe can hide normal life better while still looking clean. That does not mean white grout is bad. It just means white grout is honest. It will report every coffee splash, muddy paw, and mystery crumb.
One of the biggest professional-looking details is consistency. Even if the tile itself is beautiful, uneven grout depth can make the whole project look rushed. After the first cleaning, step back and look across the surface from different angles. Low spots, pinholes, and overfilled joints are easier to correct while the grout is workable. Once it cures, your options become more annoying.
Finally, experienced DIYers learn not to grout every gap they see. Corners, tub edges, countertop transitions, and floor-to-wall joints should usually be sealed with flexible caulk, not rigid grout. This one detail can prevent cracking and make the installation last longer. It may feel strange to leave those gaps during grouting, but it is the correct move. Grout is great, but it is not elastic. Asking it to bend is like asking a cracker to do yoga.
The best grouting experience comes from preparation: read the grout instructions, keep tools ready, protect nearby surfaces, mix only what you can use, and clean as you go. Once you understand the rhythm, grouting becomes satisfying. The tiles sharpen visually, the pattern comes alive, and the room finally looks finished. It is messy, yes. Your hands may look like you arm-wrestled a sidewalk. But when the haze is buffed away and those clean lines appear, the effort feels completely worth it.
Conclusion
Knowing how to grout tile is one of the most valuable DIY skills for homeowners. The process is straightforward, but success depends on details: choose the correct grout, let the tile set, clean the joints, mix carefully, apply with firm diagonal strokes, wash at the right time, and protect movement joints with flexible sealant. Whether you are finishing a bathroom floor, kitchen backsplash, shower wall, or entryway, careful grouting gives tile its finished character.
Take your time, follow the product instructions, and do not panic when the tile looks cloudy during cleanup. Grout haze is part of the process, not a personal attack. With clean water, a good sponge, and a little patience, your tile can look polished, durable, and professionally finished.


