Table of Contents >> Show >> Hide
- Before You Mix: What Makes a Hand & Foot Cream Actually Work?
- Safety & Shelf Life: The One Rule You Shouldn’t Ignore
- Way #1: Whipped Shea “Hand Saver” Cream (No Water, Beginner-Friendly)
- Way #2: Real Emulsified Hand & Foot Cream (The “True Cream” Option)
- Way #3: “Custom Blend” Hand & Foot Cream (Fast, Low-Stress, Highly Giftable)
- How to Get Better Results (Even With the Same Recipe)
- Common DIY Cream Problems (and How to Fix Them)
- Experiences & Lessons Learned (So You Don’t Have to Learn Them the Hard Way)
- Conclusion
Hands and feet work overtime. They wash dishes, type emails, haul groceries, survive winter air, andif you’re like most of usspend at least part of the day trapped in shoes that feel like tiny saunas. So it’s no surprise they’re usually the first to get dry, rough, and cranky.
The good news: you can make a truly effective hand and foot cream at home without turning your kitchen into a chemistry lab (although we’ll do a tiny bit of safe, grown-up mixing). In this guide, you’ll get three optionsranging from “no-water, super simple” to a “real-deal emulsified cream”plus practical tips so your DIY hand cream doesn’t end up separating, getting grainy, or smelling like regret.
Before You Mix: What Makes a Hand & Foot Cream Actually Work?
Most great moisturizers combine three roles. Think of it like a tiny skin-support team:
- Humectants pull in water (examples: glycerin, honey, panthenol). Great for hands that feel “tight.”
- Emollients smooth and soften (examples: plant oils, fatty alcohols like cetyl alcohol, butters like shea).
- Occlusives seal everything in (examples: petrolatum, beeswax, dimethicone). These are the “lock the door” ingredients that help prevent moisture loss.
Hands usually need a balancehydrating but not slippery enough to launch your phone across the room. Feet, especially heels, tend to love richer, more occlusive formulas (and they don’t care if you feel a little glossy under socks).
Safety & Shelf Life: The One Rule You Shouldn’t Ignore
Rule of thumb
If your recipe contains water (including aloe juice, hydrosols, tea, or “just a splash of water”), it needs a broad-spectrum preservative and good sanitation. Water-based creams can grow microbes even when they look and smell fineso we’ll take preservation seriously.
Quick sanitation checklist
- Wash tools and containers with hot, soapy water. Dry completely.
- Wipe mixing tools, jars, and lids with 70% isopropyl alcohol. Let air-dry.
- Use distilled water for any water-based recipe (not tap water).
- Label your batch with the date and recipe name (future-you will thank you).
Also: if you have very sensitive skin, eczema, allergies, or you’re making this for a child, choose fragrance-free options and patch test. If you have diabetes or circulation/nerve issues in your feet, be extra cautious with exfoliation and any strong essential oils, and consider checking with a clinician if you deal with cracked, non-healing skin.
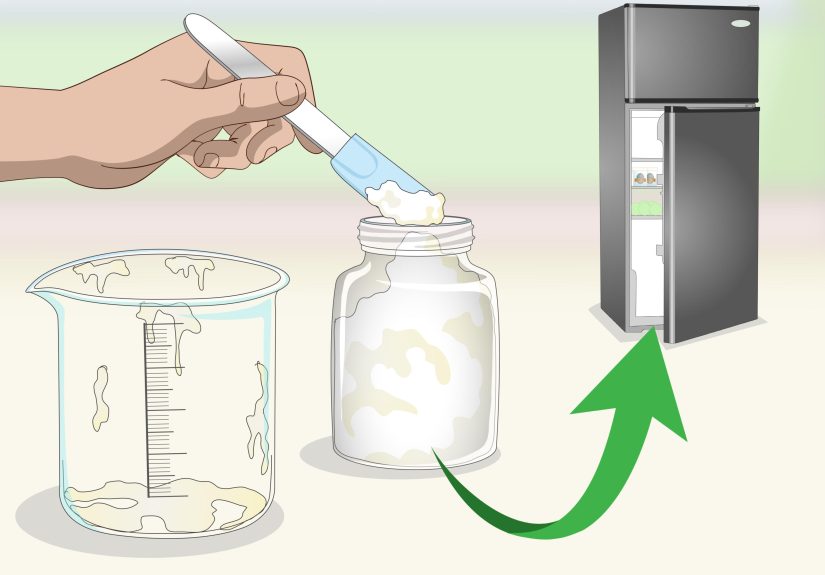
Way #1: Whipped Shea “Hand Saver” Cream (No Water, Beginner-Friendly)
This is an anhydrous (water-free) creammore like a fluffy butter. It’s easy, stable, and perfect if you want something rich for hands and “overnight glove” use. Because there’s no water, you don’t need a preservative (but you still want clean tools to keep it fresh).
Why it’s great for hands and feet
- Deeply softens rough patches
- Ideal for winter dryness and frequent handwashing
- Excellent for heels when applied before socks
Ingredients (makes ~200 g)
- 80 g shea butter (softening, protective)
- 40 g cocoa butter (adds structure; great for feet)
- 70 g jojoba oil or sweet almond oil (slip + conditioning)
- 8 g arrowroot powder or tapioca starch (optional, helps reduce greasy feel)
- 2 g vitamin E (optional antioxidant; helps slow oil oxidation)
- Optional scent: 10–20 drops skin-safe essential oil (keep it light; skip if sensitive)
Steps
- Melt the butters: In a heat-safe bowl, melt shea + cocoa butter using a double boiler (or a bowl over a pot of simmering water). Remove from heat as soon as melted.
- Cool to “thick honey” stage: Add your liquid oil. Place the bowl in the fridge for 15–25 minutes, stirring occasionally, until it looks opaque and thick (not fully solid).
- Whip: Use a hand mixer to whip for 3–5 minutes until light and fluffy.
- Finish: Sprinkle in arrowroot powder (if using), add vitamin E and optional essential oil, then whip again briefly.
- Jar it: Spoon into a clean container. Store cool and dry.
How to use it
- Hands: Use a pea-sized amount. Warm between palms, then massage into knuckles and cuticles.
- Feet: Apply a thicker layer to heels and soles, then put on cotton socks for 30 minutes (or overnight).
Pro tips
- If your whipped cream turns grainy later, it usually means the butters cooled too slowly. Next time, cool more quickly and whip sooner.
- For a “less slippery” daytime hand feel, increase arrowroot slightly (don’t go over ~6%).
Way #2: Real Emulsified Hand & Foot Cream (The “True Cream” Option)
This version contains water + oil blended into a stable emulsion using an emulsifying wax. It feels like a classic store-bought cream: hydrating, spreadable, and more “everyday” than a butter. Because it contains water, it must include a broad-spectrum preservative used according to the manufacturer’s directions.
What you’ll need
- Digital kitchen scale (grams are your best friend)
- Two heat-safe containers (one for water phase, one for oil phase)
- Stick blender or hand mixer
- Thermometer (helpful, not mandatory, but it makes life easier)
Formula (makes ~250 g)
Water phase
- 160 g distilled water
- 10 g glycerin (humectant)
Oil phase
- 30 g sweet almond oil (or grapeseed for lighter feel)
- 20 g shea butter
- 18 g emulsifying wax NF (a common, beginner-friendly emulsifier)
- 7 g cetyl alcohol (thickens and improves “cream slip”)
Cool-down phase (added when the mixture is warm, not hot)
- 2.5 g broad-spectrum preservative (example range: 1% of batch; follow your preservative’s label)
- 2 g vitamin E (optional)
- Up to 1 g essential oil or fragrance (optional; keep low for hands/feet)
Steps
- Sanitize: Clean and alcohol-wipe tools, bowls, and jars.
- Heat both phases: Heat the water phase and oil phase separately in a double boiler until everything is fully melted and hot (typically around 160–170°F). This helps the emulsion form properly.
- Combine: Pour the hot water phase into the hot oil phase (or vice versa), then blend with a stick blender for 60–90 seconds. Rest 1 minute. Blend again. Repeat until the mixture begins to thicken.
- Cool and stir: Let it cool, stirring every few minutes. As it cools, it will thicken into a cream.
- Add cool-down ingredients: When the mixture is warm (often under ~120–140°F), add preservative, vitamin E, and optional scent. Mix well. (Heat can reduce preservative effectivenesscheck the label for temperature guidance.)
- Jar and label: Spoon into containers. Label the date and ingredients.
How to customize it for hands vs. feet
- For hands (daytime): keep oils lighter (grapeseed, jojoba). Consider adding a touch more glycerin for hydration.
- For feet (night): swap part of the liquid oil for more shea butter, or add a small amount of an occlusive like dimethicone (if you use it) for a more protective finish.
Storage notes
- Store cool and dry, lid closed. Use clean hands or a spatula.
- If you notice a strange smell, visible mold, or texture changes that seem “off,” toss it.
Way #3: “Custom Blend” Hand & Foot Cream (Fast, Low-Stress, Highly Giftable)
Want a hand and foot cream you can make in about 10 minuteswithout heating phases, thermometers, or a blender that sounds like a lawnmower? Start with a fragrance-free cream base (a ready-made, preservative-containing base sold by reputable cosmetic suppliers), then customize it with a small percentage of skin-friendly boosters. This method is also great if you’re experimenting with what your skin likes before committing to full formulations.
What to buy
- A fragrance-free cream or lotion base from a reputable supplier (designed for “additives” and small customizations)
- Optional boosters: squalane, jojoba oil, calendula-infused oil, panthenol, colloidal oatmeal
Easy “Two-Jar” customization plan
You’ll make one jar optimized for hands and one for feet. No complicated mathjust simple percentages. For a 200 g jar, 2% = 4 g, 5% = 10 g, etc.
Hand cream blend (200 g jar)
- 190 g fragrance-free cream base
- 6 g squalane (3%) for silky, non-greasy softness
- 4 g glycerin (2%) for hydration (only if your base supports water-soluble additives; otherwise skip)
- Optional: 0.4–0.8 g essential oil (0.2–0.4%) or skip entirely
Foot cream blend (200 g jar)
- 188 g fragrance-free cream base
- 8 g jojoba oil or calendula-infused oil (4%)
- 4 g colloidal oatmeal (2%) for soothing comfort (stir thoroughly to avoid clumps)
- Optional: 0.2–0.4 g peppermint essential oil (0.1–0.2%) for a cooling feel (use sparingly; avoid if sensitive)
Steps
- Sanitize jars and tools (hot soapy wash + alcohol wipe).
- Weigh the base into a bowl.
- Add boosters slowly, mixing thoroughly after each addition.
- Jar it, label it, and store cool and dry.
Important note about “adding water”
Don’t add extra water, tea, or fresh botanicals to a preserved base unless you truly understand preservation. Even “natural” ingredients can introduce contamination and reduce shelf life. If you want botanical vibes, use properly prepared oil infusions or cosmetic-grade extracts made for formulations.
How to Get Better Results (Even With the Same Recipe)
Apply at the right time
Cream works best when applied to slightly damp skinright after washing hands or after a showerbecause it helps trap moisture. For feet, try a “last step” routine before bed: cream, then socks.
Use a “layering” trick for cracked-looking hands or heels
- Step 1: Apply your cream (especially one with humectants like glycerin).
- Step 2: Seal with a thin layer of an occlusive (your whipped butter works, or a simple ointment-style layer).
Patch test new formulas
If you’re changing ingredients (especially essential oils, fragrance, or new preservatives), test on a small patch of skin first. Hands and feet can be surprisingly sensitiveplus, it’s hard to enjoy your “luxury hand cream era” while itchy.
Common DIY Cream Problems (and How to Fix Them)
“My cream separated!”
- Likely causes: not enough emulsifier, phases weren’t heated adequately, or insufficient blending.
- Fix: reheat gently and re-blend (for emulsified creams). For repeated issues, adjust emulsifier/cetyl alcohol levels.
“It feels greasy.”
- Swap heavier oils for lighter ones (grapeseed, jojoba, squalane).
- Use a smaller amount and apply to damp skin.
- For anhydrous whipped creams, add a small amount of arrowroot/tapioca.
“It stings.”
- Fragrance/essential oils can irritate, especially on cracked skin.
- Skip scent, simplify ingredients, and patch test.
- If your skin is broken or inflamed, consider a bland, fragrance-free approach until it calms down.
Experiences & Lessons Learned (So You Don’t Have to Learn Them the Hard Way)
The first time I made a “hand cream,” I used way too much oil because I thought more oil automatically meant more moisture. What I actually made was a very expensive way to grease-proof my kitchen cabinet handles. (My cabinets have never been more hydrated.) The biggest lesson: hands and feet don’t just need oilthey need a balanced formula. A little humectant can make a cream feel instantly more comfortable, while a smart occlusive makes the softness last past the first handwash.
My second lesson came from the whipped butter phase of DIY life: timing matters. If you melt butters and leave them to cool slowly on the counter while you answer “just one email,” you can end up with a grainy texture later. It still works, but it feels like you’re moisturizing with tiny candle shavings. Now I cool faster, whip sooner, and keep my mixing bowl away from distractions. (If you’ve ever watched a butter bowl like it’s a thriller movie, welcome to the club.)
Then there was the “real emulsified cream” erathe one where you feel like a tiny skincare scientist and start using phrases like “oil phase” with an unreasonable amount of confidence. Here’s what surprised me: the technique is less about being fancy and more about being consistent. Heating both phases, blending properly, and waiting to add preservative until the cool-down stage isn’t optional if you want a stable cream. When I rushed, I got separation. When I followed a simple process, I got a cream that felt like something I’d happily buy.
I also learned that fragrance is the drama queen of DIY skincare. A scent that smells like a spa in the jar can turn into “cough drop confusion” once it’s on warm skin, especially on feet under socks. And if you’re prone to irritation, fragrance can be the fastest way to turn a soothing project into an itchy mystery. These days, I default to fragrance-free and only add scent when I’m making a gift for someone who specifically wants itand even then, I keep it low.
Finally, the most practical change: packaging. Jars look cute, but they invite repeated contact (and whatever your hands picked up today) into the product. For water-based creams, I started using pump bottles whenever possible. When I do use jars, I keep a tiny spatula nearby like it’s a skincare utensil set, because it kind of is. That single habit made my creams last longer and stay fresher.
If you’re new to making hand and foot cream, start with the whipped option or the custom-base method. Once you know what textures your skin loves, step up to the emulsified cream. Your hands do a lot for you, and your feet literally carry the teamso giving them a cream that actually works is one of the most satisfying small upgrades you can make.
Conclusion
You’ve got three solid ways to make hand and foot cream at home: a no-water whipped butter for maximum softness, a true emulsified cream for that classic “store-bought” feel, and a fast customization method for low-effort, high-quality results. Keep your formulas simple, patch test when you try new ingredients, and remember: if there’s water in the recipe, preservation and sanitation aren’t optional. Make a batch, label it, tweak it, and enjoy the tiny luxury of hands and feet that feel comfortable again.


