Table of Contents >> Show >> Hide
- Why Make Your Own Puzzle?
- Choose Your Puzzle Type Before You Start
- What You Need
- Step 1: Pick the Right Image or Design
- Step 2: Decide the Size and Piece Count
- Step 3: Mount the Image to the Backing
- Step 4: Draw or Plan the Puzzle Pattern
- Step 5: Cut the Puzzle Carefully
- Step 6: Separate, Test, and Fix the Pieces
- Step 7: Seal, Store, or Display the Finished Puzzle
- Common Mistakes to Avoid
- Best Puzzle Ideas for Different Uses
- What Making a Puzzle Is Really Like: The Experience Nobody Warns You About
- Final Thoughts
Making your own puzzle is one of those crafts that sounds suspiciously wholesome until you realize it is also a tiny act of creative chaos. You get to pick the image, choose the difficulty, decide whether your puzzle will be charmingly handmade or “wow, did a tiny factory move into your kitchen?” polished, and then cut it into pieces on purpose. For once, breaking something apart is the entire point.
If you have been wondering how to make a puzzle step-by-step, the good news is that you do not need a fancy workshop or a suspiciously dramatic crafting cape. You can make a DIY puzzle with cardboard, chipboard, or wood. You can use a family photo, an illustration, a quote, a map, or even your child’s artwork. The method changes a little depending on the materials, but the core process stays the same: choose a design, mount it to a sturdy backing, map out the pieces, cut carefully, and test everything before you call yourself a puzzle genius.
This guide walks you through the full process in a practical, beginner-friendly way, with tips for making a custom jigsaw puzzle that actually fits together and does not look like it lost an argument with a pair of scissors.
Why Make Your Own Puzzle?
A homemade puzzle is part craft project, part gift idea, and part sneaky brain game. It works for birthdays, holidays, classrooms, rainy weekends, family game night, or a personalized keepsake. A custom photo puzzle can turn a favorite memory into an activity. A wooden puzzle can become a durable toy. A cardboard puzzle can be fast, inexpensive, and surprisingly satisfying.
Best of all, you control the difficulty. Want a puzzle for a preschooler? Make large, simple pieces with obvious shapes. Want to challenge an adult who claims they “love puzzles” a little too confidently? Use a detailed image with lots of similar colors and cut more pieces. That confidence will quiet down beautifully.
Choose Your Puzzle Type Before You Start
1. Cardboard Puzzle
This is the easiest option for beginners. It is affordable, flexible, and great for kids’ crafts, classrooms, or quick homemade gifts. Thick cereal-box cardboard is usually too flimsy, so go for heavier cardboard or craft board if you want better durability.
2. Chipboard or Photo Puzzle
This is ideal when you want a cleaner, flatter finish. If you are making a puzzle from a printed image, chipboard gives you a sturdier base and cleaner edges. It is also a great option if you plan to use a cutting machine.
3. Wooden Puzzle
A wooden puzzle takes more time, but it is sturdy, reusable, and looks terrific when finished. It is especially good for children’s name puzzles, chunky puzzles, or keepsake gifts. If you have basic tools and a little patience, wood makes the project feel extra special.
What You Need
Your supplies depend on the method, but most DIY puzzle projects use some version of the following:
- Your chosen image, drawing, or printed design
- Cardboard, chipboard, foam board, or thin wood
- Glue or decoupage medium
- A ruler and pencil
- Scissors, a craft knife, or a cutting machine
- A cutting mat or protected work surface
- Painter’s tape or masking tape for stability
- Fine sandpaper for wood or rough edges
- Optional sealer, puzzle glue, or frame for the final result
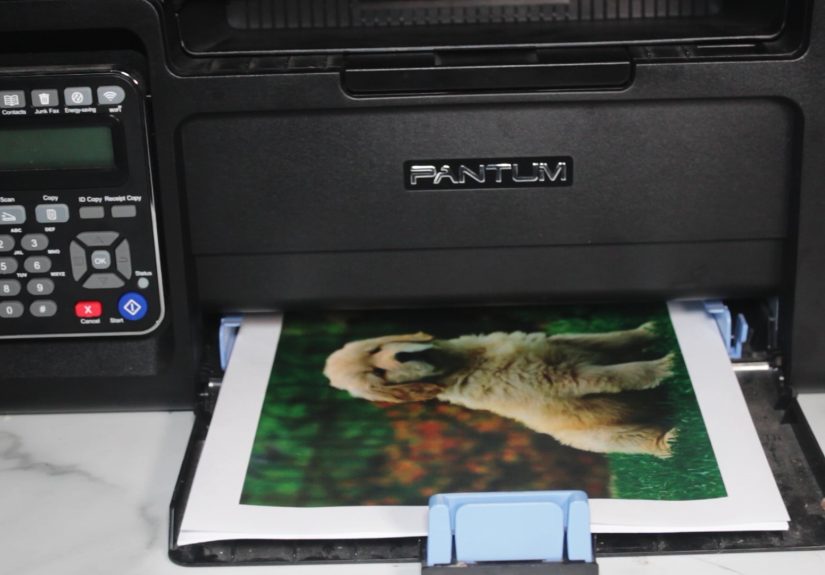
If you are making a photo puzzle, print your image on quality paper. If you are making a wooden puzzle, thin basswood or similar craft wood is a smart beginner-friendly choice. If you are using a machine, calibrate it and use the blade and material settings that match your surface.
Step 1: Pick the Right Image or Design
The image matters more than people think. A great puzzle image has contrast, clear focal points, and enough variation to make solving fun. If the whole thing is one giant beige fog, you are not making a custom jigsaw puzzle. You are making a cry for help.
Good choices include:
- Family photos with strong lighting
- Vacation scenes with landmarks or colorful backgrounds
- Illustrations with bold shapes
- Kids’ artwork
- Maps, monograms, and quote designs
Try to match the image to the person solving it. A child may enjoy bright animals or a favorite cartoon-style drawing. Adults usually like travel photos, wedding shots, pet portraits, or artistic designs. If you want to make a puzzle as a gift, choose something personal enough to feel thoughtful but not so embarrassing that it becomes a family legend.
Step 2: Decide the Size and Piece Count
Before you glue or cut anything, decide how large the finished puzzle should be and how difficult you want it to feel. A smaller puzzle with large pieces is perfect for beginners and kids. A medium-size puzzle with more irregular cuts works well for casual family use. A detailed design with many small pieces creates a tougher challenge.
As a simple rule, larger pieces are easier to handle and harder to lose. Smaller pieces look more professional, but they require sharper tools, steadier hands, and more patience. Start simpler than you think you need. Future You will be grateful and far less dramatic.
Step 3: Mount the Image to the Backing
This step gives the puzzle structure. Lay your backing flat and make sure it is clean and smooth. Apply an even layer of glue or decoupage medium to the backing, then place the image on top. Smooth from the center outward to remove bubbles and wrinkles. A brayer, scraper, or even a credit card wrapped in a soft cloth can help flatten the paper without tearing it.
Do not rush this part. Uneven glue leads to lumps, bubbles, and corners that peel later. Let the mounted image dry fully under a heavy book or another flat weight if needed. A flat puzzle is much easier to cut cleanly than one that looks like it has thoughts and feelings.
If you want extra durability, add a light seal coat on top after the image dries. This can protect the surface and make the finished puzzle feel more polished. Just keep the coat thin and even so the image does not warp.
Step 4: Draw or Plan the Puzzle Pattern
Now comes the part that turns your project from “framed picture” into “actual puzzle.” Flip the board over and sketch the puzzle pattern on the back. This keeps your front image cleaner and lets you adjust before cutting.
You have three main options:
- Classic jigsaw shapes: These include tabs and blanks, the familiar interlocking style most people expect.
- Simple geometric pieces: Squares, rectangles, triangles, or curved sections are easier for beginners and young children.
- Custom silhouette pieces: Great for themed puzzles, names, animals, or educational designs.
Keep the pieces varied but balanced. If every piece is nearly identical, solving can become frustrating. If every piece is wildly different, the puzzle may be too easy or feel messy. Good puzzle design lives in the sweet spot between order and mischief.
Step 5: Cut the Puzzle Carefully
How to Cut a Cardboard or Chipboard Puzzle
Place the board on a cutting mat. Use a sharp craft knife and cut slowly with light passes instead of trying to force one deep cut. A metal ruler helps with straight lines, but curved jigsaw cuts should be done steadily by hand. Replace dull blades sooner than you think. A dull blade tears fibers, drags the paper, and leaves edges looking rough.
How to Cut a Wooden Puzzle
For wood, draw the pattern clearly, secure the board, and cut with the appropriate tool for the thickness and detail level. After cutting, sand the edges lightly so the pieces feel smooth and safe to handle. This matters a lot for children’s puzzles, where splinters are not part of the educational experience.
How to Use a Cutting Machine
If you are using a machine like a Cricut, choose compatible material, confirm your settings, secure the board properly, and test cuts before committing to the final design. Machines can create beautifully consistent puzzle pieces, especially for a photo puzzle or gift project, but they still need the right prep work. Fancy technology is helpful, not magical.
Step 6: Separate, Test, and Fix the Pieces
Once everything is cut, gently separate the pieces. Do not yank. That is how corners bend and tiny tabs snap off. Lay all the pieces out and check whether they fit together smoothly. If any areas snag, trim or sand them carefully.
This is also the moment to decide whether your puzzle needs a storage solution. A small envelope, zip bag, or custom box label makes the final project feel more finished. If it is a gift, include a reference image so the recipient does not have to solve it by pure spiritual intuition.
Step 7: Seal, Store, or Display the Finished Puzzle
You have a few good options once the puzzle is complete. If you want it to stay reusable, skip permanent glue and store it in a labeled container. If you want to preserve it as art, use puzzle glue or a mounting method and frame it. If you want it to become something practical, you can mount and seal it as a decorative keepsake project.
For unfinished or in-progress puzzles, a mat or flat storage case helps keep the pieces together. For display, a sturdy backing and frame create a cleaner, more lasting result. Think about the puzzle’s final life before you commit. Some puzzles are born to be solved again. Others are ready for wall duty.
Common Mistakes to Avoid
- Using flimsy backing that bends too easily
- Choosing a blurry or low-contrast image
- Applying too much glue and creating wrinkles
- Cutting before the mounted image is fully dry
- Using a dull blade
- Making pieces too tiny on a first attempt
- Skipping test fitting before gifting or framing
Most DIY puzzle disasters are not dramatic. They are usually just preventable. A little patience at the beginning saves a lot of muttering later.
Best Puzzle Ideas for Different Uses
For Kids
Use large pieces, bright colors, and sturdy material. Names, animals, shapes, and alphabet themes work especially well.
For Gifts
A custom photo puzzle with a family picture, wedding photo, pet portrait, or travel memory feels personal and memorable.
For Classrooms
Educational puzzles can teach geography, vocabulary, sequencing, or matching concepts. Simpler shapes are often best for repeated use.
For Home Decor
Art-based puzzles can be glued, backed, and framed after assembly. This works especially well for scenic images or illustrations.
What Making a Puzzle Is Really Like: The Experience Nobody Warns You About
The first time you make a puzzle, there is usually a moment of total confidence. You lay out your materials, admire your printed image, and think, “This will be easy.” That is adorable. Then the glue goes down, the paper shifts slightly, and suddenly you are negotiating with a corner that refuses to lie flat like it is in contract talks.
Still, that learning curve is part of the charm. Making a homemade puzzle feels different from buying one because every stage asks for a different kind of attention. First, you become the designer. You pick the image and imagine how someone will react when they see it broken into pieces. Then you become the builder, trying to make every cut clean and every edge line up. Finally, you become the tester, sitting there with your own creation spread across the table, hoping your masterpiece fits together like you planned and not like an abstract modern art accident.
There is also something unexpectedly satisfying about choosing the right level of difficulty. If you make a puzzle for a child, you start thinking in a sweeter, more practical way: bigger pieces, bold colors, shapes that are easy to grasp. If you make one for an adult, especially a puzzle-loving adult, you start developing a mischievous streak. Suddenly you are studying the image and thinking, “Interesting… this section of blue sky could cause mild emotional damage.” It is creative, useful, and just a tiny bit devious.
Many people also discover that the process is relaxing once the pressure disappears. After the first nervous attempt, the rhythm kicks in. Measure, glue, smooth, wait. Sketch, cut, test, adjust. It becomes almost meditative. You pay attention to small details, your hands stay busy, and your brain gets a break from the digital noise of the day. That is probably why puzzle making feels both productive and calming. It gives you something tangible to do, and by the end you can actually hold the result instead of wondering where the last two hours of your life went.
Then comes the best part: watching someone use the puzzle. A child recognizes the picture and starts reaching for the big pieces. A friend laughs when they realize the image is from a favorite vacation. A grandparent opens a gift and suddenly sees a family memory turned into a hands-on activity instead of another mug. That reaction is the secret reward. You are not just making cardboard shapes or wooden pieces. You are making an experience.
Even when the project is imperfect, it still has personality. Maybe one tab is slightly crooked. Maybe the cuts are not machine-perfect. Maybe you had to trim one stubborn edge because it refused to cooperate. None of that ruins the puzzle. In fact, it often makes the result feel more handmade in the best possible way. It tells the story of how it was made.
So yes, making a puzzle step-by-step takes a little planning and patience. But it also brings a surprising amount of joy. You start with a picture and a pile of supplies, and you end with something interactive, personal, and memorable. That is a pretty good deal for a project that begins with glue and a brave attitude.
Final Thoughts
If you want to learn how to make a puzzle step-by-step, start simple and focus on clean preparation. Pick a strong image, use sturdy backing, let the glue dry properly, cut with care, and test the fit before calling it done. Whether you make a cardboard puzzle for kids, a wooden puzzle for long-term use, or a custom jigsaw puzzle from a favorite photo, the process is approachable once you break it into stages.
The beauty of a DIY puzzle is that it can be playful, personal, educational, or giftable all at once. It is one of those rare crafts that feels thoughtful without being fussy. And once you make one successfully, you will probably start eyeing every good photo in your camera roll and thinking, “Well, that could absolutely become a puzzle.”


