Table of Contents >> Show >> Hide
- What Is a Floor Outlet?
- Before You Start: Safety, Codes, and Common Sense
- Best Places to Install a Floor Outlet
- Tools and Materials You Will Need
- Step-by-Step: How to Install a Floor Outlet
- Step 1: Plan the Circuit
- Step 2: Choose and Mark the Outlet Location
- Step 3: Shut Off the Power and Verify
- Step 4: Drill a Pilot Hole
- Step 5: Cut the Floor Opening
- Step 6: Run the Cable
- Step 7: Install the Floor Box
- Step 8: Wire the Receptacle
- Step 9: Attach the Cover Assembly
- Step 10: Connect to the Power Source
- Step 11: Restore Power and Test
- Common Mistakes to Avoid
- How Much Does a Floor Outlet Cost?
- Maintenance Tips After Installation
- DIY Experience Notes: What I Wish Every Homeowner Knew
- Conclusion
A floor outlet is one of those upgrades that sounds suspiciously fancy until you live with one. Suddenly, your lamp no longer needs to trail a cord across the room like a household tripwire. Your sofa can float in the middle of the living room without looking like it is tethered to the wall. Your home office can finally stop pretending that an orange extension cord is “industrial chic.”
Installing a floor outlet can be a smart DIY project if you have solid access from below, understand basic residential wiring, and follow local electrical code. But let’s be clear: electricity is not the place for heroic guessing. If you are unsure about circuit capacity, grounding, permits, AFCI/GFCI protection, or how to make a safe connection, bring in a licensed electrician. You can still do the planning, layout, floor cutting, and cleanup. No shame. The outlet does not care who installed it; it only cares that it is safe.
This guide explains how to install a floor outlet in a wood floor above a basement or crawl space, which is the most DIY-friendly setup. Concrete slab installations, post-tension slabs, radiant floors, and complicated wiring routes usually belong in professional hands. Your floor is not a mystery box. Do not drill into it like you are hunting buried treasure.
What Is a Floor Outlet?
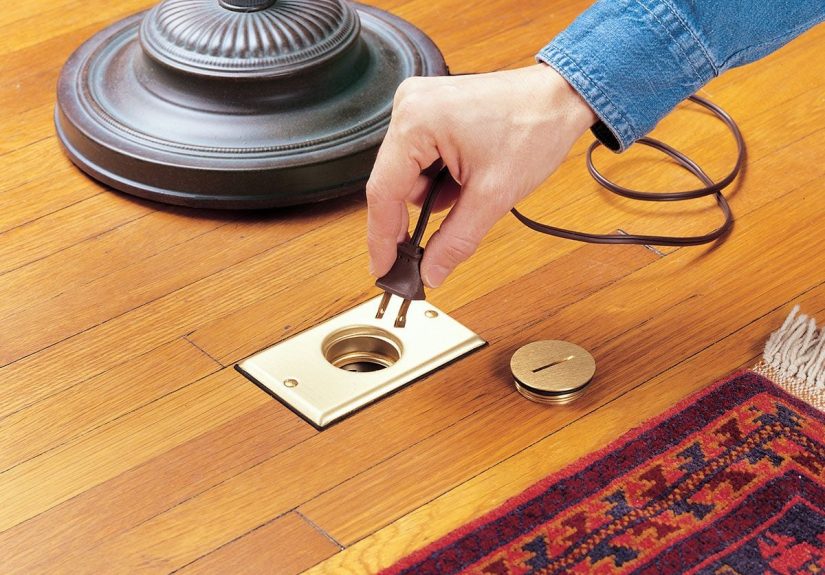
A floor outlet, also called a floor receptacle or floor box, is an electrical outlet mounted directly in the floor. Unlike a standard wall outlet, it uses a box and cover assembly specifically rated for floor use. That matters because floor outlets deal with foot traffic, furniture legs, vacuum cleaners, mop water, dust, and the occasional dropped snack. A regular wall box with a decorative cover plate is not designed for that kind of abuse.
Most floor outlet kits include a floor-rated electrical box, a receptacle, a gasketed or screw-cap cover, mounting hardware, and a trim plate. Some models are recessed with flip-up covers. Others are pop-up floor boxes that stay low-profile until you press a button. For most living rooms, offices, and dens, a tamper-resistant 15-amp or 20-amp duplex receptacle is common, depending on the circuit.
Before You Start: Safety, Codes, and Common Sense
The most important part of installing a floor outlet happens before the saw touches the floor. You need to confirm that the location is practical, the circuit can handle the added load, and the installation will meet local code. The National Electrical Code is widely adopted in the United States, but local amendments can vary. Some cities require permits or inspections for adding a new receptacle. Others may require a licensed electrician for final connections.
Use a Floor-Rated Box
Do not install a standard wall outlet box in the floor. Floor receptacles should be installed in boxes and covers identified or listed for floor use. The cover should protect the receptacle from physical damage and sit securely against the finished flooring. If the kit includes a gasket, O-ring, plug caps, or sealing compound instructions, use them. Those small parts are not decorative confetti from the manufacturer; they help keep debris and moisture away from the electrical parts.
Understand GFCI and AFCI Protection
Depending on the room and circuit, your floor outlet may need GFCI protection, AFCI protection, or both. GFCI protection helps reduce shock risk, especially in areas where water may be present. AFCI protection helps detect dangerous arcing that can lead to electrical fires. Many modern residential circuits require AFCI protection in living areas, bedrooms, family rooms, and similar spaces. Kitchens, basements, laundry areas, bathrooms, garages, and other locations may have GFCI requirements. When in doubt, check local code or ask an electrician before wiring.
Know When to Call a Pro
Call a licensed electrician if your home has aluminum wiring, knob-and-tube wiring, ungrounded circuits, a crowded electrical panel, frequent breaker trips, unknown wiring, or no clear route from the power source to the new outlet. Also call a pro if you are cutting into concrete, installing near a kitchen island, adding a new circuit, or working in a finished ceiling below with no easy access. DIY confidence is wonderful; DIY overconfidence is how breakers earn their dramatic personalities.
Best Places to Install a Floor Outlet
The best floor outlet location is useful, accessible, and safely out of the main walking path. Common spots include beside a sofa, under an end table, near a reading chair, under a desk, or close to a conference table. The goal is to reduce visible cords, not create a new obstacle in the exact place where everyone walks barefoot at midnight.
Before choosing the final spot, place the furniture where it actually lives. Then mark where lamps, chargers, speakers, or laptop cords naturally want power. A floor outlet hidden under a sofa can be hard to use. One placed too far away may still require an extension cord. Ideally, the outlet should be close enough to the furniture to be convenient but not directly under a heavy leg or in a spill-prone area.
If you want the floor receptacle to count toward required wall outlet spacing in a room, it generally needs to be close to the wall under NEC spacing rules. However, many homeowners install floor outlets for convenience rather than code-counting. Either way, local rules are the final authority.
Tools and Materials You Will Need
Tools
- Voltage tester or multimeter
- Stud finder or inspection camera
- Tape measure and pencil
- Drill and drill bits
- Jigsaw, oscillating multi-tool, or hole saw as required by the kit
- Fish tape or fiberglass fish rods
- Wire stripper
- Screwdrivers
- Utility knife
- Outlet tester
- Safety glasses, gloves, and dust mask
Materials
- Listed floor outlet box kit
- Tamper-resistant receptacle rated for the circuit
- Appropriate electrical cable, commonly NM-B for many dry interior wood-frame applications
- Cable staples or supports
- Wire connectors if needed
- GFCI or AFCI protection if required
- Painter’s tape
- Wood screws or fasteners supplied with the floor box
Step-by-Step: How to Install a Floor Outlet
Step 1: Plan the Circuit
First, determine where the new outlet will get power. The simplest route is often from an existing nearby receptacle on the same floor or from a junction point accessible in the basement or crawl space. Do not add a floor outlet to a circuit that is already overloaded. If the circuit feeds high-demand appliances, space heaters, kitchen countertop outlets, bathroom outlets, or dedicated equipment, stop and reassess.
Check the breaker size and wire gauge. A 15-amp circuit typically uses 14-gauge copper wire, while a 20-amp circuit typically uses 12-gauge copper wire. The receptacle and cable must match the circuit requirements. Mixing parts casually is not “creative problem solving”; it is how electrical systems develop trust issues.
Step 2: Choose and Mark the Outlet Location
Use painter’s tape to mark the proposed outlet location on the floor. Move furniture into position and test real-life cord reach. Look below the floor from the basement or crawl space to make sure the spot is not directly over a joist, plumbing pipe, HVAC duct, gas line, drain line, or existing cable.
Most floor box kits include a cutting template. Tape the template to the floor and align it carefully with flooring seams if possible. On hardwood floors, a slightly crooked cover plate will stare at you forever. It will not blink first.
Step 3: Shut Off the Power and Verify
Turn off the breaker for the circuit you plan to work on. Then test the existing outlet or wiring with a voltage tester. Test the tester on a known live source first, verify the circuit is dead, and then test again. This “live-dead-live” habit is simple and smart. Never assume a circuit is off because a label in the panel says so. Panel labels are often written by someone who moved away in 1998 and named everything “lights.”
Step 4: Drill a Pilot Hole
Drill a small pilot hole at the center of your marked location. From below, check where the bit came through. This confirms the outlet location before you cut a larger opening. If the pilot hole lands too close to a joist or obstruction, adjust the location before making the full cut. A tiny pilot hole is easy to patch. A floor-box-sized mistake is a conversation piece.
Step 5: Cut the Floor Opening
Follow the template supplied with your floor outlet kit. Use a jigsaw, oscillating tool, or hole saw depending on the shape of the box. Cut slowly and keep the tool steady. For hardwood, score the outline with a utility knife first to reduce splintering. For carpet, cut the carpet carefully before cutting the subfloor so the fibers do not wrap around the tool.
Dry-fit the box before moving on. The box should sit flush or at the depth specified by the manufacturer. The cover should rest neatly on the finished floor without rocking. If the opening is too tight, trim carefully. If it is too loose, check the kit instructions for allowable tolerances. Do not rely on hope and extra screws to fix a sloppy opening.
Step 6: Run the Cable
Route the cable from the power source to the new floor box. In unfinished basements or crawl spaces, cable must be supported and protected according to code. Keep it away from sharp edges, heat sources, and areas where it could be damaged. Drill through joists only where allowed and avoid notching structural members unless you understand the rules. Floor joists are not suggestions; they are holding up your house.
Leave enough cable at the floor box for safe wiring, typically several inches beyond the box opening, and follow the manufacturer’s instructions. If the circuit requires conduit, armored cable, or other wiring methods in your jurisdiction, use the required method.
Step 7: Install the Floor Box
Insert the cable through the approved clamp or connector in the floor box. Tighten the clamp so the cable is secure but not crushed. Set the box into the opening and fasten it according to the kit instructions. Many wood-floor boxes use mounting tabs or screws through the flange. Install any gasket, seal, or trim component exactly as directed.
The box should be solid. If it wiggles now, it will annoy you later. A loose floor outlet can damage wiring over time and make plugs difficult to insert or remove. Take the extra few minutes to make the box firm and level.
Step 8: Wire the Receptacle
Strip the cable jacket and individual conductors carefully. Connect the black hot wire to the brass-colored terminal, the white neutral wire to the silver-colored terminal, and the bare or green ground wire to the green grounding terminal. If the box is metal, bond the ground wire to the box as required.
Make clean terminal connections. The wire should wrap clockwise under screw terminals so tightening the screw pulls the wire in rather than pushing it out. If using back-wire clamp terminals, follow the receptacle instructions. Avoid loose strands, exposed copper outside the terminal area, or over-stripped wires. Loose connections can arc, heat up, and cause serious problems.
Step 9: Attach the Cover Assembly
Fold the wires neatly into the box without forcing them. Attach the receptacle and cover assembly using the provided screws. Install screw caps, flip lids, pop-up mechanisms, or trim rings as directed. Open and close the cover several times to make sure it operates smoothly. When the outlet is not in use, the cover should protect the receptacle and reduce debris entry.
Step 10: Connect to the Power Source
If you are extending from an existing receptacle, make the feed connection only after confirming the power is off and the existing box has enough capacity for the added conductors. If box fill is too tight, the box may need to be replaced with a larger one. If the connection must be made at the panel, hire a licensed electrician. Panel work is not a good place to “see what happens.”
Step 11: Restore Power and Test
Turn the breaker back on and test the outlet with a receptacle tester. Confirm correct hot-neutral-ground orientation. If the outlet is GFCI protected, press the test and reset buttons to verify operation. Plug in a lamp or small device as a final functional check. If the breaker trips, the tester shows an error, the outlet feels warm, or anything smells odd, turn the breaker off and troubleshoot before using the outlet.
Common Mistakes to Avoid
Using the Wrong Box
A wall box in the floor is the classic shortcut that should not happen. Use a listed floor box with a proper floor cover. It is made for traffic, cleaning, and physical protection.
Ignoring the Furniture Layout
An outlet two feet from where the lamp actually sits is just a very fancy inconvenience. Plan around real furniture, not the imaginary furniture arrangement in your head.
Cutting Before Checking Below
Always inspect from below before cutting. Pipes, wires, ducts, and joists love to live exactly where you planned to drill.
Skipping Permit Rules
Electrical permits may feel boring, but inspections can catch unsafe work before it becomes expensive or dangerous. Check with your local building department.
Creating a Permanent Extension Cord Solution
A floor outlet is often installed to eliminate long-term extension cord use. Do not install one and then plug in a nest of power strips like a caffeinated octopus. Use the outlet within its rating.
How Much Does a Floor Outlet Cost?
A basic floor outlet kit for wood floors often costs more than a standard wall receptacle because it includes a specialized box, cover, gasket, and trim. Budget-friendly kits may cost around the price of a nice dinner, while premium pop-up boxes or finishes can cost more. If you hire an electrician, labor depends on access, wiring distance, permits, floor type, and whether a new circuit is needed.
The cheapest installation is usually a wood floor over an unfinished basement with a nearby suitable circuit. The most expensive is a finished room over concrete with no accessible wiring path. In other words, your house layout gets a vote.
Maintenance Tips After Installation
Once your floor outlet is installed, keep it clean and protected. Close the cover when the outlet is not in use. Do not mop excessive water over it. Do not place heavy furniture directly on the cover. Test GFCI and AFCI devices according to manufacturer instructions. If plugs become loose, the cover cracks, or the outlet shows discoloration, stop using it until it is inspected or repaired.
Also, remember that floor outlets are convenient, not magical. They are not meant for high-demand appliances unless specifically designed and wired for that load. A lamp, laptop charger, or phone charger is one thing. A portable heater running under a rug is a firm no from the safety department.
DIY Experience Notes: What I Wish Every Homeowner Knew
The most useful lesson from floor outlet projects is that location beats speed. A homeowner can spend two hours installing a beautiful outlet and then realize the sofa covers it, the plug sticks out awkwardly, or the lamp cord still crosses the walkway. Before cutting, live with the layout for a day. Put painter’s tape on the floor, run a temporary cord, move the chair, sit down, stand up, vacuum around it, and pretend it is already installed. If the spot still makes sense after real use, it is probably a good location.
Another lesson: access from below is everything. A floor outlet above an unfinished basement can be straightforward because you can see the joists, route cable cleanly, and fasten the box securely. A floor outlet above a finished ceiling is a different animal. You may need to cut drywall, fish cable blindly, patch, sand, and repaint. Suddenly the “quick outlet project” has invited drywall dust to dinner. If you have a crawl space, check the working room before committing. Some crawl spaces are roomy enough for a person and a drill. Others are designed for spiders with excellent posture.
Flooring type also changes the experience. Hardwood requires careful measuring because the trim plate is visible forever. Carpet can hide tiny imperfections, but it can also bunch around the cover if cut poorly. Laminate and engineered flooring may chip if rushed. Tile is the least forgiving and may require specialty bits or professional help. If the floor is expensive, historic, or freshly installed, practice the cut on scrap material first. Your future self will appreciate not learning on the actual dining room floor.
One practical trick is to buy the floor box before finalizing the opening. Product photos rarely tell the whole story. Hold the actual box, study the clamp location, check the cover swing, and read the template. Some boxes need more depth than expected. Others require a specific floor thickness. A beautiful brass cover is not helpful if the box does not fit between framing members or cannot sit level with your flooring.
Finally, do not underestimate testing. A receptacle tester is inexpensive and can catch reversed polarity, open grounds, and other wiring mistakes. After installation, plug in a lamp and gently move the plug. It should feel snug, not wobbly. Open and close the cover. Walk around it. Vacuum near it. The best floor outlet disappears into daily life. It gives power where you need it, stays out of the way, and does not become a tiny metal speed bump in the middle of your room.
Conclusion
Installing a floor outlet can make a room cleaner, safer, and more flexible. It is especially useful for floating furniture layouts, home offices, reading corners, and living rooms where wall outlets are always just a little too far away. The key is to plan carefully, use a listed floor box, follow code, protect the circuit properly, and test everything before regular use.
If the project involves a simple wood floor with accessible wiring below, a skilled DIYer may be able to handle much of the work. If the wiring is old, the route is complicated, the floor is concrete, or the panel must be opened, hire a licensed electrician. A correctly installed floor outlet is a quiet luxury. A poorly installed one is a problem hiding under a rug. Choose the quiet luxury.


