Table of Contents >> Show >> Hide
- Why Removing an Object in Photoshop Is Not One-Size-Fits-All
- Before You Remove Anything: Set Yourself Up for Better Results
- Method 1: Remove an Item with the Remove Tool
- Method 2: Use Content-Aware Fill for More Control
- Method 3: Use the Spot Healing Brush for Small Items
- Method 4: Use the Clone Stamp When You Need Precision
- Method 5: Try Generative Fill for Tricky Object Removal
- How to Choose the Best Tool for Your Photo
- Common Mistakes to Avoid
- Practical Examples of Removing Items in Photoshop
- Pro Tips for More Natural Results
- Final Thoughts
- Extended Experience: Real-World Lessons From Removing Objects in Photoshop
- SEO Tags
Every great photo has one tiny problem: reality. Maybe it is a stranger wandering through your vacation shot like they paid for a ticket, a power line slicing across a dreamy skyline, or a rogue coffee cup sitting in the corner of an otherwise perfect product photo. The good news is that learning how to remove an item in Photoshop is not wizardry anymore. It is a practical skill, and once you know which tool to use, it feels less like surgery and more like housekeeping with better lighting.
This guide walks you through the easiest ways to remove unwanted objects in Photoshop, from quick one-click cleanups to more controlled retouching for tougher scenes. You will learn when to use the Remove Tool, when Content-Aware Fill makes more sense, when the Spot Healing Brush can save the day, and when the Clone Stamp still earns its old-school badge of honor. If you are a beginner, do not worry. We are keeping the process simple, clear, and human. No robotic nonsense. No “click the thingy and hope for the best” instructions.
Why Removing an Object in Photoshop Is Not One-Size-Fits-All
Before jumping into steps, it helps to know one basic truth: not all unwanted objects are equally annoying. A tiny dust spot on a blue sky is easy. A person standing in front of a brick wall with repeating patterns, shadows, and texture is a whole different beast.
That is why Photoshop gives you several object removal tools instead of one magic button that always works perfectly. In general:
- Use the Remove Tool for fast cleanup of common distractions.
- Use Content-Aware Fill when you want more control over how Photoshop samples nearby pixels.
- Use the Spot Healing Brush for tiny blemishes, wires, crumbs, and little distractions.
- Use the Clone Stamp when you need precision and Photoshop keeps inventing nonsense.
- Use Generative Fill when the missing area is awkward, large, or needs believable replacement content.
Think of these as kitchen tools. A spoon is great, but you probably do not want to slice a tomato with it.
Before You Remove Anything: Set Yourself Up for Better Results
The biggest beginner mistake is editing directly on the original photo and then wondering why everything went sideways. Start with a clean, flexible workflow instead:
1. Duplicate Your Layer
Open your image, then duplicate the background layer. This gives you a backup in case your edit turns a charming beach photo into abstract modern art.
2. Zoom In
Zoom to at least 100% when cleaning up details. A removal can look perfect from far away and awful when viewed up close. Photoshop is good, but it still occasionally hallucinates texture like it is trying to win an improv contest.
3. Work Non-Destructively
Whenever possible, use a new empty layer for retouching and enable options such as Sample All Layers on tools that support it. That keeps your original image intact and makes corrections much easier later.
4. Choose the Right Tool for the Job
If you are removing a tiny speck, do not overcomplicate it with a giant selection and advanced fill controls. If you are removing a whole person from a busy scene, do not expect one brush swipe to solve it beautifully.
Method 1: Remove an Item with the Remove Tool
If you want the easiest method, start here. The Remove Tool is one of the quickest ways to erase unwanted objects in Photoshop. It is especially good for everyday distractions like cables, signs, stray objects on tables, and random people in the background.
Step-by-Step
- Open your image in Photoshop.
- Create a duplicate layer or a blank retouching layer if your setup supports it.
- Select the Remove Tool from the toolbar.
- Adjust the brush size so it is slightly larger than the object you want to remove.
- Brush over the object or draw a loose loop around it.
- Release the mouse and let Photoshop process the area.
- Inspect the result at 100% zoom.
- Repeat on any leftover edges, shadows, or texture mistakes.
When It Works Best
The Remove Tool shines when the background around the object is fairly consistent. Think grass, sky, pavement, walls, or blurred backgrounds. It can also do a surprisingly good job on wires and minor clutter that would have taken much longer a few Photoshop versions ago.
When It Struggles
If the object overlaps detailed patterns, faces, typography, or important edges, the result may look smeared or synthetic. In those cases, switch to Content-Aware Fill or Clone Stamp for better control.
Method 2: Use Content-Aware Fill for More Control
If the Remove Tool is the fast-food version of object removal, Content-Aware Fill is the sit-down restaurant. It takes a little more effort, but you get far more control over the result.
Step-by-Step
- Open the photo and duplicate the original layer.
- Select the unwanted item using the Object Selection Tool, Lasso Tool, or Quick Selection Tool.
- Do not hug the object too tightly. Include a small amount of surrounding background in the selection.
- Right-click inside the selection and choose Content-Aware Fill, or go through the Edit menu.
- In the Content-Aware Fill workspace, look at the sampling area preview.
- Adjust the sampling area so Photoshop uses the best nearby pixels.
- Check the live preview on the other side of the workspace.
- Output the result to a new layer for easier cleanup.
- Use the Spot Healing Brush or Clone Stamp to fix any small imperfections.
Why This Method Is So Useful
Content-Aware Fill is excellent for larger object removal, especially when the scene has texture or repeated detail. Instead of blindly guessing, Photoshop lets you influence what areas it should sample from. That is a big deal when you are removing a bench from a park, a person from a street scene, or a trash can from a wedding photo.
Best Example
Imagine a beach photo with one bright cooler ruining the vibe. You can lasso the cooler, open Content-Aware Fill, and tell Photoshop to sample sand and water instead of nearby people or beach towels. That usually gives you a much cleaner result than a quick brush pass.
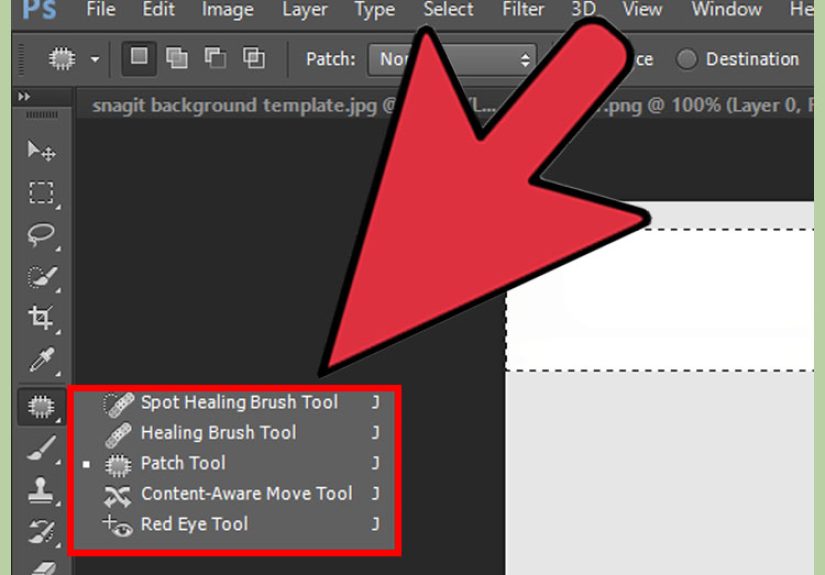
Method 3: Use the Spot Healing Brush for Small Items
For tiny distractions, the Spot Healing Brush is still incredibly useful. It is fast, intuitive, and ideal for cleaning up little things without making a huge production out of it.
Great for Removing
- Dust spots
- Skin blemishes
- Small wires
- Tiny objects in the background
- Sensor spots in skies
How to Use It
- Create a new retouching layer.
- Select the Spot Healing Brush Tool.
- Turn on Sample All Layers.
- Choose a brush slightly larger than the distraction.
- Click once on a small flaw or paint over a slightly larger one.
- Repeat until the image looks clean.
This tool is wonderfully lazy in the best possible way. You point, Photoshop thinks, and the distraction disappears. At least that is the dream. In textured areas, you may still need a second pass.
Method 4: Use the Clone Stamp When You Need Precision
The Clone Stamp Tool is not the newest or flashiest method, but it is often the most dependable when Photoshop’s automated tools get weird. It lets you sample pixels from one part of the image and paint them over another part manually.
Why It Still Matters
Sometimes automated fills create repeating blobs, muddy textures, or ghost edges. The Clone Stamp gives you direct control, which is perfect when removing objects near straight lines, architecture, repeated texture, or product edges.
Step-by-Step
- Create a blank layer above your image.
- Select the Clone Stamp Tool.
- Set the sampling option so it can pull from the image below.
- Hold Alt on Windows or Option on Mac to sample a clean area.
- Paint carefully over the unwanted object.
- Resample often so the texture stays natural.
- Use a soft brush for blended areas and a harder brush for sharp edges.
It takes more patience, but it is ideal for scenes like brick walls, fences, window frames, patterned fabric, and edges where a sloppy automated fill is easy to spot.
Method 5: Try Generative Fill for Tricky Object Removal
If you are removing a large object and the missing area needs believable replacement content, Generative Fill can help. It works especially well when the gap left behind is too complex for a basic content-aware patch.
How to Use Generative Fill to Remove an Object
- Make a selection around the object you want to remove.
- Choose Generative Fill from the contextual task bar or the relevant menu.
- Leave the prompt blank if you simply want the object removed.
- Generate the result.
- Review the variations and choose the cleanest one.
- Refine with a mask, Healing Brush, or Clone Stamp if needed.
This approach can be very effective for awkward removals, like deleting a parked car from a street scene or removing a person standing in front of a textured landscape. The catch is that AI-based results can be impressive and slightly strange at the same time. Always zoom in and check edges, perspective, patterns, and shadows before calling it done.
How to Choose the Best Tool for Your Photo
| Situation | Best Tool | Why |
|---|---|---|
| Small dust spot in sky | Spot Healing Brush | Fast and simple |
| Power line across background | Remove Tool | Quick and effective on thin distractions |
| Person in busy scene | Content-Aware Fill | More control over sampled pixels |
| Object near hard edge or pattern | Clone Stamp | Manual precision prevents artifacts |
| Large awkward object with missing detail | Generative Fill | Can rebuild complex areas more believably |
Common Mistakes to Avoid
Using a Brush That Is Too Big
A giant brush tells Photoshop to analyze and replace more than necessary. That can pull in weird texture and make the edit obvious.
Ignoring Shadows
Removing the object but leaving its shadow behind is like hiding the evidence and forgetting the fingerprints. Always clean the shadow area too.
Not Checking the Edges
Hairlines, building edges, horizon lines, and table edges reveal bad object removal immediately. Take a few extra seconds to inspect those areas.
Over-Retouching
Just because Photoshop can remove half the image does not mean it should. If the edit starts to look fake, step back and simplify.
Practical Examples of Removing Items in Photoshop
Removing a Tourist from a Travel Photo
Start with the Remove Tool. If the result looks smeared against the background, switch to Content-Aware Fill and guide the sampling area so Photoshop pulls from nearby pavement, walls, or foliage instead of random clothing textures.
Removing a Trash Can from a Real Estate Photo
For simple grass or driveway backgrounds, the Remove Tool may be enough. If the trash can overlaps siding, brick, or window edges, use the Clone Stamp for structure and the Healing Brush for blending.
Removing Acne or Small Blemishes in a Portrait
The Spot Healing Brush is perfect here. Keep the brush just a little larger than the blemish and avoid removing natural skin texture altogether. The goal is cleaner skin, not plastic doll mode.
Removing a Sign from a Product Shot
Use a selection and Generative Fill if the background needs believable continuation, especially on fabric, wood, or textured surfaces. Then clean any weird details with Clone Stamp.
Pro Tips for More Natural Results
- Do the main removal first, then zoom in for cleanup.
- Use multiple small passes instead of one aggressive edit.
- Switch between tools. The best edits often use two or three methods.
- Keep your retouching on separate layers whenever possible.
- Flip the image horizontally once in a while to spot mistakes your eyes have started ignoring.
- Take a short break if you have been staring at the same brick wall for twenty minutes. At some point, the wall starts judging you back.
Final Thoughts
Learning how to remove an item in Photoshop is one of the most useful editing skills you can have, whether you are cleaning up portraits, improving product images, fixing travel shots, or making marketing visuals look more polished. The easiest place to start is the Remove Tool, but the best long-term approach is understanding when to switch to Content-Aware Fill, Spot Healing Brush, Clone Stamp, or Generative Fill.
The real secret is not chasing perfection with one click. It is choosing the right tool, working non-destructively, and refining the result until it looks natural. When done well, object removal should feel invisible. Nobody should ever look at your finished image and say, “Wow, great job deleting that fire hydrant.” They should simply notice the photo looks clean, focused, and intentional.
Extended Experience: Real-World Lessons From Removing Objects in Photoshop
One of the funniest things about object removal in Photoshop is how often the “item” you want to remove did not look like a big deal when you took the photo. In the moment, your brain says, “This is fine.” Later, on a larger screen, you realize there is a water bottle on the floor, a parked scooter in the background, a cable hanging across the frame, and one mysterious elbow that does not seem to belong to any known member of your family. That is usually when Photoshop enters the chat.
A common beginner experience is assuming the job will take five seconds. Sometimes it does. A crumb on a tabletop can disappear with one tap of the Spot Healing Brush. A wire in the sky may vanish with a quick pass of the Remove Tool. Those moments feel amazing. You start believing you are a retouching genius. Then you try removing a person from in front of a patterned tile wall and suddenly you are negotiating with pixels like a hostage mediator.
The biggest lesson most editors learn is that easy backgrounds make you feel talented, while complicated backgrounds make you feel humble. Blue sky, grass, and soft blur are generous. They forgive almost everything. Brick, text, window frames, repeated patterns, and hair are not generous. They notice every mistake. That is why experienced Photoshop users stop asking, “What is the best object removal tool?” and start asking, “What kind of background am I dealing with?” That single mindset shift saves a lot of time.
Another practical experience is learning to work in stages. First, remove the main object. Second, clean up the obvious artifacts. Third, check edges and shadows. Fourth, walk away for a minute and come back with fresh eyes. This matters because the human brain adapts quickly. After staring at an edit for ten minutes, you can become weirdly blind to the smudged patch right in the middle of the image. Coming back later often reveals what needs one more pass.
People also learn that using more than one tool is not a sign of failure. In fact, it is often the smartest approach. You might use the Remove Tool for the main distraction, Content-Aware Fill for a stubborn section, and Clone Stamp to repair a straight line. That is not overkill. That is just good editing. Photoshop is less about finding one perfect trick and more about building a reliable workflow.
Finally, the best experience-related tip is simple: aim for believable, not magical. If the image looks natural at normal viewing size and holds up when zoomed in, you have done your job. You do not need every pixel to be museum-grade. You just need the viewer’s eye to stay on the subject instead of wandering off to that random soda can in the corner. When that happens, your object removal worked exactly as it should.


