Table of Contents >> Show >> Hide
- What Makes Luxury Vinyl Plank Flooring Popular?
- Before You Start: Read the Instructions Like They Owe You Money
- Gather the Right Tools and Materials
- Inspect and Mix Planks from Multiple Cartons
- Prepare the Room Before Installation
- Subfloor Prep: The Step You Should Not Skip
- Can You Install Luxury Vinyl Plank Over Existing Flooring?
- Plan the Layout Before You Click Anything Together
- Respect the Expansion Gap
- Install the First Rows Carefully
- Cutting Luxury Vinyl Plank Flooring Cleanly
- Installing Around Kitchens, Bathrooms, and Laundry Rooms
- Use the Right Underlayment
- Finish with Trim, Transitions, and Protection
- Common Mistakes to Avoid
- Maintenance Tips After Installation
- When to Hire a Professional
- Real-World Experiences: What You Learn While Installing Luxury Vinyl Plank Flooring
- Conclusion
Luxury plank vinyl flooring is one of those home upgrades that feels almost suspiciously practical. It looks like hardwood, handles everyday spills better than many traditional floors, and can often be installed by a careful DIYer without renting a truckload of mysterious tools. But here is the tiny catch: luxury vinyl plank flooring is forgiving, not magical. If the subfloor is lumpy, the layout is rushed, or the expansion gaps are ignored, your beautiful new floor may start clicking, lifting, separating, or making noises that sound like a haunted tap-dancing class.
The good news? Most luxury vinyl plank installation problems are preventable. Whether you are installing click-lock LVP in a bedroom, waterproof vinyl plank flooring in a bathroom, or glue-down planks in a busy hallway, the secret is not brute strength. It is preparation, patience, and a healthy respect for the manufacturer’s instructions. This guide walks through practical, real-world tips for installing luxury plank vinyl flooring so your finished room looks polished, professional, and ready for furniture instead of regret.
What Makes Luxury Vinyl Plank Flooring Popular?
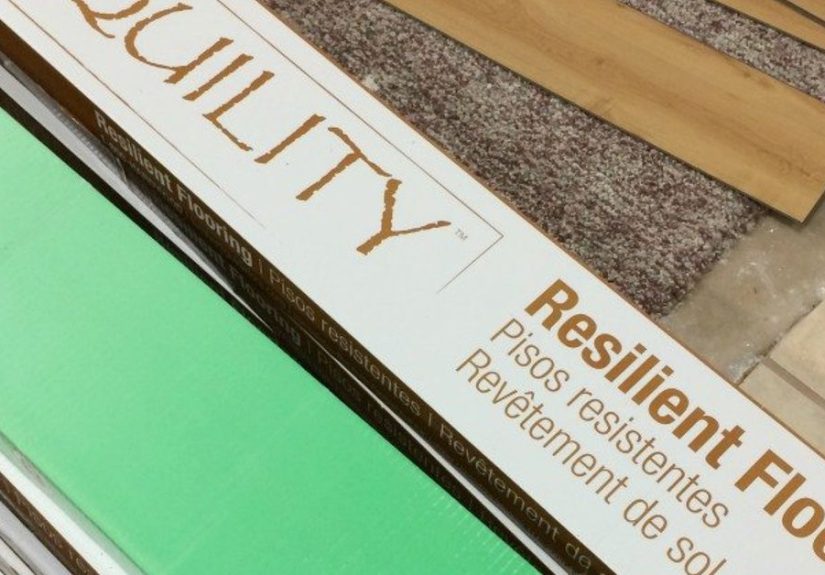
Luxury vinyl plank flooring, often called LVP, is designed to mimic the look of hardwood while offering a layered construction that can resist moisture, wear, and daily household chaos. Most modern options include a wear layer, a printed design layer, a core, and sometimes an attached underlayment pad. Depending on the product, installation may be floating, glue-down, or loose lay.
Floating click-lock vinyl plank flooring is especially popular for DIY projects because the planks connect together without being nailed or glued to the subfloor. That does not mean the floor is simply “tossed down and hoped into place.” It still needs a clean, flat, dry surface, correct room conditions, proper spacing, and careful cutting. Think of LVP as easygoing, but not careless. It is the friend who says, “No worries,” while quietly expecting you to show up on time.
Before You Start: Read the Instructions Like They Owe You Money
Every flooring product has its own rules. Some luxury vinyl planks require acclimation; others do not under normal indoor conditions. Some allow installation over existing tile if the grout lines are shallow and filled; others are stricter. Some have attached pads; others require a specific underlayment or no underlayment at all. Warranty coverage often depends on following the exact installation guide for that flooring.
Before opening every carton like it is Christmas morning, read the installation sheet from start to finish. Look for requirements about temperature, humidity, subfloor flatness, expansion gaps, approved underlayment, radiant heat, moisture testing, and whether heavy fixed objects can sit on top of the finished floor. This single step can save you from a floor that looks great for two weeks and then develops an attitude.
Gather the Right Tools and Materials
You do not need a professional flooring trailer, but you do need more than optimism and a dull utility knife. The right tools make the job cleaner, safer, and faster.
Useful Tools for Vinyl Plank Flooring Installation
- Tape measure and pencil
- Utility knife with extra sharp blades
- Straightedge or square
- Spacers for expansion gaps
- Pull bar and tapping block approved for vinyl plank flooring
- Rubber mallet
- Jigsaw, miter saw, or oscillating multi-tool for detailed cuts
- Level or long straightedge for checking subfloor flatness
- Shop vacuum or broom
- Knee pads, safety glasses, and gloves
Buy 5% to 10% extra flooring for cutting waste, mistakes, and future repairs. For rooms with many angles, closets, or diagonal layouts, lean closer to 10%. Future-you will be thrilled to have matching planks when a refrigerator delivery person decides to moonlight as a demolition crew.
Inspect and Mix Planks from Multiple Cartons
Luxury vinyl plank flooring is manufactured to look natural, which means color and pattern variation are part of the design. Before installation, open several cartons and inspect the planks for visible damage, chipped locking edges, printing issues, or shade differences. Do not install defective planks and hope no one notices. Someone will notice. It may be you, every morning, before coffee.
Work from multiple cartons at the same time to blend colors and patterns across the room. Avoid placing identical wood grain prints next to each other unless you enjoy the look of two suspiciously cloned trees. Lay a few rows loosely before locking them in place so you can balance light, dark, and high-character boards naturally.
Prepare the Room Before Installation
Remove furniture, rugs, floor vents, and anything else that blocks access. Take off shoe molding or quarter round if you plan to reuse it. Baseboards can often stay in place if they allow enough room for expansion and trim coverage, but removing them may create a cleaner finish.
Undercut door jambs and casings so the planks can slide underneath instead of being awkwardly cut around them. This gives the floor a professional look and avoids tiny gaps that collect dust, pet hair, and the occasional mystery crumb. Use a scrap piece of flooring as a height guide when cutting door trim.
Subfloor Prep: The Step You Should Not Skip
The subfloor is the foundation of your vinyl plank flooring installation. If it is dirty, uneven, damp, soft, or unstable, the finished floor may show it. LVP is thinner than hardwood, so imperfections can telegraph through or stress the locking system over time.
Make the Subfloor Clean
Sweep and vacuum thoroughly. Remove drywall mud, paint blobs, old adhesive ridges, staples, nails, and any debris that could prevent the planks from lying flat. A tiny pebble under vinyl plank flooring can feel like a mountain once the floor is installed.
Make the Subfloor Flat
Flat does not always mean perfectly level. A sloped floor may still accept LVP if it is smooth and flat within the manufacturer’s tolerance. Check the installation guide for the exact number, but many products require the surface to be flat within a small fraction of an inch over several feet. Sand down high spots and fill low spots with an approved floor patch or leveling compound.
Make the Subfloor Dry
Waterproof vinyl plank flooring does not mean moisture under the floor is harmless. Moisture trapped below the planks can create odor, mold risk, adhesive failure, or subfloor damage. Concrete slabs should be tested according to the flooring manufacturer’s requirements. Wood subfloors should be dry, solid, and well fastened. Fix leaks before installation, not after the new floor becomes an expensive sponge detector.
Can You Install Luxury Vinyl Plank Over Existing Flooring?
In many cases, luxury vinyl plank flooring can be installed over existing hard surfaces, such as sheet vinyl, linoleum, concrete, plywood, or ceramic tile, if the surface is clean, flat, dry, secure, and approved by the product instructions. However, soft flooring such as carpet and carpet padding must be removed. Installing LVP over carpet is like building a house on a trampoline. Fun image, terrible plan.
If installing over ceramic tile, grout lines may need to be filled so they do not show through or create uneven support. Loose tiles must be repaired or removed. If the existing floor contains asbestos or you are unsure about old flooring materials, do not sand, scrape, or disturb it aggressively. Have it evaluated by a qualified professional.
Plan the Layout Before You Click Anything Together
A smart layout can make an ordinary installation look custom. A rushed layout can leave you with a skinny final row that looks like a flooring afterthought. Measure the width and length of the room before beginning. Divide the room width by the plank width to see how wide the last row will be. If the final row will be too narrow, trim the first row so the first and last rows look balanced.
Choose the Direction of the Planks
Many installers run planks parallel to the longest wall or in the direction of natural light. In hallways, planks usually look best running lengthwise. However, room shape, sightlines, and adjoining spaces matter. Dry-lay several planks and step back. The floor should guide the eye through the room, not make the space feel chopped into pieces.
Stagger the End Joints
Staggering plank end joints is essential for strength and appearance. Avoid stair-step patterns, H-patterns, and short repeating joints. Most manufacturers specify a minimum distance between end seams, often several inches. Use cut pieces from previous rows when possible, as long as they meet the minimum length and seam spacing rules.
Respect the Expansion Gap
Floating luxury vinyl plank flooring needs room to move slightly with temperature and humidity changes. That is why installers leave an expansion gap around walls, cabinets, pipes, door frames, floor vents, and other fixed objects. The exact gap depends on the product, but 1/4 inch is common for many floating vinyl plank floors.
Use spacers along the walls and remove them after installation. Do not fill the expansion gap with grout, hard adhesive, or trim that pins the floor tightly in place. Baseboards, quarter round, and transition strips should cover the gap while allowing the floor to float. A floating floor that cannot float is just a floor waiting to complain.
Install the First Rows Carefully
The first few rows set the tone for the entire project. If they are crooked, every row after that will politely continue the mistake. Start along the chosen wall, trimming the tongue side if required by the manufacturer. Use spacers to maintain the expansion gap. Lock the planks together at the correct angle and make sure seams are fully seated.
Do not hammer directly on the locking edge. Use a tapping block designed for vinyl plank flooring if tapping is needed. Damaged locking tabs can cause gaps later. If a plank will not lock, stop and inspect the joint. Forcing it is rarely the answer. Flooring, much like toddlers and printers, does not respond well to rage.
Cutting Luxury Vinyl Plank Flooring Cleanly
Many vinyl planks can be scored with a utility knife and snapped. For straight cuts, mark the plank, place a straightedge along the line, score deeply, and bend the plank until it breaks. For curved cuts, vents, door trim, or irregular shapes, a jigsaw or oscillating tool may be easier.
Measure twice, cut once, and label tricky pieces. Around pipes, leave the required expansion space and use trim rings or flexible sealant only where allowed. For doorways, take your time. A clean doorway cut can make a DIY floor look professional; a sloppy one can make even expensive flooring look like it was installed during a thunderstorm.
Installing Around Kitchens, Bathrooms, and Laundry Rooms
Luxury vinyl plank flooring is popular in moisture-prone spaces because many products are waterproof on the surface. Still, installation details matter. In kitchens, install permanent cabinets and islands before floating LVP unless the manufacturer specifically allows otherwise. Heavy fixed objects can trap the floor and prevent normal movement.
In bathrooms and laundry rooms, follow the product’s sealing instructions carefully. Some manufacturers recommend silicone in certain perimeter areas or around tubs and toilets, while others have specific rules for maintaining expansion. The goal is to protect against surface water without locking the entire floating floor in place. Also, fix toilet leaks, washer hose problems, and dripping supply lines before installing. New flooring should not be used as a plumbing test kit.
Use the Right Underlayment
Many luxury vinyl planks come with an attached pad. Adding extra underlayment under those products may make the floor too soft, damage the locking system, or void the warranty. Other products may require a specific underlayment for sound reduction, moisture control, or comfort. Always use only what the flooring manufacturer approves.
If installing over concrete, check whether a vapor barrier is required. If installing in a condo or apartment, confirm sound-rating requirements before buying underlayment. The right underlayment can improve performance; the wrong one can turn your new floor into a bouncy castle with wood-look graphics.
Finish with Trim, Transitions, and Protection
After the final row is installed, remove spacers and reinstall baseboards or shoe molding. Nail trim to the wall, not through the floating floor. Add transition strips where the vinyl plank flooring meets carpet, tile, hardwood, exterior doors, or different flooring heights. Transitions are not just decorative; they protect plank edges and help manage movement between spaces.
Use felt pads under furniture legs. Lift heavy furniture instead of dragging it. When moving appliances, place hardboard or plywood panels over the floor to spread the weight. Luxury vinyl plank flooring is durable, but it is not asking to be introduced to a refrigerator wheel at full speed.
Common Mistakes to Avoid
Skipping Subfloor Repairs
Small bumps and dips can become big problems. Uneven subfloors may cause clicking, movement, gaps, or broken locking edges. Prep work is not glamorous, but neither is redoing a floor.
Ignoring Expansion Space
Without proper expansion gaps, floating floors may buckle or separate. Keep space around walls and fixed objects, and make sure trim does not pinch the planks.
Installing Defective Planks
Inspect before installing. Once a visibly damaged plank is locked into the middle of the room, replacing it becomes much less entertaining.
Using the Wrong Cleaner After Installation
Avoid steam mops, abrasive powders, harsh solvents, and wax unless the manufacturer approves them. Regular sweeping and damp mopping with a vinyl-safe cleaner usually keeps LVP looking fresh.
Maintenance Tips After Installation
Once your luxury plank vinyl flooring is installed, give it a little common-sense care. Use mats at entrances to reduce grit. Clean spills promptly. Keep pet nails trimmed. Avoid rubber-backed mats unless the flooring manufacturer says they are safe, because some rubber materials can discolor vinyl. Maintain normal indoor temperature and humidity conditions, especially in rooms with large windows or direct sunlight.
For sunny rooms, use blinds or curtains during peak sunlight to reduce heat buildup. Extreme heat can affect some vinyl floors. If your room gets intense afternoon sun, confirm that your product is rated for that environment before installation.
When to Hire a Professional
DIY vinyl plank flooring installation is realistic for many homeowners, but some projects are better handled by professionals. Hire help if the subfloor needs major leveling, the room has complicated angles, the installation involves stairs, the product is glue-down and covers a large area, or moisture testing shows possible slab issues. A professional installer can also help preserve warranty coverage when the project is complex.
There is no shame in hiring out the hard parts. The goal is not to prove you can personally defeat every plank. The goal is a beautiful, stable floor that makes your home feel better every time you walk through it.
Real-World Experiences: What You Learn While Installing Luxury Vinyl Plank Flooring
The first thing many DIYers learn is that installing luxury vinyl plank flooring is less about strength and more about rhythm. Once the subfloor is ready and the first rows are straight, the process can feel almost relaxing. Measure, cut, click, tap, repeat. Then you reach a doorway, a floor vent, or a wall that is apparently shaped by ancient pirates, and suddenly the project becomes a puzzle. That is normal. The best installers slow down at obstacles instead of rushing through them.
One practical experience is to keep a “thinking plank” nearby. This is a scrap piece used to test cuts, check door jamb height, confirm expansion gaps, and practice tricky angles. Sacrificing one scrap plank can save several full planks from becoming modern art. Another useful habit is cleaning constantly. A quick vacuum every few rows prevents grit from getting trapped under the floor or inside the locking joints. It feels excessive until one tiny crumb keeps a plank from seating correctly and you spend ten minutes questioning your life choices.
Another lesson: walls are rarely straight. Even in newer homes, the starting wall may bow slightly. Snap a chalk line or use careful measurements to keep your first row straight rather than blindly trusting the wall. If the first row follows a wavy wall, the whole floor can drift. Trim the first row where needed so the visible plank lines stay true across the room.
Many homeowners also discover that plank pattern placement matters more than expected. If three dramatic knots land in a row, the floor can look artificial. If identical printed boards sit side by side, your eye will find them immediately. Spread out bold patterns and mix planks from different cartons. It takes a few extra minutes, but it creates a more natural hardwood look.
Doorways are where patience pays rent. Undercutting the casing usually looks cleaner than cutting the plank to fit around trim. For complex shapes, make a paper template or use cardboard before cutting the actual plank. This is especially helpful around toilet flanges, radiator pipes, kitchen islands, and closet corners. A good template turns a stressful cut into a manageable one.
Finally, give yourself enough time. Luxury vinyl plank flooring may be beginner-friendly, but it should not be treated like a race. The visible installation might take a day, while the preparation may take just as long or longer. That is not wasted time. That is the difference between a floor that simply gets installed and a floor that looks intentional, quiet, smooth, and professionally finished. In flooring, as in cooking, prep work is where the flavor lives.
Conclusion
Installing luxury plank vinyl flooring is a project that rewards careful planning. Start with the manufacturer’s instructions, prepare the subfloor until it is clean, flat, and dry, plan the layout, maintain expansion gaps, stagger seams, and finish with trim that protects the floor without trapping it. The process is approachable, but the details matter.
If you treat LVP like a precision project instead of a weekend shortcut, you can get a floor that looks high-end, handles daily life, and makes the room feel instantly refreshed. And yes, you may spend more time staring proudly at your new floor than you expected. That is perfectly normal. It is one of the official side effects of a job done well.
Note: This article is based on commonly recommended installation practices from reputable U.S. flooring manufacturers, retailers, and home improvement resources. Always follow the specific instructions included with your flooring product because requirements vary by brand, construction, and installation method.


