Table of Contents >> Show >> Hide
- What Happens When You Save a Word Document in iCloud?
- Before You Start: Make Sure iCloud Drive Is Turned On
- Method 1: Save a Word Document Directly to iCloud Drive on Mac
- Method 2: Upload or Move an Existing Word Document to iCloud Drive
- Method 3: Save a Word Document to iCloud from iPhone or iPad
- How to Open a Word Document After Saving It in iCloud
- Common Problems and Quick Fixes
- Tips for Managing Word Documents in iCloud Drive
- Is iCloud Better Than OneDrive for Word Documents?
- Real-World Experiences: What Saving Word Documents in iCloud Is Actually Like
- Conclusion
Saving a Word document in iCloud sounds like it should be as easy as dropping a sandwich into a lunchbox. In many cases, it is. But because Microsoft Word often prefers OneDrive, Apple devices prefer iCloud Drive, and Windows likes to make everything just interesting enough to test your patience, the process can feel confusing the first time you try it.
The good news: you do not need to be a tech wizard, a cloud-storage philosopher, or the person everyone calls when the printer breaks. You only need to know where iCloud Drive lives on your device and how to point Word documents toward it.
This guide explains how to save a Word document in iCloud using three easy methods: saving directly from Word on a Mac, uploading or moving an existing document into iCloud Drive, and saving from an iPhone, iPad, or Windows PC. You will also learn how to avoid common mistakes, how iCloud syncing works, and what to do when Word seems determined to save everything somewhere else.
What Happens When You Save a Word Document in iCloud?
When you save a Microsoft Word file to iCloud Drive, the document is stored in Apple’s cloud-based file system. That means the file can appear on your Mac, iPhone, iPad, Windows PC with iCloud for Windows, and at iCloud.com, as long as you are signed in with the same Apple Account and iCloud Drive is turned on.
Think of iCloud Drive as a digital filing cabinet that follows you around. Save your resume on your Mac, and you can open it later from your iPad. Upload a report from a Windows laptop, and it can show up in Finder on your Mac. It is not magic, but it does occasionally feel like your computer grew tiny wings.
One important note before we begin: Microsoft Word’s built-in AutoSave feature works mainly with OneDrive and SharePoint in Microsoft 365. If your Word document is saved in iCloud Drive, you should still use Save, Command + S on Mac, or Ctrl + S on Windows to make sure your latest edits are written to the file. After that, iCloud syncs the updated file across your devices.
Before You Start: Make Sure iCloud Drive Is Turned On
Before saving anything, confirm that iCloud Drive is enabled. Otherwise, you may spend five minutes looking for a folder that does not appear, which is the digital version of searching for glasses already sitting on your head.
On Mac
Open System Settings, select your name, choose iCloud, and make sure iCloud Drive is turned on. Once enabled, iCloud Drive appears in the Finder sidebar. You can also choose to sync your Desktop and Documents folders with iCloud Drive if you want files saved there to be available across devices.
On iPhone or iPad
Open Settings, tap your name, choose iCloud, then turn on iCloud Drive. You can access iCloud Drive through the Files app by tapping Browse and selecting iCloud Drive.
On Windows
Install iCloud for Windows from the Microsoft Store, sign in with your Apple Account, and enable iCloud Drive. After setup, iCloud Drive appears in File Explorer, where you can drag, copy, open, and organize Word documents.
Method 1: Save a Word Document Directly to iCloud Drive on Mac
This is the cleanest method if you are using Microsoft Word on a Mac. Since iCloud Drive is integrated into Finder, you can save your Word document there just like you would save it to Desktop, Downloads, or any other folder.
Step-by-Step Instructions
- Open Microsoft Word on your Mac.
- Create a new document or open an existing one.
- Click File in the menu bar.
- Select Save As or Save a Copy, depending on your version of Word.
- Enter a clear file name, such as Client-Proposal-May-2026.docx.
- Choose iCloud Drive from the location list.
- Select a folder or create a new one.
- Make sure the format is Word Document (.docx).
- Click Save.
That is it. Your Word document is now saved in iCloud Drive. If your Mac is connected to the internet, iCloud will begin syncing the file so you can access it from your other Apple devices or through iCloud.com.
Best Folder Structure for Word Documents in iCloud
Organization matters. A messy iCloud Drive can become the junk drawer of your digital life. One day you are saving a contract; the next day you are staring at six files named “Document 1,” “Document 1 final,” “Document 1 final final,” and the emotionally honest “Document 1 final PLEASE USE THIS ONE.”
Try a simple folder structure like this:
- iCloud Drive > Work > Reports
- iCloud Drive > School > Essays
- iCloud Drive > Personal > Resumes
- iCloud Drive > Clients > 2026 Projects
Clear folders make it easier to find files later, especially when you are switching between Mac, iPhone, iPad, and Windows.
When This Method Works Best
Use this method when you are actively writing or editing a Word document on a Mac. It is ideal for essays, business proposals, contracts, blog drafts, invoices, research notes, and any document you want available across your Apple devices.
Method 2: Upload or Move an Existing Word Document to iCloud Drive
Maybe your Word document is already saved somewhere else: Downloads, Desktop, a USB drive, an email attachment, or a folder with a mysterious name like “Stuff 2023.” No judgment. We have all been there.
You can move or upload that existing Word document into iCloud Drive without opening Word at all. This method is especially useful when you simply want to store, back up, or transfer a .docx file.
Option A: Move a Word Document into iCloud Drive on Mac
- Open Finder.
- Locate the Word document you want to save in iCloud.
- Click iCloud Drive in the Finder sidebar.
- Drag the Word document into iCloud Drive or into a folder inside iCloud Drive.
- Wait for the file to sync.
If you see a small cloud icon, the file may be stored in iCloud but not fully downloaded on that device. If you need offline access, control-click the file and choose an option such as Download Now or Keep Downloaded, depending on your macOS version.
Option B: Upload a Word Document Using iCloud.com
If you are using a shared computer, a browser, or a device where iCloud Drive is not installed, iCloud.com is a handy shortcut.
- Open your browser and go to iCloud.com.
- Sign in with your Apple Account.
- Open iCloud Drive.
- Click the upload button.
- Select your Word document from your computer.
- Wait for the upload to complete.
Once uploaded, the document becomes available in iCloud Drive on your other devices. This is one of the easiest ways to save a Word document to iCloud when you are not working from your main Mac.
Option C: Drag Files into iCloud Drive on Windows
Windows users can save Word documents in iCloud too. After installing and setting up iCloud for Windows, open File Explorer and select iCloud Drive from the navigation pane. Then drag your Word document into the iCloud Drive folder.
You can also save directly from Microsoft Word on Windows by choosing File > Save As, browsing to iCloud Drive, naming your file, and clicking Save. Just remember that Word may highlight OneDrive more prominently because it is Microsoft’s own cloud service. iCloud Drive is still available as a folder location once iCloud for Windows is properly installed.
When This Method Works Best
Use this method when the file already exists and you want to move it into iCloud Drive. It is perfect for archiving old Word documents, transferring documents from Windows to Apple devices, uploading work from a public computer, or organizing files you downloaded from email.
Method 3: Save a Word Document to iCloud from iPhone or iPad
Saving Word documents to iCloud from an iPhone or iPad can be simple, but the exact steps may vary depending on your Word app version, iPadOS or iOS version, and whether iCloud Drive appears as an available location in the app.
The reliable approach is to use the Files app, because iCloud Drive is built into it. If Word cooperates, wonderful. If not, the Files app is the calm adult in the room.
Save from the Word App to iCloud Drive
- Open the Word document in the Microsoft Word app.
- Tap the file menu, usually represented by three dots or a document icon.
- Choose Save a Copy, Duplicate, or a similar option.
- Select Files or Browse.
- Choose iCloud Drive.
- Select a folder.
- Tap Save.
If iCloud Drive appears as a location, this process is quick. If it does not appear, make sure iCloud Drive is enabled in Settings and that the Files app can access it.
Move a Word Document Using the Files App
If your document is saved locally on your iPhone or iPad, move it into iCloud Drive with these steps:
- Open the Files app.
- Tap Browse.
- Find the Word document under On My iPhone, On My iPad, Downloads, or another location.
- Press and hold the file.
- Tap Move.
- Select iCloud Drive.
- Choose a destination folder.
- Tap Move again.
This method is especially useful when a document comes from email, Safari, AirDrop, Messages, or another app. Once the file is in iCloud Drive, you can open it from Word, Pages, or another compatible editor.
What If Word Only Shows OneDrive?
Microsoft Word may strongly encourage saving to OneDrive, especially if you are signed in with a Microsoft account. If iCloud Drive is not shown as a direct save location, save the file locally first, then move it to iCloud Drive using the Files app. It is not the fanciest solution, but it works, which is more than we can say for some “smart” devices before coffee.
How to Open a Word Document After Saving It in iCloud
Saving is only half the story. You also need to open the document later without accidentally editing the wrong copy.
On Mac
Open Finder, click iCloud Drive, locate the document, and double-click it. If Microsoft Word is installed, the document should open in Word. You can also right-click the file and choose Open With > Microsoft Word.
On iPhone or iPad
Open the Files app, go to iCloud Drive, tap the document, and choose Word if prompted. If you have both Pages and Word installed, make sure you open the file in the app you want to use for editing.
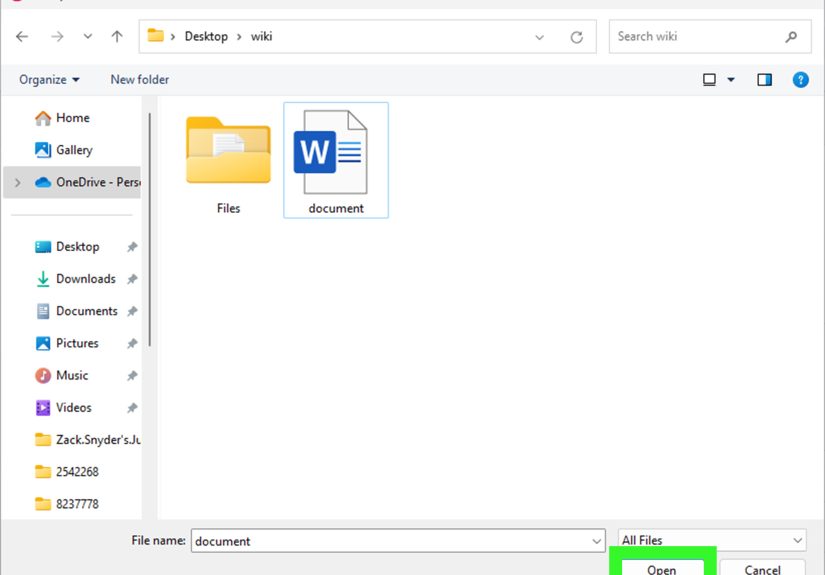
On Windows
Open File Explorer, select iCloud Drive, and double-click the Word document. If the file is not downloaded yet, Windows may need a moment to retrieve it from iCloud before opening.
Common Problems and Quick Fixes
Problem: iCloud Drive Does Not Appear
Check that you are signed in to your Apple Account and that iCloud Drive is turned on. On Mac, look in Finder settings if the iCloud Drive shortcut is missing from the sidebar. On iPhone or iPad, open the Files app and check the Browse tab.
Problem: The Word Document Is Not Syncing
Make sure your device is connected to the internet. Large files may take longer to upload, especially on slow Wi-Fi. Also check your iCloud storage. Apple provides 5 GB of free iCloud storage, but that space can fill quickly with photos, backups, videos, and documents.
Problem: Word Keeps Saving to OneDrive
Microsoft Word often defaults to OneDrive because it is part of the Microsoft ecosystem. To save to iCloud, choose Save As and manually select iCloud Drive. On Windows, make sure iCloud for Windows is installed and iCloud Drive is enabled.
Problem: AutoSave Is Off
If your document is saved in iCloud Drive, Word’s Microsoft 365 AutoSave may not behave the same way it does with OneDrive or SharePoint. Use manual saving often. A simple habit like pressing Command + S or Ctrl + S after major edits can save you from a truly dramatic afternoon.
Tips for Managing Word Documents in iCloud Drive
Use Clear File Names
A useful file name should tell future you what the document is. Try names like Marketing-Plan-Q2-2026.docx or Resume-Jordan-Smith-May-2026.docx. Avoid vague names unless you enjoy playing “document detective” later.
Create Folders by Project
Folders keep iCloud Drive usable. Create separate folders for work, school, clients, taxes, personal writing, templates, and archived files. If you write often, organize by year or topic.
Save Before Switching Devices
Before you close your laptop and continue editing on your iPad, save the document and give iCloud a moment to sync. This reduces the risk of version conflicts or missing edits.
Keep Important Files Downloaded
If you travel, work offline, or have unreliable internet, keep key Word documents downloaded on your device. Cloud storage is helpful, but offline access is still your safety net when Wi-Fi disappears at exactly the worst moment.
Is iCloud Better Than OneDrive for Word Documents?
It depends on how you work. If you live mostly in Apple’s ecosystem, iCloud Drive is convenient because it is built into macOS, iOS, iPadOS, Finder, and the Files app. It is excellent for personal documents, Apple-device workflows, and simple file syncing.
OneDrive, however, is deeply integrated with Microsoft 365. If your main priority is real-time Word collaboration, Microsoft AutoSave, version history in Word, and team editing, OneDrive may feel smoother. For many people, the best answer is not “iCloud or OneDrive forever.” It is using iCloud Drive for Apple-centered file storage and OneDrive when Word collaboration is the main event.
Real-World Experiences: What Saving Word Documents in iCloud Is Actually Like
In everyday use, saving Word documents in iCloud is usually straightforward once the setup is complete. The first experience most people have is a small moment of confusion: Word highlights OneDrive, while the user is looking for iCloud Drive. That is normal. Microsoft built Word to work beautifully with OneDrive, so iCloud may not always appear as the first choice. The trick is to stop looking for a giant “Save to iCloud” button and instead think of iCloud Drive as a regular folder location.
For Mac users, the experience is often the smoothest. Once iCloud Drive is visible in Finder, saving a Word document there feels no different from saving to Desktop. The biggest practical lesson is to create folders early. If you save every file into the main iCloud Drive folder, it works at first, but eventually the clutter becomes annoying. A simple system like Work, Personal, School, and Archive can save hours over time.
For iPhone and iPad users, the Files app is the key. Many people expect the Word app to handle every storage option perfectly, but mobile apps sometimes show different menus depending on the file type, account, or app version. When Word does not show iCloud Drive directly, saving locally and then moving the document through Files is the dependable workaround. It may take a few extra taps, but it gives you control.
Windows users may have the most surprising experience, because iCloud Drive behaves like a folder inside File Explorer after iCloud for Windows is installed. Once it is set up, you can drag a .docx file into iCloud Drive and let it sync. The main thing to remember is that Windows may show cloud-status icons, and some files may need to download before they open. If a document seems slow to open, give it a moment before assuming something broke.
The biggest habit that improves the experience is manual saving. Because Word’s AutoSave is designed around Microsoft cloud services, do not rely on it the same way when working in iCloud Drive. Press Save after important edits, especially before closing Word or switching devices. This small habit prevents most version confusion.
Another useful habit is checking the file location before editing. If you open a Word attachment from email, you may be editing a temporary copy rather than the version stored in iCloud. Save or move the file into iCloud Drive first, then edit that copy. This avoids the classic “I know I edited it, but where did it go?” situation.
Overall, iCloud Drive is a dependable place to store Word documents if you understand its role. It is a cloud folder that syncs files across devices. It is not a replacement for every Microsoft 365 collaboration feature, but it is excellent for keeping documents available, organized, backed up, and easy to open from Apple devices. Once your workflow is set, saving Word documents in iCloud becomes boring in the best possible way.
Conclusion
Learning how to save a Word document in iCloud is mostly about choosing the right path for your device. On a Mac, save directly to iCloud Drive from Word. For existing files, move or upload them through Finder, File Explorer, or iCloud.com. On iPhone and iPad, use the Files app whenever Word does not show iCloud Drive clearly.
The process is simple once you understand that iCloud Drive works like a synced folder. Save the document there, give it a clear name, organize it into a folder, and let iCloud handle the syncing. Just remember to save manually when editing in Word, especially if you are not using OneDrive or SharePoint.
With these three easy methods, your Word documents can travel smoothly between Mac, iPhone, iPad, Windows, and the web. Your files stay easier to find, easier to back up, and much less likely to vanish into the mysterious land of “I swear I saved it somewhere.”


