Table of Contents >> Show >> Hide
- What Are Custom Decoupage Napkin Designs?
- Supplies You Need
- Step 1: Choose a Design Theme
- Step 2: Create or Print Your Custom Napkin Design
- Step 3: Separate the Napkin Layers
- Step 4: Prepare the Surface
- Step 5: Cut, Tear, or Arrange the Napkin Motifs
- Step 6: Apply Decoupage Medium the Right Way
- Step 7: Let It Dry Completely
- Step 8: Seal and Finish
- Design Ideas for Custom Decoupage Napkins
- Common Mistakes and How to Fix Them
- Creative Experience: Lessons From Making Custom Decoupage Napkin Designs
- Conclusion
Custom decoupage designs on napkins are one of those crafts that look fancy enough to make people say, “Wait, you made that?” but are forgiving enough for beginners, weekend crafters, and anyone whose scissors occasionally go rogue. Whether you want personalized paper napkins for party décor, custom printed napkin layers for decoupage projects, or handmade decorative napkins for gifts, the method is simple: choose or create a design, prepare the napkin properly, apply it with the right adhesive, and seal it so the finished piece looks polished instead of “glue met paper and panic happened.”
Decoupage is the art of attaching paper or fabric cutouts to a surface with glue or a decoupage medium, then sealing the design. Paper napkins are especially popular because they are thin, flexible, inexpensive, and available in patterns that range from elegant florals to holiday chaos in the best possible way. When you make your own custom decoupage napkin designs, you are not limited to store-bought prints. You can use monograms, vintage artwork, botanical graphics, wedding motifs, family initials, seasonal illustrations, or tiny lemons wearing sunglasses if that is the energy your brunch deserves.
What Are Custom Decoupage Napkin Designs?
Custom decoupage napkin designs are decorative images, patterns, or motifs created specifically for use on napkins or with napkins as the design layer. The phrase can mean two things. First, you can decorate paper or cloth napkins with custom designs using decoupage-style techniques, stencils, or printed tissue layers. Second, you can create custom napkin designs to use as decoupage paper on objects such as trays, jars, candles, ornaments, wooden boxes, flowerpots, coasters, or party decorations.
For most craft projects, decorative paper napkins work beautifully because the top printed layer becomes almost translucent once glued down. That delicate quality helps the design blend into the surface instead of sitting on top like a sticker. However, napkins are also fragile. The secret to success is patience, light adhesive layers, and treating the napkin like it is made of butterfly wings and birthday wishes.
Supplies You Need
You do not need a professional craft studio to make custom decoupage designs on napkins. A kitchen table, a little planning, and a “do not touch this while it dries” zone will do the job.
Basic Materials
- White or light-colored paper napkins, preferably 2-ply or 3-ply
- Custom printed images, patterned napkins, or digital designs
- Decoupage medium such as matte or gloss Mod Podge
- Small flat brush, bristle brush, or soft craft brush
- Sharp scissors or detail scissors
- Plastic wrap or a clear plastic bag for smoothing
- White acrylic paint or primer for darker surfaces
- Wax paper, parchment paper, or freezer paper for handling thin napkin layers
- Fine-grit sandpaper for finishing edges on wood
- Clear sealer, varnish, or dishwasher-safe decoupage formula if appropriate
Optional Design Tools
- Inkjet or laser printer
- Graphic design software or a simple online design tool
- Painter’s tape or removable tape
- Freezer paper for stabilizing thin napkins before printing
- Rubber stamps, fabric paint, or stencils for cloth napkins
- Gold leaf, metallic paint, or paint pens for accents
Step 1: Choose a Design Theme
Before touching glue, decide what style you want. This step matters because decoupage can go from “French countryside heirloom” to “craft drawer explosion” very quickly. A clear theme keeps your custom napkins cohesive.
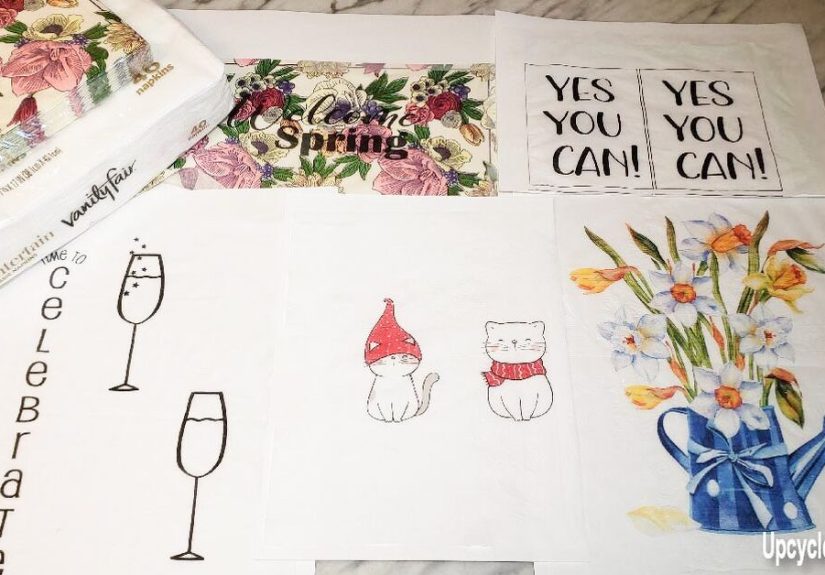
For weddings, try initials, soft florals, watercolor greenery, venue sketches, or delicate borders. For holidays, use snowflakes, holly, pumpkins, stars, vintage ornaments, or handwritten phrases. For everyday décor, consider lemons, herbs, blue-and-white chinoiserie, botanical drawings, birds, bees, mushrooms, gingham, toile, or abstract brushstrokes.
A strong custom decoupage design usually has one main focal point and a few supporting details. For example, a lavender sprig with a tiny monogram looks elegant. A lavender sprig, a bicycle, a crown, a cupcake, three fonts, and a motivational quote may look like a craft store had a very emotional day.
Step 2: Create or Print Your Custom Napkin Design
If you are making your own design digitally, set up a square or rectangular canvas that matches the folded size of your napkin. Most lunch napkins are folded into quarters, so only one quarter may show when placed on a table. Put the most important design element where it will be visible after folding.
Use high-contrast artwork because thin napkin layers soften colors once applied. Light pink may become barely-there blush. Pale yellow may disappear like a cookie at a school bake sale. If you want the design to remain crisp, use deeper tones, clear outlines, and simple shapes.
Printing on Napkin Layers
Printing directly onto a napkin can be done, but the napkin must be stabilized first. A common home-craft method is to attach a single napkin ply or tissue-thin paper to a regular printer sheet using tape around the edges. Some crafters use freezer paper because it gives delicate material support. The shiny side of freezer paper can temporarily bond to fabric or thin material with heat, while the dull paper side provides structure. Always test with your printer first, because printers vary, and nobody wants to hear the sad crunch of a jammed napkin at 11 p.m.
For the cleanest result, use white napkins, print only on the top layer, and allow the ink to dry completely. Laser prints are less likely to smear when wet adhesive touches them. Inkjet prints can work, but they should be fully dry and may need a light spray fixative or test seal before decoupage medium is applied.
Step 3: Separate the Napkin Layers
Most decorative napkins have multiple layers. For decoupage, you normally use only the top printed layer. The backing layers are removed because extra plies make the napkin thicker, harder to blend, and more likely to wrinkle. Separating the layers is easy in theory and weirdly humbling in practice.
Try this simple trick: place a small piece of tape on one corner of the napkin, press gently, and pull. The layers should begin to separate. You can also rub a corner lightly between your fingers until the plies loosen. Cut out your shapes before separating the layers if you need precise edges, because the full napkin is easier to handle while it still has structure.
Step 4: Prepare the Surface
If you are applying custom napkin designs onto another object, surface preparation is everything. Napkins are thin and slightly transparent, so the background color affects the final design. A white or light base coat makes colors look brighter and keeps the artwork clear. This is especially important on wood, terra-cotta, cardboard, glass, metal, or dark-painted surfaces.
Clean the surface first. Remove dust, grease, price stickers, mystery crumbs, and whatever that sticky thing is. For wood, lightly sand and wipe clean. For glass or ceramic, wash and dry thoroughly. For metal or plastic, check the adhesive label to make sure the decoupage medium is suitable.
Step 5: Cut, Tear, or Arrange the Napkin Motifs
You can cut napkin designs with scissors for crisp shapes or tear around them for softer, feathered edges. Torn edges often blend better, especially for vintage, floral, cottagecore, or shabby-chic looks. To tear neatly, dip a small detail brush in water and trace around the image. Wait a few seconds, then gently pull away the excess napkin. The damp line helps the napkin separate without creating harsh borders.
Lay out all pieces before gluing. This dry arrangement lets you adjust spacing, overlap motifs, and avoid accidentally placing a rose directly where a handle, fold, or curve will hide it. On curved objects, smaller pieces are easier to apply than one large sheet. Think puzzle pieces, not wallpapering a beach ball.
Step 6: Apply Decoupage Medium the Right Way
Here is the golden rule of napkin decoupage: apply the adhesive to the surface, not directly to the loose napkin. Wet glue on a fragile napkin can cause tearing, stretching, and wrinkling. Brush a thin, even layer of decoupage medium onto the area where the design will go. Place the napkin piece gently on top.
Next, use plastic wrap to smooth the napkin from the center outward. This helps remove air bubbles without dragging the paper. Once the napkin is in place, add another light coat of decoupage medium over the top. Use a soft brush and gentle pressure. If you push too hard, the napkin may tear. If you barely touch it, the napkin may wrinkle. The sweet spot is confident but kind, like correcting a friend’s typo in a group chat.
Step 7: Let It Dry Completely
Drying time is not the glamorous part, but it is where the magic settles. Let each layer dry before adding another. For most small napkin decoupage projects, wait at least one hour before applying the next coat. Larger or more humid projects may need longer. If the surface still feels cool, tacky, or soft, give it more time.
Rushing the process can trap moisture, create cloudy spots, or lift the napkin. So yes, you could poke it “just to check,” but the craft gods are watching.
Step 8: Seal and Finish
After the design is dry, seal it with additional coats of decoupage medium or a clear protective finish. For decorative objects, two to four light coats are usually better than one heavy coat. Let each coat dry fully. On glass, a smooth bristle brush can help reduce bubbles. On wood, you can gently sand rough edges after the napkin has dried, especially around ornaments, coasters, plaques, and boxes.
If the item will be handled often, choose a durable sealer. If it may be washed, use a dishwasher-safe formula and follow the product’s curing directions. Some formulas require a long cure time before washing. For anything used with food, keep decoupage away from direct food-contact areas unless every product used is clearly labeled food-safe for that purpose.
Design Ideas for Custom Decoupage Napkins
Personalized Party Napkins
Create napkins with names, dates, initials, or tiny illustrations that match a party theme. A baby shower could use soft clouds and stars. A bridal shower could feature watercolor flowers and the couple’s initials. A birthday dinner could include a small portrait-style icon of the guest of honor’s dog, because let’s be honest, the dog is probably the real celebrity.
Vintage Botanical Napkins
Botanical prints are perfect for decoupage because they look timeless and forgiving. Herbs, wildflowers, fruit branches, ferns, and butterflies all work well. Pair them with cream backgrounds, pale green accents, or handwritten-style labels.
Holiday Napkin Designs
Make custom napkins for Christmas, Thanksgiving, Easter, Halloween, or Fourth of July celebrations. Try holly leaves, plaid borders, pumpkins, bunnies, fireworks, snowflakes, or vintage postcard art. Seasonal designs are also great for decoupaging ornaments, mason jars, candles, and table-centerpiece pieces.
Monogram Napkins
Monograms are simple, elegant, and beginner-friendly. Use one large letter, a small wreath, or a thin border. Keep the design clean so it prints clearly on delicate napkin paper.
Common Mistakes and How to Fix Them
Wrinkles Everywhere
Wrinkles happen when the napkin absorbs too much moisture or is moved too much after placement. Use less adhesive, smooth with plastic wrap, and work from the center outward. For future projects, try smaller napkin pieces instead of one large sheet.
Colors Look Dull
The background is probably too dark. Paint the surface white or cream before applying napkin designs. Thin napkin paper needs a light base to keep colors vibrant.
The Napkin Tears
The brush pressure may be too heavy, or the napkin may be oversaturated. Apply adhesive to the surface first, place the napkin carefully, and use a wet brush with gentle strokes for the topcoat.
Ink Smears
If you printed the design yourself, the ink may not be waterproof. Let prints dry thoroughly, test a small piece, and consider laser printing for designs that will be covered with wet medium. If using inkjet, a light protective spray can help, but always test before committing to the final napkin.
Creative Experience: Lessons From Making Custom Decoupage Napkin Designs
The first time you make custom decoupage designs on napkins, you may discover that napkins have a personality. They are beautiful, delicate, dramatic, and occasionally determined to wrinkle in exactly the wrong place. That is normal. In fact, one of the best experiences with napkin decoupage is learning that “perfect” is less important than charming, balanced, and handmade.
A helpful approach is to start with a practice project before using your favorite design. Try a small wooden tag, a thrift-store jar, or a plain paper napkin sample. Print or cut three versions of the same motif: one large, one medium, and one small. Apply them to different surfaces and watch how the design changes. On white wood, colors may look crisp. On glass, the design may look airy and translucent. On kraft cardboard, the same design may turn soft and vintage. This testing stage saves frustration and often leads to better ideas.
Another practical lesson is that simple designs usually look more expensive. A single blue floral corner on a white napkin can feel like boutique stationery. A tiny lemon border can make a summer table look cheerful without shouting. A monogram inside a thin wreath can turn inexpensive paper napkins into something that feels made for a wedding planner’s mood board. When in doubt, remove one element. Your napkin does not need to tell its life story.
Working with custom prints also teaches patience. Ink must dry. Adhesive must dry. Sealers must cure. This is not a microwave burrito craft. But the waiting time is useful: you can prepare the next batch, clean edges, test layouts, or make a second design while the first one dries. If you are making napkins for an event, start several days early. Handmade pieces always behave better when they are not being rushed five minutes before guests arrive.
One especially satisfying experience is creating a coordinated set. For example, make napkins with a small herb illustration, then decoupage the same herb design onto place cards, candle jars, and a serving tray. Suddenly the whole table looks intentional, even if dinner is takeout transferred into nice bowls. Custom decoupage napkins are powerful that way: they create visual unity without requiring expensive décor.
The best advice is to embrace tiny imperfections. A faint wrinkle can look like texture. A torn edge can look vintage. Slightly uneven placement can look handmade rather than mass-produced. The goal is not to create factory-perfect napkins. The goal is to create something personal, useful, and delightful enough that someone picks it up and says, “This is too pretty to use,” which is your cue to proudly reply, “Use it. I can make more.”
Conclusion
Making custom decoupage designs on napkins is an affordable, creative way to personalize parties, gifts, home décor, and seasonal crafts. With the right napkins, a light-colored base, careful layer separation, gentle adhesive application, and patient drying, you can create designs that look polished without needing advanced art skills. Start with simple motifs, test your materials, seal the finished piece properly, and let your creativity have a little room to play. Decoupage may have an elegant name, but at heart it is wonderfully approachable: paper, glue, imagination, and just enough patience to keep the napkin from throwing a tiny tissue-paper tantrum.
Note: Custom decoupage napkin projects are best for decorative use. For washable items, fabric napkins, or surfaces near food, always choose products labeled for that specific purpose and follow curing, washing, and safety instructions on the product label.


