Table of Contents >> Show >> Hide
- What Makes Particle Board So Tricky to Glue?
- Main Types of Glue That Work on Particle Board
- How to Choose the Best Glue for Your Particle Board Project
- Step-by-Step: How to Glue Particle Board Like a Pro
- Common Mistakes When Gluing Particle Board (and How to Avoid Them)
- Product Snapshot: Glues Commonly Recommended for Particle Board
- Real-World Lessons: Experiences with Particle Board Glue Jobs
Particle board is like the instant ramen of building materials: cheap, everywhere, surprisingly useful, and a little fragile if you treat it wrong.
It shows up in bookcases, cabinets, closet systems, countertops, and just about every piece of flat-pack furniture you’ve ever assembled at 1 a.m.
But when particle board chips, sags, or blows out around screws, the right glue can turn a “welp, it’s ruined” moment into a solid save.
In classic Bob Vila fashion, we’re going beyond simple product links and digging into how particle board behaves, which glues actually work,
and how to use them so your joints last longer than the free Allen wrench they came with. We’ll walk through top glue types, when to use each,
step-by-step repair techniques, common mistakes, and real-world lessons from particle board rescues and rebuilds.
What Makes Particle Board So Tricky to Glue?
Before you choose the best glue for particle board, it helps to understand what you’re dealing with. Particle board isn’t solid lumber.
It’s wood chips, sawdust, and resin pressed into sheets. That structure gives it two big personality traits:
- Porous and thirsty edges. The interior acts like a sponge, especially on cut edges. It can soak up glue quickly, leaving a dry joint if you don’t apply enough or don’t give it time to penetrate.
- Weak around fasteners. Screws near the edge can cause chunks to crumble or blow out. Once that happens, you’re often relying on glue and reinforcement to rebuild the area.
On top of that, particle board has one major enemy: moisture. Water can cause it to swell, crumble, and lose strength.
That’s why choosing the right glueespecially for kitchen and bathroom projectsis critical. You’re not just bonding the surface,
you’re helping protect the material from future damage.
Main Types of Glue That Work on Particle Board
There isn’t one magical “particle board glue” that does it all. Instead, different types of adhesive shine in different situations.
Here are the main players you’ll see in Bob Vila–style recommendations and on pro job sites.
PVA Wood Glue (Carpenter’s Glue)
If you’re joining raw particle board to raw particle boardsay, assembling flat-pack cabinets, building shelves, or repairing a broken panel
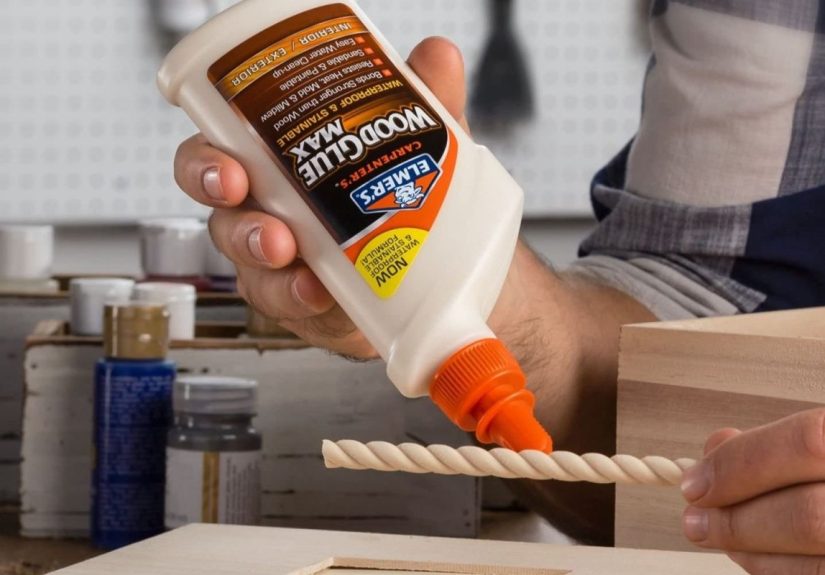
PVA wood glue is usually the MVP. This is the classic yellow or white “carpenter’s glue” you see from brands like Gorilla, Elmer’s, and Titebond.
Why it’s so good for particle board:
- Excellent for porous materials. It soaks in just enough to create a strong “wood-to-wood” bond.
- Easy to clean up. Water cleanup makes it beginner-friendly.
- Strong, rigid joints. Perfect for shelves, boxes, and cabinet carcasses where you want parts to act like one solid piece.
For particle board, look for interior or water-resistant PVA wood glues described as “carpenter’s,” “wood,” or “aliphatic resin” glue.
Many product tests and pro woodworkers favor this formula for general assembly and repair when the material stays relatively dry.
Polyurethane Glue
When the project might see moisture, temperature swings, or outdoor exposure, polyurethane glue steps up.
These glues (often brown and marketed as “original” or “waterproof” formulas) react with moisture, expand slightly as they cure,
and form a tough, water-resistant bond.
Polyurethane glue is a strong choice when:
- You’re repairing particle board near a sink, dishwasher, or bathroom vanity.
- You want extra gap-filling ability in slightly loose joints.
- You’re bonding particle board to other materials like solid wood or metal.
The trade-offs? It can foam as it cures, so squeeze-out needs to be trimmed or sanded. It also requires good clamping and can be messier to handle than PVA.
But for tough, high-moisture environments, it’s often worth it.
Contact Cement (For Laminates and Veneers)
If you’ve got a peeling laminate countertop, loose edge banding, or lifting veneer on particle board,
wood glue alone may not cut it. This is where contact cement comes in.
Contact cement is applied to both surfaces, allowed to become tacky, and then pressed together for an instant, permanent bond.
It’s especially good for:
- Reattaching laminate on particle board countertops or cabinets.
- Gluing large veneer sheets to particle board panels.
- Repairing loose edgebanding strips.
Because you don’t get “slip time,” alignment is critical. Once the two sides touch, they’re basically married.
Dry-fit and use spacers (like strips of wax paper or dowels) to position pieces before committing.
Cyanoacrylate (Super Glue) and Epoxy
Super glue and epoxy aren’t your go-to for big structural joints, but they shine in spot repairs.
Super glue (CA glue) works well when:
- You’re stabilizing crumbly edges or chipped corners.
- A small piece has broken off and you want a quick, strong reattachment.
- You need a fast cure so you can keep working.
Epoxy is ideal when:
- A screw hole has blown out and you need to rebuild it.
- You’re filling voids or missing chunks on an edge or corner.
- You want a thick, gap-filling adhesive that bonds well to both wood fibers and hardware.
Many furniture repair pros reach for epoxy when particle board damage goes beyond “simple crack” and into “wow, that looks bad” territory.
Once cured, epoxy can be sanded, drilled, and painted.
Multi-Purpose Glues for Mixed Materials
For projects where particle board meets glass, metal, or ceramicslike a DIY desk with metal legs or a shelf with bracketslook for
multi-purpose construction adhesive or flexible hybrid glues. These are designed to bond dissimilar materials while offering some flexibility for movement.
They’re not always necessary for pure particle board joints, but they’re handy if your project looks more like a modern furniture mashup than a simple cabinet box.
How to Choose the Best Glue for Your Particle Board Project
To pick the right glue, start with two simple questions: What are you gluing? and Where will it live?
1. Edge-to-Edge Joints (Shelves, Cabinets, and Carcasses)
For most structural jointslike cabinet sides, shelves, or storage cubesyour best bet is a good PVA wood glue.
It provides a strong, rigid bond that makes panels act like a single piece.
Tips for success:
- Apply a first light coat to cut edges, let it soak in for a minute, then apply a second bead before clamping.
- Use even clamp pressure, just enough to bring joints snug without squeezing out every drop.
- Allow a full cure timeusually 24 hoursbefore heavily loading shelves.
2. Loose Laminate, Veneer, or Edge Banding
When the particle board itself is sound but the decorative surface is peeling, reach for contact cement.
It’s specifically designed for laminates and veneers.
This choice is especially smart for:
- Kitchen or bath countertops with loose edges.
- Cabinet doors where the face veneer is bubbling.
- Pre-finished closet systems with delaminating edges.
3. Crumbly Edges, Corners, and Screw Blowouts
When particle board chunks blow out around screw holes or corners, think super glue + filler or epoxy.
A common technique:
- Vacuum out the loose dust and chips.
- Flood the damaged area with thin super glue so it soaks into the fibers.
- Back it up with sawdust or wood filler for bulk, or use epoxy to rebuild missing material.
- Sand, pre-drill new holes if needed, and then reattach hardware.
4. High-Moisture or Risky Environments
If the project lives in a bathroom, laundry room, basement, or near a sink, step up to polyurethane glue or a
water-resistant PVA. You want a bond that stands up to humidity and the occasional splash.
Combine the right glue with good sealing practiceslike painting exposed edges, using caulk where necessary, and avoiding standing waterand
your particle board furniture will last a lot longer than its warranty suggests.
Step-by-Step: How to Glue Particle Board Like a Pro
A strong glue bond on particle board isn’t about fancy tools; it’s about prep, patience, and pressure. Here’s a simple, reliable process you can adapt to most repairs.
Step 1: Inspect and Prep the Surface
- Remove loose chips, dust, and old glue with a brush or vacuum.
- If the area is damp, let it dry thoroughly before gluing.
- Trim any swollen or badly damaged areas back to solid material.
Remember, glue can’t bond what’s already crumbling apart. Sometimes cutting back to cleaner material and gluing in a patch piece is better than trying to save everything.
Step 2: Pre-Seal Thirsty Edges (Optional but Helpful)
For very porous cut edges, especially on older or cheaper particle board, apply a light, thin coat of wood glue first and let it soak in.
Then follow with a normal bead of glue for the actual bond. This keeps the board from drinking all the adhesive before the joint is closed.
Step 3: Apply the Right Amount of Glue
With PVA or polyurethane glues, a continuous but not excessive bead is the goal. Too little and the joint starves; too much and the piece skates around
or makes a giant mess.
For contact cement:
- Apply an even coat to both surfaces.
- Let it dry until tacky, following the product’s timing instructions.
- Use spacers (like thin strips) to help position pieces, then remove them and press the surfaces together firmly.
Step 4: Clamp or Press Firmly
For most wood glues, clamping is non-negotiable. Use bar clamps, pipe clamps, or even heavy objects to apply even pressure across the joint.
You’re aiming for a thin line of squeeze-out along the edge, not a waterfall.
With contact cement, pressure comes from rollers, blocks, or firm hand pressure across the entire surface. Since the bond is instant,
pressure ensures full contact, not movement.
Step 5: Let the Glue Fully Cure
Dry time is not the same as cure time. Many glues feel dry to the touch after 30–60 minutes but don’t reach full strength for 24 hours or more.
Resist the urge to load up a shelf or slam cabinet doors too soon. Your future self will thank you.
Common Mistakes When Gluing Particle Board (and How to Avoid Them)
Even experienced DIYers and pros occasionally get humbled by particle board. Here are some frequent missteps:
- Overclamping. Cranking clamps too tight can squeeze out almost all the glue, leaving a weak joint. Snug, not brutal, is the goal.
- Under-gluing edges. Thin, thirsty edges soak up glue fast. Double-coating edges or pre-sealing them is often necessary.
- Ignoring moisture. Using non-water-resistant glue in a humid space is a recipe for future failure.
- Using the wrong adhesive for laminates. Wood glue under peeling laminate rarely holds long-term. Contact cement works far better.
- Using expired glue. Many wood glues only have a shelf life of one to two years once opened. If it’s chunky, stringy, or separated and won’t mix smooth, retire it.
A little disciplinechecking labels, storing glue correctly, and giving it time to curegoes a long way toward repairs that actually last.
Product Snapshot: Glues Commonly Recommended for Particle Board
While you should always read current labels and reviews, here’s a quick rundown of glue types often highlighted in expert guides and pro discussions:
- PVA wood glue (e.g., Gorilla Wood Glue, Elmer’s Carpenter’s Wood Glue, Titebond-style formulas) – Best for structural joints, shelves, and cabinet carcasses where surfaces are raw or sanded.
- Polyurethane glue (e.g., “original” waterproof formulas) – Great for high-moisture or mixed-material situations where you need a waterproof, gap-filling bond.
- Contact cement (e.g., Weldwood-type products) – Ideal for laminates, veneers, and edge banding bonded to particle board.
- CA glue (super glue) – Perfect for quick fixes, stabilizing crumbly edges, and bonding small broken pieces.
- Two-part epoxy – Best for rebuilding damaged corners, filling voids, and reinforcing screw holes or hinges.
Think of these as a toolkit rather than a single “magic bottle.” The best glue for particle board is the one that matches the specific job you’re doing.
Real-World Lessons: Experiences with Particle Board Glue Jobs
Theory is nice, but particle board tends to teach its lessons in the real worldusually when something breaks right before guests arrive.
Here are some experience-based takeaways that can save you frustration, money, and maybe a friendship or two during assembly day.
1. The Flat-Pack Bookshelf Rescue
Picture this: you’re sliding a fully loaded bookshelf across the floor and suddenly hear a soft crack. One side separates at the bottom,
the shelf sags, and a small avalanche of paperbacks hits the ground. Classic particle board move.
In many cases, that joint fails because it relied mostly on tiny cam locks and screws biting into the edge of the board, not a strong glued joint.
The fixand preventionis simple:
- Disassemble the damaged corner.
- Brush off loose fibers and dust.
- Apply a generous bead of PVA wood glue along the edge and into any pre-cut grooves.
- Reassemble, clamp if possible, and wipe off squeeze-out.
- Let it cure overnight before reloading books.
Once glued properly, that corner often ends up stronger than when it was new. Many DIYers now routinely add glue to all major joints when assembling
flat-pack particle board furniture, even if the instructions don’t mention it.
2. Saving a Swollen Sink Cabinet
Under-sink cabinets made from particle board have a tough life: drips, leaks, cleaning chemicals, and humidity. One slow leak can cause
the bottom panel to swell, delaminate, or even crumble around the drainpipe cutout.
Here’s how a lot of homeowners successfully stabilize the situation:
- Fix the leak first (non-negotiable).
- Cut away the worst swollen sections back to firmer material.
- Glue in a new piece of plywood or particle board using polyurethane glue or a moisture-resistant PVA, clamped tightly.
- Seal edges with paint or a sealant after the glue cures.
Is it as perfect as replacing the entire cabinet? No. But a careful glue-and-patch approach can add years of life to an otherwise doomed cabinet,
especially when paired with a leak tray or mat under the plumbing.
3. Closet Organizer Confidence Boost
Many DIY closet systems rely heavily on particle board or melamine-coated particle board. When installed correctly, they can hold a surprising amount of weight.
The key word is correctly.
Experienced installers often:
- Use wood glue in addition to the provided fasteners wherever panels meet.
- Pre-drill holes near edges to avoid blowouts.
- Glue and clamp joints before mounting the units to the wall.
The result is a system that feels far more solid than something simply “screwed together.” You can feel the difference every time you tug on a shelf
or slam a closet door. The lesson: a few extra minutes with a bottle of glue at the assembly stage pays off in daily use.
4. Accepting the Limits (and Working with Them)
Finally, a hard truth from countless DIY stories: sometimes particle board is too far gone. If water has turned it into something resembling oatmeal,
no glue on Earth is going to revive it. In those cases, the best “glue strategy” is replacing the damaged section entirelyoften with plywoodand
using the right adhesive to tie the new material into the old structure.
The good news is that with a realistic understanding of its strengths and weaknesses, particle board can serve you well.
Combine the right glue, good prep, and a bit of patience, and your projects and repairs can feel surprisingly solid and long-lasting.
Whether you’re reattaching peeling laminate, reinforcing wobbly shelving, or rebuilding a blown-out cabinet corner, the best glue for particle board
is the one that matches your task, environment, and expectations. Choose wisely, clamp firmly, and let time do the rest.
SEO JSON


