Table of Contents >> Show >> Hide
- Why Burlap Coffee Sack Curtains Work So Well
- What You Need for This DIY Project
- Before You Cut: Clean and Prep the Burlap
- Measure Your Window the Smart Way
- Three Easy Ways to Make Burlap Coffee Sack Curtains
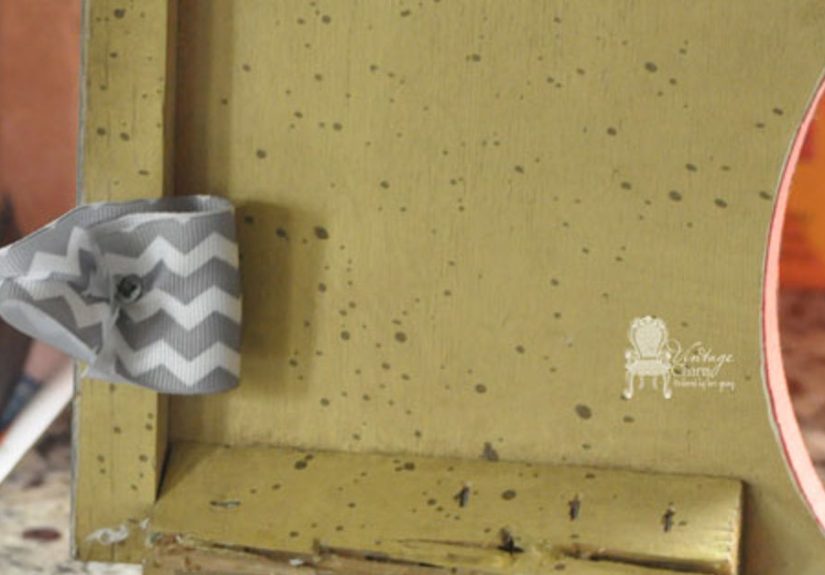
- How to Control Burlap Fraying
- Should You Add a Liner?
- Design Ideas for Different Rooms
- Safety and Practical Considerations
- Common Mistakes to Avoid
- Approximate Cost and Time
- Step-by-Step: Simple Burlap Coffee Sack Cafe Curtain
- Personal Experience Notes: What This Project Feels Like in Real Life
- Conclusion
Some decorating ideas whisper. Burlap coffee sack curtains walk into the room wearing boots, carrying a latte, and saying, “Yes, I made this myself.” If you love farmhouse style, rustic kitchen decor, budget-friendly window treatments, or the satisfying feeling of turning something humble into something charming, this DIY project deserves a spot on your weekend list.
Burlap coffee sack curtains are made from used or new jute coffee bags, usually the kind printed with coffee farm names, bean origins, logos, numbers, or bold graphic markings. Instead of hiding those markings, this project celebrates them. The texture is rough, the look is relaxed, and the result feels like a small design story hanging in your window.
The best part? You do not need to be a professional seamstress. You do not even need to be a confident beginner. If you can measure, cut, fold, clip, and occasionally argue with a piece of fabric until it behaves, you can make burlap coffee sack curtains.
Why Burlap Coffee Sack Curtains Work So Well
Burlap has a natural woven texture that instantly warms up a room. In a kitchen, breakfast nook, laundry room, pantry, craft room, porch, or casual dining area, it creates that easy “collected over time” feeling. Coffee sacks are even better because they bring built-in graphics. A plain burlap panel says rustic. A coffee sack panel says rustic with a passport.
These curtains are especially effective as cafe curtains, valances, half-window panels, door-window covers, pantry curtains, or decorative panels layered over a plain liner. The loose weave lets filtered light pass through, so the room does not feel boxed in. At the same time, the fabric softens the window and adds privacy, especially when used on lower window sections.
They are also wonderfully forgiving. A perfectly hemmed silk curtain demands respect. A burlap coffee sack curtain can be slightly imperfect and still look intentional. In fact, a little irregularity is part of the charm. This is the rare DIY where “not factory-perfect” is not a flaw; it is the entire personality.
What You Need for This DIY Project
Basic Materials
- 1 to 3 burlap coffee sacks, depending on window size
- Measuring tape
- Sharp fabric scissors
- Curtain rod, tension rod, or cafe rod
- Clip rings, curtain rings, or twine ties
- Iron and pressing cloth
- Fusible hem tape for a no-sew version
- Sewing machine and heavy-duty needle for a sewn version
- Fray-control liquid, craft glue, or clear fabric sealant
- Optional cotton liner, muslin, or drop cloth backing
Choosing the Right Coffee Sack
Look for sacks that are clean, sturdy, and visually interesting. Some have large centered graphics; others have stamps, stripes, numbers, or country names. For curtains, the best sacks are not always the most perfect ones. A faded logo, uneven printing, or slightly worn texture can make the finished window treatment feel authentic instead of overly staged.
Before cutting, inspect the sack for stains, odor, weak spots, holes, or loose seams. A tiny hole near an edge can be hidden in a hem. A large oil stain in the center of the logo is a bigger problem unless your design style is “abandoned warehouse espresso bar,” which, to be fair, might be someone’s dream aesthetic.
Before You Cut: Clean and Prep the Burlap
Used coffee sacks can carry dust, chaff, warehouse smells, and bits of coffee residue. Shake them outdoors first. Then vacuum both sides using an upholstery brush attachment. If the sack smells musty, air it outside in a dry, shaded place. Avoid leaving it in direct hot sun for too long because natural fibers can become brittle.
For spot cleaning, use a damp cloth and mild soap, then blot rather than scrub. Burlap is loosely woven, so aggressive scrubbing can distort the fabric. If you decide to hand-wash the sack, use cool water, gentle detergent, and minimal agitation. Lay it flat or hang it carefully to dry. Machine washing can work for some burlap, but it may shrink, shed fibers, wrinkle heavily, or weaken older sacks. Test first if the sack is precious.
Once dry, press the fabric with an iron on a moderate setting using a pressing cloth. This helps flatten folds and makes measuring easier. Do not expect burlap to become smooth like cotton. It has texture, attitude, and possibly a few opinions.
Measure Your Window the Smart Way
Start by deciding what type of curtain you want. A full panel covers most or all of the window. A cafe curtain covers the lower half. A valance covers only the top section. Burlap coffee sacks are often best as cafe curtains or valances because the sack graphics stay visible and the fabric does not overwhelm the room.
For Cafe Curtains
Measure the window width from outer trim to outer trim. Add a few inches if you want the curtain to extend beyond the frame. For a relaxed look, your total fabric width should be about 1.5 times the window width. Burlap is bulky, so you usually do not need dramatic fullness. Too much gathering can hide the coffee sack print and make the panel look like it lost a fight with a potato bag.
For length, measure from the rod placement to the desired bottom edge. Common cafe curtain lengths fall around the window midpoint, lower sash, or windowsill. Add extra length for a top fold, rod pocket, or hem.
For Valances
Measure the window width and add light fullness. Decide whether the valance should hang 10, 12, 14, or 16 inches down from the rod. If your coffee sack has a beautiful logo, center the print before cutting. The graphic should look deliberate, not like it accidentally wandered into the corner.
Three Easy Ways to Make Burlap Coffee Sack Curtains
Method 1: The No-Sew Clip Ring Curtain
This is the fastest method and the best choice for beginners. Cut the coffee sack into a flat panel. Seal or fold the edges to control fraying. Then attach clip rings across the top and hang the panel on a rod. That is it. The clip rings do most of the engineering, which is great because they never ask for coffee breaks.
Space the rings evenly. For a small cafe curtain, five to seven clips may be enough. For a wider panel, use more clips to prevent sagging. This method works beautifully when you want a casual, slightly gathered curtain that can be removed easily for shaking out or cleaning.
Method 2: The No-Sew Hem Tape Curtain
If you want cleaner edges but do not want to sew, fusible hem tape is your friend. Fold each raw edge about half an inch to one inch, press it flat, place the hem tape inside the fold, and iron according to the product instructions. Use a pressing cloth to protect the burlap and your iron.
This method creates a neater finish and helps reduce shedding. It is ideal for kitchen curtains, laundry room valances, and panels that will be handled occasionally but not opened and closed all day long.
Method 3: The Sewn Rod Pocket Curtain
For a more finished look, sew a rod pocket. Fold the top edge down far enough to fit your rod comfortably, then stitch across the lower edge of the fold. Use a longer stitch length because burlap’s open weave does not love tiny tight stitches. A heavier needle and sturdy thread will help.
Finish the side and bottom edges with a straight stitch, zigzag stitch, serged edge, or folded hem. If the burlap is very loose, apply a thin line of fray-control product before sewing. This gives the stitches more stability and helps the curtain survive regular handling.
How to Control Burlap Fraying
Burlap frays because it is loosely woven from natural fibers. That is part of its beauty, but it can also turn your floor into a tiny hayfield. To reduce fraying, cut along the grain whenever possible. Pull one thread from the burlap to create a straight cutting guide, then cut along that line.
After cutting, seal the edges. You can use a commercial fray-control liquid, a thin line of clear-drying craft glue, or a narrow folded hem. For a rustic look, you can intentionally leave a short fringe, but make it even. There is a difference between “artistically frayed” and “the curtain is slowly escaping.”
Should You Add a Liner?
A liner is optional, but it can make the curtain more practical. Burlap by itself filters light but does not provide full privacy at night when interior lights are on. A cotton or muslin backing adds privacy, softens the feel, protects the burlap from stretching, and reduces shedding.
For a kitchen or bathroom window, consider a washable cotton liner. For decorative spaces, a simple muslin backing is enough. If you want the coffee sack graphics to remain the star, choose a neutral liner that does not compete visually. Attach the liner by sewing it to the back of the panel or clipping both layers together with curtain rings.
Design Ideas for Different Rooms
Kitchen Windows
Burlap coffee sack cafe curtains look especially at home above a sink, near open shelves, or beside a breakfast table. Pair them with black metal rods, oil-rubbed bronze hardware, or simple wood dowels. Add white walls, butcher block, vintage jars, or open shelving and suddenly your kitchen looks like it knows how to make sourdough.
Laundry Rooms
A coffee sack curtain can hide open shelving, cover a utility sink base, or soften a small window. Because laundry rooms are often practical spaces, the rugged texture feels appropriate. It adds warmth without pretending the room is a formal parlor.
Pantries and Coffee Bars
This may be the most natural home for coffee sack curtains. Use a small panel to cover a pantry window, under-counter storage, or a coffee station shelf. The theme is obvious but not cheesy. It says “coffee lives here,” not “I own seventeen mugs with motivational slogans.”
Porches and Sunrooms
Burlap can work in covered porches and sunrooms, but it should be protected from heavy moisture. Natural jute fibers can absorb humidity and develop mildew if they stay damp. Use the curtains in dry, covered areas and bring them inside during wet seasons if necessary.
Safety and Practical Considerations
Because burlap is a natural fiber with an open weave, keep it away from candles, stovetop flames, space heaters, and hot light bulbs. Do not hang burlap curtains directly beside a range or anywhere a gust of air could push the fabric toward heat. Rustic charm is lovely; accidental fire drama is not.
If you have children or pets, avoid long cords, loose ties, or dangling loops. Use cordless window treatments where possible, and keep curtain ties short and secured. Clip rings are often safer and simpler than long tie-up cords.
Also consider dust. Burlap has texture, and texture collects particles. Shake curtains outdoors occasionally or vacuum them gently with a brush attachment. If anyone in your home is sensitive to dust or natural fibers, use a liner and keep the curtains clean.
Common Mistakes to Avoid
Cutting Before Centering the Graphic
The coffee sack print is the main attraction. Before cutting, lay the sack flat and mark the final panel around the graphic. Step back and check the composition. A centered logo usually looks best, but an intentionally off-center stamp can look stylish if balanced with the room.
Skipping Edge Finishing
Burlap will fray. It is not a question of if; it is a question of how dramatically. Seal, fold, sew, or bind the edges unless you want the curtain to shrink by one thread every time someone sneezes.
Using Too Much Fullness
Traditional curtains often use generous fullness, but burlap is heavier and more textured than sheer fabric. Use moderate gathering so the design remains visible.
Ignoring Smell
Some used coffee sacks smell pleasantly earthy. Others smell like they spent a long weekend in a damp warehouse. Clean and air them before bringing them indoors.
Approximate Cost and Time
The cost depends on where you find your sacks. Flea markets, coffee roasters, online marketplaces, craft suppliers, and salvage shops are common sources. A small curtain can cost very little if you already own a rod and clips. A more polished version with lining, new hardware, and finishing supplies will cost more but still usually stays below the price of custom window treatments.
Time-wise, a no-sew cafe curtain may take under an hour once the burlap is clean and dry. A lined, sewn curtain may take two to four hours depending on window size and your sewing confidence. Add extra time if you plan to wash, air out, or press the burlap first.
Step-by-Step: Simple Burlap Coffee Sack Cafe Curtain
- Shake and vacuum the coffee sack outdoors.
- Lay the sack flat and decide which graphic side to feature.
- Measure your window and mark the desired curtain size.
- Pull one burlap thread to create a straight cutting guide.
- Cut the panel carefully along the grain.
- Seal the raw edges with fray-control product or fold and press hems.
- Use fusible hem tape or stitching to secure the hems.
- Attach clip rings evenly across the top edge.
- Hang the curtain on a cafe rod or tension rod.
- Adjust the folds until the graphic sits nicely.
Once the curtain is up, step back and look at the whole window. If the panel feels too flat, add a second panel. If it feels too busy, remove extra gathers. If it looks slightly crooked, welcome to DIY. Adjust it, smile, and pretend that was part of the creative process.
Personal Experience Notes: What This Project Feels Like in Real Life
The first thing you notice when working with burlap coffee sacks is that the fabric does not behave like regular fabric. Cotton folds politely. Linen wrinkles beautifully. Burlap acts like it has somewhere else to be. It shifts, sheds, and occasionally sends little fibers floating into the air like rustic confetti. That is why the prep stage matters so much. Shaking the sack outside, vacuuming it, and pressing it before measuring makes the whole project calmer.
Another lesson: choose the sack for the graphic first and the size second. It is tempting to grab the biggest sack and assume it will work, but the print placement makes or breaks the finished curtain. A bold logo centered in a cafe curtain looks intentional and expensive. A logo chopped halfway through the fold looks like the curtain was made during a power outage. Lay the sack against the window before cutting. This one simple step can save the project.
Clip rings are the easiest hanging method for everyday homes. They let you adjust the panel quickly, and they are forgiving if your top edge is not perfect. Rod pockets look cleaner, but they require more precision and can hide part of the print. For a kitchen or pantry, clip rings often look casual in the best possible way.
If you are making these curtains for the first time, start with a small window. A pantry window, laundry nook, or coffee bar shelf gives you room to learn without committing to a giant living-room installation. Burlap is inexpensive compared with many decorator fabrics, but a great printed coffee sack can feel special. Practice on the less exciting side or a scrap before cutting into the main graphic.
One surprisingly helpful trick is to embrace contrast. Burlap coffee sack curtains look great with white trim, matte black rods, warm wood shelves, galvanized metal, cream walls, and simple ceramics. They can also look beautiful in modern spaces when used sparingly. The secret is not to cover every surface in burlap. One curtain is charming. Burlap curtains, burlap table runners, burlap lampshades, burlap pillows, and burlap wall art can make the room feel like it is preparing to ship potatoes.
Finally, remember that this project is not about perfection. It is about texture, reuse, personality, and the pleasure of making something useful from a material with a past life. Coffee sacks once carried beans across long distances. Turning them into curtains gives them a second act: filtering morning light while you make breakfast. That is a pretty good retirement plan for a humble burlap bag.
Conclusion
Burlap coffee sack curtains are one of those DIY projects that deliver a lot of style without demanding a complicated skill set. They are affordable, customizable, rustic, and full of character. Whether you choose a no-sew clip-ring panel, a fusible hem tape version, or a fully sewn and lined curtain, the key is to prep the fabric well, control fraying, highlight the coffee sack graphics, and hang the panels safely.
For farmhouse kitchens, cozy pantries, relaxed laundry rooms, and creative coffee corners, this project brings texture and story to the window. It is practical enough for beginners and stylish enough to look intentional. Plus, every time someone asks where you bought your curtains, you get to say, “I made them from coffee sacks,” which is far more satisfying than admitting you panic-ordered them at midnight.


