Table of Contents >> Show >> Hide
- Plywood, But Make It Pretty
- Choose the Right Plywood (So Your Project Doesn’t Cry Later)
- Finish Like You Mean It: Edges, Sanding, and Topcoats
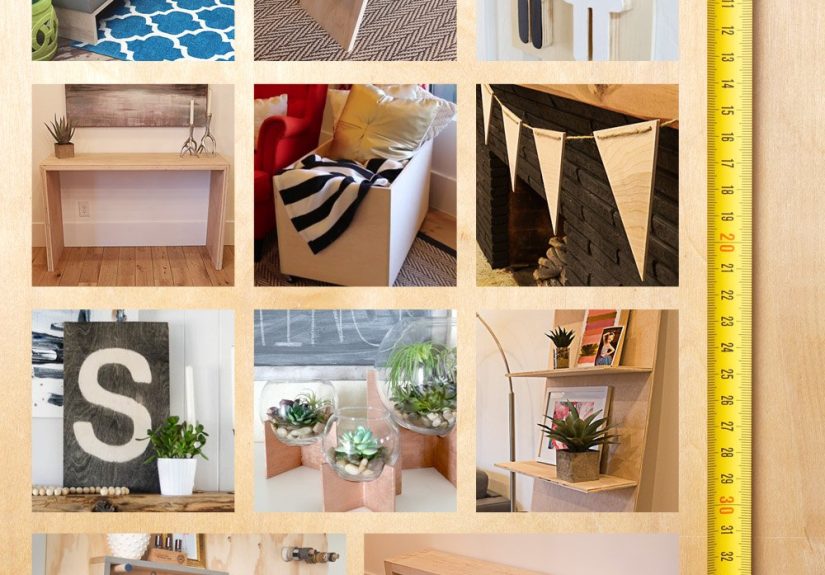
- 12 New DIY Plywood Projects + Tutorials
- 1) The “Floating” Plywood Nightstand (No Drawer Drama)
- 2) Arched Plywood Bookends (Tiny Project, Big Style)
- 3) Modular Cube Shelving (The Adult Version of Building Blocks)
- 4) Skinny Entryway Shoe Bench With Hidden Cubby Storage
- 5) Plywood Record Player Console (Mid-Century, Minus the Pricetag)
- 6) Two-Tone Plywood Coffee Table With “Layer” Edge Detail
- 7) Wall-Mounted “Drop Zone” Organizer (Mail, Keys, Sanity)
- 8) Minimalist Plywood Desk With a Cable “Hatch”
- 9) “Trough” Shelves for Workshop or Pantry (Small Parts, Big Payoff)
- 10) Plywood Plant Stand Set (Stackable, Nestable, Not Wobbly)
- 11) Hidden Litter Box Cabinet (Because You Love Your Cat, Not the Smell)
- 12) Plywood Headboard With Built-In Ledges (Hotel Look, DIY Price)
- Common Mistakes (and How to Avoid Them)
- Experience Notes: The “Pretty Plywood” Lessons DIYers Learn Fast (Extra ~)
- Conclusion: Yes, Plywood Can Be Pretty
Plywood has a reputation problem. People hear “plywood” and picture wobbly dorm furniture, mystery splinters,
and that one shelf that sagged like it gave up on life. But here’s the plot twist: plywood can look
ridiculously high-endclean lines, modern edges, designer vibeswithout the designer budget.
In this guide, you’ll get a practical, no-fluff roadmap to building DIY plywood projects that
look polished: how to choose the right sheet, how to make edges look intentional (not “saw blade roulette”),
and twelve fresh build ideas with mini tutorials you can actually follow.
Plywood, But Make It Pretty
The secret is simple: the “pretty” part is less about fancy tools and more about smart choicescabinet-grade
plywood, consistent cuts, and a finish plan that doesn’t involve “eh, I’ll sand it later.” (Spoiler: Later
never comes. Later is a liar.)
Plywood is stable, strong, and comes in big sheets that are basically a cheat code for building
modern plywood furniture, built-ins, and storage. And with the right edge treatment, it can pass
for custom cabinetry without you having to sell a kidney for hardwood.
Choose the Right Plywood (So Your Project Doesn’t Cry Later)
Cabinet-grade vs. construction-grade
Not all plywood is created equal. Construction/sheathing plywood is meant to disappear behind drywall and
shingles. It’s strong, surebut the face veneer can be rough, knotty, and full of patches that look like a
woodpecker went through a breakup.
For furniture and visible surfaces, aim for cabinet-grade plywood (often hardwood-faced like
birch, maple, or oak). It’s flatter, smoother, and more predictable when you paint, stain, or clear-coat.
Why Baltic birch is the overachiever of plywood
If you’ve seen those crisp, modern plywood edges where the layers look intentionalthat’s often
Baltic birch plywood. It tends to have more uniform plies, fewer voids, and better screw-holding
than bargain sheets. It’s a favorite for drawer boxes, cabinets, and “I want this to look like I know what I’m
doing” builds.
Thickness basics (the quick cheat sheet)
- 1/4": backs, drawer bottoms, lightweight wall panels
- 1/2": smaller shelves, boxes, lighter-duty furniture parts
- 3/4": most furniture and built-ins (the go-to)
Pro move: measure the real thickness. “3/4-inch” plywood is often a hair under 0.75". That matters for
pocket-hole settings, edge banding, and flush trim.
How to shop smarter (and waste less)
Plan cuts around the standard 4×8 sheet. Many home centers will do straight cuts for youperfect if you
don’t have a table saw. Also: buy one extra sheet if your project is big and your timeline is tight. Matching
grain and color later is not a guaranteed vibe.
Finish Like You Mean It: Edges, Sanding, and Topcoats
Edge banding: the fastest “custom” upgrade
Plywood edges are where “DIY” screams the loudestunless you tame them. Iron-on veneer edge banding is the
most beginner-friendly fix. You trim it flush, sand lightly, and suddenly your shelf looks like it came from a
boutique showroom instead of your garage.
- Sand the edge smooth and dust-free.
- Iron on the banding (slow, steady heat).
- Press it down while warm to bond well.
- Trim the overhang, then lightly sand the corners.
Alternative: “make the edge a feature”
You can also embrace the layers. Baltic birch with a clear coat can look intentionally modernespecially on
desk tops, shelving, and minimalist furniture. A tiny chamfer (a small bevel) on the edge makes it feel
finished, not sharp.
Topcoat choices that won’t ruin your day
- Water-based polyurethane: clear, low-odor, stays lighter
- Wipe-on poly: forgiving, great for beginners
- Paint + primer: best when the plywood face isn’t “stain-worthy”
Whatever you choose: sand between coats, and don’t skip the edges. The edges are thirsty and will soak up
finish like they’ve been in the desert.
12 New DIY Plywood Projects + Tutorials
Below are twelve build ideas that look modern and intentionalplus mini tutorials you can adapt to your space.
Each one is designed to be realistic with common tools (circular saw, drill/driver, sander), and each one has
a “make it pretty” upgrade so it doesn’t look like a prototype.
1) The “Floating” Plywood Nightstand (No Drawer Drama)
A wall-mounted nightstand keeps the floor clear and makes small bedrooms feel bigger.
- Cut a top, bottom, and two side panels from 3/4" plywood.
- Assemble a simple open box with glue + screws or pocket holes.
- Mount a hidden cleat to studs, then hang the box on the cleat.
- Add edge banding or a chamfered “layered” edge for a clean finish.
Pretty upgrade: add a round-over on the front corners or a tiny lip to keep your phone from base-jumping at 2 a.m.
2) Arched Plywood Bookends (Tiny Project, Big Style)
This is a quick win that teaches cutting curves and finishing edgeswithout committing to a whole dresser.
- Trace an arch shape on two rectangles of 3/4" plywood.
- Cut with a jigsaw, then sand the curve smooth.
- Glue a small base strip under each bookend for stability.
- Paint, clear coat, or add veneer edge banding.
Pretty upgrade: paint the outside and clear-coat the inside ply layers for a two-tone modern look.
3) Modular Cube Shelving (The Adult Version of Building Blocks)
Make one cube. Then make more cubes. Suddenly you have a whole wall system.
- Rip 3/4" plywood into equal-width strips (depth of your cubes).
- Cut to length for tops/bottoms/sides.
- Assemble cubes with pocket holes or confirmat screws.
- Stack and secure with screws from inside where needed.
Pretty upgrade: add edge banding and a 1/8" reveal between cubes so it looks intentionally modular, not “I ran out of clamps.”
4) Skinny Entryway Shoe Bench With Hidden Cubby Storage
A bench + storage is basically a peace treaty for messy entryways.
- Build a plywood box sized to your space (about chair height).
- Add internal dividers for shoe cubbies.
- Top it with a plywood lid (hinged) or a fixed top panel.
- Anchor to the wall if it’s tall or narrow.
Pretty upgrade: add a thin hardwood edge strip on the seat front for a “custom built-in” vibe.
5) Plywood Record Player Console (Mid-Century, Minus the Pricetag)
A low cabinet with open bays and a couple doors is perfect for vinyl, routers, and “things I don’t want guests to see.”
- Build a simple carcass from 3/4" plywood (top, bottom, sides).
- Add a center divider and shelf for structure.
- Attach a face frame or edge banding for clean lines.
- Add simple slab doors and modern pulls.
Pretty upgrade: mount tapered legs (or build a recessed toe-kick) and do a matte clear coat.
6) Two-Tone Plywood Coffee Table With “Layer” Edge Detail
This one leans into plywood’s layered look in a modern way.
- Cut a top panel and a slightly smaller lower shelf.
- Make four legs from plywood strips laminated together (strong + stable).
- Attach legs to the underside with glue and screws.
- Add the lower shelf between legs for rigidity.
Pretty upgrade: paint the legs and keep the top naturalclean contrast, no fuss.
7) Wall-Mounted “Drop Zone” Organizer (Mail, Keys, Sanity)
A plywood organizer can replace that chaotic counter pile you keep promising to deal with.
- Cut a back panel and a small shelf ledge.
- Add a shallow pocket for mail (angled divider works great).
- Attach hooks or a small dowel for keys.
- Mount into studs or use heavy-duty anchors.
Pretty upgrade: route a shallow groove detail or add a thin contrasting edge band for a “designed” look.
8) Minimalist Plywood Desk With a Cable “Hatch”
A clean plywood desk is simple to build and instantly upgrades a home office.
- Cut a desktop from 3/4" plywood (size to your room).
- Build two leg panels (or use hairpin legs).
- Add a back stretcher panel for stiffness and cable management.
- Drill a grommet hole or make a flip-up cable hatch.
Pretty upgrade: edge band the front + sides, then ease the corners with a small round-over.
9) “Trough” Shelves for Workshop or Pantry (Small Parts, Big Payoff)
Trough shelves keep items visible and corralledperfect for spices, paints, or screws that love disappearing.
- Cut a long back panel, bottom shelf, and front “lip” strip.
- Assemble into a shallow U-shape with glue and brad nails/screws.
- Add dividers if you want sections.
- Mount with a French cleat for easy removal.
Pretty upgrade: use Baltic birch and clear coat for a tidy, Scandinavian workshop aesthetic.
10) Plywood Plant Stand Set (Stackable, Nestable, Not Wobbly)
Make a trio of stands at different heights for that “I definitely planned this” plant corner.
- Cut round or square tops from 1/2" or 3/4" plywood.
- Make legs from plywood strips or dowels (dowels are extra cute).
- Attach legs with angled screws, brackets, or half-lap joinery.
- Seal with water-resistant topcoat.
Pretty upgrade: paint just the undersides and legs; keep the tops natural for a clean two-tone look.
11) Hidden Litter Box Cabinet (Because You Love Your Cat, Not the Smell)
A plywood cabinet hides the box, reduces tracking, and makes the room feel calmer. Your cat will still judge you, though.
- Build a basic cabinet box sized to your litter tray.
- Cut a side entry hole (use a jigsaw; sand smooth).
- Add a removable interior tray liner for easy cleaning.
- Install a door with magnetic catch.
Pretty upgrade: add vertical slats (thin plywood strips) to the door front for modern texture.
12) Plywood Headboard With Built-In Ledges (Hotel Look, DIY Price)
A headboard with slim shelves is perfect for books, glasses, or that cup of water you’ll forget until morning.
- Cut a large plywood back panel to bed width.
- Build two shallow ledges and attach across the front.
- Add side “wings” if you want a wraparound effect.
- Mount to wall studs or attach to bed frame.
Pretty upgrade: paint the panel and clear-coat the ledges, or do a soft arch cut at the top for instant design cred.
Common Mistakes (and How to Avoid Them)
- Buying the cheapest sheet: Save money on size, not on quality. A smoother face saves hours of filling and sanding.
- Skipping an edge plan: Decide early: edge band, hardwood edging, or “layered edge” feature. Don’t improvise at the finish line.
- Not sealing edges: Even painted projects need primed edges to avoid fuzzy, thirsty end-grain texture.
- Over-sanding veneer: Hardwood face veneers can be thinsand gently and evenly.
- Weak shelf spans: If a shelf is long, add a front edge strip or a hidden brace so it doesn’t sag over time.
Experience Notes: The “Pretty Plywood” Lessons DIYers Learn Fast (Extra ~)
If you build with plywood long enough, you collect a special set of little wisdom nuggetslike a woodworking
fortune cookie, but dustier. Here are the lessons that come up again and again when people start making
DIY plywood furniture and wonder why their “simple” box turned into a three-day saga.
Lesson #1: The sheet you choose is basically half the finish. If your plywood face is already smooth
and attractive, finishing feels like victory laps. If it’s rough and patchy, you’ll be filling, sanding, and
negotiating with your life choices. When in doubt, buy the better sheet for anything you’ll see or touch.
Lesson #2: Edges are where your project either looks custom or looks… temporary. Edge banding is the
easiest glow-up, but the trick is patience. Heat it evenly, press it down while it’s still warm, and trim it
with a sharp blade. Then do the thing everyone skips: lightly ease the corners. That tiny soft edge is the
difference between “store-bought” and “science fair display board.”
Lesson #3: Paint loves primer, and primer loves edges. Raw plywood edges soak up paint like a sponge,
leaving that fuzzy look that screams “unfinished.” The workaround is boring but magical: sand, prime, sand
again, then paint. If you want a dead-smooth painted finish, consider a high-build primer and don’t rush the
drying time. (Yes, it’s annoying. Yes, it works.)
Lesson #4: Pocket holes are greatuntil they’re not. Pocket-hole joinery is fantastic for plywood
cabinets, shelves, and boxes, but plywood thickness can be slightly under-size. That means you want to test on
scraps and adjust drill depth and screw length so you don’t get those surprise “hello daylight” blowouts. A
five-minute test saves a one-hour patch-and-pretend session.
Lesson #5: Long shelves need a plan. Plywood is strong, but any long span can sag over timeespecially
with books (aka “tiny bricks”). A simple front edge strip, a thicker shelf, or a hidden brace can keep your
shelf from slowly turning into a sad banana. If you’re building built-ins, consider adding dividers not just
for looks, but for structure.
Lesson #6: The most “professional” builds are usually the simplest ones. Clean lines, consistent
reveals, and intentional finishes beat complicated shapes that don’t assemble cleanly. If you’re trying to make
plywood look expensive, focus on alignment, symmetry, and repeatable details (like matching edge banding and
uniform hardware placement). Simple, but executed well, is the whole game.
Conclusion: Yes, Plywood Can Be Pretty
Plywood is one of the smartest materials in DIY because it’s stable, strong, and incredibly flexibleespecially
when you pair it with modern design choices and clean finishing techniques. Start with one project (a nightstand,
a shelf, a small organizer), learn your edge and finish preferences, and build up from there. Before you know
it, you’ll be that person who casually says things like, “Oh this? Just a little plywood console I built.”


