Table of Contents >> Show >> Hide
- First: Figure Out Where the Leak Is Coming From
- Safety + Setup (The “Avoid Regret” Checklist)
- Simple Fixes to Try Before Buying Parts
- The Most Common Real Fix: Replace the Cartridge (Delta Single-Handle Faucets)
- Delta Designs You Might Have (So You Don’t Buy the Wrong Part)
- Fixing a Two-Handle Delta Bathroom Sink Faucet (Hot/Cold Handles)
- If the Leak Is at the Base of the Spout: Replace Spout O-Rings
- Under-Sink Leaks: The Repair That People Forget to Check
- Troubleshooting Cheat Sheet (Fast Diagnosis)
- When to Stop DIY and Call a Plumber
- Bonus: Save Money with Delta Support (Worth Checking)
- Prevent the Next Leak (Because Future-You Deserves Nice Things)
- Real-World Experiences: What Actually Happens When You Fix a Leaky Delta Faucet (500+ Words)
- Conclusion
A leaky bathroom sink faucet is the home equivalent of a mosquito in your bedroom: small, persistent, and somehow louder at 2:00 a.m.
If your Delta bathroom sink faucet is dripping, trickling, or doing that charming “one drop… two drop…” routine, the good news is you can
often fix it with basic tools, a little patience, and the courage to look under the sink.
This guide walks you through simple, DIY-friendly fixesstarting with the quick stuff (the “please be the aerator” phase) and moving to the
most common real culprit: worn seals, O-rings, seats and springs, or a tired cartridge. Along the way, you’ll learn how to diagnose where the
leak is coming from, which repair makes sense for your Delta faucet style, and how to avoid the classic DIY mistakes (like sacrificing a tiny
set screw to the drain gods).
First: Figure Out Where the Leak Is Coming From
“My faucet is leaking” is like saying “my car is making a noise.” Helpful, but we need the plot details. Grab a dry paper towel and play detective:
1) Dripping from the spout (even when the handle is off)
This usually points to a worn cartridge or internal seals (and in some Delta designs, seats and springs). The faucet is failing to make a tight seal,
so water sneaks through and exits at the spout like it pays rent.
2) Leaking around the handle
Common causes: a worn O-ring, loose retaining/bonnet nut, or a cartridge that isn’t seated correctly. Sometimes it’s just a handle screw that has
loosened over time.
3) Leaking at the base of the spout (where it meets the faucet body)
Classic O-ring territory. If water appears around the spout base when you run the faucet, the spout O-rings may be worn or dry.
4) Leaking under the sink
Check supply lines, shutoff valves, and mounting hardware. This is often a connection issuenot a cartridge issue. (Translation: don’t rip apart the
handle if the leak is happening below deck.)
Safety + Setup (The “Avoid Regret” Checklist)
Before you start taking anything apart, do these steps. They take 3 minutes and can save you 3 hours:
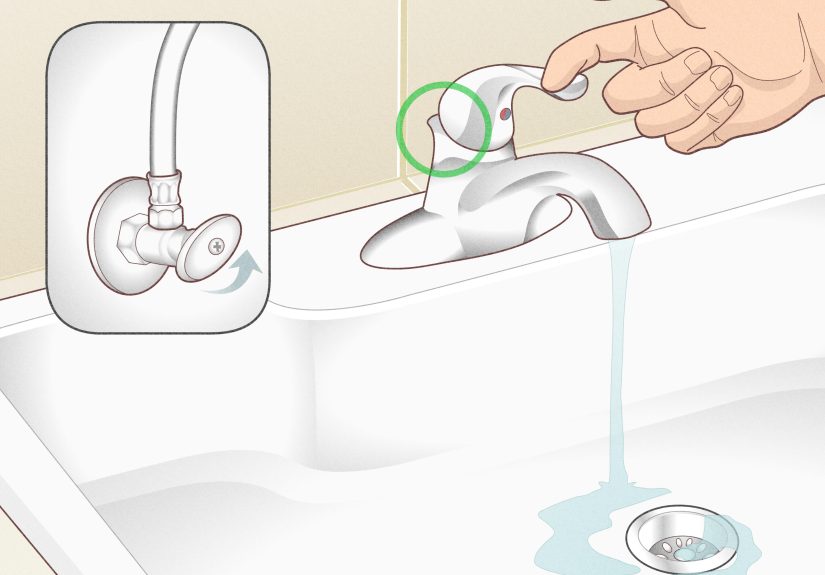
- Turn off the water at the shutoff valves under the sink (hot and cold). Turn them clockwise until they stop.
- Relieve pressure by opening the faucet handle to let remaining water drain out.
- Plug the drain or cover it with a rag. Tiny screws are born with a homing instinct for drains.
- Protect the finish with a towel and use tape on tool jaws if you’re gripping chrome parts.
- Take a quick photo before and during disassembly. Future-you will be grateful.
Tools you’ll likely need
- Allen key (often 1/8″ or 3/32″) or Phillips screwdriver (depends on handle style)
- Adjustable wrench or channel-lock pliers
- Small flathead screwdriver (for caps and clips)
- Old toothbrush + white vinegar (for mineral buildup)
- Silicone plumber’s grease (safe for rubber O-rings)
- Flashlight (because under-sink lighting is always tragic)
Simple Fixes to Try Before Buying Parts
If you love “free fixes,” you’re in the right place. Start hereespecially if the leak is minor or recent.
Fix #1: Clean the aerator (and flush the lines)
A clogged aerator doesn’t usually cause a true “won’t shut off” drip, but it can cause weird spray patterns, reduced flow, or water that seems to
“drip” because debris is disrupting the stream. Mineral buildup can also make you think the faucet is misbehaving when it’s really just crusty.
- Unscrew the aerator at the tip of the spout (use a towel for grip; avoid scratching).
- If it’s stuck, wrap it with a vinegar-soaked towel for 30–60 minutes, then try again.
- Soak aerator parts in vinegar, scrub with a toothbrush, rinse, and reinstall.
- Pro move: With the aerator removed, briefly turn on water to flush any debris from the faucet body and lines (aim into the sink).
Fix #2: Tighten a loose handle or bonnet/retaining nut
If water is seeping around the handle, a slightly loose retaining nut (or adjusting ring on some designs) can let water escape where it shouldn’t.
Don’t Hulk-tighten anythingover-tightening can damage parts or make the handle stiff.
- Pop off the decorative cap (if present) and check the handle screw or set screw.
- Tighten it snugly, re-test.
- If the leak persists and appears below the handle, you may need to access and gently snug the retaining/bonnet nut.
Fix #3: Re-seat the cartridge (if someone recently “fixed” it)
A surprisingly common scenario: someone replaced a cartridge, then the faucet leaks anyway because the cartridge tabs aren’t aligned, the clip isn’t
fully seated, or an O-ring got pinched. If the leak started right after a repair, suspect alignment.
The Most Common Real Fix: Replace the Cartridge (Delta Single-Handle Faucets)
Many Delta bathroom sink faucets use a cartridge that controls mixing and shutoff. Over time, rubber seals wear, mineral deposits build up, and the
cartridge stops sealing perfectlyleading to that slow spout drip when the faucet is “off.”
Step-by-step cartridge replacement (single-handle Delta)
- Shut off hot and cold water at the under-sink valves. Open the faucet to confirm water is off.
- Remove the handle: locate the set screw (often on the back/side) or a top screw hidden by a cap.
- Remove trim: slide off any decorative sleeve/escutcheon to expose the cartridge retention hardware.
-
Identify the retainer: you may see a retaining nut, bonnet nut, or clip (varies by model).
Remove it carefully and set aside. - Pull the cartridge straight out. If it’s stuck, wiggle gently. Mineral buildup can glue it in placepatience beats prying.
- Inspect and clean: wipe the valve body and remove debris. If mineral deposits are heavy, vinegar on a cloth can help.
- Install the new cartridge in the same orientation as the old one. Align tabs with notches. If it sits proud or crooked, stop and realign.
- Lubricate O-rings lightly with silicone plumber’s grease (not petroleum jelly) for smoother seating and longer life.
- Reinstall the retainer and reassemble trim and handle. Tighten snugnot brutal.
-
Turn water back on slowly and test. Run hot and cold. Check for leaks around the handle and under the sink.
Finally, remove and clean/flush the aerator again if needed and reinstall it.
Example: If your faucet drips from the spout only when “off,” and tightening the handle does nothing, a new cartridge is often the winning move.
If it leaks around the handle, you may still need a cartridgebut you’ll also want to confirm the retaining nut is snug and the O-rings are in good shape.
Delta Designs You Might Have (So You Don’t Buy the Wrong Part)
Delta has produced a lot of faucet designs over the years. The repair approach is similar, but the internal parts vary. Here’s the simplest way to think about it:
- Single-handle bathroom faucet: usually cartridge-based (common fix: replace cartridge and/or O-rings).
- Two-handle centerset or widespread: may use cartridges/stems in each handle (common fix: replace stems/cartridges and seals).
- Older ball-type style: can use seats and springs (common fix: replace seats/springs and seals).
Pro tip that saves money: If you’re unsure which cartridge you need, pull the old one and take it to a reputable home improvement store.
Matching the part in person avoids the “I bought the wrong thing, now I live at the returns counter” lifestyle.
Fixing a Two-Handle Delta Bathroom Sink Faucet (Hot/Cold Handles)
Two-handle Delta bathroom faucets commonly leak for the same reasons: worn seals, O-rings, washers, or cartridges. The difference is you’ll repair one side
(hot or cold) or both, depending on symptoms.
When the spout drips on a two-handle faucet
If the faucet drips when both handles are fully off, one (or both) handle cartridges/stems isn’t sealing. You can often rebuild or replace the stem/cartridge.
Step-by-step: basic two-handle leak repair
- Shut off water under the sink (hot and cold). Open faucet to confirm it’s off.
- Remove the handle: pop the cap, remove the screw, lift handle off.
- Remove the retaining nut (or bonnet) holding the stem/cartridge.
- Pull the stem/cartridge straight out and inspect seals/O-ring/washer.
- Replace worn parts or install a new matching stem/cartridge.
- Reassemble, turn water back on, test for drip and handle leaks.
Small-but-important detail: If you have a compression-style stem (more common in older fixtures), a worn washer can cause a drip.
If you have a cartridge style, the cartridge and its seals do the sealing. The outside can look similarso match the internal part, not just the handle style.
If the Leak Is at the Base of the Spout: Replace Spout O-Rings
When water pools around the spout base during use, it usually means the spout O-rings aren’t sealing tightly anymore. This is a very normal wear-and-tear issue.
- Turn off water. Plug the drain.
- Remove the spout (method variessome lift off after loosening a set screw; others have a retaining nut).
- Remove old O-rings and clean the spout and faucet body contact surfaces.
- Install new O-rings (lightly greased with silicone plumber’s grease).
- Reinstall spout and test.
Under-Sink Leaks: The Repair That People Forget to Check
If you see dripping under the sink, don’t immediately blame the faucet cartridge. Common under-sink culprits include:
- Supply line connections (at shutoff valve or faucet shank)
- Worn supply lines (bulging, corrosion, or seepage near crimps)
- Loose mounting nuts (faucet body shifts, stressing connections)
- Leaky shutoff valves (water around the valve stem or packing nut)
Tighten connections gently. If a supply line looks old or damaged, replacement is safer than “maybe tightening will fix it.”
And if the shutoff valve itself leaks when you turn it, that’s a separate repair (and sometimes a good reason to call a pro).
Troubleshooting Cheat Sheet (Fast Diagnosis)
| Symptom | Most Likely Cause | Simple Fix |
|---|---|---|
| Drips from spout when off | Worn cartridge / seals (or seats & springs on some designs) | Replace cartridge; consider seats/springs where applicable |
| Water around handle | Loose retaining nut, worn O-ring, mis-seated cartridge | Tighten gently; replace O-ring; re-seat/replace cartridge |
| Water at spout base during use | Worn spout O-rings | Replace spout O-rings + silicone grease |
| Leak under sink | Supply line or valve connection / worn line | Tighten carefully or replace supply line |
| Weak flow + weird spray | Clogged aerator / mineral buildup | Clean aerator with vinegar; flush lines |
When to Stop DIY and Call a Plumber
DIY is fantasticuntil it isn’t. Consider professional help if:
- The shutoff valves won’t close fully or start leaking when you touch them
- The cartridge is stuck hard and you’re tempted to use “creative violence”
- You find corrosion, cracked plastic, or damage inside the valve body
- The faucet still leaks after new parts (could indicate a damaged seat, improper fit, or misalignment)
- You don’t have shutoff valves under the sink (or the main shutoff is questionable)
Bonus: Save Money with Delta Support (Worth Checking)
Many Delta residential faucets are covered by a limited warranty for the original consumer purchaser, and Delta provides support resources to help identify parts.
If your faucet is relatively new (or you’re the original owner), it may be worth checking warranty coverage and parts support before paying out of pocket.
Prevent the Next Leak (Because Future-You Deserves Nice Things)
- Don’t over-tighten handles. “Off” is a position, not a weightlifting competition.
- Clean the aerator periodically if you have hard water.
- Use silicone plumber’s grease on O-rings during repairs to prevent tearing and drying.
- Fix small drips early. A drip can waste surprising amounts of water over time.
Real-World Experiences: What Actually Happens When You Fix a Leaky Delta Faucet (500+ Words)
Let’s talk about the part no instruction manual includes: the “human factors.” You can read ten guides, watch three videos, and still end up staring at a
faucet handle like it personally insulted you. Here are some real-world lessons that tend to show up when people fix a leaky Delta bathroom sink faucet.
Experience #1: The Mystery of the Missing Screw
The most common DIY plot twist is losing a tiny set screw. You loosen it, set it “somewhere safe,” and it immediately teleports to another dimension.
That’s why plugging the drain (and laying a towel in the sink) is not optionalit’s the difference between a 30-minute repair and a late-night trip to the
hardware store, where you buy three “close enough” screws and none of them are actually close enough.
Experience #2: The Cartridge That Refuses to Leave
Cartridges can get stuck due to mineral buildup, especially in areas with hard water. The temptation is to pry aggressively. The better approach is to go
slow: wiggle, pull straight, and clean as you go. If you yank at an angle, you can damage the valve body or scratch sealing surfaces. The “simple fix”
becomes a “why is the faucet now leaking in a new and exciting way?” situation. Patience is cheaper than replacing the whole fixture.
Experience #3: The Aerator Surprise Shower
Flushing the faucet with the aerator removed is smartuntil you forget the aerator is removed. Then you turn on the water and launch a high-pressure
stream straight into your shirt, the mirror, and any nearby bystanders (including a confused cat). Aim the spout into the basin, start the water slowly,
and keep the handle controlled. You’re flushing lines, not pressure-washing your bathroom.
Experience #4: The “I Tightened It More” Trap
People love tightening. Tightening feels productive. But with faucets, over-tightening can crush seals, strip threads, and make handles stiff. Many Delta
repairs work best with “snug plus a little,” not “snug plus my entire emotional baggage.” If the leak doesn’t stop after a gentle snug, the fix is usually
replacement of the correct seal/O-ring/cartridgenot turning the wrench until the faucet fears you.
Experience #5: The Best DIY HabitTaking Photos
The simplest habit that saves the most time is snapping quick phone photos as you disassemble. It’s especially helpful with two-handle faucets where
parts stack in a specific order, or when you remove a clip and forget which way it faced. Photos turn reassembly from “puzzle game” into “reverse the steps.”
Experience #6: The Unexpected WinIt’s Often One Cheap Part
Here’s the satisfying truth: a lot of Delta faucet leaks are caused by one worn piece of rubber or a cartridge that’s simply reached the end of its life.
Once you’ve done this repair once, the fear disappears. The next time a faucet drips, you’ll recognize the symptoms, grab the right tools, and handle it
like a calm, capable personrather than someone bargaining with a plumbing fixture at midnight.
Bottom line: fixing a leaky Delta bathroom sink faucet is usually very doable. Start with the simple checks (aerator, looseness, alignment), then move to
the most common durable fix (cartridge/O-rings/seats & springs where applicable). And if you mess up oncewelcome to DIY. That’s how you level up.
Conclusion
A leaky Delta bathroom sink faucet is annoying, but it’s rarely a mystery. Most drips come down to worn seals, O-rings, seats and springs, or a cartridge
that no longer seals tightly. Start with quick, low-effort fixes like cleaning the aerator and checking for loose hardware. If the faucet still drips from the
spout when “off,” a cartridge replacement is the most common and reliable solution. And don’t ignore under-sink leakssometimes the problem is a supply line,
not the faucet itself.
Fixing the drip isn’t just about sanityit can also reduce wasted water over time. Even a “small” drip adds up, so once you notice it, you’re doing yourself
(and your water bill) a favor by handling it sooner rather than later.
Sources consulted (no links shown): Delta Faucet (how-to + support + warranty), EPA WaterSense, The Home Depot, Lowe’s, Family Handyman, This Old House, Bob Vila, The Spruce, Angi, Danco, Popular Mechanics.


