Table of Contents >> Show >> Hide
- Quick Navigation
- Before You Replace It: Confirm It’s the Radiator
- Tools, Parts, and Supplies Checklist
- Safety Rules (Hot Coolant Is Not a Vibe)
- Step-by-Step: How to Replace a Radiator
- 1) Prep the workspace and vehicle
- 2) Drain the coolant
- 3) Disconnect the radiator hoses and overflow line
- 4) Remove the fan assembly and shroud (common step)
- 5) Automatic transmission? Disconnect cooler lines (if routed to radiator)
- 6) Unbolt the radiator mounts and separate it from nearby components
- 7) Remove the old radiator
- 8) Transfer parts to the new radiator
- 9) Install the new radiator
- Refill and Bleed the Cooling System (The Step People Rushand Regret)
- Troubleshooting After Installation
- Should You Flush the Cooling System When Replacing a Radiator?
- DIY vs. Shop: Time and Cost Reality Check
- When to Call a Pro Instead
- FAQ: Radiator Replacement Questions People Google at 2 A.M.
- Real-World Experiences & Lessons (Extra )
- 1) The biggest time-waster isn’t the radiatorit’s the little plastic stuff
- 2) Hoses can be bonded like they signed a contract
- 3) Clamp orientation matters more than you think
- 4) Transmission cooler connections: expect a drip and plan for it
- 5) “It overheated once after the swap” is usually an air pocket story
- 6) Photos are a cheat code
- 7) The “clean and recheck” habit separates smooth jobs from messy ones
- Conclusion
Replacing a radiator sounds dramaticlike open-heart surgery for your carbut in many vehicles it’s a very doable DIY job.
The radiator’s job is simple: move heat out of the coolant so your engine doesn’t turn into an expensive space heater.
When the radiator leaks, clogs, or cracks, you’ll often see overheating, coolant loss, or mystery puddles that smell oddly sweet.
This guide walks you through how to change a car radiator safely and correctly, with real-world tips to avoid the
most common “Why is my car still overheating?!” moments. (Spoiler: air pockets and forgotten connectors are frequent offenders.)
Quick Navigation
- Before You Replace It: Confirm It’s the Radiator
- Tools, Parts, and Supplies Checklist
- Safety Rules (Hot Coolant Is Not a Vibe)
- Step-by-Step: Radiator Replacement
- Refill and Bleed the Cooling System
- Troubleshooting After Installation
- DIY vs. Shop: Time and Cost Reality Check
- FAQ
- Real-World Experiences & Lessons (Extra )
Before You Replace It: Confirm It’s the Radiator
Not every overheating situation is a radiator failure. A leaking hose, a bad radiator cap, a stuck thermostat,
a failing water pump, or an inoperative cooling fan can cause similar symptoms. Replacing the radiator won’t fix
a fan that’s unplugged… even if you glare at it really hard.
Common signs the radiator is the problem
- Coolant puddles near the front of the vehicle (often under the radiator area).
- White/green/orange crusty residue or staining on the radiator or near seams and hose necks.
- Overheating at idle or in traffic, sometimes improving at highway speed (airflow matters).
- Low coolant level that keeps dropping, even after topping off.
- Visible damage like bent fins, cracks, or a wet radiator core.
Fast checks that can save your weekend
- Inspect hoses and clamps: A clamp slightly loose can mimic a “radiator leak.” Look at hose ends.
- Check the radiator cap and reservoir: A weak cap can let coolant boil or push it out early.
-
Pressure test (best test): If you can borrow or rent a cooling-system pressure tester, it can reveal
leaks quickly without running the engine.
If you suspect an internal coolant leak (coolant disappearing without drips, sweet smell from vents, or persistent overheating),
stop and diagnose before you wrenchinternal leaks can point to bigger problems than a radiator.
Tools, Parts, and Supplies Checklist
Parts (typical)
- New radiator (correct fit for your year/make/model/engine)
- Fresh coolant (or premixed coolant) that matches your manufacturer’s spec
- New radiator hoses (upper/lower) if old ones are swollen, cracked, or “original since dinosaurs”
- New hose clamps (optional but smart if clamps are rusty or weak)
- Radiator cap (optional but worth considering if age is unknown)
- Transmission cooler line sealing washers/O-rings (if your vehicle uses them)
Tools
- Drain pan (large enough for the system capacity)
- Ratchet + sockets, extensions, and basic wrenches
- Screwdrivers
- Pliers (including hose clamp pliers if you have spring clamps)
- Trim clip tool (for plastic covers and shrouds)
- Line wrench or disconnect tool (often needed for automatic transmission cooler lines)
- Funnel and shop rags
- Jack and jack stands (or ramps) if access from below is needed
- Gloves and safety glasses
Nice-to-have
- Torque wrench (helpful for mounts and brackets)
- Cooling-system pressure tester
- Catch bottle for small spills
- Distilled water (if mixing concentrate coolant)
Safety Rules (Hot Coolant Is Not a Vibe)
- Work on a cold engine. Never remove the radiator cap when the engine is hot or pressurized.
- Secure the car. Park on level ground, set the parking brake, chock wheels if raised.
- Protect pets and kids. Coolant is toxic and can attract animals. Clean spills immediately.
- Dispose properly. Used coolant should be recycled at an approved facilitydon’t pour it out.
- Don’t open A/C lines. Many radiators sit next to the A/C condenser; you can unbolt and move it carefully without disconnecting refrigerant lines.
Step-by-Step: How to Replace a Radiator
Your exact steps depend on your vehicle’s layout, but the overall sequence is consistent across most cars and light trucks.
If your vehicle has unusual packaging (some modern cars do), a model-specific service manual is gold.
1) Prep the workspace and vehicle
- Park on a flat surface and let the engine cool completely.
- Open the hood, remove any engine cover, and locate the radiator, hoses, fan/shroud, and coolant reservoir.
- If you need access from below, raise the front and support it on jack stands (never rely on a jack alone).
- Remove splash shields or undertrays as needed to access the radiator drain and lower hose.
2) Drain the coolant
- Place a drain pan under the radiator drain (petcock) or under the lower hose connection.
- Confirm the radiator cap is safe to remove (engine cold). Remove it to help coolant flow.
- Open the petcock or loosen the lower hose and drain coolant into the pan.
- Close the petcock once drained (or temporarily reinstall the hose) so you’re not “leaking while working.”
Tip: If your coolant is rusty, sludgy, or contaminated, plan on a thorough flush after installation.
A new radiator doesn’t deserve to inherit old grime.
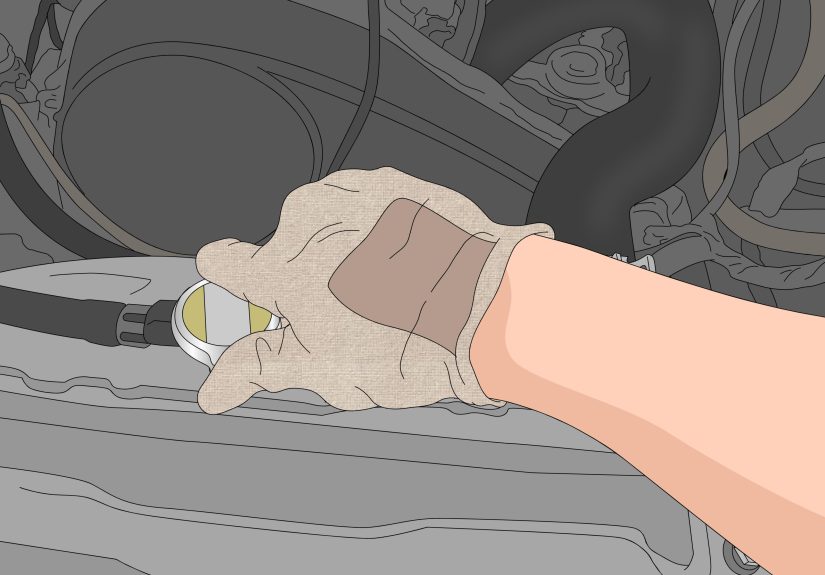
3) Disconnect the radiator hoses and overflow line
- Loosen clamps on the upper radiator hose and remove it. Twist gently to break the seal.
- Repeat for the lower radiator hose (more coolant may drainhave the pan ready).
- Disconnect the small hose to the overflow/recovery reservoir (if equipped).
If a hose is stubborn, don’t pry like you’re opening a can of paint. Use controlled twisting, or carefully slit the hose end if you’re replacing it.
Damaging a plastic radiator neck is a fast track to buying another radiator.
4) Remove the fan assembly and shroud (common step)
- Unplug the electric fan connector(s).
- Remove fasteners holding the fan shroud to the radiator or support.
- Lift out the fan/shroud assembly and set it aside safely.
Some vehicles use a mechanical fan or have tight clearance. If the fan is engine-driven, follow your vehicle’s manual procedure.
5) Automatic transmission? Disconnect cooler lines (if routed to radiator)
- Locate the transmission cooler lines entering the radiator (usually on one side tank).
- Place a small drain pan beneath the connectionsome transmission fluid may drip.
- Use the correct line wrench or disconnect tool to avoid rounding fittings.
- Cap or plug the lines to reduce mess and contamination while the radiator is out.
Note: Not all vehicles route transmission cooling through the radiator. If yours doesn’t, you can skip this.
6) Unbolt the radiator mounts and separate it from nearby components
- Remove the top brackets or mounts securing the radiator.
- If the A/C condenser is attached to the radiator, unbolt it from the radiator and support it gentlydo not disconnect refrigerant lines.
- Check for any remaining connectors, clips, or brackets (some cars have temperature sensors or additional ducting).
7) Remove the old radiator
- Lift the radiator straight up and out if the design allows.
- If clearance is tight, you may need to angle it out or remove it from belowgo slow and protect fins.
- Keep it upright as much as possible to reduce spills.
8) Transfer parts to the new radiator
Many new radiators come “bare,” so compare old vs. new and move anything needed:
- Rubber mounting bushings/isolators (often at the bottom)
- Fan shroud mounts (if separate)
- Drain plug/petcock (if it didn’t come installed)
- Sensor fittings or clips (vehicle-dependent)
- Radiator cap (if your system uses one on the radiator; consider replacing if old)
9) Install the new radiator
- Lower the new radiator into place, ensuring it sits in the lower mounts correctly.
- Reinstall top mounts/brackets and tighten securely.
- Reattach the A/C condenser if it mounts to the radiator.
- Reconnect transmission cooler lines (if applicable), using the correct fittings and seals.
- Reconnect hoses and position clamps properly behind the bead on the neck.
- Reinstall the fan/shroud and plug in electrical connectors.
Pro tip: Before refilling, do one last “hands-and-eyes lap” around the radiator:
hoses fully seated, clamps tight, electrical connectors plugged in, mounts secure, and nothing rubbing on the fan blades.
Refill and Bleed the Cooling System (The Step People Rushand Regret)
Refilling is where a lot of DIY radiator replacement projects go sideways. Air trapped in the cooling system can cause overheating,
poor heater performance, or temperature spikes that look scary even when nothing is “broken.”
1) Use the correct coolant
- Use the coolant type specified for your vehicle (your owner’s manual or coolant label under the hood is your friend).
- If using concentrate, mix with distilled water to the correct ratio (commonly 50/50 unless specified otherwise).
- Premixed coolant is convenient and avoids “I eyeballed it” errors.
2) Fill slowly
- Fill the radiator (or the designated fill point) slowly to reduce trapped air.
- Fill the coolant reservoir to the correct “MAX” line.
3) Bleed air from the system
Bleeding methods vary. Some vehicles have a bleed screw. Many don’t. Here’s a safe, common approach:
- Set the cabin heat to HOT (this helps coolant circulate through the heater core).
- Start the engine and let it idle. Watch the temperature gauge.
- As the thermostat opens, coolant level may droptop off as needed (only if safe and your design allows).
- Look for steady heat from the vents (a clue coolant is circulating through the heater core).
- Shut the engine off, let it cool fully, then recheck and top off both radiator and reservoir as needed.
If your vehicle is known to be picky about bleeding, consider using a spill-free funnel kit or a vacuum-fill tool (or have a shop do the final fill).
The goal is simple: no air pockets.
Troubleshooting After Installation
Problem: It overheats after radiator replacement
- Air pocket: Most common. Re-bleed the system.
- Fans not running: Check connectors, fuses, relays, and fan control plugs.
- Thermostat issue: If it was borderline before, the new radiator may expose it.
- Wrong coolant mix: Too much water lowers boiling protection; too much concentrate can reduce heat transfer.
- Radiator cap: A weak cap can affect pressure and boiling point in systems that use a cap.
Problem: Coolant leak at hose connection
- Clamp not positioned correctly (it should sit behind the raised bead on the neck).
- Hose is old/hardened and no longer seals wellreplace it.
- Plastic neck damaged (especially if pried on). If cracked, it won’t seal reliably.
Problem: Transmission fluid leak (automatic)
- Cooler line fitting not fully seated or cross-threaded.
- Missing O-ring/clip/seal (vehicle-dependent).
- Overtightened fitting damaging threads (tighten to spec when possible).
Should You Flush the Cooling System When Replacing a Radiator?
Often, yesespecially if the old coolant is rusty, muddy, or looks like it’s been through a long-term relationship with corrosion.
Sludge and deposits can clog small passages inside the new radiator and undermine the whole job.
At minimum, a drain-and-fill with the correct coolant is smart. A full flush is best when coolant condition is unknown,
when components have failed internally, or when you’re dealing with visible contamination.
DIY vs. Shop: Time and Cost Reality Check
DIY radiator replacement can save serious money, but it isn’t always “cheap.” The radiator itself, coolant, and small extras add up.
The bigger variable is labor: shops charge for time, access difficulty, and whether other components should be replaced “while you’re in there.”
Typical time
- DIY: 2–6 hours depending on experience and vehicle layout (first-timers should plan a relaxed afternoon).
- Shop: Often a few hours of labor, plus parts and coolant.
Typical cost (very vehicle-dependent)
- DIY parts: Radiator + coolant + optional hoses/clamps/cap.
- Shop total: Can land in a wide range based on labor rates and parts pricing for your vehicle.
If you want a sanity check, online estimators can give a ballpark rangebut always price it by your exact make/model and your local labor rates.
When to Call a Pro Instead
- Your vehicle requires removing the bumper/front clip or major structural panels for access.
- You have stubborn corrosion, seized fasteners, or fragile plastic parts everywhere.
- The cooling system needs a vacuum-fill procedure and you can’t reliably bleed it.
- You suspect an internal engine issue (coolant loss with no leak, repeated overheating, heater core symptoms).
- You’re not comfortable dealing with transmission cooler connections or fluid level checks afterward.
FAQ: Radiator Replacement Questions People Google at 2 A.M.
Can I drive with a leaking radiator?
It’s risky. Coolant loss can quickly lead to overheating, and overheating can cause expensive engine damage.
If you must move the car, keep trips short, monitor the temperature gauge closely, and fix the leak ASAP.
Should I replace the thermostat when replacing the radiator?
Not mandatory, but it’s often a smart “while you’re in there” upgrade if the thermostat is old or the vehicle has a history of temperature issues.
Thermostats are relatively inexpensive compared to the effort of repeating cooling-system work.
Can I use water instead of coolant?
In an emergency, plain water can help you limp to safetybut it’s not a proper long-term solution.
Coolant provides corrosion protection and freeze/boil protection. Replace water with the correct coolant mix as soon as possible.
Can I reuse old coolant?
If the coolant is fresh, clean, and you captured it in a clean container, some people reuse it.
But if it’s old, contaminated, or you’re not sure, don’t gambleuse new coolant.
Real-World Experiences & Lessons (Extra )
Guides make radiator swaps look like a smooth 14-step dance. Real life is more like a dance… on a gravel driveway… while holding a slippery hose clamp.
Here are the “experience-based” lessons that come up again and again from DIYers who have done this job.
1) The biggest time-waster isn’t the radiatorit’s the little plastic stuff
Modern engine bays love plastic covers, push-clips, splash shields, and ducts. They’re not hard, but they’re fiddly.
The trick is to treat clips like reusable hardware, not disposable confetti. Use a trim tool, go gently, and keep
clips organized so you don’t end up with “one mysterious clip” at the end.
2) Hoses can be bonded like they signed a contract
Old hoses sometimes cling to radiator necks like they’re emotionally attached. Twisting helps, but prying can crack a plastic neck.
Many DIYers learn the hard way that it’s better to sacrifice the hose (if replacing it) than to damage the new radiator.
If you’re keeping the hose, work it slowly and evenlypatience beats brute force every time.
3) Clamp orientation matters more than you think
A clamp installed with the screw facing the wrong direction can turn a five-second retighten into a 20-minute disassembly later.
Before tightening, rotate clamps so you can reach them with a screwdriver or socket after everything is back in place.
It’s one of those “future you will be grateful” details.
4) Transmission cooler connections: expect a drip and plan for it
If your automatic uses the radiator as a transmission cooler, cooler lines can seep when disconnected. That doesn’t mean catastrophe,
but it does mean you should have a small pan ready and wipe everything clean before final inspection.
Many DIYers also label which line goes where (or take a photo) because it’s surprisingly easy to mix them up when you’re juggling brackets,
bolts, and a radiator that’s the size of a carry-on suitcase.
5) “It overheated once after the swap” is usually an air pocket story
The most common post-install freak-out is: the car warms up, the temperature climbs, and panic sets in.
Often, the system simply needs more bleeding. Some engines trap air stubbornly; the heater may blow cool until coolant circulates.
The experienced move is to let the engine cool completely, top off properly, and repeat the bleeding process rather than chasing random parts.
This is also why people recommend setting the heat to HOT and verifying you get steady warm air from the vents.
6) Photos are a cheat code
DIYers who take quick phone photos before removing brackets, shrouds, and routing clips tend to finish faster and with fewer leftover bolts.
A 10-second photo can save a half-hour of “where did this go?” laterespecially around fan wiring and hose routing.
7) The “clean and recheck” habit separates smooth jobs from messy ones
After you refill and run the engine, wipe connections dry and recheck for leaks. Coolant can dribble onto lower parts and make it look like
a new leak when it’s just leftover from draining. A clean surface tells the truth. Then, after your test drive and full cool-down,
check levels again. Many people find the reservoir level drops a little as the last trapped air works its way outnormal, as long as it stabilizes.
Bottom line: radiator replacement is rarely “hard,” but it rewards organization, patience, and a respectful fear of hot pressurized coolant.
Do it carefully, and you’ll have a cooling system that behaves like it’s supposed toquietly, reliably, and without dramatic puddles.
Conclusion
Learning how to change a car radiator is a practical DIY skill that can save money and prevent serious overheating damage.
The winning formula is straightforward: confirm the radiator is actually the problem, drain coolant safely, remove and install carefully,
reconnect everything correctly, then refill and bleed the cooling system like your engine depends on it (because it does).
Take your time, keep everything clean, recycle old coolant responsibly, and don’t be shy about replacing tired hoses and clamps while you’re there.
Your future selfand your temperature gaugewill thank you.


