Table of Contents >> Show >> Hide
- Why Make Faux Birch Bark Instead of Using the Real Thing?
- Supplies You’ll Need for Faux Birch Bark Projects
- Method 1: Flat Painted Faux Birch Bark (Perfect for Wrapping Objects)
- Method 2: Dimensional Faux Birch Bark with Tissue or Paper
- Method 3: Faux Birch Logs with Pool Noodles or Cardboard
- How to Paint Faux Birch Bark So It Looks Convincing
- Creative Ways to Use Faux Birch Bark in Your Home
- Safety and Cleanup Tips
- Common Faux Birch Bark Mistakes (and How to Fix Them)
- Real-Life Faux Birch Bark Experiences and Pro Tips
- Conclusion
Real birch bark is gorgeous and also, annoyingly, not always easy (or legal) to harvest.
The good news? You can learn how to make faux birch bark that looks convincing enough to fool guests,
style your mantel for the holidays, or wrap a boring vase in rustic charm without ever touching a chainsaw.
In true eHow style, this guide walks you through simple, budget-friendly methods using basic craft supplies:
paper, paint, cardboard, pool noodles (yes, really), and a few clever painting tricks. You’ll learn a flat
faux-bark technique you can wrap around almost anything, plus dimensional methods for making faux birch logs
and knotted textures that look surprisingly realistic.
Why Make Faux Birch Bark Instead of Using the Real Thing?
Before we break out the paint, it helps to know why faux birch bark is worth your time:
- It’s eco-friendly. You don’t have to strip bark from living trees or buy imported decor.
- It’s customizable. Make birch “bark” to fit odd shapes vases, boxes, candleholders, or DIY logs.
- It’s lightweight and safe indoors. No bugs, no sap, no splinters.
- It’s inexpensive. Most projects use cardboard, kraft paper, tissue, and a few bottles of craft paint.
Whether you’re decorating for Christmas, styling a woodland wedding, or just love Scandinavian-inspired decor,
learning how to make faux birch bark gives you a flexible, reusable way to add rustic texture anywhere you want it.
Supplies You’ll Need for Faux Birch Bark Projects
Exact supplies will vary by method, but here are common materials used in popular DIY birch bark tutorials:
- White acrylic or latex paint (matte or satin)
- Light gray and beige/tan craft paint
- Black craft paint for stripes and “eyes”
- Kraft paper or brown packing paper
- Tissue paper or toilet tissue (for raised knots)
- Mod Podge or white glue (diluted slightly with water)
- Paintbrushes or foam brushes
- Cardboard, pool noodles, or rolled newspaper for faux logs
- Scissors, tape, and a utility knife (for cutting bases)
- Old plastic tablecloth or paper to protect your workspace
You don’t need all of these at once. Start with the basic painted faux bark method, then add dimensional tricks as you get more comfortable.
Method 1: Flat Painted Faux Birch Bark (Perfect for Wrapping Objects)
This technique is inspired by common faux-finishing methods for birch trunks: building up soft layers of white, gray, and tan,
then adding dark dashes and knotted “eyes” on top. It’s ideal for making sheets of birch bark you can wrap around jars,
vases, candles (battery-operated), or boxes.
Step 1: Prepare Your Base
Start with a flexible base, such as:
- Heavy white cardstock
- Watercolor paper
- Strips of kraft paper painted white
Cut your paper slightly larger than the item you want to wrap. Protect your table with scrap paper or a drop cloth.
Step 2: Paint a Soft White Base
Brush on a coat of white paint in loose, horizontal strokes. Don’t worry about perfect coverage a little unevenness
actually helps mimic the natural variation of birch bark. Let some of the paper peek through for added texture.
Step 3: Add Gray and Beige “Shadow” Layers
When the white layer is dry to the touch:
- Thin your light gray paint with a bit of water to make a wash.
- Brush or dry-brush it lightly across the surface in horizontal strokes, focusing on areas you want to look shaded.
- Repeat with a light beige or tan wash, here and there, to warm up the bark and add depth.
The goal is a soft, streaky background with hints of gray and tan over white no hard lines. If it starts to look too dark,
feather in more white while the paint is still damp.
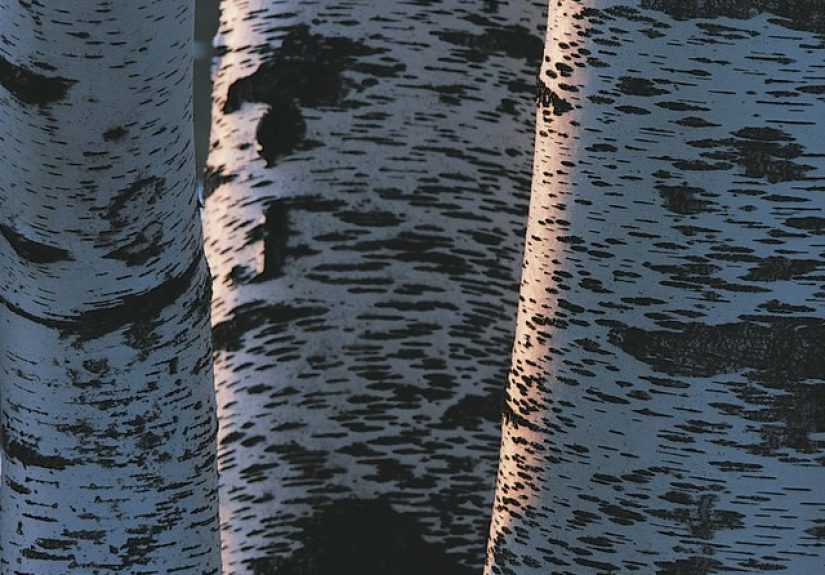
Step 4: Paint the Signature Birch Dashes and “Eyes”
Now it’s time for the details that scream “birch tree.”
- Mix a dark gray or black-brown color with black paint and a tiny touch of gray or brown.
- Use a small, round brush to paint horizontal dashes across the bark, varying their length and spacing.
- Cluster a few dashes together to suggest natural scars and markings.
- Add occasional “eyes” small, curved shapes with dark centers and subtle shading around them.
Keep your hand loose and random. Real birch trunks aren’t lined up like notebook paper a bit of chaos is your friend.
Step 5: Wrap Your Object
Once the painted faux birch bark is completely dry:
- Wrap it around your vase, jar, candleholder, or box.
- Trim any excess from the top and bottom.
- Attach it with double-sided tape, hot glue (for non-heat-sensitive items), or dots of white glue.
Instantly, you’ve turned a plain glass cylinder or cardboard box into a stylish birch-inspired decor piece.
Method 2: Dimensional Faux Birch Bark with Tissue or Paper
If you want more realistic texture, especially those raised, knotted areas on birch trunks, add dimension with tissue paper,
toilet paper, or torn strips of kraft paper glued to your base before painting.
Step 1: Create the Texture
- Tear tissue paper or toilet tissue into small strips and wads.
- Brush a layer of diluted white glue or Mod Podge onto your base (paper, cardboard, or log form).
- Press the wads into the glue in random patches, especially where you want knotted “bumps.”
- Smooth torn strips along the surface to create subtle ridges and torn edges.
Let everything dry completely. You should now have a bumpy, organic surface that feels like bark under your fingers.
Step 2: Paint the Bark Layers
Paint this textured surface much like the flat method:
- Cover the entire piece with white paint, working the brush into the creases.
- Add soft gray and beige washes for shadows and depth.
- Use darker washes to emphasize the raised knots and recesses.
- Finish with dark stripes and dots around the knots to highlight the bark pattern.
Because the tissue absorbs the paint, those knots crumple and darken in a wonderfully organic way, giving your DIY birch bark
a very realistic look.
Method 3: Faux Birch Logs with Pool Noodles or Cardboard
Want full-on birch logs to stack in a fireplace or arrange in a basket? Craft bloggers often use pool noodles, rolled newspaper,
or cardboard boxes as lightweight, inexpensive cores for faux birch logs.
Option A: Pool Noodle Faux Birch Logs
This method is light, quick, and perfect for holiday decor.
- Cut pool noodles to your desired log lengths (around 18–24 inches works well).
- Wrap each noodle in kraft paper, tearing the paper into strips and crumpling it first to create texture.
- Attach strips with Mod Podge or white glue, overlapping edges irregularly.
- Glue tissue-paper wads in random spots to create knots.
- Paint the logs white, then layer gray and beige washes and dark stripes as described above.
Noodles keep the logs very lightweight, which is ideal if they’ll sit on a mantel, shelf, or in a decorative basket.
Option B: Cardboard or Newspaper Faux Birch Logs
For heavier, more realistic-feeling logs, roll up newspaper or use a cardboard box:
- Roll several sheets of newspaper into a tube and tape or tie securely, or
- Disassemble a cardboard box, dampen it slightly, roll it into a log shape, and secure with tape and glue.
Once you have a log-shaped core, cover it with brown packing paper or kraft paper, glue it down, then paint and detail as you would
any other birch bark surface. This approach creates logs with more weight and a satisfying, “real” feel.
How to Paint Faux Birch Bark So It Looks Convincing
Painting is where your faux birch bark really comes to life. Keep these tips in mind:
- Work in horizontal strokes. Birch bark has a subtle horizontal grain; brush strokes in that direction help sell the effect.
- Layer colors, don’t rely on just white. Combine white, gray, and beige to avoid that “flat white tube” look.
- Use a light touch with dark paint. Thin black or dark gray with water; it’s easier to build up darkness than to fix harsh lines.
- Vary the dash pattern. Short, broken dashes, clusters, and small “eyes” look more natural than perfectly spaced lines.
- Step back often. Every few minutes, back up and view your work from across the room. If it reads as birch from a distance, you’re winning.
Creative Ways to Use Faux Birch Bark in Your Home
Once you know how to make faux birch bark, it’s dangerously easy to birch-ify everything in sight. A few ideas:
- Wrapped vases and jars: Use flat faux bark sheets to wrap clear glass containers for flowers or branches.
- Faux logs in the fireplace: Stack pool-noodle or cardboard logs in a nonworking fireplace for cozy, low-maintenance decor.
- Table centerpieces: Arrange bundles of birch logs with greenery and fairy lights for holidays or winter weddings.
- Planter sleeves: Wrap inexpensive plastic pots in faux birch bark for a Scandinavian-style plant display.
- Wall art: Mount strips of faux bark onto wood panels or canvases to create a woodland-inspired gallery wall.
Safety and Cleanup Tips
Faux birch bark is a low-risk craft, but it’s still smart to:
- Protect surfaces with plastic or paper before painting.
- Use water-based, non-toxic paints and glues, especially around kids or pets.
- Allow pieces to dry completely before setting them near fabrics or placing them in baskets.
- Keep faux logs and bark away from open flames; they’re decor, not firewood.
Common Faux Birch Bark Mistakes (and How to Fix Them)
Even simple projects can go sideways. Here’s how to rescue them:
Mistake: The Bark Looks Too Dark or Muddy
If your birch bark starts creeping into “charcoal log” territory, don’t panic. Let it dry, then:
- Dry-brush white paint over the surface to lighten it.
- Soften harsh stripes with a damp brush, feathering edges outward.
- Add a fresh, thin gray wash only where you need subtle shadows.
Mistake: The Stripes Look Too Perfect
Birch bark shouldn’t look like a ruled notebook. If your stripes feel too regular:
- Break up long lines into shorter dashes.
- Smudge parts of the stripe with your finger or a damp brush.
- Add random little clusters of dashes to create organic variation.
Mistake: Texture Isn’t Showing Up
If you used tissue or kraft paper for dimension but it’s disappearing under paint, try:
- Dry-brushing a slightly darker gray over raised areas to highlight them.
- Adding more tissue wads or torn strips, letting them dry, and repainting those areas.
- Using a thinner paint wash so the texture doesn’t get filled in.
Real-Life Faux Birch Bark Experiences and Pro Tips
When people start experimenting with faux birch bark, a few patterns show up again and again. Beginners often worry
that their first attempt doesn’t look “real enough” up close. Here’s the secret most experienced crafters learn quickly:
birch decor is meant to be seen from a few feet away. If it reads as birch from across the room, you’ve done your job.
One common experience is underestimating how much texture helps. Crafters who start with just paint on plain paper
often find that their second or third project looks far better once they add crumpled tissue or torn paper underneath.
Those subtle bumps catch the light and shadows, making the bark feel more three-dimensional without much extra work.
Another shared lesson is to embrace imperfection. Real birch trunks have scars, discoloration, strange knots, and patches
where the bark peels. People who try to make every stripe perfectly even usually end up less satisfied with the final piece.
The turning point often comes when they give themselves permission to be messy: letting the gray wash streak, allowing
some darker areas to develop, and painting a few exaggerated knots. Suddenly, the project stops looking like “careful craft”
and starts looking like something pulled from a forest.
Many DIYers also discover how forgiving faux birch bark is. If you add too much black, you can simply paint over it with white,
let it dry, and try again. If a tissue knot sticks out too far, you can trim it or soften it with more glue and paint.
That flexibility makes this an ideal project for experimenting with kids or friends: nobody has to stress about “ruining”
anything, because nearly every mistake can be toned down, blended in, or transformed into a new detail.
Crafters who make multiple sets of faux birch logs often notice how quickly the process speeds up. The first set may take
an afternoon as you figure out your rhythm. By the second or third set, people frequently report that they can prep, paint,
and detail a bundle of logs in about an hour or so. The technique becomes more intuitive: you instinctively know how much gray
to add, where to focus darker knots, and which areas should stay lighter for contrast.
Finally, there’s a universal experience once the faux birch makes it into your decor: it’s weirdly versatile. People start by
making logs for a winter fireplace, then realize the same pieces look great in spring with ferns or summer with simple greenery.
What began as a holiday craft often becomes a year-round styling tool. Once you know how to make faux birch bark in sheets and
log form, it’s easy to tailor it to different seasons with just a change of ribbon, greenery, or surrounding accessories.
The bottom line: learning how to make faux birch bark is less about perfection and more about play. The more you experiment
with layering paint, tearing paper, and embracing texture, the more realistic and more uniquely yours your “birch” decor will become.
Conclusion
Making faux birch bark is a beginner-friendly project that delivers surprisingly sophisticated results. With a little white paint,
a few gray and beige washes, and some strategic dark dashes, you can transform basic supplies into decor that feels cozy,
rustic, and high-end. Whether you’re wrapping a vase, crafting faux logs for a mantel, or building a woodland centerpiece,
the same core techniques layered color, subtle texture, and imperfect patterns will carry you through.
Once you’ve tried it once or twice, you may find yourself looking at every cardboard box, pool noodle, and glass jar as a potential
birch bark makeover. And honestly? That’s a very fun way to see your craft stash.


