Table of Contents >> Show >> Hide
- Why a Slab Pie Works So Well
- Recipe Snapshot
- Ingredients
- Equipment
- Step-by-Step Instructions
- Pro Tips for a Crisp Crust and Sliceable Filling
- Easy Variations
- Make-Ahead, Storage, and Freezing
- Serving Ideas
- Troubleshooting
- Final Thoughts
- Real-Life Experiences: What I’ve Learned Making Blueberry & Peach Slab Pie
If classic pie is a love letter, a slab pie is a group text: it feeds everyone, it’s easy to share,
and somebody will absolutely sneak a second piece when they think no one’s looking.
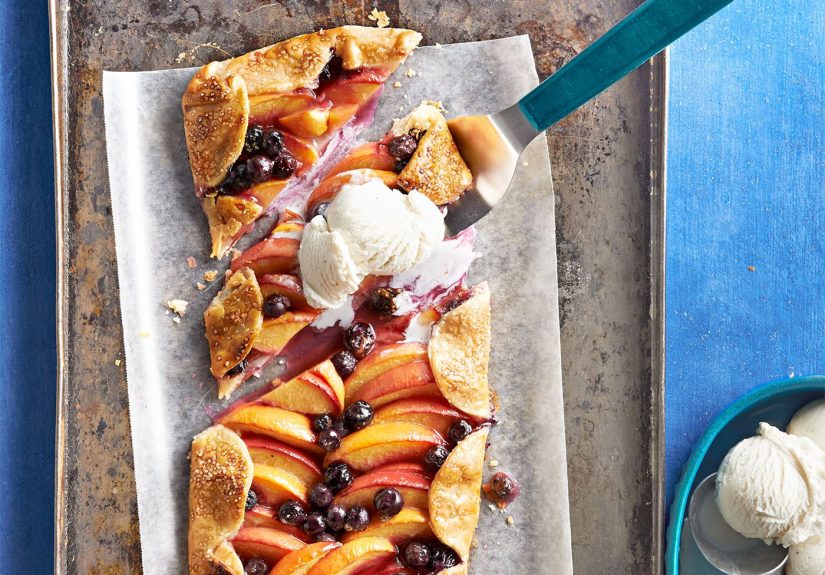
This blueberry and peach slab pie brings peak-summer fruit energy to a sheet pansweet peaches, poppy blueberries,
bright citrus, and a flaky, all-butter crust that shatters in the best possible way.
The goal here is simple: a crisp bottom crust (no soggy sadness), a filling that slices cleanly (no fruit soup),
and enough servings to handle birthdays, potlucks, cookouts, and “I brought dessert!” emergencies.
You’ll also get smart options: use fresh or frozen fruit, go full top crust or easy lattice, and adjust sweetness
depending on how bold your peaches are feeling.
Why a Slab Pie Works So Well
Slab pies bake in a rectangular panusually a 10×15-inch jelly roll panso you get more crust-to-filling balance,
faster portioning, and slices that don’t collapse like pointy triangles sometimes do.
It’s the “brownie pan” approach to pie: same cozy vibe, less fuss, more crowd control.
Recipe Snapshot
- Pan: 10×15-inch jelly roll pan (about 1 inch deep)
- Yield: 18–24 squares (depending on how generous your friends are)
- Active time: About 45–60 minutes
- Chill + bake + cool: 4–6 hours (hands-off time included)
- Best served: The day it’s baked, once fully cooled and set
Ingredients
All-Butter Slab Pie Crust (Top + Bottom)
- 5 cups all-purpose flour (plus more for rolling)
- 2 tablespoons granulated sugar
- 2 teaspoons kosher salt
- 2 cups (4 sticks) cold unsalted butter, cut into 1/2-inch cubes
- 1 cup ice water, plus 2–4 tablespoons as needed
- 1 tablespoon apple cider vinegar (optional, but helpful for tenderness)
Blueberry-Peach Filling
- 6 cups peeled, sliced peaches (about 6–8 medium peaches)
- 3 cups blueberries (fresh or frozen)
- 3/4 cup granulated sugar (use 2/3 cup if peaches are very sweet; up to 1 cup if fruit is tart)
- 1 tablespoon fresh lemon juice
- 1 teaspoon lemon zest (optional, but makes the fruit taste louder)
- 1/2 teaspoon ground cinnamon
- 1/4 teaspoon fine salt
- 1 teaspoon vanilla extract
- 1/4 cup cornstarch
- 2 tablespoons instant tapioca (optional but excellent for a glossy, sliceable set)
- 2 tablespoons water (for a quick cornstarch slurry if needed)
Finishing
- 1 large egg
- 1 tablespoon water or milk
- 1–2 tablespoons turbinado (raw) sugar (optional crunch and sparkle)
- Optional “anti-sog” layer: 2–3 tablespoons finely crushed graham crackers or vanilla wafers
Equipment
- 10×15-inch jelly roll pan (rimmed, about 1 inch deep)
- Parchment paper
- Rolling pin
- Large mixing bowl
- Small saucepan (for reducing juices)
- Pastry brush
- Sharp knife or pizza cutter (for lattice strips)
- Cooling rack
Step-by-Step Instructions
1) Make the Dough (and Keep It Cold)
- Mix dry ingredients: In a large bowl, whisk flour, sugar, and salt.
-
Cut in butter: Add cold butter cubes. Use your fingers, a pastry cutter, or two forks to work
butter into the flour until you have a mix of pea-size and almond-size pieces. (Those bigger butter bits are
future flake factories.) -
Add water: Drizzle in 1 cup ice water (and vinegar if using), a little at a time, tossing with a fork.
Stop when the dough holds together when squeezed. If it feels dusty, add 1 tablespoon ice water at a time. -
Divide and chill: Split dough into two portions, about 60/40.
Shape each into a flat rectangle (not a ballrectangles roll out like a dream for slab pies).
Wrap and refrigerate at least 2 hours (or overnight).
2) Prep the Fruit and Tame the Juices
-
Combine fruit: In a large bowl, toss peaches and blueberries with sugar, lemon juice, zest,
cinnamon, salt, and vanilla. -
Macerate: Let the fruit sit 15–20 minutes. This pulls out juices so you can control them
(instead of letting them flood your crust later). -
Reduce the juices: Set a strainer over a saucepan and drain the fruit juices into the pan.
Bring juices to a simmer and cook 5–8 minutes until slightly thickened and reduced. -
Thicken: Whisk cornstarch with 2 tablespoons water to make a slurry, then whisk it into the simmering juices.
Cook 30–60 seconds until glossy and thick. Remove from heat. -
Finish filling: Pour thickened juices back over the fruit and toss well.
Stir in instant tapioca (if using). Let the filling cool while you roll the crustwarm filling melts cold butter,
and melted butter makes crust sad.
3) Roll and Line the Pan
- Prep the pan: Line the jelly roll pan with parchment, leaving overhang on two sides for easy lifting later.
-
Roll bottom crust: On a floured surface, roll the larger dough rectangle into a roughly 13×18-inch shape
(so it covers bottom + climbs the sides). Transfer to the pan and gently press into corners.
Leave a slight overhang for crimping. - Chill: Refrigerate the lined pan for 15–20 minutes while the oven heats.
4) Heat the Oven Like You Mean It
- Preheat: Heat oven to 425°F. Set a rack in the lower third.
-
Drip insurance: Put a foil-lined sheet pan on a lower rack (or the oven floor if your oven manual allows).
Fruit pies can bubble over, and nobody wants to smoke-alarm-test their dessert.
5) Fill, Top, Seal
-
Optional crisping trick: Sprinkle crushed graham crackers (or vanilla wafers) evenly over the chilled bottom crust.
It’s a tiny “sponge layer” that helps absorb extra juice without tasting like cardboard. -
Add filling: Spoon the cooled fruit mixture into the crust and spread evenly.
Pile it a bit higher toward the center (fruit shrinks as it bakes). -
Top crust option A (full cover): Roll the smaller dough rectangle to about 12×16 inches.
Drape over filling, trim excess, then fold edges under and crimp. Cut 10–12 small vents. -
Top crust option B (easy lattice): Roll dough to about 12×16 inches.
Cut into 1-inch strips. Lay half the strips across the pie, fold back alternating strips,
place a perpendicular strip, then unfold. Repeat for a simple lattice. Trim and crimp edges.
6) Egg Wash, Sugar, Bake
-
Finish the top: Whisk egg with 1 tablespoon water or milk. Brush over the top crust.
Sprinkle turbinado sugar if you want sparkle and crunch. -
Bake hot, then steady: Bake at 425°F for 18–22 minutes (this helps set the crust).
Reduce heat to 375°F and bake 30–45 minutes more, until the crust is deep golden and you see thick bubbles in the center,
not just around the edges. -
Prevent over-browning: If the top is getting too dark before the filling bubbles,
tent loosely with foil for the remaining bake time.
7) Cool Completely (Yes, Really)
Let the slab pie cool on a rack at least 3 hours before slicing. Fruit pie filling continues to set as it cools.
If you cut too soon, it’ll taste greatbut it’ll look like a delicious landslide. If you want clean squares, patience is the secret ingredient.
Pro Tips for a Crisp Crust and Sliceable Filling
-
Use the lower rack early: Starting lower helps the bottom crust cook through.
A pale bottom is usually a heat-placement problem, not a personal failing. -
Don’t fear bubbles: Bubbling in the center is the best sign your thickener activated and the filling is actually done.
“Golden top” alone can lie. -
Adjust for super-juicy peaches: If peaches are dripping like they’re auditioning for a soap commercial,
increase cornstarch by 1–2 tablespoons. -
Frozen fruit works: Use frozen blueberries straight from the freezer.
For frozen peaches, thaw, drain well, and pat dryexcess water can overwhelm the thickener. -
Keep dough cold: Warm dough = melting butter = less flake.
If rolling gets sticky, slide everything into the fridge for 10 minutes and regroup.
Easy Variations
Crumb-Topped “No Top Crust” Version
Want a faster build? Skip the top crust and use a crisp crumb topping instead.
Make the bottom crust as written, then top the filling with a simple crumble:
mix 1 cup flour, 1/2 cup oats, 1/2 cup brown sugar, pinch of salt, and 8 tablespoons cold butter until crumbly.
Bake at 375°F until bubbly and golden. It’s basically pie wearing a cozy sweater.
Flavor Swaps That Still Taste Like Summer
- Ginger: Add 1–2 teaspoons grated fresh ginger for a bright, spicy edge.
- Cardamom: Swap cinnamon for 1/4 teaspoon cardamomfancy without being fussy.
- Orange: Use orange zest instead of lemon for a softer citrus note.
- Brown sugar: Replace 1/4 cup of the white sugar with brown sugar for a caramel hint.
- Herb twist: Add 1 teaspoon finely chopped basil or thyme (sounds odd, tastes shockingly right).
Make-Ahead, Storage, and Freezing
Make-Ahead
- Dough: Make up to 3 days ahead; keep refrigerated. Freeze up to 3 months.
- Filling: Prep up to 24 hours ahead and refrigerate. Stir before using.
- Assembled unbaked pie: Chill 30–60 minutes before baking for extra flaky results.
Storage
Store leftovers covered in the fridge for up to 4 days.
Rewarm slices in a 300°F oven for 10–12 minutes to re-crisp the crust (microwaves are quick, but they soften crust).
Freezing
For best texture, freeze the baked and fully cooled pie (or individual slices).
Wrap tightly, then freeze up to 2 months. Thaw overnight in the fridge and rewarm in the oven.
Serving Ideas
- Classic: Vanilla ice cream and a spoon. No notes.
- Bright: A dollop of lemony whipped cream.
- Brunch energy: Serve slightly warm with Greek yogurt and a drizzle of honey.
- Picnic-friendly: Chill completely and slice into smaller squares for grab-and-go dessert.
Troubleshooting
“My filling is runny.”
Most of the time, it’s one of three things: the pie didn’t bubble long enough in the center,
it was sliced before fully cooled, or the fruit was extra juicy and needed a bit more thickener.
Next time, bake until you see thick bubbles in the middle and cool at least 3 hours.
“My bottom crust is pale.”
Start the pie on a lower rack and make sure your oven is truly preheated.
A hot start (425°F) helps set the crust early.
Also: don’t overload the filling with watery fruit juicesreducing them first makes a difference.
“My crust is tough.”
Overmixing and too much water are the usual suspects.
Stop adding water as soon as the dough holds together, and don’t knead it like bread dough.
Chill time matters, tooresting relaxes gluten and keeps butter cold.
“The top is browning too fast.”
Tent with foil once it reaches a deep golden color, and keep baking until the filling is done.
A fruit pie that isn’t bubbling in the middle is basically a beautiful lie.
Final Thoughts
This blueberry and peach slab pie is the kind of dessert that makes people hover near the kitchen “just to talk”
while it cools. It’s big, bright, and built for sharing. Once you’ve made it, you’ll understand why slab pies have
such devoted fans: less drama than a tall round pie, more servings than anyone expects, and enough flaky crust
to keep every corner-piece lover very happy.
Real-Life Experiences: What I’ve Learned Making Blueberry & Peach Slab Pie
The first time I made a blueberry and peach slab pie for a group, I thought the hardest part would be rolling the dough into a neat rectangle.
Plot twist: rectangles are finewhat really tests your character is waiting for the pie to cool while it smells like a summer festival.
Slab pie cooling time feels longer than a DMV line, but the payoff is worth it. Once I let it cool completely, the slices came out like
perfect little postcards: crisp edges, jammy center, and a top crust that crackled when cut. That’s the moment I realized slab pie is less
a recipe and more a strategy for feeding people without stress.
I’ve also learned that peaches have moods. Some are politesweet, juicy, but not chaotic. Others are absolute drama queens that release
enough juice to qualify as a small swimming pool. If you’ve ever baked a fruit pie that looked done and then turned into a puddle the second
you cut it, you know the feeling. That’s why I started doing the “macerate and reduce” step. Draining off the fruit juices and simmering them
down makes the filling taste more like concentrated peach-blueberry goodness and less like fruit tea. Bonus: your kitchen smells incredible
while those juices reduce, which is both a gift and a test of willpower.
Serving slab pie taught me something about people, too: everyone claims they want “a small piece,” and then they choose the corner slice
the size of a paperback novel. Corner slices are the crispy-crust jackpot, and slab pie produces a whole lineup of themno fighting over
who gets the “good piece.” If you’re hosting, that alone is reason to bake in a sheet pan. I like to cut the first row of slices smaller
(party-size), then offer “upgrade squares” for anyone who’s still making eye contact with the pan. It keeps things tidy, and it gives you
plausible deniability when the last piece mysteriously disappears.
Over time, I’ve built a few habits that make slab pie day smoother. I roll the dough on parchment whenever possible, then flip it into the pan
like a confident magician (confidence helpseven if you’re secretly sweating). I also chill the assembled pie for 20–30 minutes before baking.
It sounds like a tiny step, but it keeps the butter cold and helps the crust hold its shape. And I always bake with a “drip catcher” sheet pan
below. Fruit pies love to bubble over right when you’re feeling proud of yourself. The drip pan turns that moment from a crisis into a shrug.
The best experience, though, is the way this pie fits into real life. It’s picnic-friendly, potluck-proof, and forgiving.
If your lattice isn’t perfect, no one caresthere’s warm fruit underneath.
If your peaches are a little firm, the oven handles it.
If your blueberries stain the crust purple in spots, it looks rustic and charming (and also like you definitely meant to do that).
And when someone asks for the recipe, you get to say, “It’s easier than it looks,” which is trueand also a tiny flex.
Slab pie is the rare dessert that feels special without demanding you perform pastry gymnastics. It just asks for cold butter, hot oven heat,
and the patience to let it cool before you cut in. After that, it’s basically guaranteed applause.


