Table of Contents >> Show >> Hide
- Why a Drawer Makes a Surprisingly Great Shelf
- Step 1: Pick the Right Drawer (Don’t Adopt a Problem Child)
- Step 2: Choose Your Drawer-to-Shelf Style
- Step 3: Tools, Materials, and the “Please Don’t Get Hurt” Talk
- Step 4: Clean It Like You Mean It
- Step 5: Remove Hardware and Fix the “Drawer Trauma”
- Step 6: Sand (or Degloss) for a Finish That Actually Sticks
- Step 7: Prime, Paint, Stain, or Go Full “Designer Shelf”
- Step 8: Mounting Your Drawer Shelf (The Part That Matters Most)
- Mounting Method 1: Brackets (straightforward and sturdy)
- Mounting Method 2: French cleat (super secure, “floating” look)
- Mounting Method 3: Keyhole hangers or figure-eight hangers (for lighter loads)
- If you can’t hit studs: use the right anchors
- Absolutely not recommended: adhesive hooks for shelves
- Step 9: Make It Level, Then Make It Look Effortless
- Troubleshooting: When Your Shelf Gets “Opinionated”
- Why This Upcycle Is Worth Doing
- DIY Experiences That Make Drawer Shelves Better (The “Learned It the Hard Way” Section)
- Conclusion
Somewhere in your home, a lonely drawer is having an identity crisis. Maybe it fell out of a thrift-store dresser.
Maybe it’s from that “I’ll fix it later” furniture pile that has officially become “decor.”
Either way, good news: drawers are basically shelves that haven’t realized their full potential yet.
With a little cleanup, reinforcement, and a solid mounting plan, you can turn a plain old drawer into a
stylish, functional shelf that looks intentionally cool (not “I ran out of storage and hope no one asks questions”).
This guide walks you through choosing the right drawer, prepping it like a pro, and mounting it safelyplus
plenty of design ideas so your new shelf feels like a glow-up, not a weird science experiment.
Why a Drawer Makes a Surprisingly Great Shelf
A shelf is usually just a flat board. A drawer, on the other hand, already comes with side wallslike a tiny,
well-behaved storage corral. That means fewer items sliding off, more visual structure, and a built-in “frame”
that looks high-end once it’s finished.
Drawer shelves shine when you want:
- Instant character: old wood grain, dovetail joints, vintage details.
- Contained storage: spices, toiletries, craft supplies, kids’ books, mail, keys.
- Flexible styling: paint it bold, stain it warm, wallpaper the bottom, or keep it rustic.
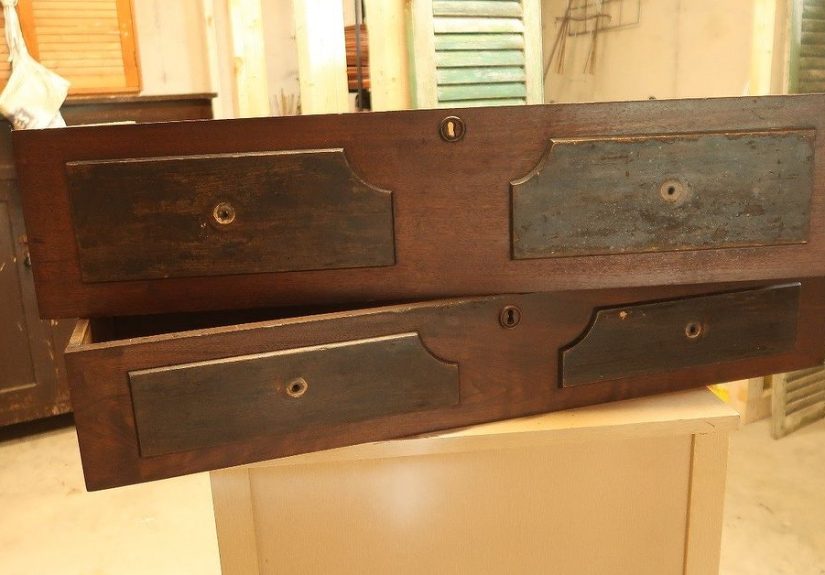
Step 1: Pick the Right Drawer (Don’t Adopt a Problem Child)
Not every drawer deserves a second chance. Some drawers are charming. Others are… structurally committed to chaos.
Here’s what to look for so your shelf doesn’t become a surprise gravity demo.
Best drawer candidates
- Solid wood or sturdy plywood: heavier, stronger, easier to refinish.
- Decent corners: dovetails or tight joints are a big win.
- At least 4–6 inches deep: deep enough to hold things, not so deep it dominates the wall.
Proceed with caution if…
- The bottom panel is thin and saggy (fixable, but needs reinforcement).
- The drawer smells like a decade of mystery (cleaning is non-negotiable).
- The sides are cracked or splitting (repairable, but don’t skip strengthening).
Step 2: Choose Your Drawer-to-Shelf Style
Before you touch sandpaper, decide what you’re building. The orientation changes everythingfunction, look, and how you mount it.
Option A: The classic “box shelf”
Turn the drawer so the opening faces outward. This creates a shadow-box shelfgreat for décor, folded towels, or small bins.
Option B: The “tray shelf”
Use the drawer like a shallow ledge: keep the bottom as the shelf surface and use one side as a front lip.
Perfect for spice jars, small frames, or a mini plant lineup (with drip trays, please).
Option C: The “drawer-front drama” shelf
Keep the decorative drawer front facing outward and mount the drawer as a floating display shelf.
It looks like boutique storage, especially with vintage pulls.
Option D: Stack-and-style
Combine two or three drawers into a staggered wall arrangement. Same prep stepsjust plan your layout before mounting.
Step 3: Tools, Materials, and the “Please Don’t Get Hurt” Talk
If you’re a teen or new to DIY: you can absolutely do the design and finishing parts yourself.
For drilling into walls or using saws, it’s smart to ask an adult to helpespecially if you’re mounting the shelf where someone could get bonked.
Materials (most projects)
- Drawer (obviously)
- Wood glue
- Sandpaper (medium and fine grit) or a sanding block
- Primer (optional but helpful for paint)
- Paint or stain + a protective topcoat
- Wood filler (for dents/holes)
- L-brackets or a French cleat kit (mounting)
- Appropriate screws and wall anchors (if not hitting studs)
- Level + tape measure
Optional upgrades
- Thin plywood for a new back panel (adds strength and a clean look)
- Wallpaper/contact paper for the inside bottom
- Corner braces (great for wobbly drawers)
- New hardware (knobs/pulls) if the old ones are missing
Step 4: Clean It Like You Mean It
This is the least glamorous step and also the one that determines whether your finish looks “handmade” or “haunted.”
Remove all contents, vacuum out dust, and wipe every surfaceinside and out.
Quick cleaning routine
- Wipe with warm water + mild dish soap.
- For sticky grime, use a degreaser (follow label directions and ventilate).
- Let the drawer dry fully. Moisture under paint is a recipe for peeling later.
Step 5: Remove Hardware and Fix the “Drawer Trauma”
Take off handles, label holders, or anything that will get in your way. If you’re keeping the hardware for looks,
remove it now anywaypainting around a handle is how brush marks become permanent memories.
Reinforce weak spots
- Loose joints: work wood glue into seams, clamp if possible, wipe excess glue.
- Thin bottom panel: add a new plywood base inside (glued and nailed) if you plan to store heavier items.
- Wobbly corners: add small corner braces on the inside where no one sees them.
- Old screw holes: fill with wood filler, sand smooth after drying.
Step 6: Sand (or Degloss) for a Finish That Actually Sticks
You don’t have to sand the drawer into dustjust give paint or stain a surface it can grip.
If the drawer has a glossy finish, scuff sanding or a deglosser helps a lot.
A simple sanding plan
- Start with medium grit to knock down shine and rough spots.
- Switch to fine grit to smooth everything out.
- Wipe away dust with a damp cloth (or tack cloth) before priming/painting.
Step 7: Prime, Paint, Stain, or Go Full “Designer Shelf”
This is where the drawer stops being “old furniture part” and becomes “intentional home décor.”
Choose a finish that matches where the shelf will live.
Paint ideas
- Classic: warm white, soft greige, or matte black.
- Bold: deep green, navy, terracotta, or a glossy pop color.
- Two-tone: paint the outside neutral and line the inside with a fun pattern.
Stain ideas
- Great for real wood drawers with attractive grain.
- Finish with a clear protective coat if the shelf will get handled a lot.
Pro tip for a clean look
Paint thin coats and let them dry properly. Rushing paint is how fingerprints become “texture.”
Step 8: Mounting Your Drawer Shelf (The Part That Matters Most)
A drawer shelf can hold surprisingly useful stuffso mount it like you expect it to be used, not like it’s a delicate museum artifact.
The safest approach is to attach into wall studs whenever possible.
Mounting Method 1: Brackets (straightforward and sturdy)
Use two L-brackets (or decorative shelf brackets) screwed into studs. Then screw the drawer to the brackets from inside the drawer.
This hides fasteners and keeps the shelf stable.
Mounting Method 2: French cleat (super secure, “floating” look)
A French cleat uses two angled pieces that lock togetherone on the wall, one on the shelf.
It’s a favorite for heavier wall storage because it spreads weight and makes leveling easier.
Mounting Method 3: Keyhole hangers or figure-eight hangers (for lighter loads)
These are neat for small drawer shelves that will hold light décor items. Still: studs are your best friend.
If you can’t hit studs: use the right anchors
Drywall alone isn’t meant to carry heavy shelving. If studs aren’t available where you need them,
use anchors rated for the job (like toggle-style anchors for heavier loads), and follow the package instructions carefully.
Absolutely not recommended: adhesive hooks for shelves
Adhesives are great for lightweight décor. Shelves are a different gameespecially if you’ll put anything breakable on them.
Gravity is patient and has excellent timing.
Step 9: Make It Level, Then Make It Look Effortless
Take your time with layout. Measure the height, mark your positions, and check level before you commit.
If you’re doing multiple drawers, place paper templates on the wall first to audition spacing.
Easy styling wins
- Entryway shelf: keys, sunglasses, mail sorter basket.
- Bathroom shelf: rolled towels, toiletries in jars, a small framed print.
- Kitchen shelf: spices, mugs, or a “coffee corner” lineup.
- Kids’ room: books facing forward, small toys in bins (mount higher if little hands are curious climbers).
- Craft shelf: paint bottles, washi tape, scissorsorganized chaos, but the cute kind.
Troubleshooting: When Your Shelf Gets “Opinionated”
The drawer shelf wobbles
- Add interior corner braces.
- Use a third bracket (especially for wider drawers).
- Confirm screws are tight and anchored properly.
The finish feels sticky days later
- Humidity can slow curinggive it more time.
- Thin coats cure better than thick coats.
- Use a topcoat that matches your paint type.
The drawer pulls away from the wall
- This usually means the mounting method doesn’t match the weight.
- Re-mount into studs or upgrade to stronger anchors or a French cleat system.
Why This Upcycle Is Worth Doing
Turning a drawer into a shelf is one of those rare DIY wins that’s both practical and genuinely stylish.
It’s budget-friendly, keeps usable materials out of the landfill, and gives your space personality that store-bought shelving can’t fake.
Plus, it’s endlessly customizablepaint, stain, wallpaper, labels, hooks, baskets, you name it.
DIY Experiences That Make Drawer Shelves Better (The “Learned It the Hard Way” Section)
If you ask a group of DIYers about turning drawers into shelves, you’ll hear a pattern: the idea is easy,
the execution is where your patience gets tested. Not in a dramatic “home renovation reality show” way,
but in a series of small moments where you realize why pros always say “prep is everything.”
One of the most common experiences people report is underestimating how much cleaning matters. A drawer can look fine
until you start sanding and suddenly the sandpaper clogs with old wax, furniture polish, or mystery residue.
The fix is simpleclean thoroughly and let it drybut it’s also the difference between a smooth finish and a paint job
that flakes off like a sunburn. The drawer shelf that lasts is the one that got treated like a real surface prep project,
not a “quick craft.”
Another classic: discovering the drawer isn’t square. Older furniture pieces often have character… and also angles.
When you mount something that’s slightly skewed, your level will loudly inform you that geometry is not a suggestion.
Many DIYers solve this by planning the orientation that hides imperfections best (for example, using the drawer as a box shelf
where the sides create a forgiving frame) and by adding a back panel or internal braces that “true up” the shape.
The lesson here is reassuring: you don’t need perfection; you need stability and a layout that flatters the piece.
Then there’s the mounting experiencearguably the most universal DIY plot twist. People often start with the optimistic plan:
“I’ll just anchor it to the drywall.” And sometimes that works for light décor. But shelves are ambitious. They invite weight.
Even if you swear you’ll only put “a couple little things” on it, shelves attract objects the way a clean chair attracts laundry.
DIYers who end up happiest with the result usually choose a mounting method with future weight in mind:
brackets into studs when possible, a French cleat for a cleaner floating look, or heavy-duty anchors when studs aren’t an option.
The best feeling is finishing the project and not having to worry every time someone walks by it.
A smaller but real experience: hardware decisions. Keeping the original pull can look charming, but it can also poke people,
snag sleeves, or make the shelf stick out farther than planned. A lot of DIYers end up removing the pull entirely, replacing it
with a flatter knob, or turning it into a hook feature underneath (which is a very satisfying glow-up for a drawer handle that
thought it was retiring). It’s one of those choices you only understand after living with the shelf for a week.
Finally, there’s the styling experiencewhere your drawer shelf goes from “project” to “part of the room.”
People often discover that the inside of the drawer is the magic spot. Lining the bottom with wallpaper or contact paper,
painting the interior a surprise color, or adding a thin wood insert creates a finished look that reads intentional.
And once you do it once, you start eyeing every leftover furniture part like it’s auditioning for a new career.
That’s the real DIY reward: not just the shelf, but the new ability to see potential in things that used to feel like clutter.
Conclusion
Transforming a drawer into a shelf is a smart, stylish way to upgrade storage without buying something bland and expensive.
Pick a sturdy drawer, prep it properly, finish it with intention, and mount it safely. Do that, and your “random old drawer”
becomes a shelf with personalityone that looks custom because, well, it is.


