Table of Contents >> Show >> Hide
- Choose Your Oven-Steak Adventure
- Pick the Right Steak
- Tools That Make This Easy (and Less Smoky)
- Method 1: Sear-Then-Oven (Steakhouse Classic at Home)
- Method 2: Broil Steak (Fast, Simple, Great for Thinner Cuts)
- Method 3: Reverse Sear (The Thick-Steak Secret Weapon)
- Steak Doneness Temperatures (and a Quick Safety Note)
- Common Mistakes (and How to Fix Them)
- FAQ: Oven Steak Questions People Whisper Into Their Fridges
- Real-World Oven Steak Experiences (The 500-Word “What It’s Like” Section)
- Conclusion
Cooking steak in the oven is the weeknight superpower nobody talks about enough. You get that steakhouse vibe (brown crust, juicy middle, smug confidence) without standing outside in flip-flops, wrestling a grill in the dark. The oven is steady, predictable, andunlike your cousin’s “secret marinade”doesn’t lie.
This guide covers three reliable oven steak methods (sear-then-oven, broil, and reverse sear), how to pick the right cut, the exact temperatures to aim for, and the small details that separate “wow” from “why is this chewy?”. Bring a meat thermometer and a little patience. Leave the fear and the fork-poking behind.
Choose Your Oven-Steak Adventure
- Sear-then-oven (best all-around): Great crust + controlled finish. Ideal for 1-inch+ steaks.
- Broil (fast and dramatic): Like upside-down grilling. Great for thinner steaks and quick dinners.
- Reverse sear (best for thick steaks): Gentle oven cook first, then a quick sear for a perfect edge-to-edge pink.
Pick the Right Steak
You can cook almost any steak in the oven, but your results get wildly better when you match the method to the cut. Here’s the cheat sheet:
- Ribeye: Rich, forgiving, loves high heat. Great for sear-then-oven.
- New York strip: Beefy, firm, excellent crust potential. Great for all three methods.
- Filet mignon: Tender but leandon’t overcook it. Great for sear-then-oven or reverse sear.
- Sirloin: Budget-friendly, can be excellent if you don’t push it past medium.
- Flank/skirt: Better broiled quickly and sliced thin against the grain.
Thickness matters more than almost anything. If your steak is under 1 inch, broiling is usually easier than trying to sear and finish without overshooting. If it’s 1 to 1½ inches, sear-then-oven is your best friend. If it’s 1½ inches or thicker, reverse sear starts to shine.
Tools That Make This Easy (and Less Smoky)
- Instant-read thermometer: The only trustworthy steak psychic.
- Oven-safe skillet: Cast iron is ideal; stainless works too.
- Sheet pan + wire rack: Especially handy for reverse sear (airflow = even cooking).
- Tongs: Because forks make holes, and holes make sadness.
- High-heat oil: Avocado, canola, grapeseed (save olive oil for finishing).
Method 1: Sear-Then-Oven (Steakhouse Classic at Home)
This is the “start on the stove, finish in the oven” approach. You build a flavorful crust quickly, then let the oven bring the center to your target doneness with less guesswork.
Step-by-Step
- Dry and season: Pat the steak very dry with paper towels. Season generously with kosher salt and black pepper. If you have 45–60 minutes, salt it earlier and let it sit uncovered on a plate or rackbetter browning, deeper seasoning.
- Preheat the oven: Set to 450°F. (High heat finishes the interior quickly without turning the crust soggy.)
- Heat the skillet: Place a cast-iron skillet over high heat until it’s very hot. Add a small splash of high-heat oil. The oil should shimmer like it’s about to reveal plot spoilers.
- Sear: Lay the steak in the pan and don’t move it for 1½–2 minutes. Flip and sear the second side another 1½–2 minutes. Sear the fat cap for 15–30 seconds if it has one.
- Finish in the oven: Transfer the entire skillet to the oven. Roast until the steak hits your target internal temperature (see the temperature table below).
- Rest: Move steak to a plate and rest 5–10 minutes. This helps juices redistribute and prevents the “cut it open and it floods the plate” scenario.
Timing Examples (Use These as Starting Points, Not Laws of Physics)
Oven times vary by steak thickness, starting temperature, and your pan. Use a thermometer for accuracy, but these examples help you plan dinner without staring into the oven like it’s going to text you updates.
- 1-inch strip or ribeye: After searing, typically 4–8 minutes at 450°F to reach medium-rare-ish territory.
- 1½-inch ribeye: After searing, often 8–14 minutes at 450°F depending on doneness.
- Filet mignon (thick cut): After searing, usually 6–12 minutes at 450°Fpull early; it overcooks fast.
Optional “Restaurant Finish” (Highly Recommended)
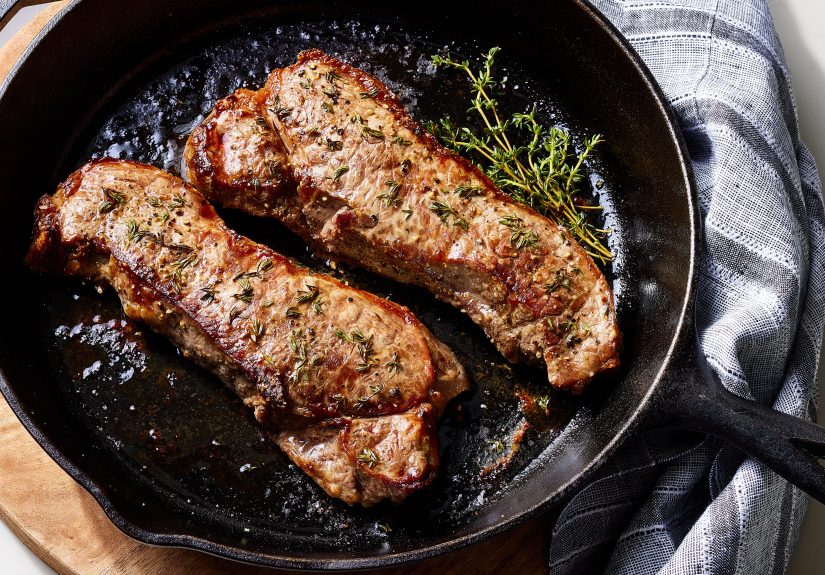
In the last minute of searing (or right after the steak comes out of the oven), add a tablespoon of butter plus aromatics like smashed garlic and a sprig of thyme or rosemary. Tilt the pan and spoon the foamy butter over the steak. Congratulations: you now cook like someone who owns at least one apron they didn’t get for free.
Method 2: Broil Steak (Fast, Simple, Great for Thinner Cuts)
Broiling uses intense heat from abovethink “ceiling toaster” energy. It’s excellent for quick-cooking steaks, flank steak, and weeknights when you want steak now, not in a gentle hour-long relationship.
Step-by-Step
- Position the rack: Place an oven rack about 4–6 inches from the broiler element.
- Preheat the broiler: Let it heat several minutes so it’s fully ready.
- Prep the steak: Pat dry, then season with salt and pepper. Lightly oil the steak (not the pan) to improve browning.
- Use the right pan: Put steak on a foil-lined sheet pan or broiler pan. If you have a wire rack that fits, use it for better airflow.
- Broil: Broil, flip once halfway through, and start checking temperature early. Thin steaks may need only a few minutes per side.
- Rest: Rest 5 minutes before slicing.
Broiler Safety & Sanity Checklist
- Avoid nonstick pans: Many aren’t broiler-safe.
- Avoid glass dishes: High broiler heat can cause cracking or shattering.
- Skip parchment paper: It can scorch or ignite under direct broiler heat.
- Watch closely: Broiling goes from “beautiful” to “charcoal audition” fast.
Method 3: Reverse Sear (The Thick-Steak Secret Weapon)
Reverse sear flips the usual order: cook gently in a low oven first, then sear briefly at the end for crust. This reduces the gray overcooked band and gives you a more even doneness from edge to center. It’s especially good for steaks 1½ inches and up.
Step-by-Step
- Preheat oven low: Set oven to 200–275°F.
- Rack it up: Place steak on a wire rack set over a rimmed sheet pan. Season with salt and pepper. (Airflow mattersthis is not the time to suffocate your steak on a flat pan.)
- Slow cook: Bake until the steak is 10–15°F below your final target temperature. Example: if you want 130–135°F final (medium-rare), pull it around 115–120°F.
- Sear hard and fast: Heat a skillet until very hot with a touch of oil. Sear 45–90 seconds per side until deeply browned.
- Rest briefly: A short rest (about 5 minutes) is usually enough.
Why Reverse Sear Works
Low oven heat cooks the interior evenly and gently, then a short blast of high heat creates the Maillard browning that gives steak its craveable crust. It’s a practical, repeatable way to get “steakhouse” results without needing a culinary crystal ball.
Steak Doneness Temperatures (and a Quick Safety Note)
For accuracy, measure the internal temperature in the thickest part of the steak. Also remember carryover cooking: the temperature often rises a few degrees while resting. So pull the steak slightly early.
| Doneness | Pull Temp (Approx.) | Finish Temp (Approx.) | Look/Feel |
|---|---|---|---|
| Rare | 120°F | 125°F | Very red center, soft |
| Medium-rare | 125–130°F | 130–135°F | Warm red center, springy |
| Medium | 135–140°F | 140–145°F | Pink center, firmer |
| Medium-well | 145–150°F | 150–155°F | Faint pink, quite firm |
| Well-done | 155–160°F | 160°F+ | Little to no pink, very firm |
Food safety note: Official guidance for whole cuts like steaks commonly recommends a minimum of 145°F with a short rest time. Many people prefer lower temperatures for tenderness (rare/medium-rare), so use good judgment: buy quality meat, keep it properly refrigerated, avoid cross-contamination, and cook with a thermometer.
Common Mistakes (and How to Fix Them)
1) Gray, sad crust
Usually caused by moisture. Pat the steak dry, season ahead of time if you can, and make sure the pan is properly hot before searing. Crowding the pan also steams the meatcook one or two steaks at a time.
2) Overcooked center
Your oven isn’t “wrong,” it’s just enthusiastic. Pull the steak earlier and let carryover cooking finish the job. A thermometer makes this a one-problem world.
3) Tough steak
Toughness can come from overcooking a lean cut, slicing with the grain (especially flank/skirt), or skipping rest. If it’s a flank steak, slice thinly against the grain. If it’s a sirloin, aim for medium-rare to medium, not “congratulations, you made jerky.”
4) Too much smoke
Use a high-heat oil, keep your vent fan on, and don’t add butter at the very beginning of a ripping-hot sear (it burns quickly). Save butter for later basting.
FAQ: Oven Steak Questions People Whisper Into Their Fridges
Should I bring steak to room temperature first?
You don’t have to, but letting it sit 20–45 minutes can reduce the chill and help it cook more evenly. More important than “room temp” is drying the surface and using a thermometer.
Do I need a cast-iron skillet?
Cast iron is excellent because it holds heat well, but any heavy, oven-safe skillet works. If you’re broiling, a sturdy sheet pan or broiler pan is fine.
Can I cook steak in the oven without searing?
Yes, but the crust won’t be as bold. If you want color without a stovetop sear, broiling at the end helps. Reverse sear is also designed around finishing with a quick high-heat sear for crust.
What seasoning should I use?
Salt and pepper alone can be incredible. Add garlic powder, smoked paprika, or a steak seasoning blend if you like, but don’t bury the beef. Finish with flaky salt for a steakhouse-style pop.
Real-World Oven Steak Experiences (The 500-Word “What It’s Like” Section)
Here’s what usually happens the first few times people cook steak in the oven: you discover that steak is less of a mysterious culinary boss battle and more like driving with GPS. The thermometer is the GPS. Without it, you’re taking random exits and hoping dinner shows up on time.
One common experience is the “I thought I ruined it, and then it was perfect” moment. That’s carryover cooking at work. You pull the steak, it looks a touch underdone, your brain panics, and you consider putting it back “just for a minute.” Then you rest it properly, slice it, and realize the center finished exactly where you wanted. It’s a small lesson in trusttrust the process, trust the thermometer, and trust that resting is not optional. Resting is the difference between a juicy steak and a plate that looks like it sprung a leak.
Another frequent lesson: smoke is a feedback mechanism. If your kitchen turns into a dramatic fog scene, it’s usually because the pan was nuclear-hot with the wrong oil, or butter went in too early, or the steak surface was wet. People often learn to pat the steak dry like it owes them money. And once you do that, browning improves so much that it feels like you upgraded your oven without telling your landlord.
Cooks also tend to develop a “method personality.” The sear-then-oven method becomes the reliable weekday routine: quick crust, quick finish, predictable results. Broiling becomes the impatient hero when you want steak fast or you’re cooking flank steak for tacos and you plan to slice it thin anyway. Reverse sear becomes the special-occasion flexthicker cuts, more control, and that satisfying edge-to-edge rosy interior that makes people assume you watched a three-hour cooking documentary.
And then there’s the seasoning discovery arc. Many people start by throwing a whole spice cabinet at the steak, hoping flavor will happen by force. Over time, you realize salt and pepper do a lot of heavy lifting, especially when the crust is properly browned. Butter basting becomes the “oh wow” movenot because it’s complicated, but because it adds aroma, richness, and that restaurant-like finish that tastes expensive. It’s also where you learn that garlic can burn if it hits screaming-hot fat too early, so you add it later and let it perfume the butter instead of turning into bitter confetti.
Finally, people learn to stop chasing exact minutes. The most consistent oven-steak cooks aren’t the ones with the fanciest timers; they’re the ones who check internal temperature early and adjust calmly. If the steak is rising faster than expected, you pull it early. If it’s lagging, you give it another minute and check again. This is the quiet confidence of oven steak: you’re not guessing, you’re measuring. And when your steak comes out juicy with a proper crust, you’ll start to wonder why you ever thought steak was only a “grill food.” The oven has been ready for you this whole timepatient, steady, and slightly judgmental about your past overcooking.
Conclusion
If you remember only three things: dry the steak, use high heat strategically (either a hot sear or a hot broiler), and cook to temperaturenot to time. Pick the method that matches your steak thickness, rest before slicing, and you’ll get consistent, steakhouse-quality results with normal-home-kitchen effort.


