Table of Contents >> Show >> Hide
- Before You Measure: Know What “Wheel Size” Really Means
- Method 1: Read the Tire Sidewall (and Decode It Like a Pro)
- Method 2: Measure the Rim and Tire Directly (Tape Measure + Common Sense)
- Tools you’ll want
- Step A: Find the rim’s key diameter (BSD) the easy way
- Step B: If the rim isn’t labeled, measure the rim diameter (approximation approach)
- Step C: Measure the wheel’s outside diameter (useful, but not the final truth)
- Step D: Measure tire width (for clearance and performance)
- When Method 2 is the best choice
- Method 3: Measure Rollout Circumference (Most Accurate for Bike Computers)
- Common Wheel Size “Translations” (Quick Reference)
- Which Method Should You Use? A Simple Decision Guide
- Conclusion
- Bonus: Rider Experiences That Make These Measurements Feel Very Real (About )
Measuring a bicycle wheel sounds like the kind of task that should take five seconds… right up until you’re holding a “26-inch” tire that absolutely refuses to fit your “26-inch” rim. Bike sizing is full of historical quirks, marketing nicknames, and numbers that are technically true in a parallel universe where tires don’t squish and standards don’t evolve.
The good news: you can measure your wheel in a few different ways depending on what you’re trying to dobuy the right tire or tube, confirm rim compatibility, or set up a bike computer so your speed isn’t “Tour de Neighborhood” fast.
This guide covers three practical methods:
- Method 1: Read and decode the tire’s printed size (fastest, best for shopping).
- Method 2: Measure the rim and tire directly (best for confirming compatibility).
- Method 3: Measure wheel rollout circumference (best for bike computers and precision).
Before You Measure: Know What “Wheel Size” Really Means
People say “wheel size” when they mean at least three different things:
- Rim diameter (where the tire bead sits). This is the number that decides whether a tire can physically mount.
- Tire width (how wide the tire is when mounted and inflated).
- Outside diameter / rolling size (how tall the whole wheel is with the tire installed).
If your goal is fit and compatibility, the most reliable “truth” is the standardized diameter at the tire-to-rim interface, commonly called the bead seat diameter (BSD) in millimeters. If your goal is accuracy for a speed sensor, you care about the rolling circumference.
Method 1: Read the Tire Sidewall (and Decode It Like a Pro)
If you have the tire that’s currently on the bike, the easiest measurement is already printed on the sidewall. Think of it as the tire’s tiny tattoo that says, “I belong here.”
What you’re looking for
You’ll usually see one (or several) of these formats:
- ISO/ETRTO (recommended): 32-622 (width in mm – BSD in mm)
- French / road style: 700x32C
- Inch / MTB style: 29×2.25 or 26×1.95
Why ISO/ETRTO is the hero of this story
The ISO/ETRTO format (like 32-622) is the clearest because:
- The first number is the approximate tire width in millimeters.
- The second number is the bead seat diameter (BSD) in millimetersthe “must match” number.
Example: 32-622 means a tire about 32 mm wide that fits a 622 mm bead seat diameter rim.
Common “same rim, different nickname” situations
Some popular wheel labels are basically nicknames for the same BSD:
- 700C road and 29-inch mountain often share the same BSD: 622 mm. The big difference is usually tire width and rim width.
- 650B and 27.5-inch commonly share BSD: 584 mm.
- 26-inch (modern MTB) commonly uses BSD: 559 mm (but older/other “26” variants existthis is where confusion lives).
Quick “shopping checklist” using Method 1
- Find the ISO/ETRTO code on your tire (or sometimes on the rim).
- Match the second number (BSD) exactly when buying a tire or tube.
- Choose a width that fits your rim and frame clearance.
- If you only see 700x25C or 29×2.25, look up the ISO equivalent (many brands print both).
Small trivia that saves real headaches: that “C” in 700x25C is a historical label, not a modern unit of measurement. It’s not “centimeters,” and it won’t help you win an argument at a bike shop.
Method 2: Measure the Rim and Tire Directly (Tape Measure + Common Sense)
Method 1 is great when the tire label is readable and honest. But sometimes the sidewall is worn off, the bike is a mystery purchase, or you’re trying to confirm compatibility for a new rim, wheelset, or tire style (like switching between 700C and 650B setups).
This is when you measure directly.
Tools you’ll want
- Flexible tape measure (or a rigid ruler and patience)
- Optional: calipers (nice, but not required)
- Pen + paper (or your phone notes app)
- Optional: tire levers if you need to remove the tire
Step A: Find the rim’s key diameter (BSD) the easy way
The most accurate way to know rim diameter is to find the marking on the rim itself. Many rims have an ISO/ETRTO marking such as 622 or 584 printed/stamped somewhere (often near spoke holes or the valve area).
If you can find it, congratulationsyou’ve just skipped the messiest part.
Step B: If the rim isn’t labeled, measure the rim diameter (approximation approach)
Measuring true bead seat diameter precisely can be tricky without removing the tire, because BSD refers to where the tire bead sits inside the rim, not the outer edge you can easily touch.
Still, you can get a strong approximation by measuring:
- Rim outside diameter (edge to edge across the rim), then
- Estimating the difference to bead seat diameter (varies by rim shape).
A more practical approach is to use your measurement to identify the likely standard size, then confirm it by cross-checking with typical BSD values (622, 584, 559, 507, 406, etc.).
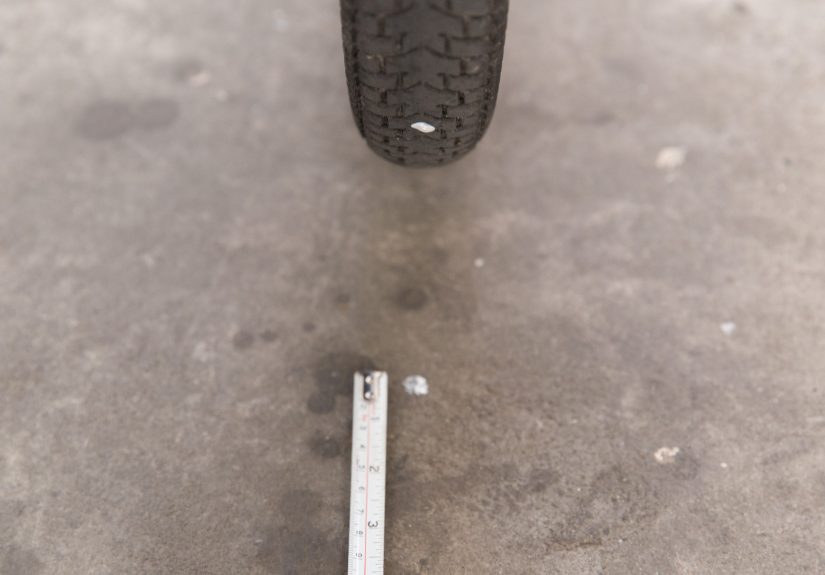
Step C: Measure the wheel’s outside diameter (useful, but not the final truth)
If you want the “how tall is my wheel with this tire” number (outside diameter), do this:
- Inflate the tire to your normal riding pressure.
- Measure from the floor to the top of the tire (wheel height).
- Multiply by 2 to estimate outside diameter.
This is helpful for clearance checks and rough comparisons, but it’s not a perfect “fit” measurement because tire height changes with tread thickness, casing design, pressure, rider weight, and even your enthusiasm for snacks.
Step D: Measure tire width (for clearance and performance)
Tire width affects comfort, grip, speed, and whether your frame will quietly accept your choices or loudly reject them with rubbing noises.
To measure width:
- Inflate the tire.
- Measure the widest point of the tire casing (sidewall to sidewall), not the rim.
- Record the width in millimeters.
Real-world note: a “40 mm” tire might measure 38–43 mm depending on rim internal width and tire model. That’s normal.
When Method 2 is the best choice
- You’re mixing brands and want to confirm the size system (ISO/ETRTO) yourself.
- You’re buying a wheelset online and need to verify it matches your bike.
- You’re checking frame and fork clearance for wider tires.
- The sidewall label is unreadable, missing, or suspicious.
Method 3: Measure Rollout Circumference (Most Accurate for Bike Computers)
If you use a speed sensor, cadence/speed combo sensor, or a bike computer that asks for wheel circumference, this method gives the most accurate number because it accounts for your specific tire, your specific pressure, and the fact that physics is more reliable than marketing.
Why circumference beats “wheel size charts” for accuracy
Wheel size charts can be close, but two tires labeled the same size can roll differently based on tread depth and casing shape. Rollout measurement captures the wheel’s true travel distance per revolution.
The rollout method (step-by-step)
- Inflate your tire to your normal riding pressure.
- Put the valve stem at the bottom (closest to the ground).
- Mark a starting point on the floor directly under the valve (chalk or tape).
- Roll the bike forward in a straight line for exactly one full wheel revolution until the valve returns to the bottom.
- Mark the ending point on the floor under the valve.
- Measure the distance between the marks in millimeters. That number is your wheel circumference.
For best results, sit on the bike (or load it similarly) while rolling, because tire compression changes the effective circumference. If that’s awkward, do a few trials and average them.
Example: what you might record
A typical 700×25 tire might land around the low 2000s in millimeters (often roughly 2090–2130 mm depending on tire and pressure), while a bigger 29×2.25 MTB tire can be higher. The point isn’t the “perfect universal number”it’s your number.
When Method 3 is the best choice
- You want accurate speed/distance readings on a bike computer.
- You’re using a speed sensor indoors (trainer) where GPS isn’t the boss.
- You changed tire model or size and want your data to stay honest.
- You’re doing gear-rollout checks (yes, some races and training rules care).
Common Wheel Size “Translations” (Quick Reference)
Here’s a practical cheat sheet for common adult bike wheels. Always confirm with ISO/ETRTO when possible, but these are the usual suspects:
- 700C / 29-inch: typically BSD 622 mm
- 650B / 27.5-inch: typically BSD 584 mm
- 26-inch (modern MTB standard): typically BSD 559 mm
- 24-inch (many kids/junior): often BSD 507 mm
- 20-inch (BMX/folders common): often BSD 406 mm
If your bike is vintage, a cruiser, or a classic road model, you may run into less-common BSDs (like 630 mm for some “27-inch” road wheels). That’s exactly why ISO/ETRTO labeling is worth hunting down.
Which Method Should You Use? A Simple Decision Guide
- Buying a replacement tire or tube? Use Method 1 first (ISO/ETRTO), then confirm width/clearance.
- Building a wheel, swapping wheelsets, or confirming compatibility? Use Method 2 and prioritize BSD.
- Setting up a bike computer or speed sensor? Use Method 3 (rollout circumference).
Conclusion
Measuring a bicycle wheel isn’t hardit’s just annoyingly easy to measure the wrong thing. If you remember one rule, make it this: for fit and compatibility, the key number is the ISO/ETRTO bead seat diameter. For speed sensors and bike computers, the key number is your rollout circumference.
Use the tire sidewall when you can, measure the rim when you must, and roll out a circumference when accuracy matters. Your future self (and your brake pads, derailleur, and pride) will thank you.
Bonus: Rider Experiences That Make These Measurements Feel Very Real (About )
Nearly every cyclist has a “wheel size lesson” storyusually learned at the exact moment they least wanted homework. One common scene: someone orders a “26-inch” tire online, confident they’ve cracked the code, only to discover that “26-inch” is a family of sizes, not a single size. The tire arrives, looks right, smells new, and then refuses to mount like it has personal boundaries. That’s when riders discover why the ISO/ETRTO code is the real VIP. Once you’ve had one tire that doesn’t fit, you start looking for that second number (the BSD) like it’s a secret password.
Another classic experience happens when switching riding styles. A rider buys a gravel bike, hears that “wider tires are more comfortable,” and decides to size up. Suddenly, “700×38” isn’t just a numberit’s a clearance negotiation between tire knobs, frame stays, and the laws of rubbing. Measuring tire width on the actual rim becomes the difference between a smooth ride and a constant shhhk-shhhk soundtrack. Riders who have been burned once tend to measure twice, especially around chainstays and forks. It’s not paranoia; it’s wisdom earned from hearing rubber kiss metal at the worst possible time.
Then there’s the bike computer reality check. Many riders set up a speed sensor with a default wheel size and happily ride alonguntil they notice their buddy’s phone GPS says 15 miles, the computer says 17, and their ego says, “I choose to believe the computer.” That’s usually when the rollout method enters the chat. Rolling the bike one full revolution and measuring the distance feels almost too simple, but it’s the method that accounts for the specific tire, pressure, and load. Riders who take data seriously (or who just want their routes to add up) often do two or three rollouts and average them, especially after changing tires or switching between slicks and knobbies.
There’s also a small group of riders who meet wheel measurement in a more dramatic way: during parts shortages or mid-trip repairs. When the exact tire isn’t available, understanding that matching BSD can get you “close enough to get home” becomes priceless. A rider might not care if the replacement tire is slightly narrower or a different tread pattern, but they absolutely care that it can mount on the rim. In those moments, knowing the ISO/ETRTO code isn’t triviait’s a rescue tool.
Taken together, these experiences all point to the same takeaway: wheel measurement isn’t about memorizing sizes. It’s about choosing the right method for the problem you’re solvingfit, clearance, or accuracyand using numbers that mean the same thing everywhere. Once you do that, bike wheels stop being mysterious circles and start being predictable, cooperative equipment. Mostly.


